Table of Contents
Advertisement
TXU Series
OPERATION AND MAINTENANCE
MANUAL
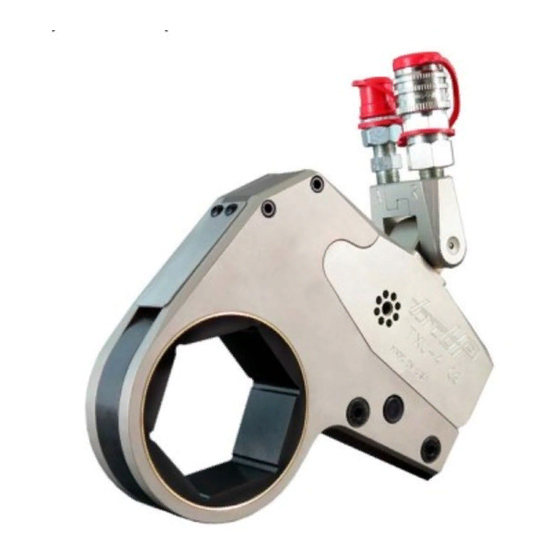
TXU Series Uniswivel Low Profile
Hydraulic Torque Wrenches
MODELS TXU-2, TXU-4, TXU-8 and TXU-16
1025 Conroy Place, Easton, PA. 18040 U.S.A.
Phone: +1 610-250-5800
Fax: +1 610-250-2700
Toll Free: 1-888-TORCUP-1
Email: sales@torcup.com
Website: www.torcup.com
Advertisement
Table of Contents

Subscribe to Our Youtube Channel
Related Manuals for TorcUP TXU-2


Summary of Contents for TorcUP TXU-2
- Page 1 TXU Series OPERATION AND MAINTENANCE MANUAL TXU Series Uniswivel Low Profile Hydraulic Torque Wrenches MODELS TXU-2, TXU-4, TXU-8 and TXU-16 Phone: +1 610-250-5800 Fax: +1 610-250-2700 Toll Free: 1-888-TORCUP-1 Email: sales@torcup.com 1025 Conroy Place, Easton, PA. 18040 U.S.A. Website: www.torcup.com...
- Page 2 Version 2: 2016 September NOTICE Series TXU-2, TXU-4, TXU-8, and TXU-16 Low Profile Hydraulic Torque Wrenches are designed for installing and removing threaded fasteners having minimal wrench clearance and requiring precise high torque during bolt makeup and maximum torque for bolt breakout.
- Page 3 • failure. • Use accessories recommended by TorcUP. Use only impact sockets and accessories. Do not use hand (chrome) sockets or accessories. • Use only sockets and accessories that correctly fit the bolt or nut and function without tilting the tool off the •...
- Page 4 PLACING THE TOOL IN SERVICE Dwg. 1 CONNECTING THE TOOL 1. Attach the twin line hose to the swivel inlets of the low profile drive cylinder using the spring–loaded quick connect ends. 2. Connect the opposite ends of the hose to the pump in the same manner.
- Page 5 PLACING THE TOOL IN SERVICE 3. After having turned the pump on and presetting the pressure for the correct torque, depress the remote control button to advance the piston assembly. If the notch in the piston rod did not engage the retract pin in the ratchet link when the link was joined to the housing, it will engage the pin automatically during the first advance stroke.
- Page 6 TXU Series Uni-Swivel Wrench Technical & Dimensional Data Model Number TXU-2 TXU-4 TXU-8 TXU-16 Min. Torque (ft/lbs) 1560 Max. Torque (ft/lbs) 3950 8630 1928 16600 Min. Torque (nm) 1125 2115 Max. Torque (nm) 5355 22503 2614 11699 +/-3% +/-3% +/-3%...
- Page 15 TXU-2 Cylinder Swivel Low Profile Hydraulic Torque Wrench Part Numbers for Ordering ITEM NAME PART # QTY. Housing TXU-2-C01 TX-2-C03 Piston Slider TX-2-C09 End Cap TXU-2-C11 Retaining Ring TX-2-C13 Link Pin TX-2-C15 End Cover TXU-2-C17 TX-2-C23 End Cover Screw Slider Pin...
- Page 16 TXU-2 Series Link Part Numbers for Ordering ITEM NAME PART # QTY. Side Plate - Left TX-2-L01 Side Plate - Right TX-2-L02 TX-2-L03 Drive Plate Drive Pin TX-2-L05 Drive Pin Spring TX-2-L07 Ratchet TX-2-L09 Drive Segment TX-2-L11 TX-2-L13 Upper Spacer...
- Page 17 TXU-4 Cylinder Swivel Low Profile Hydraulic Torque Wrench Part Numbers for Ordering ITEM NAME PART # QTY. Housing TXU-4-C01 TX-4-C03 Piston Slider TX-4-C09 End Cap TXU-4-C11 Retaining Ring TX-4-C13 Link Pin TX-4-C15 End Cover TXU-4-C17 TX-4-C23 End Cover Screw Slider Pin TX-4-C27 End Plug Seal TX-4-C29...
- Page 18 TXU-4 Series Link Part Numbers for Ordering ITEM NAME PART # QTY. Side Plate - Left TX-4-L01 Side Plate - Right TX-4-L02 TX-4-L03 Drive Plate Drive Pin TX-4-L05 Drive Pin Spring TX-4-L07 Ratchet TX-4-L09 Drive Segment TX-4-L11 TX-4-L13 Upper Spacer Lower Spacer TX-4-L15 Spacer Pin...
- Page 19 TXU-8 Cylinder Swivel Low Profile Hydraulic Torque Wrench Part Numbers for Ordering ITEM NAME PART # QTY. Housing TXU-8-C01 TX-8-C03 Piston Slider TX-8-C09 End Cap TXU-8-C11 Retaining Ring TX-8-C13 Link Pin TX-8-C15 End Cover TXU-8-C17 TX-8-C23 End Cover Screw Slider Pin TX-8-C27 End Plug Seal TX-8-C29...
- Page 20 TXU-8 Series Link Part Numbers for Ordering ITEM NAME PART # QTY. Side Plate - Left TX-8-L01 Side Plate - Right TX-8-L02 TX-8-L03 Drive Plate Drive Pin TX-8-L05 Drive Pin Spring TX-8-L07 Ratchet TX-8-L09 Drive Segment TX-8-L11 TX-8-L13 Upper Spacer Lower Spacer TX-8-L15 Spacer Pin...
- Page 21 TXU-16 Cylinder Swivel Low Profile Hydraulic Torque Wrench Part Numbers for Ordering ITEM NAME PART # QTY. Housing TXU-16-C01 TX-16-C03-1 Piston Rod TX-16-C03-2 Piston Cap Valve Ball TX-16-C03-3 Valve Spring TX-16-C03-4 TX-16-C03-5 Valve Cup Slider TX-16-C09 End Cap TXU-16-C11 Link Pin TX-16-C15 Slider Pin TX-16-C27...
- Page 22 TXU-16 Series Link Part Numbers for Ordering ITEM NAME PART # QTY. Side Plate - Left TX-16-L01 Side Plate - Right TX-16-L02 TX-16-L03 Drive Plate Drive Pin TX-16-L05 Drive Pin Spring TX-16-L07 Ratchet TX-16-L09 Drive Segment TX-16-L11 TX-16-L13 Upper Spacer Middle Spacer TX-16-L14 Lower Spacer...
- Page 23 TXU Series USS Uni-swivel USS Uni‐swivel Parts List Available repair kits ITEM NAME Post Kit USS‐PKIT ITEM NAME Post Joint Post Swivel Arm (Advance) Swivel O‐ring (Small) Swivel Arm (Retract) Swivel O‐ring (Large) Retaining Ring Post O‐ring Swivel O‐ring (Small) Swivel Post Screw Swivel O‐ring (Large) Post O‐ring Joint Kit USS‐JKIT Joint O‐ring ITEM NAME Swivel Screw Joint Swivel Post Screw Swivel Arm (Advance) Swivel Arm (Retract) Retaining Ring Post O‐ring Joint O‐ring Swivel Screw Seal Kit USS‐SKIT ITEM NAME...
- Page 24 TXU Series USL Uni-swivel USL Uni‐swivel Parts List Available repair kits ITEM NAME Post Kit USL‐PKIT ITEM NAME Post Joint Post Swivel Arm (Advance) Swivel O‐ring (Small) Swivel Arm (Retract) Swivel O‐ring (Large) Post O‐ring Swivel O‐ring (Small) Swivel Post Screw Swivel O‐ring (Large) Post O‐ring Joint Kit USL‐JKIT Joint O‐ring ITEM NAME Swivel Screw Joint Swivel Post Screw Swivel Arm (Advance) Cap Screw Swivel Arm (Retract) Post O‐ring Joint O‐ring Swivel Screw Cap Screw Seal Kit USL‐SKIT ITEM NAME...
- Page 25 TXU Series Uni-swivel Assembly 1. Clamp the post (1) in a copper-covered or leather-covered vice by the base. 2. Slide the post O-rings (9) onto the post starting from the top to the base. 3. Lightly lubricate the post. 4. Using hand pressure, press the joint (2) onto the post until it makes contact with the base of the post and until the top of the post is flush with the top of the joint.
- Page 26 Using a hex wrench, unscrew the four uniswivel post screws (20) that clamp the uniswivel to the housing. Collect the O-rings (three for the TXU-2, five for the TXU-4 and TXU-8). 2. Remove the housing from the vise and turn it over a container to catch any oil remaining inside the cylinder.
- Page 27 MAINTENANCE SECTION During removal and after the piston shaft is removed; DO NOT grasp the round portion of the rod with any holding device that will damage NOTICE the surface. Any nicks or scratches to the surface will allow hydraulic oil to leak from the cylinder when the tool is reassembled.
- Page 28 12. Apply moly grease to the face of the sliders and the notch in the piston. 13. Apply non-permanent, thread-locking compound to the threads of the cylinder, and install uniswivel O-rings and uniswivel (USS for TXU-2 or USL for TXU-4 & 8), tightening uniswivel post screws (20) in a cross pattern.
- Page 29 6. Using a socket, thread the end cap (7), O-ring leading, into the bore of the housing and tighten. 7. Install uniswivel O-rings and uniswivel (USS for TXU-2 or USL for TXU-4 & TXU-8), tightening uniswivel post screws (20) in a cross pattern. Apply non-permanent, thread-locking compound to the threads.
- Page 30 MAINTENANCE SECTION 13. Place the left side plate sleeve on the hub of the ratchet and align the screw holes for the spacers. 14. After applying a non-permanent, thread-locking compound to the threads. Use hex wrenches to install the two remaining lower spacer screws. ASSEMBLY OF THE TOOL 1.
-
Page 31: Troubleshooting Guide
TROUBLESHOOTING GUIDE Trouble Probable Cause Solution Check the coupler connections and Couplers are not securely attached make certain that they are connected. to the tool or pump Coupler is defective Replace any defective coupler. Piston will not advance Replace the switch and/ or retract Defective remote control switch or control pendent. - Page 32 SAVE THESE INSTRUCTIONS DO NOT DESTROY NOTES: Phone: +1 610-250-5800 Fax:+1 610-250-2700 Toll Free: 1-888-TORCUP-1 Email: sales@torcup.com 1025 Conroy Place, Easton, PA. 18040 U.S.A. Website: www.torcup.com...
Need help?
Do you have a question about the TXU-2 and is the answer not in the manual?
Questions and answers