Table of Contents
Advertisement
Quick Links
Download this manual
See also:
Handbook
Advertisement
Table of Contents

Related Manuals for Panasonic AG-UX90


Summary of Contents for Panasonic AG-UX90
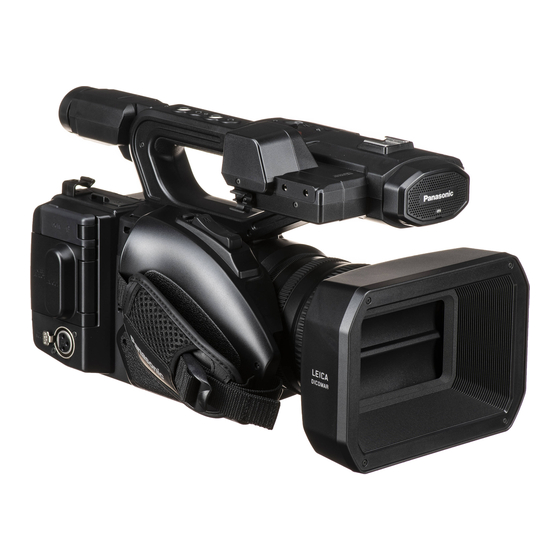
- Page 1 Operating Instructions Memory Card Camera-Recorder AG-UX90 Model No. Please read these instructions carefully before using this product, and save this manual for future use. EJ EN ED ENGLISH F1016YA0 DVQP1150ZA...
- Page 2 Hrvatski Suomi Magyar Português http://pro-av.panasonic.net/en/manual/index.html - 2 -...
-
Page 3: Information For Your Safety
Information for Your Safety Before use For the AC mains plug of three pins ∫ Caution for AC mains lead Remove the connector cover. For your safety, please read the following text How to replace the fuse carefully. The location of the fuse differ according to the This appliance is supplied with a moulded three type of AC mains plug (figures A and B). -
Page 4: Emc Electric And Magnetic Compatibility
∫ Concerning the battery Warning Risk of fire, explosion and burns. Do not disassemble, heat above 60 oC or incinerate. CAUTION ≥ Danger of explosion if battery is incorrectly replaced. Replace only with the type recommended by the manufacturer. ≥ When disposing of the batteries, please contact your local authorities or dealer and ask for the correct method of disposal. -
Page 5: To Remove The Battery
To remove the battery Main Power Battery (Lithium ion Battery) (Refer to page for the detail.) While pressing the battery release button, remove the battery. Back-up Battery (Lithium Battery) ≥ For the removal of the battery for disposal at the end of its service life, please consult your dealer. -
Page 6: About The Battery
About using a headphone When you are not going to use the unit for ≥ Excessive sound pressure from earphones an extended time and headphones can cause hearing loss. ≥ When storing the unit, it is recommended that ≥ Listening at full volume for long periods may you place a desiccant (silica gel) in with it. - Page 7 Be sure to detach the battery after use. About the AC adaptor/battery ≥ If the battery is left attached, a minute amount charger of current continues to flow even if the unit is off. Keeping the unit in this state may result in ≥...
- Page 8 [YES] and follow the instruction on the screen. operation, effect of static electricity, accident, malfunction, repair, or other handlings. Please note in advance that Panasonic is not liable in any way for any direct or indirect damage from the alteration or vanishing of information or personal information.
-
Page 9: This Unit
Cards that do not have the SDXC logo are ∫ Indemnity about recorded not based on SD Memory Card content Specifications. Panasonic does not accept any responsibility for ≥ Refer to page for more details on SD damages directly or indirectly due to any type of cards. -
Page 10: Table Of Contents
Contents Information for Your Safety ......3 Audio Input ..........71 Accessories ..........12 Switching Audio Input ......71 Optional accessories ........13 Adjusting the audio input level ....73 Counter display ...........75 Preparation Setting the Time Code ......75 Setting the User Information ....77 Setting the Recording Counter ....78 USER button ..........79 What you can do with this unit .... - Page 11 Connecting to a PC ......122 About the PC display ......123 Copying/playing back with an external media device ............125 Preparing for copying/playing back ..125 Copy once ........... 127 Copy selected files ......128 Playing back the External Media ..129 Using an iPad as a Remote Control (AG ROP application) .......
-
Page 12: Accessories
Accessories Check the accessories before using this unit. Keep the accessories out of reach of children to prevent swallowing. Eye cup Battery pack* INPUT terminal cap Battery charger (2 caps) Lens hood AC adaptor The part number of the battery pack is AG- VBR59. -
Page 13: Optional Accessories
Optional accessories Some optional accessories may not be available in some countries. Product numbers correct as of September 2016. These may be subject to change. Unidirectional microphone (AG-MC200G) Battery pack (VW-VBD58/AG-VBR59/AG-VBR89/AG-VBR118) Battery charger (AG-B23/AG-BRD50) LED video light (VW-LED1) - 13 -... -
Page 14: Preparation
Preparation What you can do with this unit Recording to the SD card It is possible to record motion pictures and still pictures to the SD card using a variety of recording functions. ≥ This unit supports relay/simultaneous recording using double card slots. Linking to external devices USB Device Mode Transfer data (files) to perform nonlinear editing on another device (PC, etc.). -
Page 15: Remote Operations With An Ipad
It can also play back the scenes and still pictures copied to the external media device. ≥ This unit supports USB 3.0. Refer to the following support site for information about an external media device. http://pro-av.panasonic.net/ (This Site is English only) ... -
Page 16: Names And Functions Of Main Parts
Preparation Names and Functions of Main Parts USB HOST terminal 125, 130) Camera remote terminal [CAM REMOTE] 116) USB DEVICE terminal 122) HDMI OUT connector [HDMI] 117) ≥ FOCUS IRIS terminal (3.5 mm diameter mini Handle jack) Lens hood release button ≥... - Page 17 38 39 42 43 44 45 Focus ring Tripod receptacle Zoom ring ≥ There are tripod mounting holes that are Iris ring compatible with 1/4-20UNC and 3/8-16UNC User 6 button [O.I.S.] 50, 80) screws. Use the size that matches the User 7 button [LCD/EVF] 32, 79) diameter of the tripod’s fixing screw.
- Page 18 59 60 SD Card slot cover Eye cup mount Access lamp (card 1) Viewfinder Card slot 1 Eye cup Access lamp (card 2) Battery release button [PUSH] Card slot 2 Battery holder INPUT1 / INPUT2 switches Built-in microphone CH1 SELECT/CH2 SELECT switches Recording lamp (Front) 174) Lens cover...
- Page 19 71 72 73 74 75 76 77 78 79 80 Accessory shoe Sub zoom lever 48, 158) ≥ This lever functions in the same manner as the zoom lever. ≥ The zoom speed is controlled with this lever in a way different from the way it is controlled with the zoom lever.
- Page 20 ∫ Attaching/detaching the lens hood (How to detach the lens hood) While pressing and holding the lens hood release button, rotate the lens hood in the direction of the arrow to detach it. A Lens hood release button (How to attach the lens hood) ...
-
Page 21: Attaching The Eye Cup
∫ Adjust the length of the hand strap so that it fits your hand. Adjust the hand strap according to the size of your hand. ≥ If you find it difficult to fasten the buckle B, move the pad A forward, and fasten the buckle B again. - Page 22 ∫ Attaching the front microphone ≥ The microphone holder is set up so that a 21 mm external microphone (AG-MC200G: optional) can be attached. Check in advance whether the microphone you wish to use can be attached. Attach the microphone holder to the microphone holder attachment part. ≥...
-
Page 23: Power Supply
Please be advised that we are not liable for any accident or failure occurring as a result of use of a counterfeit battery pack. To ensure that safe products are used we would recommend that a genuine Panasonic battery pack is used. Charging the battery When this unit is purchased, the battery is not charged. - Page 24 Slide the battery to remove it. ≥ We recommend using Panasonic batteries 26). ≥ If you use other batteries, we cannot guarantee the quality of this product. ≥ Do not heat or expose to flame.
-
Page 25: Inserting/Removing The Battery
Inserting/removing the battery Install the battery by inserting it in the direction shown in the figure. ≥ Insert the battery until it clicks and locks. Removing the battery Make sure that the power switch is set to OFF and the status indicator is turned off, and then remove by holding onto it taking care not to drop. -
Page 26: Charging And Recording Time
Charging and recording time Charging/Recording time Voltage/Capacity Continuously recordable Battery model number Charging time (minimum) time Supplied battery/ 7.28 V/5900 mAh 3 h 20 min 7 h 10 min AG-VBR59 (optional) AG-VBR89 (optional) 7.28 V/8850 mAh 10 h 45 min AG-VBR118 (optional) 7.28 V/11800 mAh 4 h 40 min... - Page 27 Checking the remaining power of the battery You can check the remaining power of the battery by looking at the battery capacity indication displayed on this unit's screen or by looking at the supplied battery AG-VBR59. ∫ Checking the remaining power using this unit Battery capacity indication ≥...
-
Page 28: Connecting To The Ac Outlet
Connecting to the AC outlet The unit is in the standby condition when the AC adaptor is connected. The primary circuit is always “live” as long as the AC adaptor is connected to an electrical outlet. Important: ≥ Use the supplied AC adaptor. Do not use the AC adaptor of another device. ≥... -
Page 29: Preparation Of Sd Cards
The unit can record motion pictures or still pictures to an SD card. Cards that you can use with this unit ≥ The cards that you can use are correct as of September 2016. ≥ We recommend that you use a Panasonic Memory Card. Card type Capacity... -
Page 30: Inserting/Removing An Sd Card
Inserting/removing an SD card When using an SD card for the first time, it is necessary to format the SD card. 42) When the SD card is formatted, all of the recorded data is deleted. Once the data is deleted, it cannot be restored. -
Page 31: Turning The Unit On/Off
Preparation Turning the unit on/off Set the power switch to ON while pressing the lock release button B to turn on the unit. To turn off the unit Set the power switch to OFF while pressing the lock release button. The status indicator goes off. -
Page 32: Using The Lcd Monitor/Viewfinder
Preparation Using the LCD monitor/Viewfinder The viewfinder is turned off and the LCD monitor is turned on when the LCD monitor is extracted. The viewfinder is turned on when the LCD monitor is retracted. Switching between the LCD monitor and viewfinder displays Select the menu. -
Page 33: Using The Lcd Monitor
Using the LCD monitor Extract the LCD monitor in the direction as indicated in the figure. ≥ Hold the LCD monitor extract part A, and extract the LCD monitor until it clicks into position. Rotate to the position that is easy to view. -
Page 34: How To Use The Touch Screen
How to use the touch screen You can operate by directly touching the LCD monitor (touch screen) with your finger. ∫ Touch Touch and release the touch screen to select icon or picture. ≥ Touch the center of the icon. ≥... -
Page 35: Lcd Monitor Adjustment
LCD monitor adjustment ≥ These settings will not affect the images actually recorded. [POWER LCD] This makes it easier to view the LCD monitor in bright places including outdoors. Select the menu. MENU : [DISP SETUP] # [POWER LCD] # [+1] (Makes brighter)/[0] (Normal)/[-1] (Makes less bright) ≥... -
Page 36: Viewfinder Adjustment
Viewfinder adjustment ≥ These settings will not affect the images actually recorded. Adjusting the field of view It adjusts the field of view to show the image on the viewfinder clearly. Adjust the viewfinder to suit your vision so that you can see the display images clearly. ≥... -
Page 37: Recording Yourself
[EVF COLOR] The recording images or playback images on the viewfinder can be selected between color/black and white. Select the menu. MENU : [DISP SETUP] # [EVF COLOR]# [ON] or [OFF] [ON]: Displayed in color [OFF]: Displayed in black and white ≥... -
Page 38: Setting Date And Time
Preparation Setting date and time When this unit is turned on, the message [SET TIME ZONE AND DATE/TIME] may appear. To make these settings, select [YES], and follow the instructions from Step 2-3 of the time zone setting procedure. Time zone Time difference from the Greenwich Mean Time can be set. - Page 39 ∫ Time zone table Time Time Region Region difference difference 0:00 London, Casablanca Tehran r3:30 Azores Dubai, Abu Dhabi s1:00 r4:00 Fernando de Noronha Kabul s2:00 r4:30 Rio de Janeiro, Sao Paulo, Islamabad, Karachi, Male s3:00 r5:00 Buenos Aires Newfoundland Delhi, Kolkata, Mumbai, Chennai, s3:30 r5:30...
-
Page 40: Using The Menu Screen
Preparation Using the menu screen ≥ You can also select menu items by operating the jog dial. 101) MENU MENU Press the MENU button Touch the top menu A. Touch the submenu B. ≥ Next (Previous) page can be displayed by touching Touch the desired item to enter the setting. -
Page 41: Recording
Recording Before recording ≥ When recording, make sure your footing is stable and there is no danger of colliding with another person or object. ≥ Hold the eye cup of the viewfinder as close as possible to your eye. ≥ Adjust the angle of the LCD monitor according to the position in which the unit is held. ≥... -
Page 42: Formatting Media
Formatting media If you use the SD cards for the first time for recording with this unit, format the cards. Please be aware that if a medium is formatted, then all the data recorded on the medium will be erased and cannot be restored. Back up important data on a PC etc. 121) ≥... - Page 43 ∫ Screen indications in the Recording Mode TC 00:00:00:00 TC 00:00:00:00 TC 00:00:00:00 R 1h20m R 1h20m R 1h20m MAIN MAIN R 1h20m R 1h20m R 1h20m 50.00p 50.00p TC 00:00:00:00 Counter display Card slot number (White) R 1h20m Approximate remaining recordable time ≥...
-
Page 44: Switching Between Auto And Manual Mode
Recording Switching between Auto and Manual Mode MANU AUTO/MANU switch Slide the switch to change Auto Mode/Manual Mode. is displayed in the Auto Mode. ≥ ∫ Auto Mode In Auto Mode, this unit operates according to the [ ] menu settings. AUTO SW ≥... -
Page 45: Auto Focus
Menu item Setting [ON]: Activates Auto Focus in Auto Mode. [AF] [OFF]: Activates Auto Focus as a manual mode. Focus is adjusted according to the functions of the FOCUS A/M/¶ switch. Automatic Tracking White Balance The Auto Tracking White (ATW) Balance function of this unit automatically adjusts the White Balance according to the lighting condition. -
Page 46: Adjusting The Picture Quality
Recording Adjusting the Picture Quality You can set the picture quality of images to be recorded in the main menu # [SCENE FILE]. Detail function This function thickens or weakens the outlines of images. It effectively softens or sharpens images, but in some cases, the whole image may become rough due to emphasized noise and edges. - Page 47 Black control function This function sets the black level that is to be the reference of luminance. ∫ Menu item [MASTER PED] 143) Gamma function This function optimizes the tone of images. ∫ Menu item [GAMMA MODE]: Sets the optimal tone and contrast of images for the scene to be recorded.
-
Page 48: Using The Zoom
Recording Using the zoom The unit can deliver a maximum optical zoom of 15k. ≥ (When the picture size of [REC FORMAT] 147) is 1920k1080 or below) It can zoom up to approx. 25k when the [i.Zoom] is set to [ON]. ≥... -
Page 49: About The Zoom Speed
Using the i.Zoom When [i.Zoom] is set to [ON], you can zoom in while maintaining the beauty of high-definition picture quality up to a magnification of approx. 25k. ≥ Set [REC FORMAT] to a setting with a picture size of 1920k1080 or below. 147) Select the menu. -
Page 50: Image Stabilizer Function
Recording Image Stabilizer Function Use the Image Stabilizer to reduce the effects of shake during recording. This unit is equipped with Hybrid Optical Image Stabilizer. Hybrid Optical Image Stabilizer is a hybrid of Optical and Electrical Image Stabilizer. Register [O.I.S.] to a USER button. ≥... - Page 51 ∫ Blur amplitude You can adjust the performance of camera shake correction according to the level of camera shake during recording. Select the menu. MENU : [SW SETUP] # [BLUR AMPLITUDE] # desired setting [1]/[2]/[3]/[4]/[5] ≥ If you set a smaller value, correction performance against minor camera shake will be enhanced. Even though smaller values allow more effective screen stabilization in situations with minor camera shake, such as when you are recording from a fixed position, they are less effective for correcting significant camera shake.
-
Page 52: Focus
Recording Focus Perform focus adjustments using the focus ring. If auto focusing is difficult due to the conditions, then use Manual Focus. A FOCUS A/M/¶ switch B PUSH AUTO button FOCUS C Focus ring ∞ PUSH AUTO ≥... - Page 53 ∫ To change the way you adjust focus with the focus ring Select the menu. MENU : [SW SETUP] # FOCUS RING DRIVE] [SPEED]: Adjusts the focus value according to the speed at which the focus ring is rotated. [COARSE]: Adjusts the focus value according to the rotational position of the focus ring.
- Page 54 Customizing Auto Focus for various recording conditions You can customize Auto Focus for various recording conditions by adjusting the settings of [AF SPEED], [AF SENSITIVITY], and [AF AREA WIDTH] individually. ∫ Custom AF function When [ON] is selected, Auto Focus works with customized [AF SPEED] and [AF SENSITIVITY] settings.
-
Page 55: One Push Af
∫ AF Area Width adjustment You can adjust the effective area width for Auto Focus according to the size of the subject. ≥ Switch to Auto Focus Mode. Select the menu. MENU : [SW SETUP] # [AF AREA WIDTH] # [SET] Push the jog dial. -
Page 56: Push Af
Push AF If you press and hold the PUSH AUTO button, Manual Focus will be temporarily switched to Auto Focus. ≥ Set this unit to Manual Focus. Press and hold the PUSH AUTO button. ≥ The focus position will be automatically adjusted for the subject at the center of the screen. ≥... -
Page 57: Using Focus Assist
Using Focus Assist ≥ Switch to Manual Focus Mode. Press the FOCUS ASSIST button or the USER button to which [FOCUS ASSIST 1] or [FOCUS ASSIST 2] is FOCUS ASSIST registered. ≥ You can also use Focus Assist by touching the USER button icon to which [FOCUS ASSIST 1] or [FOCUS ASSIST 2] is registered. - Page 58 ∫ To change the peaking settings If you set Focus Assist to ON by following either of the procedures below, in-focus portions are highlighted with color (peaking). j Setting the menu item [FOCUS ASSIST 1] to [PEAKING] or [BOTH] and pressing the FOCUS ASSIST button or the USER button to which [FOCUS ASSIST 1] is registered.
- Page 59 (Notes on the peaking of Focus Assist) ≥ When EVF/LCD detail is enabled, Focus Assist is canceled. (Notes on the magnified display of Focus Assist) ≥ Some information on the screen disappears when the screen is magnified. ≥ In the following cases, the screen is not magnified during Focus Assist: j During motion picture recording or PRE-REC 91, 164) j When using Digital Zoom...
-
Page 60: White Balance
Recording White Balance Automatic White Balance function may not reproduce natural colors depending on the scenes or lighting conditions. If so, you can adjust the White Balance manually. 5600K WHITE BAL A White Balance B Color temperature display ≥... - Page 61 About White Balance modes Mode Settings ATW (ATW) It will automatically adjust in accordance with the recording condition. LOCK It will lock the setting for ATW. (ATW Lock) P3200K Preset value for studio/indoor recording (halogen lamp, etc.) (P3200K) P5600K Preset value for outdoors (P5600K) Setting can be finely adjusted in accordance to the recording conditions.
- Page 62 Customizing ATW for various recording conditions You can customize the ATW settings for various recording conditions by adjusting the settings of [ATW TARGET R] and [ATW TARGET B] individually. ∫ Fine-adjusting the color balance of ATW Select the menu. MENU : [SW SETUP] # [ATW TARGET R] or [ATW TARGET B] ≥...
- Page 63 To finely adjust the White Balance Setting the White Balance mode to [VAR] allows you to set a White Balance value between 2000K and 15000K. ≥ Use the jog dial to change the settings. ≥ Switch to Manual Mode. Set the White Balance mode to [VAR]. Rotate the jog dial to adjust the color balance.
-
Page 64: Iris/Gain Adjustment
Recording Iris/Gain adjustment When recording a scene that is too dark (or bright) or a scene in a similar situation, manually adjust the iris and gain. Iris adjustment IRIS F4.0 A Iris value 1 IRIS button B Auto iris icon 2 Iris ring * It is displayed in Auto Iris Mode. - Page 65 Customizing Auto Iris motion settings for various recording conditions You can customize Auto Iris motion settings for various recording conditions by adjusting the settings of [AUTO IRIS LEVEL] and [AUTO IRIS LEVEL EFFECT] individually. ∫ Adjusting brightness during the Auto Iris Mode Select the [AUTO IRIS LEVEL EFFECT] menu.
-
Page 66: Gain Adjustment
Gain adjustment ≥ Use the jog dial to change the settings. GAIN 1 Jog dial 2 GAIN button A Gain value ≥ In Auto Gain Mode, “AGC” is displayed; in Manual Gain Mode, the gain value is displayed in dB. B [GAIN] ≥... - Page 67 ≥ It is not possible to adjust the gain value using the GAIN button and jog dial in the following situations: j During Freeze Frame ≥ If the gain value is increased, the noise on the screen increases. ≥ In Auto Iris Mode or Auto Shutter Mode, the screen brightness may not change even if you adjust the gain.
- Page 68 Low Light mode Switch to Low Light mode, which is suited to recording under low light. ≥ Register “Low Light mode” to a USER button. ≥ Slide the AUTO/MANU switch to switch to Auto Mode. Press the applicable USER button or touch the applicable USER button icon. ≥...
-
Page 69: Manual Shutter Speed
Recording Manual shutter speed Adjust the shutter speed when recording fast-moving subjects. ≥ Use the jog dial to change the settings. SHUTTER A.SHTR 1/60 1 SHUTTER button A Shutter speed 2 Jog dial B Auto Shutter display ≥... - Page 70 ∫ Shutter speed guide for fast moving subjects Refer to the table below to reduce afterimages that appear when playback is paused. Subject Shutter speed Golf or tennis shot 1/500 to 1/2000 Roller coaster 1/500 to 1/1000 ≥ The shutter speed cannot be adjusted in the following cases: j During Freeze Frame ≥...
-
Page 71: Audio Input
Recording Audio Input This unit can record audio in 2 ch. It is possible to switch between built-in microphone, external microphone, or connected audio equipment for each channel. ∫ About audio recording methods The audio recording method varies depending on the [REC MODE] setting. 147) Recording mode Audio recording method... - Page 72 Use INPUT1 or INPUT2 switches to switch the connected audio input signal. LINE : Audio equipment is connected : An external microphone is connected +48V : When using a phantom microphone (which requires a power supply of +48 V) The input level varies depending on the [INPUT1 LINE LEVEL] or [INPUT2 LINE LEVEL] setting.
-
Page 73: Adjusting The Audio Input Level
≥ Set INPUT1, 2 switches to LINE or MIC if you connect equipment not compatible with +48 V. You can damage this unit or such equipment if you leave the setting at [+48V]. ≥ This unit is turned off when a problem occurs with the +48 V power supply. ≥... - Page 74 Using the ALC function ALC can reduce audio noise. For audio channel 1, select [AUDIO ALC CH1]: for audio channel 2, select [AUDIO ALC CH2]. Set [AUDIO LEVEL CH1]/[AUDIO LEVEL CH2] to [MANUAL]. Select the menu. MENU : [AUDIO SETUP] # [AUDIO ALC CH1] or [AUDIO ALC CH2] # desired setting [ON] Enables ALC, allowing you to record audio with reduced noise.
-
Page 75: Counter Display
Recording Counter display You can change a counter display that indicates how much time has elapsed during recording or playback. A COUNTER button B RESET button COUNTER RESET Press the COUNTER button to switch the counter display. ≥ The display will be switched in the following order: Time Code # User Information* # Recording Counter # Off. - Page 76 [TCG] Sets the way the time code will move. Select the menu. MENU : [RECORD SETUP] # [TCG] # desired setting [FREE RUN]: It will constantly move. [REC RUN]: It will move only when recording. ≥ [FREE RUN] is automatically selected during PRE-REC. 91, 164) ≥...
-
Page 77: Setting The User Information
[TC PRESET] You can set the initial time code. Select the menu. MENU : [RECORD SETUP] # [TC PRESET] Touch the item to set and change with ≥ It will be set to 00h00m00s00f when the RESET button is pressed. ≥... -
Page 78: Setting The Recording Counter
Setting the Recording Counter Recording Counter will display the recording time in seconds. 0:00:00 (hour : minute : second (When [REC COUNTER] is set to [TOTAL])) SCN 0:00:00 (hour : minute : second (When [REC COUNTER] is set to [SCENE])) [REC COUNTER] Select the counting method during the recording. -
Page 79: User Button
Recording USER button Each of the USER button can register one function from the 40 available functions. ≥ There are 9 USER buttons (USER1 to 9) on the main body and 4 USER button icons (USER10 to USER13) displayed on the LCD monitor. Setting the USER button Select the menu. -
Page 80: Using The User Button
Using the USER button To use the function assigned to a USER button or USER button icon, press the applicable USER button (one of the USER buttons 1 to 9), or touch the applicable USER button icon (one of the USER button icons 10 to 13) while operation icons are displayed. -
Page 81: Functions Of The User Button
Functions of the USER button ∫ List of USER button functions Item Icon Function [INHIBIT] [INH] Invalid [FOCUS ASSIST 1] [FA1] Focus Assist 1 [BACKLIGHT] [B.Light] Backlight Compensation [SPOTLIGHT] [S.Light] Spotlight [BLACK FADE] [B.FD] Black Fade [WHITE FADE] [W.FD] White Fade [ATW] [ATW] Auto Tracking White Balance... -
Page 82: Backlight Compensation
Item Icon Function [USB MODE] [USB] USB Mode* [AWB] [AWB] Auto White Balance [SLOT SEL] [SlotSel] Slot Selection [AF AREA] [AF Area] AF Area Width adjustment [LCD/EVF OUTPUT] [LCD/EVF] LCD/EVF Output [LOW GAIN] [LowGain] Low gain [MID GAIN] [MidGain] Mid gain [HIGH GAIN] [HighGain] High gain... -
Page 83: Black Fade
Spotlight ≥ Register “Spotlight” to a USER button. Switches to automatic iris control for spotlight. Very bright object is recorded clearly. appears when it is set. ≥ ≥ Canceling Spotlight resets the iris mode to the previous setting. ≥ This item cannot be set during Freeze Frame. Black Fade ≥... -
Page 84: Atw Lock
Auto Tracking White Balance ≥ Register “Auto Tracking White Balance” to a USER button. The White Balance can be changed to ATW. ≥ This function is not available when the White Balance mode is set to [ATW LOCK]. ATW Lock ≥... -
Page 85: Recording Check
Focus Assist 2 ≥ Register “Focus Assist 2” to a USER button. You can set the Focus Assist. ≥ You can set the Focus Assist method in [FOCUS ASSIST 2] in the [SW SETUP] menu. ≥ When [FOCUS ASSIST 1] in the [SW SETUP] menu is set to [BOTH], the USER button is disabled. -
Page 86: Freeze Frame
≥ Register “DRS” to a USER button. Selects the DRS (Dynamic Range Stretcher) function. It is possible to expand the dynamic range by compressing the video signal level of the highly illuminated area that gets washed out with standard recording. ≥... - Page 87 Area Mode You can apply a variety of effects to the subject you touch. ∫ Setting an Area Mode effect You can select the following menu items to set an effect to be applied when you touch the subject. MENU : [SW SETUP] # [AREA MODE] # desired setting [INH]: Does not apply any effects of Area Mode.
- Page 88 ≥ Area Function is not possible in following cases: j In Variable Frame Rate Mode j During AG ROP application connection 130) ≥ Area mode is canceled in following cases: j If you turn the unit off j If you press the THUMBNAIL button j When the setting of [ASPECT CONVERT] is changed 149) j When [USB MODE SELECT] is set to [DEVICE] and this unit is connected to a PC...
- Page 89 EVF/LCD detail ≥ Register “EVF/LCD detail” to a USER button. [EVF/LCD DETAIL] helps you achieve focus easier by emphasizing the outlines of an image displayed on the LCD monitor or the viewfinder. ≥ These settings will not affect the images actually recorded. Low Light mode ≥...
- Page 90 Flash band compensation ≥ Register “Flash band compensation” to a USER button. If you set this item to [ON], you can compensate for and reduce flash band, a phenomenon that creates markedly different levels of luminance between the top and bottom of the image when recording is performed in an environment where another camera is firing its flash.
- Page 91 PRE-REC ≥ Register “PRE-REC” to a USER button. This allows the recording of an image and audio to start before you press the recording start/stop button. AVCHD scenes will be recorded from approximately 3 seconds before the operation, while MOV/MP4 will be recorded from approximately 4 seconds before the operation. ≥...
- Page 92 Press USER button or touch USER button icon in the recording screen. ≥ [VFR] will be displayed. ≥ The frame rate display will change. (Example) Frame Rate (fps) Frame rate in [REC FORMAT] 12 : 25.00p will be displayed. Audio is not recorded during recording. ≥...
- Page 93 ≥ You can also enable/disable Variable Frame Rate Mode or change the frame rate using the menu. j [VFR MODE] 163) j [FRAME RATE] 163) ≥ Variable Frame Rate Mode is set to [OFF] in following cases: j When the [REC MODE] or [REC FORMAT] setting is changed to a setting that does not support Variable Frame Rate Mode ≥...
-
Page 94: Optical Image Stabilizer
Auto Iris Level ≥ Register “Auto Iris Level” to a USER button. This enables/disables the Auto Iris Level. ≥ When this item is enabled, the [AUTO IRIS LEVEL EFFECT] setting is applied. Zebra ≥ Register “Zebra” to a USER button. Press USER button or touch USER button icon in the recording screen. -
Page 95: Auto Rec
Scene File ≥ Register “Scene File” to a USER button. You can save the scene file settings to the SD card or load them from the SD card to this unit. ∫ Saving scene file settings Press USER button or touch USER button icon in the recording screen. Touch [SAVE]. - Page 96 ≥ When is displayed, signals will be transmitted, prompting the external device to start recording. ≥ To stop the recording being performed with the external device, press the applicable USER button or touch the applicable USER button icon again. When is displayed, signals will be transmitted, prompting the external device to stop the recording.
- Page 97 LCD/EVF Output ≥ Register “LCD/EVF Output” to a USER button. This changes how to turn on/off the LCD monitor and Viewfinder. Low gain ≥ Register “Low gain” to a USER button. The gain value can be changed to low gain. ≥...
-
Page 98: Useful Functions
Recording Useful functions A BARS button B ND FILTER switch C DISP/MODE CHK button Color Bar Screen BARS button Press the BARS button to output a color bar screen to an external monitor so you can adjust them. -
Page 99: Nd Filter
ND filter Using the ND filter switch, you can switch the built-in optical ND filter setting. (The filter adjusts the amount of light.) ≥ Use this function when recording a bright subject outdoors under a clear sky that causes the screen to look white. -
Page 100: Using Operation Icons
∫ To display the Mode Information Press and hold the DISP/MODE CHK button to display the mode information screen first. Each time you press the button, the display mode of the screen switches in the following order: Mode information display1 # Mode information display2 # Mode information display3 # Normal display Mode information display4 # Mode information display5 # Mode information display1:... -
Page 101: Using Of Jog Dial
Recording Using of jog dial A Jog dial Selecting/setting items You can select and set menu items 40), etc. using the jog dial. Rotate the jog dial on the menu screen, etc., to move the cursor. ≥ The selected item will be displayed in yellow. Push the jog dial to set. - Page 102 Using the multi manual function You can select the following functions and adjust their settings using the jog dial. You can also switch between the functions and adjust their settings. (When the recording screen is displayed) On-screen icons Functions Settings GAIN Gain adjustment Adjusts the gain value.
- Page 103 To change the function you adjust Change settings in advance so that you can select more than two functions. ≥ Change settings as follows: Functions Settings to be changed in advance Gain adjustment Switch to Manual Mode. Press the WHITE BAL button and the USER button to which VAR adjustment [AWB] is registered to set the White Balance mode to [VAR].
-
Page 104: Playback
Playback Motion picture/Still picture playback Set this unit to playback mode. Touch the play mode select icon A. Media display The selected media is displayed in yellow. Select the media C you wish to play back. (To set this unit to Motion Picture Playback Mode) Touch the desired recording mode D and ... - Page 105 (To set this unit to Still Picture Playback Mode) Touch the still picture (JPEG) F. Touch the scene or the still picture to be played back. ≥ Next (Previous) page can be displayed by touching ≥ You can change the playback media by pressing the USER button to which [SLOT SEL] is registered.
- Page 106 * Detailed information of the scene is displayed when playing back motion pictures. Following information is displayed. START TC, START UB, and DURATION are displayed only for AVCHD scenes. j START TC j DURATION j START UB j REC MODE j DATE j FORMAT j TIME ZONE...
-
Page 107: Motion Picture Compatibility
≥ If you set recording format to [ALL] and play back a scene, the screen may turn dark momentarily when it switches to another scene. Motion picture compatibility ≥ This unit is based on AVCHD Progressive/AVCHD. ≥ Even if the devices used have compatible standards, when playback of video recorded using another device is performed using this device, or when video recorded using this device is played back in another device, playback may not proceed normally, or may not be possible. -
Page 108: Motion Picture Playback Using Operation Icon
Motion picture playback using operation icon For details on the basic playback operations, refer to page 104. Playback operation Playback display Operating steps During Playback Touch the LCD monitor and slide from right to left (from left to right) during playback. Skip playback (to the start of a scene) -
Page 109: Useful Functions
Playback Useful functions Creating still picture from motion picture You can save a frame of a recorded motion picture as a still picture. The picture size with which a still picture will be recorded differs depending on the picture size of [REC FORMAT] with which the motion picture was recorded. -
Page 110: Repeat Playback
Repeat Playback Playback of the first scene starts after playback of the last scene finishes. Select the menu. MENU : [VIDEO SETUP] # [REPEAT PLAY] # [ON] indication appears on the full screen views. ≥ All the scenes displayed in the thumbnail will be repeatedly played back. ≥... -
Page 111: Playing Back Scenes Or Still Pictures By Date
Playing back scenes or still pictures by date The scenes or still pictures recorded on the same day can be played back in succession. Touch the date select icon. A Date select icon Touch the playback date. ≥ The scenes or still pictures recorded on the date selected are displayed as thumbnails. Touch the scenes or still picture to be played back. -
Page 112: Editing
Editing Deleting scenes/still pictures Deleted scenes/still pictures cannot be restored, so perform appropriate confirmation of the contents before proceeding with deletion. ≥ Press the THUMBNAIL button to switch this unit to the Playback Mode. ∫ To delete the scene or still picture being played back Touch while scenes or still pictures to be TC 00:02:30:00... -
Page 113: Protecting Scenes/Still Pictures
When you stop deleting halfway: Touch [CANCEL] or press MENU button while deleting. ≥ The scenes or still pictures that have already been deleted when the deletion is canceled cannot be restored. To complete editing: Touch [Return] or press MENU button. ≥... -
Page 114: Copying Between Sd Cards
Editing Copying between SD cards Motion pictures or still pictures recorded with this unit can be copied between SD Cards inserted in this unit. ≥ Copying is not possible if the type of the source SD card (SDHC Memory Card/SDXC Memory Card) is different from that of the target SD card. - Page 115 If you will delete the motion pictures or still pictures after copying is complete, be sure to play back the motion pictures or still pictures to check that they have been copied to correctly before deleting. ≥ Depending on the following conditions, the time it takes for copying may be longer. j The number of recorded scenes is large.
-
Page 116: Linking To External Devices
Linking to external devices Connecting Headphones, a Remote Control or an External Monitor Headphones You can connect headphones (commercially-available) to the headphone output jack (3.5 mm diameter stereo mini jack). A Headphone output jack ≥ Sound is not output from the speaker when headphones are connected. Remote control You can connect a remote control (commercially-available) to either of the CAM REMOTE terminals (FOCUS IRIS or ZOOM S/S). -
Page 117: External Monitor
External monitor You can connect this unit to an external monitor as shown in the figure below. VIDEO AUDIO OUT A HDMI Cable (commercially-available) B AV cable (commercially-available) ≥ To use an AV cable for external output 119) C External monitor ≥... - Page 118 ∫ To watch images on a regular TV (4:3) or when both sides of the images do not appear on the screen Change the menu setting to display the images correctly. (Check the external monitor setting.) Select the menu. MENU : [OUTPUT SETUP] # [RESOLUTION] # [DOWN CONV.] MENU : [OUTPUT SETUP] # [DOWN CONV.] # desired setting...
-
Page 119: Setting The External Output Resolution
Setting the external output resolution Change the setting for outputting images to an external monitor or other external device (recorder, etc.). Select the menu. MENU : [OUTPUT SETUP] # [RESOLUTION] # desired setting [SYSTEM]/[1080p]/[1080i]/[DOWN CONV.] ≥ [SYSTEM] automatically sets the output resolution according to the setting in [REC FORMAT]. If the images are not output on the external device when the setting is [SYSTEM], switch to the method [1080p], [1080i] or [DOWN CONV.] which enables the images to be displayed on your external device. - Page 120 Setting External output resolution Picture size/Frame [RESOLUTION] rate HDMI OUT terminal VIDEO OUT terminal setting in [REC FORMAT] [SYSTEM] 2160/25.00p [1080p] 1080/50.00p UHD (3840k2160)/ 25.00p [1080i] 1080/50.00i [DOWN CONV.] 576/50.00p 576/50.00i [SYSTEM] 1080/50.00p FHD (1920k1080)/ [1080p] 50.00p, [1080i] 1080/50.00i PS 1080/50.00p [DOWN CONV.] 576/50.00p 576/50.00i...
-
Page 121: Connecting To A Pc (File Transfer/Nonlinear Editing)
Linking to external devices Connecting to a PC (File transfer/nonlinear editing) When this device and a computer for editing are connected using a USB 3.0 Cable (commercially- available), image data in the SD card can be transferred. ≥ This unit supports USB 3.0. ≥... -
Page 122: Connecting To A Pc
Connecting to a PC Micro-B DEVICE A USB 3.0 Cable (commercially-available) ≥ Insert the plugs as far as they will go. Connect this unit to the AC adaptor. ≥ Use the AC adaptor to free you from worrying about the battery running down. Turn on the unit. -
Page 123: About The Pc Display
∫ To disconnect USB Cable safely (For Windows) Select the icon in task tray displayed on the PC, and then select the model number of this unit to disconnect the USB cable. ≥ Depending on your PC’s settings, this icon may not be displayed. (For Mac) Drag [CAM_SD] disk icon to the [Trash], and then disconnect the USB Cable. - Page 124 ∫ Folder names for motion picture data recorded in MOV/MP4 format The fourth to sixth, and eighth characters of the folder name of a recorded MOV/MP4 scene are determined by its picture size, frame rate, motion picture format and camera number setting. 1 0 0 R D R H 0 ...
-
Page 125: Copying/Playing Back With An External Media Device
≥ Please read the operating instructions of the external media device for how to use it. Preparing for copying/playing back Refer to the following support site for information about an external media device. http://pro-av.panasonic.net/ (This Site is English only) When the external media device that requires formatting is connected, a message is displayed. - Page 126 ≥ If you are using a bus-powered or portable USB HDD, this unit can supply power to the USB HDD by USB Cable (supplied with USB HDD). Connect the AC adaptor to this unit. ≥ Use the AC adaptor to free you from worrying about the battery running down. Turn on this unit, and press the THUMBNAIL button to switch to Playback Mode.
-
Page 127: Copy Once
∫ Formatting This is for initializing the external media device. ≥ Please be aware that if a media is formatted then all the data recorded on the media is erased and cannot be recovered. Back up important data on a PC etc. ≥... -
Page 128: Copy Selected Files
Copy selected files Connect this unit to the external media device to prepare for copying. 125) Touch [SELECT COPY]. ≥ You can also access this function by selecting menu items. [ COPY ] # [ SELECT COPY ] Touch the media you want to copy. When copying from the SD card 1 to the external media device. -
Page 129: Playing Back The External Media
Playing back the External Media ≥ Only motion picture/still picture that have been copied by connecting this unit to the external media device can be played back. HOST A USB Cable (supplied with USB HDD) B USB HDD (commercially-available) C USB flash memory (commercially-available) Connect this unit to the external media device to prepare for playback. -
Page 130: Using An Ipad As A Remote Control (Ag Rop Application)
Linking to external devices Using an iPad as a Remote Control (AG ROP application) Attaching a wireless module that support this unit 131) to the USB HOST terminal of this unit allows you to connect to a wireless LAN network. You can remotely control some functions by connecting this unit and an iPad on which the AG ROP application is installed. -
Page 131: Before Connection
≥ For details on wireless modules that support this unit, refer to the support desk at the following website. http://pro-av.panasonic.net Settings to be made on this unit To connect an iPad to this unit via wireless LAN, the following information on this unit is required:... - Page 132 Entering text Operate in the same way as you enter characters with a keyboard. Icon Description of operation [A-a] Switches between uppercase and lowercase. Returns to the previous screen. The entered characters are [Return] canceled. Switches to symbols and numbers. Enters a space.
- Page 133 ∫ Configuring the wireless LAN settings (IP address, etc.) Select the menu. MENU : [NETWORK SETUP] # [Wireless LAN setup] Touch and set the desired items as needed. ≥ All default settings are indicated with underlined text. [IP Address]: Enter the IP address. ≥...
-
Page 134: Connecting This Unit And An Ipad
Connecting this unit and an iPad ≥ Change the mode to Recording Mode. If you switch to Recording Mode while this unit is connected in Playback Mode, the connection may be terminated to restart this unit. We recommend setting this unit to Recording Mode before making a connection. -
Page 135: Connecting To A Wireless Access Point
≥ Some settings in [BAND], [CHANNEL (2.4GHz)] and [CHANNEL (5GHz)] cannot be selected depending on the wireless module used. ≥ For details on how to enter characters, refer to page 132. Touch [RETURN]. Set [DHCP] to [SERVER]. MENU : [NETWORK SETUP] # [Wireless LAN setup] # [DHCP] # [SERVER] Touch [EXIT]. -
Page 136: Setting Up A Connection Manually
≥ Depending on your environment, the communication speed may become slower or the wireless access point may not be available for use. ≥ When [DHCP] in [Wireless LAN setup] is set to [OFF] or [CLIENT], apply the [IP Address] setting to [AG ROP] in [Settings] 133) on the iPad. - Page 137 ∫ Connecting from History Connections made to wireless access points are saved in History. Connecting from History allows you to easily connect with the same settings as used previously. ≥ Attach a wireless module that support this unit to the USB HOST terminal of this unit. 131) ≥...
-
Page 138: Operations During Ag Rop Application Connection
Operations during AG ROP application connection ∫ Operations with this unit during connection ≥ The following buttons are disabled: j SHUTTER button j GAIN button j WHITE BAL button j MENU button (The applicable USER button is also disabled, making it impossible to operate the menu.) j BARS button j THUMBNAIL button... -
Page 139: Menu
Menu Using the Menu Refer to page for how to set up the Menu. Scene file Settings that are assigned to [F1:] in [FILE SELECT] by default are indicated with underlined text. MENU : [SCENE FILE] # desired setting [FILE SELECT] You can save the desired image settings to each scene number. - Page 140 ≥ It is possible to switch the scene number by touching while displaying the operation icons. 100) ≥ You can rename the titles for scene numbers (FLUO, etc.) in [NAME EDIT]. ≥ It will return to the default settings when [SCENE] is selected in [INITIAL SET]. 176) [NAME EDIT] You can rename the title of the scene number selected in [FILE SELECT].
-
Page 141: Skin Tone Dtl
[SKIN TONE DTL] This makes skin colors appear softer for a more attractive appearance. This is more effective if you record a person closely from the torso up. [ON]/[OFF] Touch [SKIN TONE DTL]. Touch [ON]. Touch [EXIT] to exit the menu screen. ≥... - Page 142 [RB GAIN CONTROL SETTING] This adjusts the color balance for [Ach] or [Bch] of the White Balance mode. You can also set whether or not to apply the color balance settings to Auto White Balance/Auto Black Balance. Touch [RB GAIN CONTROL SETTING], and select the desired item. [AWB A]: Setting for the White Balance mode [Ach] [AWB B]:...
-
Page 143: Master Ped
[CHROMA LEVEL] Adjusts color density. Touch [CHROMA LEVEL]. Touch to adjust settings. ≥ You can select a value between s70 and r30. Touch [EXIT] to exit the menu screen. ≥ The default setting that is assigned to [F1:] in [FILE SELECT] is “0”. [CHROMA PHASE] Adjusts color balance. - Page 144 [GAMMA MODE] Tone or contrast of the image is set in accordance with the recorded scenes. Touch [GAMMA MODE]. Touch to select the setting item. [HD]: This is the video gamma feature for HD (High Definition). [SD]: This increases gain in darker areas more than [HD] does. [FILMLIKE1]: This feature reproduces highlight areas more than [HD] does.
- Page 145 [KNEE MODE] To avoid overexposure, select the compression level of the high intensity video signals received through the image sensor. Touch [KNEE MODE]. Touch to select the setting item. [AUTO]: Sets the level automatically according to the signals received. [MANUAL]: Applies the [KNEE MASTER POINT] and [KNEE MASTER SLOPE] settings.
- Page 146 [DRS EFFECT] Selects the level of the DRS function. Touch [DRS EFFECT]. Touch to select the setting item. [1]/[2]/[3] ≥ Higher the value, greater the compression level of the highly illuminated area. ≥ Higher the value, greater the noise of the dark area. Touch [EXIT] to exit the menu screen.
-
Page 147: System Mode
System mode All default settings are indicated with underlined text. MENU : [SYSTEM MODE] # desired setting [REC MODE] Switch the recording mode of the motion pictures to record. [MOV]*: This recording method is suitable for editing images. Motion pictures will be saved in MOV format. - Page 148 ≥ When [MOV] or [MP4] in [REC MODE] is selected Size Recording format Frame rate Bit rate (VBR) (Picture size) [UHD 2160/25.00p 100M] 25.00p Average 100 Mbps (3840k2160) [FHD 1080/50.00p 50M] 50.00p [FHD 1080/25.00p 50M] 25.00p Average 50 Mbps (1920k1080) [FHD 1080/50.00i 50M] 50.00i ≥...
- Page 149 Recording function Simultaneous Recording format Normal Interval Rec VFR Mode Relay recording recording recording 162) l 161 162) [UHD 2160/25.00p ± ± ± ± 100M] [FHD 1080/50.00p ± ± ± 50M] [FHD 1080/25.00p ± ± ± ± ± 50M] [FHD 1080/50.00i ±...
- Page 150 [FLASH BAND COMPENSATION] If you set this item to [ON], you can compensate for and reduce flash band, a phenomenon that creates markedly different levels of luminance between the top and bottom of the image when recording is performed in an environment where another camera is firing its flash. [ON]/[OFF] [CAMERA NUMBER SET] This sets the camera number for this unit.
-
Page 151: User Switch
User switch All default settings are indicated with underlined text. MENU : [USER SW] # desired setting [USER1]/[USER2]/[USER3]/[USER4]/ [USER5]/[USER6]/[USER7]/[USER8]/[USER9] Sets the function to assign to the USER buttons. ≥ For the functions of the USER button that can be registered, refer to page 81. ≥... -
Page 152: Switch Setting
Switch setting All default settings are indicated with underlined text. MENU : [SW SETUP] # desired setting [IRIS RING] Sets the rotation direction and iris control of the iris ring. [DOWN OPEN]: Iris will open when it is turned toward B. [UP OPEN]: Iris will open when it is turned toward A. - Page 153 [HIGH GAIN] Sets the gain value for the [HIGH GAIN] position of the GAIN button. Touch [HIGH GAIN]. Touch to adjust settings. ≥ You can select [AUTO] or a value between 0 dB and 30 dB. When [EXTENDED SENSITIVITY] is set to [ON], you can set a value between -3 dB and 30 dB. 149) Touch [EXIT] to exit the menu screen.
- Page 154 [CUSTOM O.I.S.] When [ON] is selected, the Image Stabilizer works with customized [BLUR AMPLITUDE] and [BLUR FREQUENCY] settings. [ON]/[OFF] [BLUR AMPLITUDE] This sets the blur amplitude of the Image Stabilizer during recording. [1]/[2]/[3]/[4]/[5] [BLUR FREQUENCY] This sets the blur frequency of the Image Stabilizer. [1]/[2]/[3] [ATW SET] When you press the WHITE BAL button, you can assign ATW.
- Page 155 [WB PRESET] Sets which White Balance mode to use when the WHITE BAL button is pressed to switch to the PRST position. [3200K]/[5600K]/[VAR] [WB VAR] Sets the color temperature when the White Balance mode is set to [VAR]. Touch [WB VAR]. Touch to adjust settings.
- Page 156 [FOCUS RING DRIVE] This sets the way you adjust focus with the focus ring. [SPEED]/[COARSE]/[FINE] [FOCUS MACRO] This enables/disables the Focus Macro function. [ON]/[OFF] ≥ If [ON] is selected, subjects at a distance of approximately 10 cm to infinity can be brought into focus when the zoom position is at the W end.
-
Page 157: Bars Type
[ZEBRA] Switch between the zebra display and marker display. [ZEBRA 1]/[ZEBRA 2]*/[MARKER]*/[OFF] * Not displayed when [ZEBRA 2]/[MARKER] is set to [ OFF ]. 169) ≥ For information on the zebra display and marker display, refer to page 94. [ZEBRA MODE] This sets the display duration of the zebra display. - Page 158 [SUB ZOOM] Enable/disable of the sub zoom lever on the handle can be switched. Zoom speed will be different depending on the setting. [OFF]/[1]/[2]/[3]/[4]/[5]/[6]/[7] ≥ The larger the value is, the faster the zoom speed becomes, and vice versa. ≥ When [FAST ZOOM] is set to [ON] and [7] is selected, the zoom speed becomes as same as Fast Zoom.
-
Page 159: Auto Switch Setting
Auto switch setting All default settings are indicated with underlined text. MENU : [AUTO SW] # desired setting [A.IRIS] This enables/disables Auto Iris for Auto Iris Mode. [ON]/[OFF] [AGC] This enables/disables AGC for Auto Iris Mode. [ON]/[OFF] [AGC LIMIT] Sets the maximum possible gain value for Auto Gain Mode. [3 dB]/[6 dB]/[9 dB]/[12 dB]/[15 dB]/[18 dB]/[21 dB]/[24 dB]/[27 dB]/[30 dB] ≥... -
Page 160: Auto Slow Shtr
[AUTO SLOW SHTR] You can record bright pictures even in dark places by slowing the shutter speed. Slow Shutter works in Auto Shutter Mode. [ON]/[OFF] ≥ The shutter speed is adjusted to 1/25 or more according to the ambient brightness. ≥... -
Page 161: Recording Setup
Recording Setup All default settings are indicated with underlined text. MENU : [RECORD SETUP] # desired setting [MEDIA SELECT] Card slot can be selected separately to record motion pictures. [SD CARD 1]/[SD CARD 2] [2 SLOTS FUNC.] You can set relay/simultaneous recording. ≥... -
Page 162: Simultaneous Recording
while for this unit to recognize a new SD card, replace the SD card that ran out of space when the SD card currently being used as a destination still has sufficient remaining recordable time. ≥ The maximum recording time for Relay Recording is 10 hours. ≥... -
Page 163: Frame Rate
≥ After recording, the setting of Interval Recording is canceled. ≥ Audio cannot be recorded. Setup time Setup example Recording time Recorded time (recording interval) Sunset 2 min 20 s Blooming 30 s 14 s ≥ “h” is an abbreviation for hour, “min” for minute and “s” for second. ≥... -
Page 164: Time Stamp
[PRE-REC] This allows the recording of an image and audio to start before you press the recording start/stop button. AVCHD scenes will be recorded from approximately 3 seconds before the operation, while MOV/MP4 will be recorded from approximately 4 seconds before the operation. [ON]/[OFF] [TIME STAMP] You can stamp the date and time of recording on the images you record. -
Page 165: Audio Setup
Audio Setup All default settings are indicated with underlined text. MENU : [AUDIO SETUP] # desired setting [AUDIO LOW CUT CH1] Reduces the level of low-pitched sound for audio channel 1. [ON]/[OFF] ≥ You may not see the full effect depending on the recording conditions. [AUDIO LOW CUT CH2] Reduces the level of low-pitched sound for audio channel 2. - Page 166 [AUDIO ALC CH1] If you set this item to [ON], you can reduce the audio noise of audio channel 1. It will record with natural sound when set to [OFF]. ≥ Set [AUDIO LEVEL CH1] to [MANUAL]. [ON]/[OFF] [AUDIO ALC CH2] If you set this item to [ON], you can reduce the audio noise of audio channel 2.
-
Page 167: Output Setup
Output Setup Different menu items are displayed depending on whether this unit is in Recording Mode or Playback Mode. All default settings are indicated with underlined text. MENU : [OUTPUT SETUP] # desired setting [RESOLUTION] This changes the way in which images are output to an external device. 119) [SYSTEM]/[1080p]/[1080i]/[DOWN CONV.] [REMOTE REC]... -
Page 168: Test Tone
[AV OUT] Enable/disable output from the VIDEO OUT terminal or AUDIO OUT terminal. 119) [ON]/[OFF] [H/PHONE MODE] Select the sound heard through the headphone terminal and AUDIO OUT terminal. [LIVE]: The sound which has been input from the microphone is output as is. This setting is selected when delays in the sound are annoying. -
Page 169: Display Setting
Display setting Different menu items are displayed depending on whether this unit is in Recording Mode or Playback Mode. All default settings are indicated with underlined text. MENU : [DISP SETUP] # desired setting [ZEBRA DETECT 1] Selects the brightness level of the left-leaning zebra patterns on the screen. Touch [ZEBRA DETECT 1]. -
Page 170: Guide Lines
[GUIDE LINES] You can check if the image is level while recording motion pictures and still pictures. The function can also be used to estimate the balance of the composition. /[OFF] ≥ The guidelines do not appear on the images actually recorded. ≥... -
Page 171: Zoom Display
[FOCUS DISPLAY] This changes the units of focus values. [NUMBER] A value between 0 and 99 is displayed. [feet] All values are displayed in feet. All values are displayed in meter. [OFF] No value is displayed. [ZOOM DISPLAY] This changes the units of zoom values. [NUMBER] A value between 0 and 99 is displayed. -
Page 172: Lens Status
[AUDIO LEVEL METER] Select to display the audio level meter. ≥ (In Playback Mode) Touch the play mode select icon, and set this unit to Motion Picture Playback Mode. 104) [ON]/[OFF] [LENS STATUS] Display relating to lens can be switched. (Zoom Display, Optical Image Stabilizer, ND filter, Focus Display, White Balance, Iris, Gain, Auto Iris, Shutter Speed) [ON]/[OFF] [CARD &... - Page 173 [EVF SETTING] Adjusts the brightness and color intensity of the viewfinder. [COLOR]/[BRIGHTNESS]/[CONTRAST] ≥ The default settings are as follows: j [COLOR]: “0” j [BRIGHTNESS]: “0” j [CONTRAST]: “0” [SELF SHOOT] Switches the mirror function of the LCD monitor when recording yourself. The image on the LCD monitor is displayed mirrored horizontally during recording of yourself when it is set to [MIRROR].
-
Page 174: Other Functions
Other Functions Different menu items are displayed depending on whether this unit is in Recording Mode or Playback Mode. All default settings are indicated with underlined text. MENU : [OTHER FUNCTION] # desired setting [FORMAT MEDIA] The SD card or the external media device can be formatted. 42, 127) ≥... - Page 175 [ALERT SOUND] Touch screen operation, start and stop of recording can be confirmed with this sound. When [OFF] is selected, the sound is not output at the start/end of recording, etc. [OFF]/ (Volume low)/ (Volume high) 2 Beeps for 4 times When an error occurs.
- Page 176 [INITIAL SET] The menu settings or [FILE SELECT] are reset to the default. 139) [ALL]: This is for initializing all menus. [SCENE]: This is for initializing the setting of each scene number of [FILE SELECT]. [NETWORK]: This is for initializing the [NETWORK SETUP] menu settings. [NO]: This is for not performing initialization.
-
Page 177: Network Setup
Network Setup All default settings are indicated with underlined text. MENU : [NETWORK SETUP] # desired setting [USER ACCOUNT] Set up a login user account for the AG ROP application. 131) [SET]/[OFF] [WIRELESS SETUP] Set the wireless LAN connection method. 134) [DIRECT]/[SSID(SELECT)]/[SSID(MANUAL)] [Wireless LAN setup]... -
Page 178: Maintenance
[NETWORK SETUP PASSWORD] This will set/clear the Password to limit the startup of the [NETWORK SETUP] menu. By setting the Password, it will prevent erroneous operation, prevent wrongful use of the wireless LAN function by third party, and protect the set personal information. [Setup]/[Delete] Touch [Setup]. -
Page 179: Video Setup
Video Setup All default settings are indicated with underlined text. ≥ Press the THUMBNAIL button to switch this unit to the Playback Mode. ≥ Touch the play mode select icon, and set this unit to Motion Picture Playback Mode. 104) MENU : [VIDEO SETUP] # desired setting [REPEAT PLAY]... -
Page 180: Picture Setup
Picture Setup ≥ Press the THUMBNAIL button to switch this unit to the Playback Mode. ≥ Touch the play mode select icon, and set this unit to Still Picture Playback Mode. 104) MENU : [PICT. SETUP] # desired setting [SCENE PROTECT] Still pictures can be protected so that they are not deleted by mistake. -
Page 181: Display
Display Indications ∫ Recording indications Example: Display in English I- REC TC 00:00:00:00 HDMI R 1h20m EX.SENS. R 1h20m FLUO D 5X 5600K Ach 25:25.00p FBC ND1/64 A.SHTR SHUTTER 1/100 15 11 2016 15:30:00 AF50 AUTO OPEN 86, 145) Area Mode TC 00:00:00:00... - Page 182 Flash band compensation 15 11 2016 15:30:00 90, 150) Date indication Time indication 5600K Color temperature display Focus Macro 89, 156) ATW, LOCK, P3200K, P5600K, VAR, Ach, AF50, MF50, Focus White Balance [AUDIO LEVEL CH1], AUTO Variable Frame Rate mode [AUDIO LEVEL CH2] 91, 163) ND 1/4,...
- Page 183 ∫ Playback indications Scene Number (In 9-scene display in thumbnail mode) Example: Display in English 104) TC 00:00:00:00 No.0010 100M 25.00p Recording format (When thumbnails are displayed) 104, 147) Resume Playback (in thumbnail view) 110) ICONS 15:30 Protected motion pictures/still 15 11 2016 pictures (in thumbnail view) 113)
-
Page 184: Messages
Display Messages Major confirmation/error messages to be indicated on the screen in text. During recording/playback Display Description Behavior and cause CHECK CARD. The SD card is not supported by this ≥ Check the SD card. unit. THIS CARD CANNOT This is displayed when the SD card ≥... - Page 185 Display Description Behavior and cause CANNOT RECORD This is displayed when you try to ≥ The operation will stop. - DATE CAPACITY IS record in excess of the maximum ≥ Replace the SD card or FULL. number of scenes allowed for one delete unnecessary SD card.
- Page 186 Display Description Behavior and cause CARD ERROR. This is displayed when the SD card ≥ Check the SD card. PLEASE REFORMAT. cannot be formatted. ≥ Replace the SD card in the card slot at which the error has occurred. UNABLE TO FORMAT. Formatting is not possible due to, ≥...
- Page 187 During USB Host mode Display Description Behavior and cause This external media This is displayed when the ≥ Connect a supported external cannot be used. memory capacity of the media. Disconnect the USB external media is 32 GB or cable from this unit. below or above 2 TB.
- Page 188 Display Description Behavior and cause THIS SCENE CANNOT BE This is displayed when one or more of ≥ Copy scenes except for COPIED. the scenes you are trying to copy the ones that cannot be cannot be played back on this unit. copied.
-
Page 189: Warning Indications
Display Warning Indications When an error is detected immediately after this unit is turned on or while it is being operated, the status indicator, on-screen displays and the AG ROP application screen (during AG ROP connection) inform you of the error. Status indicator It flashes once per second. - Page 190 Status indicator It flashes once per second. On-screen display ] flashes four times per WARNING AG ROP application screen second. A recording error or recording circuit Recording error Meaning of the warning setting error has occurred. The recording may either continue or Recording/playback stop.
- Page 191 Status indicator The remaining recordable time flashes On-screen display red. (When it is less than 1 minute) ] flashes once per second. WARNING AG ROP application screen The card is nearly (When it is less than 1 minute) full Meaning of the warning The SD card is almost out of space.
-
Page 192: Others
Others Troubleshooting ∫ It is not a malfunction in following cases The lens, the viewfinder or ≥ This is due to condensation. This is not a malfunction. Please LCD monitor fog up. refer to page 9. A clicking sound is heard ≥... - Page 193 Indication Problem Check points Function display ≥ [CARD & BATTERY] or [OTHER DISPLAY] of the (Remaining Display, [DISP SETUP] is [OFF]. 172) Counter Display, etc.) is ≥ Press the COUNTER button to switch the counter display. not displayed. Recording Problem Check points The unit arbitrarily stops ≥...
- Page 194 Playback Problem Check points Scenes/still pictures ≥ Any scenes/still pictures where the thumbnails are displayed cannot be played back. cannot be played back. ≥ In most cases, is displayed for the following scenes: j Scenes recorded with another device or edited with editing software j Scenes with damaged data ≥...
- Page 195 With a PC Problem Check points When connected by the ≥ After re-inserting the SD card into the unit, reconnect the USB USB Cable, this unit is not Cable. detected by the PC. ≥ Select another USB terminal on the PC. ≥...
-
Page 196: About Recovery
≥ Update completes by loading the downloaded files to the camera via the SD card. For details on update, visit the support desk at the following website: http://pro-av.panasonic.net - 196 -... -
Page 197: About Copyright
“AVCHD Progressive” logo are trademarks of activity and/or was obtained from a video Panasonic Corporation and Sony provider licensed to provide AVC Video. No Corporation. license is granted or shall be implied for any ≥... - Page 198 Menu" in the Operating Instructions (PDF file). At least three (3) years from delivery of this product, Panasonic will give to any third party who contacts us at the contact information provided below, for a charge no more than our cost of...
-
Page 199: Recording Functions That Cannot Be Used Simultaneously
Others Recording functions that cannot be used simultaneously Due to the specifications of this unit, depending on the recording function being used, it is not possible to use or select certain other recording functions. ≥ “ ± ”: Available; “ s ”: Not available* * “Not available”... -
Page 200: Recording Modes/Approximate Recordable Time
Others Recording modes/approximate recordable time ≥ SD cards are only mentioned with their main memory size. The stated times are the approximate recordable times for continuous recording. ≥ “h” is an abbreviation for hour, “min” for minute and “s” for second. ≥... -
Page 201: Approximate Number Of Recordable Pictures
Others Approximate number of recordable pictures ≥ SD cards are only mentioned with their main memory size. The stated number is the approximate number of recordable pictures. SD card Picture size Aspect ratio 4 GB 16 GB 64 GB 3840k2160 3000 12000 1920k1080... -
Page 202: Specification
Others Specification Memory Card Camera-Recorder Lens: General Optical image stabilizer lens, optical 15k motorized zoom F value (focal length) Power: F2.8 to F4.5 (f=8.8 mm to 132 mm) DC 7.28 V (When using battery) 35 mm conversion DC 12 V (When using AC adaptor) FHD (1920k1080);... -
Page 203: Digital Audio
Minimum subject illumination: 2 Slot function: Relay, simultaneous 1.1 lx (F2.8, Super Gain 36 dB, Manual slow shutter 1/25 sec.) Digital video Digital zoom: 2k/5k/10k/i.Zoom (max. 25k) Video signal for external output: Lens hood: 8 bit 4:2:2 Hood with lens cover Recording video signal: 8 bit 4:2:0 Video compression format:... -
Page 204: Audio Output
Video input/output Other input/output VIDEO OUT terminal: CAM REMOTE terminal: VIDEO OUT terminal k1 2.5 mm diameter super mini jack k1 HDMI OUT terminal: (ZOOM, S/S) HDMI k1, 3.5 mm diameter mini jack k1 (FOCUS, IRIS) ( HDMI Type A, not compatible with USB HOST terminal: VIERA Link) Type A connector, 9-pin... -
Page 205: Battery Charger
AC adaptor Battery charger Power source: Input voltage: 100 V to 240 V, 12 V, 3.0 A 50 Hz/60 Hz, 1.2 A Output voltage: Power output: 8.4 V, 4.0 A 12 V, 3.0 A indicates safety information indicates safety information Charging current: Ambient operating temperature: Max. - Page 206 частин на мільйон; 6. полібромдефенілові ефіри (PBDE) – не перевищує 0,1 % ваги речовини або в концентрації до 1000 частин на мільйон. Manufactured by: Panasonic Corporation, Osaka, Japan Importer’s name and address of pursuant to EU rules: Panasonic Marketing Europe GmbH...
Need help?
Do you have a question about the AG-UX90 and is the answer not in the manual?
Questions and answers