Panasonic AG-AC160 Manual
Hide thumbs
Also See for AG-AC160:
- Operating instructions manual (42 pages) ,
- Brochure & specs (12 pages) ,
- Brochure & specs (12 pages)
Advertisement
Field Camera Workshop
Pg. 1
Electronic Field Production (EFP):
"EFP" refers to equipment and techniques for recording video and audio at remote locations.
The equipment is compact, rugged, and designed for ease of use. EFP equipment frees the
video producer from the confines of the traditional TV Studio, and permits recording in more
interesting and less artificial locations.
This compactness also allows productions to be done by a very small technical crew, or even
just one person.
EFP equipment is commonly used for recording video and audio to be used in specific types
of programs, including interviews, documentaries, music videos, and news or magazine style
shows.
Video and audio recorded with EFP gear must normally be edited before it will be suitable to
watch. Because the "footage" you shoot will be edited, you don't have to worry about erasing
or deleting bad shots from the camera; the editing system lets you easily toss out any "bad
takes" that you record, and rearrange the order of the various shots and scenes you videotape.
EFP cameras are poorly suited for certain kinds of "event" productions, like sports contests or
concerts, where there are many things happening simultaneously over a large area. If you wish
to shoot an event, talk with MetroEast Staff about using one of the multi-camera systems, like
Studio A or B, or the Mini-Mobile, Micro-Mobile.
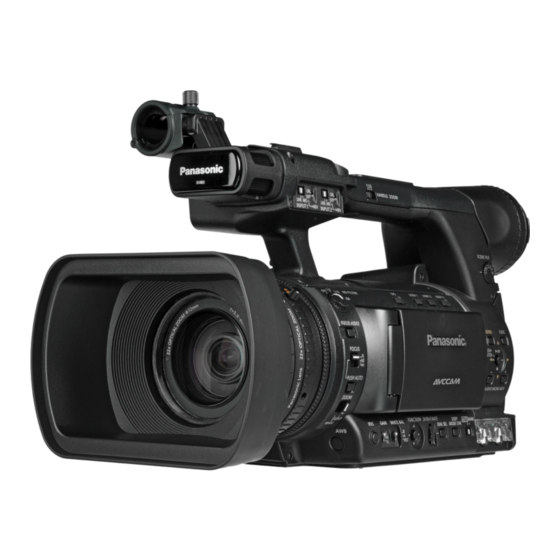
The Camera:
The Panasonic AG-AC160 camcorder records high-quality digital video and audio on "flash
memory" cards. The camera comes equipped with 2 64-Gigabyte SDHC cards which com-
bined can hold more than 10 hours of High Definition video in the standard setting.
Once recorded, the video and audio on the memory cards can be transferred to an editing
computer quickly. For example, if you completely filled one card with video (over 5 hours), it
would only require about 10 minutes to transfer the footage from the card to MetroEast's Edit-
ing Storage system (the "SAN").
This "Flash Memory" also allows quick and easy review of recorded material; simply select any
"clip" from tiny "thumbnails" on the LCD viewfinder. After review, you can immediately begin
recording again; no rewinding or fast forwarding is needed.
For sound, the camcorder has connections for attaching high-quality external microphones, or
connecting to existing sound systems often found in auditoriums, churches, or clubs.
The camera also provides automatic or manual control of most of the important functions of the
camera and recorder. Switch to "Auto" for Point-and-Shoot ease of use, or set the controls to
"Manual" for more precision control over color, contrast, or audio.
About This Handout:
This packet provides general information about what the various parts of the camera are for,
and how they apply to making video productions.
There is also a smaller companion booklet that offers a step-by-step guide to operation.
Advertisement
Table of Contents

Related Manuals for Panasonic AG-AC160


Summary of Contents for Panasonic AG-AC160
- Page 1 Studio A or B, or the Mini-Mobile, Micro-Mobile. The Camera: The Panasonic AG-AC160 camcorder records high-quality digital video and audio on “flash memory” cards. The camera comes equipped with 2 64-Gigabyte SDHC cards which com- bined can hold more than 10 hours of High Definition video in the standard setting.
-
Page 2: Using The Camcorder
Pg. 2 MetroEast has 6 camera packages that you can use for your programs. Each one includes: 1) Panasonic AG-AC160a Camcorder 2) 2 - 64 gigabyte SDHC Memory Cards (5+ hours recording time on each) 3) 3 - Rechargeable Batteries (about 3 hours recording time for each) -
Page 3: Left Side
A Quick Tour of the Camera: Pg. 3 Here are a few of the basic features of the AC160 camcorder: Eyepiece Viewfinder Camera Microphone HANDLE ZOOM LINE MIC LINE MIC INPUT1 +48V INPUT2 +48V Manual Focus Viewfinder SCENE FILE Focus Controls Lens Menu... - Page 4 The Tripod: Pg. 4 Professional videographers will ALWAYS use a tripod if possible/ Using the “sticks” will make your shots more steady, and will make movement of the camera much more smooth and fluid. Camera Mount Panhandle Adjust Camera Release Slide camera plate into Push and hold to slide Loosen to tilt handle...
-
Page 5: Counter Balance Spring
The Tripod Head: Pg. 5 The tripod head includes several controls for attaching/releasing the camera, checking that the camera is level, and adusting the cameras pivoting movement. The Camera Mount: 1) Camera Plate Channel: Slide the plate attached to the underside of the camera into this groove. - Page 6 The Parts of the Camera: Battery vs. Power Supply Pg. 6 The Camcorder can be powered from a rechargeable battery, or from a provided AC power supply. The power supply can also be used for recharging the batteries. Attaching a Battery: You’ll probably do the majority of your shooting using a battery.
- Page 7 The Parts of the Camera: ON or OFF Pg. 7 PUSH PUSH With a battery or power supply attached, you INPUT 2 - AUDIO - INPUT 1 can now turn on the power. You can’t record VIDEO OUT AUDIO OUT or see the camera image until you turn on Power Switch the power.
- Page 8 The Parts of the Camera: The Viewfinders Pg. 8 Eyepiece Viewfinder Viewfinders let you see what the camera sees while you are recording, and also let you play back HANDLE ZOOM LINE MIC LINE MIC INPUT1 +48V INPUT2 +48V what you shot previously. The camera is equipped SCENE FILE with 2 viewfinders: Eyepiece and LCD.
- Page 9 Lens Functions: Zoom and Focus Zoom Controls Pg. 9 ZOOM: The Zoom controls simulate the effect of mov- PUSH PUSH ing the camera closer or further from the subject INPUT 2 - AUDIO - INPUT 1 by magnifying the image. At maximum zoom, the VIDEO OUT AUDIO OUT camera magnifies the image by 22X.
- Page 10 Camera Technique: Using Zoom and Focus Pg. 10 ZOOM: The Zoom function can add impact to your video if used thoughtfully: 1) Use zooms sparingly; if overused, they can distract from the content and make the viewer concentrate on the mechanics of the production. 2) If you do zoom, make the move slowly.
-
Page 11: Gain Switch
Controlling Brightness: Iris and Gain Pg. 11 IRIS: HANDLE ZOOM The Iris on a camera is like the pupil of your eye, LINE MIC LINE MIC INPUT1 +48V INPUT2 +48V SCENE FILE an opening that can be enlarged to let in more light when the room is dark, or closed when the OFF 1/4 1/16 USER 1... - Page 12 Adjusting Color: White Balance Pg. 12 HANDLE Z Different sources of light -- the sun, an electric HANDLE ZOOM LINE MIC LINE MIC INPUT1 +48V INPUT2 +48V lightbulb -- produce different colors of light. LINE MIC LINE MIC +48V +48V INPUT1 INPUT2 SCENE FILE...
- Page 13 HANDLE ZOOM Other Video Controls: Pg. 13 LINE MIC LINE MIC Behind & above the LCD monitor, you’ll find several additional video (and some audio controls) +48V INPUT1 INPUT2 +48V underneath. These are used less than those for iris, gain, focus, and white balance. SCENE FILE OFF 1/4 1/16 USER 1...
- Page 14 SCENE FILE Other Video Controls: Pg. 14 OFF 1/4 1/16 USER 1 USER 2 USER 3 ND FILTER 1/64 Just below the LCD monitor is a row of 4 buttons and a switch. BARS AUDIO FOCUS ASSIST MENU EXEC CH1 SELECT CH2 SELECT INT(L) INT(R) INPUT1...
- Page 15 Inside the Viewfinders: Pg. 15 The viewfinders (eyepiece or LCD) provide a wealth of information about the camera controls. 2h58m TC 02:25:00:06 R 10h5m 1080 ND OFF MF40 BACK F8.6 1) MEMORY CARD - The “1” or “2” numbers are highlighted in green to show which of the Memory Cards is currently being used for recording or playback (see page 16).
-
Page 16: Memory Card Slots
Memory Cards Pg. 16 The AC160 Camera records video and audio on inexpensive, readily available “flash memory” cards. MetroEast will provide cards, but you can also decide to purchase your own if you wish. If you use the provided cards, MetroEast staff will transfer the footage you’ve recorded to the edit system when you return the camera, and then erase the cards for the next user. -
Page 17: Handle Zoom
Reviewing What You’ve Recorded: Pg. 17 You can watch what you’ve recorded on either viewfinder (eyepiece or LCD), or connect an external monitor. Switch to Playback mode: This control switches from the “Camera” or “Record” function to “Playback” mode. 1) Rotate the Main Power Switch PAST the ON position to the MODE setting. -
Page 18: Recording Audio
Recording Audio: Camera Pg. 18 Microphone To record good quality sound, you must: 1) Select and position the correct type of microphone for the sound and conditions. HANDLE ZOOM LINE MIC LINE MIC INPUT1 +48V INPUT2 +48V SCENE FILE 2) Controlling the volume or “level” at which the USER 1 USER 2 USER 3... - Page 19 Recording Audio: Pg. 19 MIC POWER +48V These switches provide power from the camera to some types of microphones, so that the mic LINE MIC LINE MIC doesn’t need a battery. +48V +48V INPUT1 INPUT2 OFF 1/4 1/16 USER 1 USER 2 USER 3 a) INPUT 1 - Powers a mic connected to the...
- Page 20 Recording Audio: Pg. 20 One of the most important functions of 2h58m TC 02:25:00:06 audio is setting the “level” or volume at which the sound is recorded. If you record the volume at too low a 1080 level (too quiet), the sound will have more “noise”, such as buzz, or hiss.
Need help?
Do you have a question about the AG-AC160 and is the answer not in the manual?
Questions and answers
где указание что в режиме авто надо выбрать скорость затвора