Advertisement
Quick Links
Advertisement

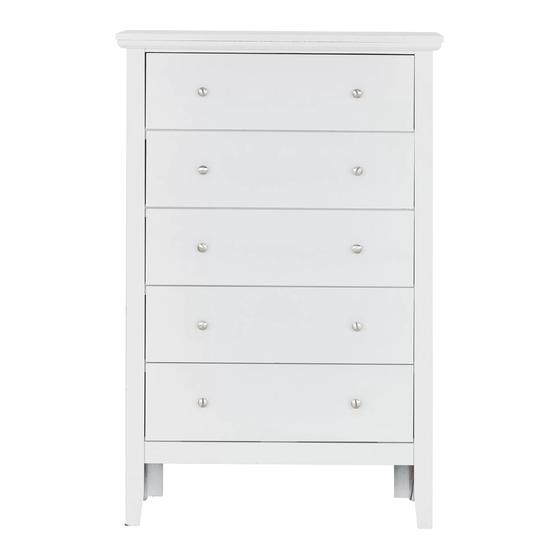
Summary of Contents for fantastic furniture TALLBOY 5 DRW
- Page 1 Assembly Instructions HAYMAN TALLBOY 5 DRW VER 1.1...
- Page 3 What You Need To Assemble The Body Top Panel (P1) Rail (Tools not provided) (P15) Flat Blade Screwdriver Phillips Head Screwdriver Mallet 4 x Back Panels Right Side Rail (P8) Panel (P5) (P3) Rail (P6) Left Side Panel Connect (P2) Right Drawer Stick Side (P11)
- Page 4 Step 1 You will need: 5 x CL Runner Tracks (H6) 5 x CR Runner Tracks (H7) 30 x Small Screws (H5) (P2) Attach 5 x CL Runner Tracks (H6) to Left Side Panel (P2) with 15 x Small Screws (H5). Attach 5 x CR Runner Tracks (H7) to Right Side Panel (P3) with Page 4 15 x Small Screws (H5).
- Page 5 Step 2 You will need: 4 x Dowels (H1) 16 x Cam Bolts (H3) (P2) Insert 4 x Dowels (H1) into Left Side Panel (P2). Attach 16 x Cam Bolts (H3) into Side Panels (P2) and (P3) as shown. Step 3 You will need: 4 x Cam Nuts (P6)
- Page 6 Step 4 (P14) You will need: (P6) 4 x Cam Nuts (P8) (H4) (P15) (P5) (P7) Make sure the side with bigger holes is facing to Rail (P4). (P4) (P2) Insert 4 x Cam Nuts (H4) into the holes of Rails (P4, P5) and (P15). Rotate the cam nuts so the arrows point towards the incoming cam bolts.
- Page 7 Step 6 You will need: 4 x Cam Bolts (H3) (P1) Attach 4 x Cam Bolts (H3) into Top Panel (P1) as shown. Step 7 You will need: 4 x Cam Nuts (H4) (P8) (P14) (P3) (P2) Join 2 x Back Panels (P8) with Connect Stick (P14), then put into the groove of Side Panels (P2) and (P3).
- Page 8 Step 8 (P1) You will need: 3 x Long Screws (H17) (P15) (P1) (P15) Attach Rail (P15) to Top panel (P1) with 3 x Long Screws (H17). Step 9 (P1) You will need: 8 x Wedges (H15) 8 x Screws (H16) (P8) Make sure Wedge (H15) is facing...
- Page 9 Step 10 You will need: 4 x Cam Bolts (H3) (P9) Attach 4 x Cam Bolts (H3) to Drawer Front (P9) as shown. Step 11 You will need: 1 x DL Runner (H8) 1 x DR Runner (H9) (P11) (P10) 4 x Small Attach 1 x DL Runner (H8) to Left Drawer Side (P10) Screws...
- Page 10 Step 14 You will need: (P13) 4 x Long Screws (P10) (H2) (P11) Attach Drawer Back (P13) to Drawer Sides (P10,P11) with 4 x Long Screws (H2). Make sure that the groove lines up the whole way around the drawer. Step 15 You will need: 2 x Handles...
- Page 11 Step 17 Put the drawers into the chest. Please make sure your chest is sitting squarely on the floor, then tighten all the screws and bolts – being careful not to over tighten Page 11...
- Page 12 Step 18 We strongly advise that you use the wall safety strap provided to You will need: prevent the unit toppling 1 x Safety Strap (H12) 1 x Screw (H13) 1 x Washer (H14) Attach Safety Strap (H12) to the Top Panel (P1) using 1 x Screw (H13) and 1 x Washer (H14). Step 19 Seek advice from a qualified trades person on how to...


Need help?
Do you have a question about the TALLBOY 5 DRW and is the answer not in the manual?
Questions and answers
there are n markings on my side panels as to where to put the screws for the runners
To determine the correct placement for the screws for the runners on the Fantastic Furniture Tallboy 5 Drawer:
1. Use 5 CL Runner Tracks (H6) for the Left Side Panel (P2) and 5 CR Runner Tracks (H7) for the Right Side Panel (P3).
2. Attach each runner using 3 Small Screws (H5), totaling 15 screws per side.
3. Align each runner track with the pre-drilled holes on the side panels.
4. Secure each runner track with the screws into the matching holes to ensure proper alignment.
Make sure all runner tracks are evenly spaced and oriented correctly.
This answer is automatically generated