Table of Contents
Advertisement
WS-110 Wireless 8 Channel Advanced Weather Station
with Temperature Spectrum Color Changing Backlight
Table of Contents
1
Introduction ............................................................................................................................... 2
2
Getting Started .......................................................................................................................... 2
2.1
Parts List ........................................................................................................................... 2
2.2
Recommended Tools ........................................................................................................ 3
2.3
Thermo-Hygrometer Sensor Set Up ................................................................................. 3
2.4
Display Console Set Up ................................................................................................... 5
2.4.1 Display Console Layout ................................................................................................... 6
2.4.2 Sensor Operation Verification .......................................................................................... 8
3
Remote Sensor Installation ....................................................................................................... 8
4
Display Features ........................................................................................................................ 8
4.1
Comfort Icon .................................................................................................................... 8
4.2
Rate of Change Icon ......................................................................................................... 9
4.3
Low Battery Icon .............................................................................................................. 9
5
Console Operation..................................................................................................................... 9
5.1
Quick Display Mode ........................................................................................................ 9
5.4
Sensor Search Mode ....................................................................................................... 13
5.5
History Graph Mode ....................................................................................................... 13
5.6
Reset Min/Max record .................................................................................................... 13
5.7
Snooze Mode .................................................................................................................. 14
5.8
Backlight Mode .............................................................................................................. 14
5.9
Adjustment or Calibration .............................................................................................. 15
5.9.1
Temperature Calibration ............................................................................................. 15
5.9.2
Setting Calibrated Humidity....................................................................................... 15
5.9.3
Setting Calibrated Barometric Pressure ..................................................................... 16
6
Alarm Mode ............................................................................................................................ 17
6.1
Alarm Operation ............................................................................................................. 17
6.2
Alarm Settings ................................................................................................................ 17
6.3
Setting the Alarms .......................................................................................................... 17
6.4
Alarm and Command Key Beeper ON/OFF Mode ........................................................ 18
7
Other Console Features ........................................................................................................... 18
7.1
Moon Phase .................................................................................................................... 18
Version 1.1
©Copyright 2014, Ambient LLC. All Rights Reserved.
User Manual
1
Page
Advertisement
Table of Contents

Related Manuals for Ambient Weather WS-110


Summary of Contents for Ambient Weather WS-110
-
Page 1: Table Of Contents
WS-110 Wireless 8 Channel Advanced Weather Station with Temperature Spectrum Color Changing Backlight User Manual Table of Contents Introduction ..........................2 Getting Started .......................... 2 Parts List ........................... 2 Recommended Tools ......................3 Thermo-Hygrometer Sensor Set Up ................. 3 Display Console Set Up ....................5 2.4.1 Display Console Layout .................... -
Page 2: Introduction
14 Warranty Information ......................... 24 1 Introduction Thank you for your purchase of the WS-110 Wireless 8 Channel Advanced Weather Station. The following user guide provides step by step instructions for installation, operation and troubleshooting. To download the latest manual and additional troubleshooting tips, please visit: http://ambientweather.wikispaces.com/ws110... -
Page 3: Recommended Tools
Figure 2 displays all four switches in the OFF position (factory default setting). Figure 2 3. Channel Number: The WS-110 supports up to eight transmitters. To set each channel number (the default is Channel 1), change DIP Switches 1, 2 and 3, as referenced in Table 4. - Page 4 vs. °C), change DIP Switch 4, as referenced in Table 1. DIP SWITCH FUNCTION DOWN DOWN DOWN Channel 1 DOWN DOWN Channel 2 DOWN DOWN Channel 3 DOWN Channel 4 DOWN DOWN Channel 5 DOWN Channel 6 DOWN Channel 7 Channel 8 DOWN °F...
-
Page 5: Display Console Set Up
seated in its trace prior to closing the door. Tighten the set screw. 2.4 Display Console Set Up 1. Move the remote thermo-hygrometer(s) about 5’ to 10’ away from the display console (if the sensor is too close, it may not be received by the display console). If you have more than one transmitter, make sure they are all powered up and transmitting on different channels. -
Page 6: Display Console Layout
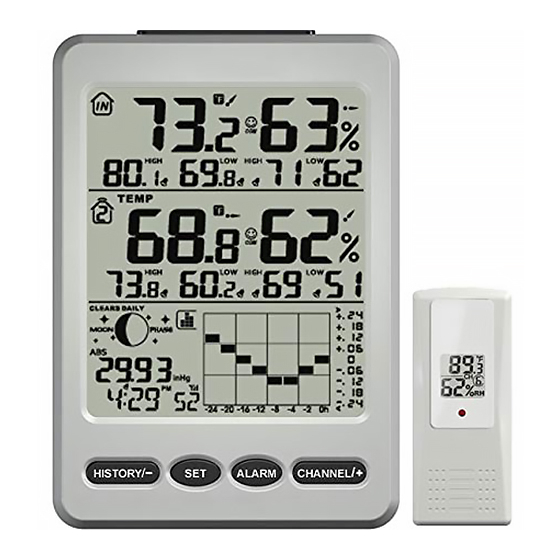
While in the search mode, the remote search icon will be constantly displayed. If you have more than once remote sensor (up to eight remotes are supported), the display will automatically toggle between sensors until all sensors have reported in. Do not touch any buttons until the remote sensor has reported in, or the radio search icon is no longer on, otherwise the remote sensor search mode will be terminated. - Page 7 1. Indoor temperature display 13. Low power indicator 2. Indoor humidity display 14. Outdoor temperature display 3. Humidity Comfort Icon 15. Outdoor temperature and humidity Mix/Max 4. Temperature units (°F or °C) information 5. Temperature and humidity, Rate of 16. Outdoor humidity display Change indicator 17.
-
Page 8: Sensor Operation Verification
2.4.2 Sensor Operation Verification Verify the indoor and outdoor humidity match closely with the console and sensor array in the same location (about 5’ to 10’ apart). The sensors should be within 10% (the accuracy is ± 5%). Allow about 30 minutes for both sensors to stabilize. The humidity can be adjusted or calibrated later to match each other a known source. -
Page 9: Rate Of Change Icon
Comfortable Figure 8 4.2 Rate of Change Icon The rate of change icon detects rapid changes in temperature and humidity. If the arrow points upward, the temperature is increasing at a rate of +2°F per 30 minutes (or greater), or humidity is increasing at a rate of +5% per 30 minutes (or greater). - Page 10 between the last -12 hours or -24 hours record time. Each bar represents the corresponding data and time for pressure, temperature or humidity (default is -24 hours). Figure 9 Note: The graph displays hours on the horizontal or x-axis (the most recent data to the right of the graph).
- Page 11 The Max/Min can be programmed to clear daily (at midnight) or manually. Press the [+] key to switch between “Clears Daily” and Clears Manually. 9. Temperature Units of Measure (default: °F):. Press the SET key again to change the temperature units of measure (the UNITSET icon will be displayed). Press the [+] key to switch between °F and °C units of measure.
- Page 12 The following table provides 11 different backlight colors for reference: Color Colors Comments (Manually set (USE) Outdoor Indoor maximum and minimum Temperature Temperature values) Cold <10 <58 Purple 1 Fuchsia 10-20 58-61 2 Purple 20-30 61-64 30-40 64-67 Blue 40-50 67-70 Aqua Color Increment =...
-
Page 13: Sensor Search Mode
Note: Reference Section 7.2 Personalizing Color Ranges to modify the color changes to best suit your comfort level and location. 12. Backlight Contrast: Press the SET key again to change the backlight brightness (the BRIGHT icon will be displayed). Press the [+] key or [-] key to adjust the backlight contrast from 1 (dim) to 8 (bright). -
Page 14: Snooze Mode
begin flashing and the MAX CLR icon will be displayed. Press the SET key to clear the maximum values. The maximum values will now display the current values. Press the HISTORY/- key again (do not hold), and the minimum values will begin flashing and the MIN CLR icon will be displayed. -
Page 15: Adjustment Or Calibration
The purpose of your weather station is to measure conditions of your surroundings, which vary significantly from location to location. The WS-110 supports up to eight remote sensors. Each of the eight sensors can be calibrated. If you own more than one remote sensor, press the CHANNEL/+ button first to display the specific channel you wish to calibrate. -
Page 16: Setting Calibrated Barometric Pressure
Press the [+] or [-] key to increase or decrease the humidity reading (in increments of 1%). Press and hold the [+] or [-] key for three seconds to increase or decrease rapidly. Press the ALARM key to reset current value. Press the SET key switch to next channel (1through 8). -
Page 17: Alarm Mode
(the internet is the best source for real time barometer conditions, such as Weather.com or Wunderground.com), and set your weather station to match the official reporting station. 6 Alarm Mode The WS-110 includes time alarm, temperature alarm and humidity alarm features for indoor and Channel 1. 6.1 Alarm Operation... -
Page 18: Alarm And Command Key Beeper On/Off Mode
5. Indoor humidity high alarm 6. Indoor humidity low alarm 7. Outdoor 1 (channel 1) temperature high alarm 8. Outdoor 1 (channel 1) temperature low alarm 9. Outdoor 1 (channel 1) dew point high alarm 10. Outdoor 1 (channel 1) dew point low alarm 11. -
Page 19: Personalizing Color Ranges
Figure 11 7.2 Personalizing Color Ranges You can customize your background color ranges to suit your location, or personal preferences. For example, if you live in Alaska, your definition of hot and cold may be very different if you live in Arizona. Likewise, if you track your indoor comfort level, your comfort range may be very different than someone else. -
Page 20: Glossary Of Terms
8. Glossary of Terms Term Definition Accuracy Accuracy is defined as the ability of a measurement to match the actual value of the quantity being measured. Hygrometer A hygrometer is a device that measures relative humidity. Relative humidity is a term used to describe the amount or percentage of water vapor that exists in air. -
Page 21: Measurement Specifications
9.2 Measurement Specifications The following table provides specifications for the measured parameters. Measurement Range Accuracy Resolution Indoor Temperature 32 to 140 °F ± 1 °F 0.1 °F Outdoor Temperature -40 to 140 °F ± 1 °F 0.1 °F Indoor Humidity 10 to 99 % ±... - Page 22 Problem Solution Make sure the remote sensor LCD display is working and the transmitter light is flashing once per 60 seconds. Install a fresh set of batteries in the remote thermo-hygrometer. For cold weather environments, install lithium batteries. Make sure the remote sensors are not transmitting through solid metal (acts as an RF shield), or earth barrier (down a hill).
-
Page 23: Accessories
SRS100LX Temperature climates. Remove the rain guard and install over thermo-hygrometer. and Humidity Solar Radiation Shield Ambient Weather Humidity One step calibration kits for digital hygrometers use salt slurry formula Calibration Kits to accurately calibrate the indoor and outdoor hygrometers. -
Page 24: Warranty Information
This device complies with part 15 of the FCC rules. Operation is subject to the following two conditions: 1. This device may not cause harmful interference. 2. This device must accept any interference received, including interference that may cause undesired operation. Statement according to FCC part 15.21: Modifications not expressly approved by this company could void the user's authority to operate the equipment. - Page 25 (7) extreme acts of nature, such as lightning strikes or floods. This warranty covers only actual defects within the product itself, and does not cover the cost of installation or removal from a fixed installation, normal set-up or adjustments, claims based on misrepresentation by the seller or performance variations resulting from installation-related circumstances.
Need help?
Do you have a question about the WS-110 and is the answer not in the manual?
Questions and answers