Advertisement
Quick Links
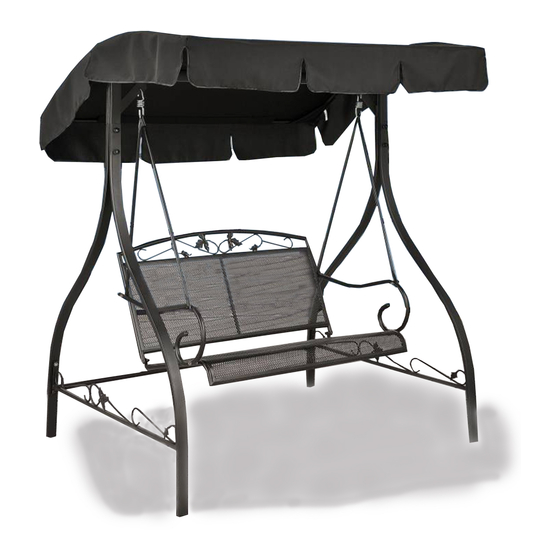
ASSEMBLY INSTRUCTIONS
ATTENTION: THIS PRODUCT IS NOT FOR COMMERCIAL USE
!
Do not discard of any of the packaging until you have checked that you have all of the parts and
fittings required.
!
Keep children away during assembly. This item contains small parts that can be swallowed by
children. Children should always be under direct adult supervision while using this product.
!
Retain these assembly instructions for future reference.
!
Quote the following FQC NO. when contacting the service center.
INTENDED FOR RESIDENTIAL USE ONLY.
SERVICE CENTER TOLL FREE NO.
TEL: 1-877-539-7436
FAX: 1-877-539-7439
DON'T RETURN TO STORE!
STOP
RLS409A
-WM
PAGE 1 OF 6
COURTYARD CREATIONS INC.
Advertisement

Related Manuals for Courtyard Creations RLS409A-WM


Summary of Contents for Courtyard Creations RLS409A-WM
- Page 1 Children should always be under direct adult supervision while using this product. Retain these assembly instructions for future reference. Quote the following FQC NO. when contacting the service center. SERVICE CENTER TOLL FREE NO. TEL: 1-877-539-7436 FAX: 1-877-539-7439 COURTYARD CREATIONS INC. DON’T RETURN TO STORE! STOP PAGE 1 OF 6...
-
Page 2: Parts List
A. Read these instructions thoroughly and acquaint yourself with the parts and the illustrations to ensure safe and proper assembly. B. You will need the following tools - Phillips Screwdriver - Nut Wrench (See Part #29) - Hex. Key Wrench (See Part #28) C. - Page 3 Note: When fastening with bolts and nuts, always use Step A - 1 a washer (#20 and #21) between the tube and the bolt and the tube and the nut. Step A - 1 : Do not tighten the bolts Fasten the front and rear upright supports (#5 after Step 1.
- Page 4 Step C : Open the seat and back assembly and fasten a swing arm tube (#10) and a swing arm (#7) to the back assembly (#9) by using bolt (#17) and washers (#21). Do the same procedure for both sides. Fasten another swing arm tube (#10) to the swing arm (#7) at the front bend by using bolt (#17), washers (#21), and plastic nut (#23).
- Page 5 Step F - 1 and Step F - 2 : Slide the canopy/frame connectors (#26) onto the side canopy braces (#11) and fasten into position by using screws (#19). Make sure that the teeth of the canopy connectors are facing Step 1 towards the inside of the swing.
- Page 6 Step H : To assure stability, double check that all of the bolts have been completely tightened and cover them with bolt caps (#24 and #25). Warning : To avoid danger of suffocation, always keep plastic bags or small parts away from babies and children.
Need help?
Do you have a question about the RLS409A-WM and is the answer not in the manual?
Questions and answers
Where can I get replacement parts specifically swing arms tube and canopy for model RLS409A?