Table of Contents
Advertisement
Quick Links
PCE Americas Inc.
PCE Instruments UK Ltd.
711 Commerce Way
Units 12/13
Suite 8
Southpoint Business Park
Jupiter
Ensign way
FL-33458
Hampshire / Southampton
USA
United Kingdom, SO31 4RF
From outside US: +1
From outside UK: +44
Tel: (561) 320-9162
Tel: (0) 2380 98703 0
Fax: (561) 320-9176
Fax: (0) 2380 98703 9
info@pce-americas.com
info@pce-instruments.com
www.pce-instruments.com/english
www.pce-instruments.com
Manual
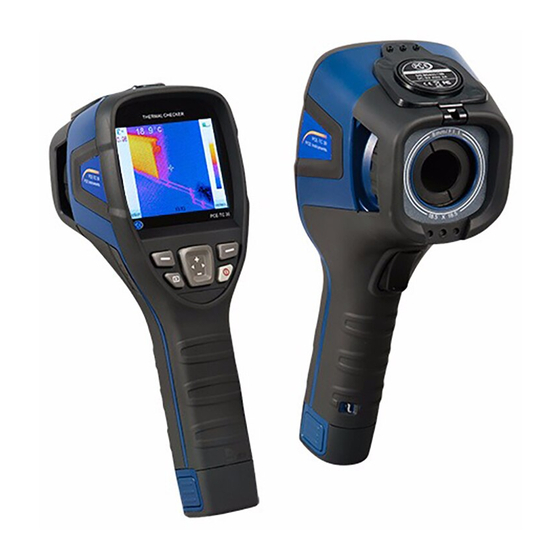
Thermal Imager PCE - TC 31
Version 2.0
Date of creation: 10.06.2015
Date of last change: 11.04.2016
Advertisement
Table of Contents

Related Manuals for PCE Instruments PCE-TC 31


Summary of Contents for PCE Instruments PCE-TC 31
- Page 1 PCE Americas Inc. PCE Instruments UK Ltd. 711 Commerce Way Units 12/13 Suite 8 Southpoint Business Park Jupiter Ensign way FL-33458 Hampshire / Southampton United Kingdom, SO31 4RF From outside US: +1 From outside UK: +44 Tel: (561) 320-9162 Tel: (0) 2380 98703 0...
-
Page 2: Table Of Contents
Open ............................17 6.5.2 Delete ............................17 6.5.3 Format ............................18 Troubleshooting ....................18 Appendix ........................ 19 Common material emissivity..................... 19 Factory default parameter setting table ..................20 Contact ........................21 PCE Instruments UK ........................ 21 PCE Americas .......................... 21... -
Page 3: Introduction
Thank you for purchasing the PCE-TC 31 hand-held infrared thermal image camera. The PCE-TC 31 adopts an un-cooled focal plane infrared detector, and displays the thermal image as a pseudo colour one with high definition and sensitivity. The image could be stored in the internal FLASH for computer analysis, which matches the requirements of analyzing the surface temperature and non- contacted measurement in different sectors. -
Page 4: Safety Notes
Please read this manual carefully and completely before you use the device for the first time. The device may only be used by qualified personnel and repaired by PCE Instruments personnel. There is no warranty of damage or injuries caused by non-observance of the manual. -
Page 5: Specifications
Manual Specifications Technical parameter Item Type Un-cooled focal plane Resolution 160×120 Detector Range of λ performance 8~14μm ≤0.1℃@30℃ Thermal sensitivity Frame frequency 60Hz Image High resolution 2.5” color LCD 320 x 240 Pixel performance Field of view 18°×13° Range of focus 0.3m~∞... -
Page 6: System Description
Manual System description Function keys [1] Shortcut key User can define the operation function. The default is laser locator switch. [2] Freeze/Save key (Mark S) Used for freezing or saving thermal image. Press the key once to freeze the image; Press again to save the image and pop up Voice comment dialog box. -
Page 7: Interface
Manual keys to move the reference line. If measurement line is vertical, press Left and Right keys to move the line; press Up and Down keys to move the reference line. If doing area temperature measurement, press the Confirm key to pop up the attribute box. Press the four navigation keys to move the area location or change the size of the area, which depends on attribute setting. -
Page 8: Getting Started
Manual Getting started Inserting battery Remove the lid of battery compartment. Insert the battery. Make sure both bottoms of the battery and battery compartment are parallel. Press and push the battery lightly forwards until the battery is locked firmly. Insert the Left part of lid to the battery compartment and then press the lid until the lid locked. -
Page 9: Quick Access
Manual Quick access 5.3.1 Acquire an image After the battery installed, long press the power key (≥3 seconds) until the power indicator turns on. After start-up finished, the camera will start working. Open the lens cap and aim at the target. Adjust the focus to get the clear target thermal image. ... -
Page 10: Save Image
Manual 5.3.3 Save image To save the image, there are three ways: Press Confirm key to activate the main menu. Choose File->Save and the system will save the image automatically. Press S key to freeze the image and then press again to save the image. ... -
Page 11: Operation Guide
Manual Operation guide Graphic interface description 6.1.1 Screen graphic interface while camera is working [1] Working status: display the current working status [2] Spot temperature measurement: spot temperature measurement crosshair. [3] Selected spot temperature: selected spot temperature measurement crosshair (Yellow). [4] Emissivity: set target object’s emissivity. -
Page 12: Main Menu
Manual 6.1.2 Main menu [1] Main menu: Include four options: Measurement, Level/Span, Setup, and File. [2] Low-level menu prompt: Indicate this menu has low-level menu. If select this menu, the low-level menu will pop out 6.1.3 Dialog box [1] Dialog box name: Display the dialog box name, e.g. Measuring Setup. [2] Item title: A dialog box may contain several items, such as Temp Range. -
Page 13: Measurement
Manual Measurement Used for adding or deleting the measurement object. Press Confirm key to activate the main menu. Select the Measurement and press Confirm key. It will pop up the below dialog box: If select None, all objects will be deleted. Note: when deleting a single object, press A key to select the object and then press C key to delete. -
Page 14: Measureset
Manual 6.4.1 MeasureSet Press Confirm key to activate the main menu. Select Setup->MeasureSet and press Confirm key to pop up the Measuring Setup dialog box. User can set temperature range, lens type, temperature unit, ambient temperature, reference type and reference temperature. Press Up and Down keys to choose different items, Left and Right keys to modify the item contents. -
Page 15: Analysis
Manual 6.4.3 Analysis Press Confirm key to activate the main menu. Select Setup->Analysis and press Confirm key to pop up the Analysis dialog box. User can set temperature alarm, alarming temperature, alarming color, isotherm color, isotherm temperature and isotherm width. Press Up and Down keys to choose different items, Left and Right keys to modify the item contents. -
Page 16: Systeminfo
Manual 4.4.5 LocalAdapt Press Confirm key to activate the main menu. Select Setup->LocalAdapt and press Confirm key to pop up the Local Adapt Setup dialog box. User can set language, Auto calibration interval, video mode, quick access, standby time and auto off time. Press Up and Down keys to choose different items, Left and Right keys to modify the item contents. -
Page 17: File
Manual File 6.5.1 Open Press Confirm key to activate the main menu. Select File->Open, press Confirm key to open the saved images. Press Left and Right keys to change the images. Press C key to exit the opened image and return to measurement status. -
Page 18: Format
Manual 6.5.3 Format Used for formatting the internal FLASH. Press Confirm key to activate the main menu. Select File- >Format and press Confirm key to pop up the below dialog box. Press Confirm key to do format; press C key to cancel the format. Note: Be careful to use this function. -
Page 19: Appendix
Manual Appendix Common material emissivity Material Surface Temperature(℃) Emissivity(ε) Non-oxidation 0.20 Aluminum Oxygenated 0.55 Brown after grinding 0.40 Brass Dull luster 0.22 Oxygenated 0.61 Copper Seriously oxygenated 0.78 Oxygenated 0.74 Iron Rusty 0.65 Oxygenated 0.64 Cast iron Non-oxygenated 0.21 Quarry-faced 0.94 Wrought iron Polished... -
Page 20: Factory Default Parameter Setting Table
Manual Factory default parameter setting table Table.1 Measurement temperature setting table Parameter Value Temperature Range -20/250℃ Lens Standard ℃ Temperature Unit Reference Type Reference Temperature 30℃ Table.2 Measurement temperature correction table Parameter Value Emissivity 0.96 Temperature Correction 0℃ Distance 2m(Note: Not support in TE) Humidity 60(Note: Not support in TE)... -
Page 21: Contact
Contact If you have any questions about our range of products or measuring instruments please contact PCE Instruments. PCE Instruments UK By post: PCE Instruments UK Ltd. Units 12/13 Southpoint Business Park Ensign Way, Southampton Hampshire United Kingdom, SO31 4RF...
Need help?
Do you have a question about the PCE-TC 31 and is the answer not in the manual?
Questions and answers