Table of Contents
Advertisement
Quick Links
Key Features
•
Nokia Services Catalog
•
Windows Phone 8.1
•
Cortana personal digital assistant
•
Live tiles
Specs
Battery
Usage time: 13 hours
Standby time: 780 hours
Dimensions
Length 129.5mm x 66.7mm x 9.2mm
Weight: 134 grams
Display
4.5" 854x480 screen
Color depth 24 bit, 16M
Keyboard
Touch screen with on-screen keyboard
Memory
512MB RAM, *GB ROM
Up to SDXC/64GB MicroSD supported
Supports up to 32 GB microSD card
Network
WCDMA 850 / 1700 / 1900
GSM 850 / 900 / 1800 / 1900
Operating System
Android 4.2
Processor
QCT, MSM8930
System Manager (Carrier IQ)
Yes
Emergency Alerts (CMAS)
Yes
HD Voice Capable
No
MobileLife Contacts
No
Connectivity
Wi-Fi 802.11 b, g, n (2.4 GHz)
Connect authentications: WPA-PSK, WPA2-PSK,
WPA-Enterprise, WPA2-Enterprise, Protected EAP
(PEAP)
1X1 802.11n connect Implementation
Wi-Fi web browsing
Wi-Fi sharing
Wi-Fi Calling with included Micro GBA SIM card
USB file transfer
USB mass storage
uUSB, DLNA
Bluetooth® 4.0 A2DP 1.2, AVCTP 1.3, AVDTP 1.2,
AVRCP 1.4, GAVDP 1.2, OPP 1.1, PBAP (PSE),
RFCOMM, SPP, SDAP
Smartphone Mobile HotSpot - up to 8 connections
Web
Internet Explorer Mobile 10
Compatible: MSIE 10.0; Windows NT 6.2;
Trident/6.0; ARM; Touch; WPDesktop; MSIE 10.0;
Windows Phone 8.0; IEMobile/10.0; NOKIA, Lumia
XXX
HTML XHTML Version 5
Camera
5 MP rear facing
No front-facing, but has voice guided "selfies" with
rear camera
No flash, but new imaging algorithms for better low
light
Camera Sensor Manufacturer: Toshiba, ST
Optical Sensor Size (Units of 1/xx Inches): 1/4
Image Stabilizer: None
Max Shutter Speed: 1ms
Min Shutter Speed: 200ms
Min Focus Range: 10cm
Continuous Shooting Speed: 7 frames in 2 seconds
with Nokia Smart camera
Max Light Sensitivity: ISO1600
Focal Length: 3.16mm
F/# Aperture: F2.4
Sensor Pixel Size: 1.4um
Screen Pixel Density: 220ppi
Digital zoom: 4x
Advertisement
Table of Contents

Subscribe to Our Youtube Channel
Related Manuals for Microsoft lumia 635


Summary of Contents for Microsoft lumia 635
- Page 1 Key Features • Nokia Services Catalog • Windows Phone 8.1 • Cortana personal digital assistant • Live tiles Specs Battery Connectivity Usage time: 13 hours Wi-Fi 802.11 b, g, n (2.4 GHz) Standby time: 780 hours Connect authentications: WPA-PSK, WPA2-PSK, WPA-Enterprise, WPA2-Enterprise, Protected EAP Dimensions (PEAP)
-
Page 2: What's In The Box
Specs Multimedia Stereo audio (with headset) Audio support: MP3, AAC, AAC+, eAAC, WMA, MPEG4, WAV, MIDI Image support: GIF87A, GIF87A, PNG Video support: 3GP, MP4, AVI, WMV What's in the Box The device comes with the following accessories included in the box: •... -
Page 3: Call Basics
Call Basics Answer calls To answer a call, follow these steps: When receiving a call touch the phone icon and slide to the right to answer. Block calls Block calls from a number To block incoming calls from a number, follow these steps: 1. -
Page 4: Call Settings
Voice Commands To set up Cortana to use for voice commands, follow these steps: 1. Create or sign into your existing Microsoft account. 2. On the start screen, swipe left, and tap Cortana. 3. Follow the instructions shown on your phone. - Page 5 Open an app To open an app with Cortana, follow these steps: 1. On the start screen, swipe left, and tap Cortana. 2. Tap the microphone. 3. Say "open" followed by the name of the application. 4. Answer any clarifying questions from Cortana. Voice dial a contact To use with Cortana to call a contact, follow these steps: 1.
- Page 6 4. Tap settings. 5. Tap the Use default voicemail number switch to turn off. 6. Tap the new voicemail number field. 7. Enter the desired phone number. 8. Tap anywhere outside of the phone number field to save your changes. Bluetooth Pair/Unpair Bluetooth device To turn on Bluetooth and pair with a headset or other device, follow these steps:...
-
Page 7: System Manager (Carrier Iq)
Manual network selection To manually select the wireless network the device connects to, follow these steps: 1. From the start screen, swipe left. 2. Scroll down to and tap Settings. 3. Scroll down to and tap cellular+SIM. 4. Scroll down to and tap SIM settings. 5. -
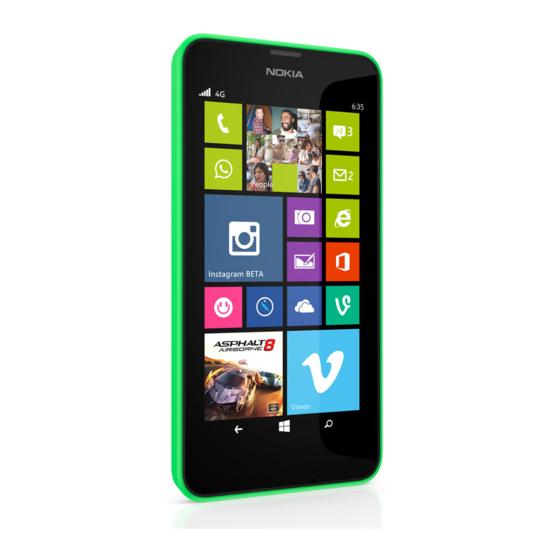
Page 8: Home Screen
Turn On 1. Swipe left on the start screen. 2. Scroll down to and tap Settings. 3. Tap Wi-Fi. 4. Tap the Wi-Fi networking switch to turn on. Turn Off 1. Swipe left on the start screen. 2. Scroll down to and tap Settings. 3. - Page 9 Your phone has two views, start screen and apps menu. To switch between the views, swipe left or right. • Start screen: The animated live tiles show your missed calls and received messages, the latest news. • Apps menu: All your apps are listed here, all neatly ordered. If you have a lot of apps, to look one up, tap Search.
- Page 10 Text entry mode To change the text entry or predictive text mode, follow these steps: 1. From the Start screen, touch the screen and slide left. 2. Scroll down to and tap Settings. 3. Scroll down to and tap keyboard. 4.
- Page 11 Icons To understand what icons and indicators on the display screen mean, refer to the following:...
-
Page 13: Liquid Damage Indicator (Ldi)
IMEI To find the IMEI serial number of your device, follow these steps: 1. From the start screen, swipe left. 2. Scroll to and tap settings. 3. Scroll to and tap about. 4. Tap more info. 5. View the IMEI. Liquid Damage Indicator (LDI) Family Mobile devices have an indicator that shows if it has been subjected to liquid damage. -
Page 14: Internal Memory (Ram)
White LDI (indicates no liquid damage) Pink or red LDI (indicates liquid damage) Internal Memory (RAM) Manage memory To manage the internal memory, follow these steps: You should restart the phone at least once a day: 1. Press and hold the Power key. 2. -
Page 15: Internal Storage (Rom)
Task manager A task manager can view running apps and close them. To use the task manager, follow these steps: 1. From any open window, touch and hold the Back button. 2. Each open application appears in a carousel of thumbnails. 3. - Page 16 2. On the corner of the phone, put the tip of your index finger in the seam between the screen frame and the back cover. Press the middle of the back cover, bend the cover open, and remove it. Do not use any sharp tools, as they may damage the screen.
- Page 17 4. Push the mircoSD card into the SD slot as shown. 5. Line up the battery contacts, and put the battery in.
- Page 18 6. Press the bottom edge of the back cover against the bottom edge of your phone, and snap the cover into place. Don't press the keys while attaching the cover. 7. Turn your phone on. To remove the memory card, follow these steps: 1.
- Page 19 not use any sharp tools, as they may damage the screen. 8. If the battery is in, lift it out.
- Page 20 9. To remove the memory card, pull it out from the slot. 10. Line up the battery contacts, and put the battery in.
- Page 21 11. Press the bottom edge of the back cover against the bottom edge of your phone, and snap the cover into place. Don't press the keys while attaching the cover. 12. Turn your phone on. Open or delete files using a computer To open or delete files on the SD card using a computer, follow these steps: 1.
- Page 22 2. Touch and hold the file. 3. Tap delete. 4. Tap yes to confirm. Set default memory storage By default, the device stores data on the [SD card or internal storage]. To set the default memory storage to another location, follow these steps: 1.
-
Page 23: Pictures And Videos
Camera settings To change the settings for taking and displaying pictures, follow these steps: 1. Swipe left on the start screen. 2. Tap camera. 3. Tap the More.. icon and then tap photo settings. 4. Adjust the fields as necessary: Tap to take photo (on/off) Keep unsaved burst photos Scenes... -
Page 24: Device Lock
Device Lock Change device lock password / PIN To change device lock password or PIN, follow these steps: 1. On the start screen, swipe down from the top of the screen. 2. Tap ALL SETTINGS > lock screen. 3. Scroll down to and tap change password. 4. -
Page 25: Backup Data
2. Scroll to and tap Settings. 3. Scroll to and tap backup. 4. Tap app list+settings. 5. Tap the App backup switch to turn on. 6. If necessary, sign in to your Microsoft account. 7. Tap back up now. 8. Tap continue. -
Page 26: Restore Data
3. Scroll to and tap backup. 4. Tap app list+settings. 5. Tap the Settings backup switch to turn on. 6. If necessary, sign in to your Microsoft account. 7. Tap back up now. 8. Tap continue. 9. The backup begins and may take several minutes. -
Page 27: Set Custom Sounds
5. Wait as the phone is restored. This may take several minutes. The percentage slowly increases and the blue bar moves right until it reaches 100%. The next button remains grayed out until the restore is complete. 6. Tap next when the percentage shows 100%. The next button is no longer grayed out. 7. -
Page 28: Contact Management
3. If you're signed in to several accounts, select the account to which you want to save the contact. 4. Add the contact details, then tap the save icon. 5. Your contacts are backed up automatically to your Microsoft account. Add contact to speed dial This feature is not available. - Page 29 2. Tap People. 3. Tap ... > settings > export to SD card. 4. To import all your contacts, tap export. 5. To select individual contacts, tap clear, and use the check boxes. Groups Create a caller group To create a caller group, follow these steps: 1.
- Page 30 not use any sharp tools, as they may damage the screen. 3. Line up the battery contacts, and put the battery in.
- Page 31 4. Press the bottom edge of the back cover against the bottom edge of your phone, and snap the cover into place. Don't press the keys while attaching the cover. 5. Turn your phone on. To remove the battery, follow these steps 1.
- Page 32 not use any sharp tools, as they may damage the screen. 3. Lift the battery out.
-
Page 33: Battery Life
Battery Life Battery saving mode This feature is not available. However, please see below for tips on how to save battery life. Tips to save battery life To save and extend battery life, follow these steps: Lower screen brightness and timeout duration 1. - Page 34 2. From the Home screen, swipe left. 3. Scroll to and tap Settings. 4. Touch phone update. 5. Touch check for updates. 6. Follow on screen prompts. 7. Wait as your phone restarts and updates. SIM Card You must insert your SIM card to make phone calls. Turn off your phone before inserting or removing SIM card.
- Page 35 3. If the battery is in, lift it out. 4. Push the SIM card into the SIM slot with the metal contact area down.
- Page 36 5. If you have a memory card, push the card into the memory card slot. 6. Line up the battery contacts, and put the battery in.
- Page 37 7. Press the bottom edge of the back cover against the bottom edge of your phone, and snap the cover into place. Don't press the keys while attaching the cover. 8. Turn your phone on. To remove the SIM card, follow these steps: 1.
- Page 38 not use any sharp tools, as they may damage the screen. 3. If the battery is in, lift it out.
- Page 39 4. To remove the SIM card, pull it out from the slot. 5. To remove the memory card, pull it out from the slot.
- Page 40 6. Line up the battery contacts, and put the battery in. 7. Press the bottom edge of the back cover against the bottom edge of your phone, and snap the cover into place. Don't press the keys while attaching the cover. 8.
-
Page 41: Sim Storage
SIM Storage Delete SIM messages This feature is not available. View free SIM space This feature is not available. SIM Unlock Phone SIM unlock phone The SIM subsidy unlock code allows the device to use a SIM card from another wireless carrier. This may be necessary when traveling internationally. - Page 42 Setup wizard To set up your phone you'll need to sign into your Microsoft account. If you are unsure whether or not you already have one, or if you have more than one and need to choose between them, go to www.windowsphone.com...
-
Page 43: Time And Date
13. Tap sure to set up Cortana or not now, thanks to do this later. 14. Tap next to the Almost done... screen. 15. If desired, tap the Join the Nokia Improvement Program box. 16. Tap next to complete the setup. Time and Date Auto-update time (NITZ) To set the device clock to automatically update based on what time zone it is in, follow these steps... -
Page 44: Hide Or Show Apps
Clear app cache and data 1. On the start screen, swipe down from the top of the screen. 2. Tap ALL SETTINGS. 3. Swipe left to the applications tab. 4. Tap the desired app. 5. Tap delete history. Not all apps have this option. 6. - Page 45 • App Social • Battery Saver • Calculator • Calendar • Camera • Cortana • Data Sense • device hub • Facebook • Finance • FM Radio • Food & Drink • Games • Health & Fitness • HERE Drive+ •...
-
Page 46: Cache Partition
Cache Partition Wipe cache partition This feature is not available. Master Reset Master reset from settings menu A master reset restores the original factory settings and may delete your personal data on the internal storage, such as downloaded content, ringtones, images, apps, and contacts. It does not delete data stored on the SIM card or SD card. -
Page 47: Safe Mode
Safe Mode Turn on and use safe mode This feature is not available. Turn off safe mode This feature is not available. Wi-Fi Turn On 1. Swipe left on the start screen. 2. Scroll down to and tap Settings. 3. Tap Wi-Fi. 4. -
Page 48: Transfer Music
Turn on / off FM radio To use the FM radio app, follow these steps: 1. Plug in your wired headphones (they double as an antenna). 2. Swipe left on the start screen. 3. Scroll down to and tap FM Radio. 4. -
Page 49: Manage Messages
Manage Messages Add SMS service center number To view the SMS service center number, follow these steps: 1. Swipe left from the start screen. 2. Scroll down to and tap Messaging. 3. Tap the More icon. 4. Tap settings. 5. Scroll down to and tap the SMS center number field. 6. -
Page 50: Send Messages
3. Navigate to and select the picture you want to save. 4. Tap the More ... icon. 5. Tap save to phone. Send Messages Send a group text message (SMS) To write and send text messages (SMS) to a group, follow these steps: Create a custom group To create a caller group, follow these steps: 1. -
Page 51: Email Accounts
10. Frame your subject. 11. Press the Camera key to take a picture. 12. Tap accept. 13. When finished, tap Send. Send Video 1. From the start screen, tap Camera. 2. Tap the Video icon. 3. Press the Camera key or tap the screen to begin recording. 4. - Page 52 6. Review the account details, then tap Accept. Create a new email account 1. Swipe left on the start screen. 2. Scroll down to and tap Settings. 3. Tap email+accounts. 4. Tap to select the account type. 5. Follow the prompts to create a new email account. 6.
-
Page 53: Email Messages
6. Tap delete to confirm. Inbox Email Notification To turn on and turn off email notifications, follow these steps Turn on 1. Swipe left on the start screen. 2. Scroll down to and tap Settings. 3. Tap ringtones+sounds. 4. Scroll down to and tap New email. 5.
Need help?
Do you have a question about the lumia 635 and is the answer not in the manual?
Questions and answers