Digi ConnectPort X2 Getting Started Manual
Wireless m-bus development kit
Hide thumbs
Also See for ConnectPort X2:
- User manual (254 pages) ,
- Quick start manual (2 pages) ,
- User manual (237 pages)
Table of Contents
Advertisement
Quick Links
Download this manual
See also:
User Manual
Advertisement
Table of Contents

Related Manuals for Digi ConnectPort X2


Summary of Contents for Digi ConnectPort X2
- Page 1 ConnectPort X2 Wireless ® M‐Bus Development Kit Getting Started Guide 90001223 _B September 9, 2011 ...
- Page 2 ©2011 Digi International, Inc. All rights reserved. Digi, iDigi, Digi International, the Digi and iDigi logos, ConnectPort, Digi ESP, XBee, iDigi Manager Pro, iDigi Device Cloud, and a Digi International Company are trademarks or registered trademarks of Digi International, Inc. in the United States and other countries worldwide. All other trademarks are the property of their respective owners. Information in this document is subject to change without notice and does not represent a commitment on the part of Digi International. Digi provides this document “as is,” without warranty of any kind, expressed or implied, including, but not limited to, the implied warranties of fitness or merchantability for a particular purpose. Digi may make improvements and/or changes in this manual or in the product(s) and/or the program(s) described in this manual at any time. This product could include technical inaccuracies or typographical errors. Changes are periodically made to the information herein; these changes may be incorporated in new editions of the publication. ConnectPort X2 Wireless M‐Bus Development Kit Getting Started Guide 2 ...
-
Page 3: Using This Guide
Using this Guide Contact Information Please always check the product specific section on the Digi® support website for the most current revision of this document: http://www.digi.com/support/. For more information about your Digi products, or for customer service and technical support, contact Digi International. To contact Digi International by Use Mail Digi International 1101 Bren Road East Minnetonka, MN 55343 U.S.A. World Wide Web http://www.digi.com/support Telephone (US) (952) 912‐3444 or (877) 912‐3444 Telephone (other locations) +1 (952) 912‐3444 or (877) 912‐3444 Conventions used in this Guide This icon indicates a hint, or concept that is learned. This icon indicates a warning of the potential for confusion or danger. ConnectPort X2 Wireless M‐Bus Development Kit Getting Started Guide 3 ... -
Page 4: Table Of Contents
Contents Using this Guide ............................ 3 Contact Information .......................... 3 Conventions used in this Guide ........................ 3 Introduction to the ConnectPort X2 Wireless M‐Bus Development Kit ............ 5 Goals of the Kit ............................ 5 Requirements of the Kit .......................... 5 System Requirements ........................... 5 Web Browser Requirements ......................... 5 Part 1: Setup your Wireless M‐Bus Development Kit .................. 6 Step 1: Identify Your Kit Components ....................... 6 Step 2: Getting to Know Your Device ...................... 7 Step 3: Connect and Power‐On the ConnectPort X2 ................ 9 Step 4: Connect the Interface Board ....................... 10 Part 2: Download and Install the Digi ESP for Python Development Environment ........ 11 Part 3: Follow the Instructions in the ESP Help System to Complete the Development Kit Experience ........................ 17 ConnectPort X2 Wireless M‐Bus Development Kit Getting Started Guide 4 ... -
Page 5: Introduction To The Connectport X2 Wireless M-Bus Development Kit
Introduction to the ConnectPort X2 Wireless M‐Bus Development Kit Thank you for purchasing the Digi ConnectPort X2 Wireless M‐Bus Development Kit. The M‐Bus Development Kit includes all the hardware and software tools necessary to deploy and configure an ™ M‐Bus infrastructure with a simulated metering device. The iDigi® Device Cloud will help you store and read M‐Bus data generated by the simulator. By using the iDigi Device Cloud, developers can rapidly deploy and manage their applications remotely across an IP connection without the need to program middleware applications. Goals of the Kit As you go through the steps in this kit, you will: 1. Connect the ConnectPort X2 to your local network. ™ 2. Use the Digi ESP for Python IDE to build, download, and launch a Python application for your ConnectPort X2 gateway, then interact with the application in a realistic setting. 3. Create an iDigi developer account on the iDigi Device Cloud. 4. Use the iDigi storage interface to retrieve meter data. Requirements of the Kit System Requirements Internet connection PC running Microsoft Windows XP, Vista or Windows 7 Note: Mac operating systems are not supported in this Development Kit experience. Web Browser Requirements Microsoft Internet Explorer 7.0 or newer Google Chrome 4.0 or newer Mozilla Firefox 3.0 or newer ConnectPort X2 Wireless M‐Bus Development Kit Getting Started Guide 5 ... -
Page 6: Part 1: Setup Your Wireless M-Bus Development Kit
Part 1: Setup your Wireless M‐Bus Development Kit Step 1: Identify Your Kit Components Carefully unpack and verify the contents of your kit. Your kit should include each of the following: Figure 1: Kit Contents ConnectPort X2 Wireless M‐Bus Development Kit Getting Started Guide 6 ... -
Page 7: Step 2: Getting To Know Your Device
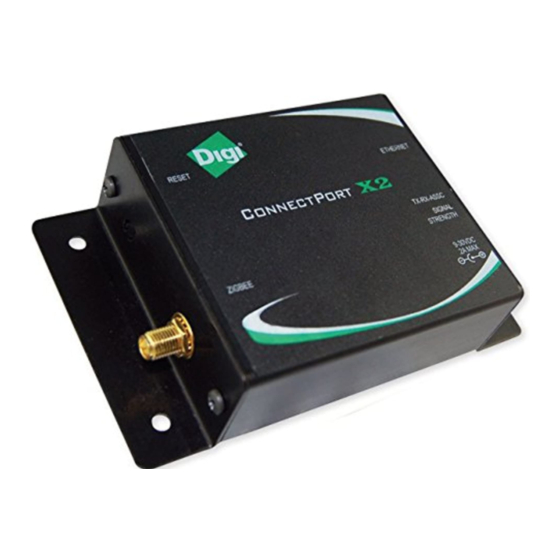
Step 2: Getting to Know Your Device ConnectPort X2 LEDs and Buttons Digi devices have several LEDs that indicate system status, link integrity, and link activity. The following images illustrate the ConnectPort X2 LEDs. Figure 2: ConnectPort X2 LEDs and Buttons The ConnectPort X2 reset button is located on the side panel of the device (as shown above). To perform a factory reset of the device, locate an item that is small enough to be inserted into the reset button hole (for example, the end of a paperclip or push‐pin). Next, insert the item into the reset button hole, and press and hold the reset button for a few seconds. When the unit resets, a flashing pattern of 1‐5‐1 on the Ethernet LED will indicate a successful factory reset. ConnectPort X2 LED and Button Functionality LED/Button Color and Light Description Pattern Ethernet Solid yellow Ethernet link is up Link LED Ethernet Blinking green Ethernet traffic is on the link Activity LED Association N/A Not used Power OFF Not functioning correctly ON OK Reset Single press ‐ performs equivalent of a power‐cycle. Button Press and hold at power on ‐ resets the device configuration settings to factory defaults (factory reset). ... - Page 8 Web Interface Digi ConnectPort X2 devices utilize a web‐based interface for configuring, monitoring, and administering Digi devices. To configure your ConnectPort X2, simply enter the IP address of the device into your web browser. You will discover the IP address of your device later in this guide when you go through the process of installing and running your first Python program. For additional information regarding the ConnectPort X2 web interface, see the ConnectPort X Family User’s Guide available on the Digi Support website. Command Line Interface Digi ConnectPort X2 devices can be configured by issuing commands from the command line. The command‐line interface allows communication directly without a graphical interface. The command‐line interface provides flexibility for making precise changes to device configuration settings and operation. It does require users to have experience issuing commands, and access to command documentation. The command line is available through Telnet or SSH TCP/IP connections, or through serial port using terminal emulation software such as Hyperterminal. Access to the command line from serial ports depends on the port profile in use by the port. By default, serial port command‐line access is allowed. For additional information on accessing and configuring the command line interface of your ConnectPort X2, as well as the various command descriptions available, see the Digi Connect Family Command Reference available on the Digi Support website. ConnectPort X2 Wireless M‐Bus Development Kit Getting Started Guide 8 ...
-
Page 9: Step 3: Connect And Power-On The Connectport X2
Step 3: Connect and Power‐On the ConnectPort X2 To begin setting up your Digi ConnectPort X2 Wireless M‐Bus Development Kit you will need to connect and power‐on the ConnectPort X2. 1. Connect one end of the Ethernet cable to the ConnectPortX2, and the other end to your Ethernet switch (the ConnectPort X2 defaults to obtaining its IP Address via DHCP). WARNING: If the ConnectPort X2 does not have access to the Internet this kit cannot be completed. 2. Connect the appropriate power supply adapter to the power supply. 3. Connect the power supply to the ConnectPort X2 and then plug the power supply into a wall outlet. Figure 3: Connecting the ConnectPort X2 ConnectPort X2 Wireless M‐Bus Development Kit Getting Started Guide 9 ... -
Page 10: Step 4: Connect The Interface Board
Step 4: Connect the Interface Board 1. Install the Amber Wireless M‐Bus (OMS) module onto the interface board. 2. Connect the USB cable to the interface board then connect the other end to your PC. Figure 4: Connecting the Interface Board 3. Install USB drivers for your interface board. If you have never installed USB COM port drivers on your PC, Windows will display a pop‐up asking to install drivers. The drivers can be downloaded from the Digi website here: http://www.digi.com/support/kbase/kbaseresultdetl.jsp?id=2138 If you have existing USB COM port drivers installed on your PC, you will need to install the drivers manually. You may need to disable or uninstall the existing drivers for the interface board to function properly. ConnectPort X2 Wireless M‐Bus Development Kit Getting Started Guide 10 ... -
Page 11: Part 2: Download And Install The Digi Esp For Python Development Environment
Part 2: Download and Install the Digi ESP for Python Development Environment The Digi ESP for Python Development Environment is an Eclipse‐based Integrated Development Environment (IDE) that simplifies the process of creating Python applications for iDigi devices. It also provides many example projects, one of which we will be using later in this section. 1. Navigate to www.digi.com/wmbus and click on the “Download Digi ESP for Python” link. 2. You will be redirected to the Python Product page. The various download options for the Digi ESP for Python will be displayed on this page. Click on the “Digi ESP for Python ‐ Windows XP/Vista/Windows 7 installer” link to download the Digi ESP for Python Development Environment. Note: Mac operating systems are not supported in this Development Kit experience. After the download has completed, the Digi ESP for Python Setup Wizard will open. Figure 5: Digi ESP for Python Setup Wizard ‐ Welcome 1. Click Next to continue. Follow the instructions in the wizard. ConnectPort X2 Wireless M‐Bus Development Kit Getting Started Guide 11 ... - Page 12 Figure 6: Digi ESP for Python Setup Wizard 2. On the last install screen click Finish. Figure 7: Selecting your Digi ESP for Python Workspace 3. The Digi ESP for Python IDE will launch automatically and prompt you to select a workspace directory. Use the default workspace directory (or click the Browse button and navigate to your desired alternate workspace location), check the “Use this as the default and do not ask again” box, and click OK. Note: The Digi ESP for Python IDE 'workspace' is the directory where projects and configurations will be stored. The default location for this directory is a subfolder called workspace on the user home directory, for example, C:/Documents and Settings/[username]/workspace. ConnectPort X2 Wireless M‐Bus Development Kit Getting Started Guide 12 ...
- Page 13 4. The Digi ESP for Python Welcome page will be displayed (as shown below). You will need to run the Digi ESP for Python Package Manager. Package Manager allows Digi ESP for Python to check the Package Manager Update Server for updates and enhancements. These updates will keep your Digi ESP for Python environment current. Navigate to Package Manager > Open Package Manager from the Welcome page’s main menu to open Package Manager. Figure 8: Open Package Manager ConnectPort X2 Wireless M‐Bus Development Kit Getting Started Guide 13 ...
- Page 14 5. If Package Manager discovers any available updates, a dialog box similar to the one below will be displayed. If updates are available for your product, they should be installed. The dialog below is an example of what you would see if packages were available for a new product (for the example used in this document packages for a ConnectPort X5 R Iridium model are displayed; if packaged for your product are available they will be displayed in place of the ConnectPort X5 R Iridium options). Locate your package in the list and click to select it. Once selected, click the Request Install button. Repeat as needed for any additional packages. 6. All requested installs will be displayed within the Package Request List Panel, click the Continue button to proceed with the installation of your package(s). Figure 9: Packages to Install ConnectPort X2 Wireless M‐Bus Development Kit Getting Started Guide 14 ...
- Page 15 Verify that all packages to be installed are displayed in the installation panel, then click the Proceed button. Once all packages are installed a dialog box will appear, click OK. Figure 10: Install Updates ConnectPort X2 Wireless M‐Bus Development Kit Getting Started Guide 15 ...
- Page 16 8. Once all packages have been successfully installed, Digi ESP for Python may need to restart. If new packages were installed and Digi ESP for Python was restarted, open the Digi ESP for Python Workbench (second image shown below) by clicking on the Workbench icon (as indicated in the image below). The first time you run Digi ESP for Python the Welcome screen is displayed. Figure 11: Digi ESP for Python Welcome Screen Figure 12: Digi ESP for Python Workbench NOTE: If at any point you close Digi ESP for Python, it can be reopened by double‐clicking on the Digi ESP for Python icon from your computer’s desktop, or by navigating to Start > Digi > iDigi > Digi ESP. ConnectPort X2 Wireless M‐Bus Development Kit Getting Started Guide 16 ...
-
Page 17: Part 3: Follow The Instructions In The Esp Help System To Complete The Development Kit Experience
Part 3: Follow the Instructions in the ESP Help System to Complete the Development Kit Experience 1. From the Workbench’s main menu open the embedded help system by navigating to Help > Help Contents. Figure 13: Help Contents 2. Within the Getting Started section of the Contents list, select ConnectPort X2 Wireless M‐Bus Development Kit. Figure 14: Getting Started > ConnectPort X2 Wireless M‐Bus Development Kit ConnectPort X2 Wireless M‐Bus Development Kit Getting Started Guide 17 ... - Page 18 The ConnectPort X2 Wireless M‐Bus Development Kit starting page will display. 3. Follow the instructions within the ESP embedded help system to complete the setup, and to run through the ConnectPort X2 Wireless M‐Bus metering device simulator application Figure 15: Connectort X2 Wireless M‐Bus Development Kit starting page For more information or for support assistance, see our website at http://www.digi.com/support. ConnectPort X2 Wireless M‐Bus Development Kit Getting Started Guide 18 ...
Need help?
Do you have a question about the ConnectPort X2 and is the answer not in the manual?
Questions and answers