
Related Manuals for Rhin-O-Tuff Onyx PAL-14 Piks-A-Lift


Summary of Contents for Rhin-O-Tuff Onyx PAL-14 Piks-A-Lift
- Page 1 PAL-14 Piks-A-Lift Operator’s Training Manual Issue “0” 03/05 PDI Part # 900770 Performance Design Inc. 2350 East Braniff St. Boise Idaho 83716 Issue “0” Part #900770 www.RHIN-O-TUFF.com...
- Page 2 APES-14-77. Paper sizes range from 5-1/2” x 5-1/2” (140mm) through 14” x 14” (356mm). A maximum of 6” (152mm) can be stacked at a time. This manual discusses all of the necessary steps to use and care for your machine. Issue “0” Part #900770 www.RHIN-O-TUFF.com...
-
Page 3: Table Of Contents
Book Stop Plate Adjustment Procedure. Left Book Stop Rod Adjustment Procedure Plunger Bracket Loading Paper Paper Amount Adjustment Knob 11) Paper Separating and Punching. 12) Quick Setup Guide 13) Trouble Shooting 14) Schematics 15) Product Registration and Contact Information Issue “0” Part #900770 www.RHIN-O-TUFF.com... -
Page 4: Important Safety Notice
PAL-14. NEVER REMOVE BACK COVER! Doing so may result in personal injury! Never operate the PAL-14 if the provided power cord does not fit your outlet. Power cord shall be certified for the country where the machine will be installed. Issue “0” Part #900770 www.RHIN-O-TUFF.com... -
Page 5: Shipment Overview Of The Pal-14
Shipment Overview of the PAL-14; The very first step is to un-box the PAL-14 including the smaller accessory kit inside. Your PAL-14 requires some assembly before it can operate. Find an open area and layout the components inside the boxes as shown in illustration 2.0; Listed below are the items in illustration 2.0. - Page 6 Assembly of PAL-14: See illustration 3.0 Some assembly is required before using the PAL-14. Locate the PAL-14 table (1), table attachment screws (2) and Allen key (3). Using the screws provided, attach the table to the main machine assembly (4) as shown. Attach the left book stop assembly (5) using the three winged knob (6).
-
Page 7: Placing The Pal-14 In The Proper Location & Binding Styles
Placing the PAL-14 in the proper location & Binding Styles; Locate a clear work area with an outlet within 5 feet that provides a 15-amp service (16-amp European) which is protected at the customer’s circuit box. The work area must be a solid, firm cabinet or a heavy duty table with a flat level surface. -
Page 8: Mounting The Pal-14 Onto The Od-4012, Od-4000 Or Od-4800
Place your PAL-14 on top of your punch, as shown in illustration 5.3. Use a white spacers (1) under the forward sheet metal portion of the table as shown, then use the 3-winged knobs to fasten the PAL-14 to your punch as shown. Repeat on opposite side of your PAL-14. -
Page 9: Mounting The Pal-14 Onto An Apes-14
Mounting the PAL-14 onto an APES-14: See illustration 7.0. Make sure the APES is mounted on the HD punch before proceeding with this step, refer to the APES manual. Locate the APES module standoff kit. Remove the four long metal spacers (1) and find the two short plastic spacers (2). -
Page 10: Use As Stand Alone
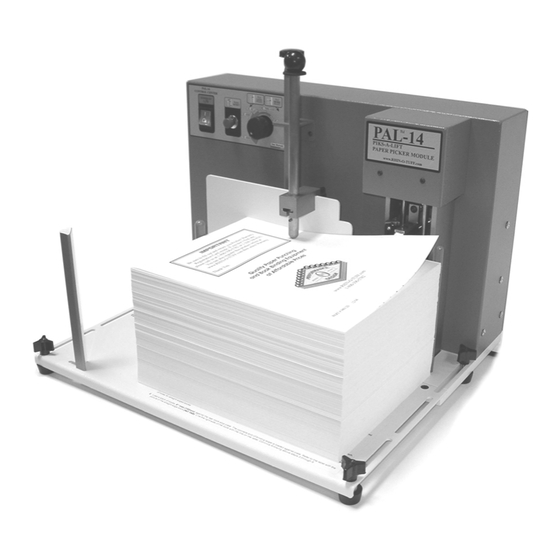
Use as stand alone: Locate the Information sheet for PAL-14 stand-alone assembly. Follow the instructions. Overview of the PAL-14 Paper Separator: See illustration 9.0. The PAL-14 has many useful features to increase your punching productivity. 1. Power Switch: This switch turns on the main power to the PAL-14. In case of any emergency use the power cord as the main power cutoff! 2. -
Page 11: Green Start Button
115VAC use: 2ea. #007120 FUSE, 2 AMP MDL SLO 1/4 X 1 1/4 1ea. #001659 FUSE,1.5 AMP GMA M5 X 20MM (circuit board) 230VAC use: 2ea. #007019 FUSE, 1 AMP GDC SLOW M5 X 20 1ea. #001659 FUSE,1.5 AMP GMA M5 X 20MM (circuit board) Detailed Use of the PAL-14 Paper Separator: See illustration 9.0 on previous page. -
Page 12: Plunger Bracket
must have a 1/2” (12.5mm) indent so stabber enters pile correctly. Be careful not to allow the left stop rod (1) to block sensor beam (2). 5. Plunger Bracket: See illustration 10.1. The plunger is used to add weight to the top of the pile. The only time it will be necessary to use this is when a lift of paper slides forward as the stabber enters the pile. -
Page 13: Paper Separating And Punching
7. Paper Amount Adjustment Knob: Set the adjustment knob clockwise to increase the number of sheets and counterclockwise to decrease the number of sheets. Depending on the model punch and type of die being used, this amount will vary. Use a comfortable setting so the sheets fit into the die without much effort. -
Page 14: Quick Setup Guide
PAL-14 Quick Setup Guide: Books with Tabs 1. If the rear book stop plate is in the forward position, loosen the tall knob located behind the plate. You do not have to unscrew this knob completely but just enough to lift the plate and move it to its back position. There are two sets of alignment holes. -
Page 15: Trouble Shooting
Trouble Shooting; Only qualified personnel should attempt to work on this equipment! Most of the problems you may encounter are due to setup problems. There are two fuses on the 115VAC machine and two fuses on the 230VAC machine located on the rear of the PAL-14 that can be replaced by the customer. Below is a troubleshooting guide to help you through most of the problems that may be encountered. -
Page 16: Schematics
Schematics;... -
Page 17: Product Registration And Contact Information
Product Registration and Contact Information; Product registration is important to establish trouble free warranty repair of any of your Rhin-O-Tuff equipment. Please fill out and mail in the card provided with your machine or register on-line at www.RHIN-O-TUFF.com then select Warranty.
Need help?
Do you have a question about the Onyx PAL-14 Piks-A-Lift and is the answer not in the manual?
Questions and answers