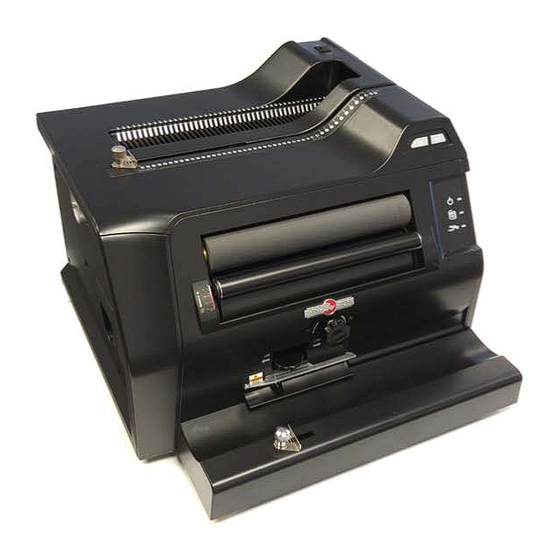
Summary of Contents for Rhin-O-Tuff 3000
- Page 1 COIL BINDING SYSTEM 3000 SETUP & OPERATOR MANUAL Performance Design LLC| 2350 East Braniff St. | Boise, Idaho 83716 www.Rhin-O-Tuff.com...
- Page 2 Office Elite Series Coil Binding System 3000 FEATURES: Open-ended Punch Throat 20-sheet Electric Punch Electric Coil Insertion Power Crimper 1-Year Limited Warranty...
- Page 3 Main System Features Foot Pedal Control Switch Power Switch/ (can use foot pedal to Punch or Crimp) 47 Disengageable Foot Pedal Receptacle Punch Pins Open-ended Punch Throat Adjustable Edge Guide Punch Button/ Coil Roller ON/OFF Switch LED Panel Margin Control Dial Dual Coil Rollers Paper Chad Waste Coil Roller Adjustment Dial...
-
Page 4: Important Safety Notice
Capabilities & Specifications Important Safety Notice • Always replace fuses or circuit breakers with the correct amperage and type. • Never bypass safety devices. • Hazardous voltages inside of machine. • No user serviceable parts inside of machine. Machine should only be opened by qualified repair personnel. - Page 5 Setup 1. Unpack machine 2. Place machine on solid 7. Turn Power switch ON – from inner carton. surface. Amber LED should light up on front LED panel. 3. Plug power cord into machine and wall outlet. 4. Plug in foot pedal. 5.
- Page 6 5 - 35 1/4" Set Margin Control 36 - 47 9/32" Dial 48 - 60 5/16" on Left side of Coil Binding System 3000 61 - 70 11/32" 71 - 80 3/8" 10MM 81 - 90 7/16" 11MM 91 - 100 1/2"...
- Page 8 Legal (14" or 356mm) = Our pull pin label on top of the A4 (11.69" or 297mm) = 47 holes Coil Binding System 3000 is A3 Landscape (11.69" or 297mm) = 47 holes designed to guide you as to what Letter (11"...
- Page 9 Electric Coil Insertion (Binding): Document Prepare book to be coiled by placing the Body Front Cover on top and the Back Cover on the bottom of the document body. Front Cover Set the Coil Roller Adjustment Dial to the Back Cover proper setting that corresponds to the Coil diameter.
- Page 10 Crimping (Secure Binding): Set-up the Power Crimper. Set Foot Pedal Control Switch (top right) to ‘Crimped Coil’ icon. This will activate the Power Crimper when depressed. Turn the Power Crimper Adjustment Dial to the left for smaller coil diameters (6mm) or to the right for larger coil diameters (50mm).
-
Page 11: Troubleshooting
OFF and then back ON. This will return the punch to its “HOME” position. Gently remove all sheets from punch throat. Clear any remaining paper chads if possible If you cannot remove your document, please call your local Rhin-O-Tuff® Dealer for Service. •... - Page 12 Trouble Shooting: BINDING YOUR DOCUMENT SYMPTOM SOLUTION Coil will NOT spin into punched holes Check wall outlet has power Switch machine power switch to the “ON” position Check coil roller switch is turned ‘ON’. The green LED should be illuminated. If the light is not ON, depress the Coil Roller Switch button just above the LED panel.
-
Page 13: Warranty
Warranty The Coil Binding System 3000 is covered by a 1-Year Limited Warranty against defects in materials and workmanship, and is limited to a replacement of the defective system. Modifications or intentional abuse of the system will not be covered under this warranty. - Page 14 STRONG • SIMPLE • HONEST • CAPABLE TUFF AND BUILT TO LAST EASY TO USE & MAINTAIN TRUSTWORTHY & SOUND NEVER LETS YOU DOWN...


Need help?
Do you have a question about the 3000 and is the answer not in the manual?
Questions and answers