Pacific energy NEO 2.5 NEWCASTLE Installation And Operating Instructions Manual
Hide thumbs
Also See for NEO 2.5 NEWCASTLE:
- Installation and operating instructions manual (28 pages) ,
- Manual (10 pages) ,
- Installation and operating instructions manual (24 pages)
Table of Contents
Advertisement
IMPORTANT:
THESE INSTRUCTIONS ARE TO
REMAIN WITH THE HOMEOWNER
SAFETY NOTICE
If this stove is not properly installed, a
house fire may result. For your safety,
follow the installation instructions.
Contact local building or fire officials
about restrictions and installation
inspection requirements in your area.
TESTED and LISTED to CAN/ULC S627
AND UL 1482
Meets the Environmental Protection
Agency's May 2015 Particulate Emission
Standards
Standards
Visit www. pacificenergy.net for the most up-to-date version of this manual
5055.880
INSTALLATION
AND OPERATING
INSTRUCTIONS
MODEL - NEO 2.5 NEWCASTLE
SERIES - A
NEO 2.5 NEWCASTLE
SERIAL #
210616-28
Advertisement
Table of Contents

Subscribe to Our Youtube Channel
Related Manuals for Pacific energy NEO 2.5 NEWCASTLE


Summary of Contents for Pacific energy NEO 2.5 NEWCASTLE
-
Page 1: Safety Notice
TESTED and LISTED to CAN/ULC S627 AND UL 1482 Meets the Environmental Protection Agency's May 2015 Particulate Emission Standards Standards MODEL - NEO 2.5 NEWCASTLE SERIES - A Visit www. pacificenergy.net for the most up-to-date version of this manual 5055.880 NEO 2.5 NEWCASTLE 210616-28... -
Page 2: Table Of Contents
Table of Contents Troubleshooting ............. 12 Rating Label ..............3 Warranty Information ............. 13 Rating label location ..........3 LTD Lifetime Coverage (10 years) ......13 Ef ciency and BTU Output ........3 3 Year Comprehensive ..........13 Safety ................4 Conditions ............... -
Page 3: Rating Label
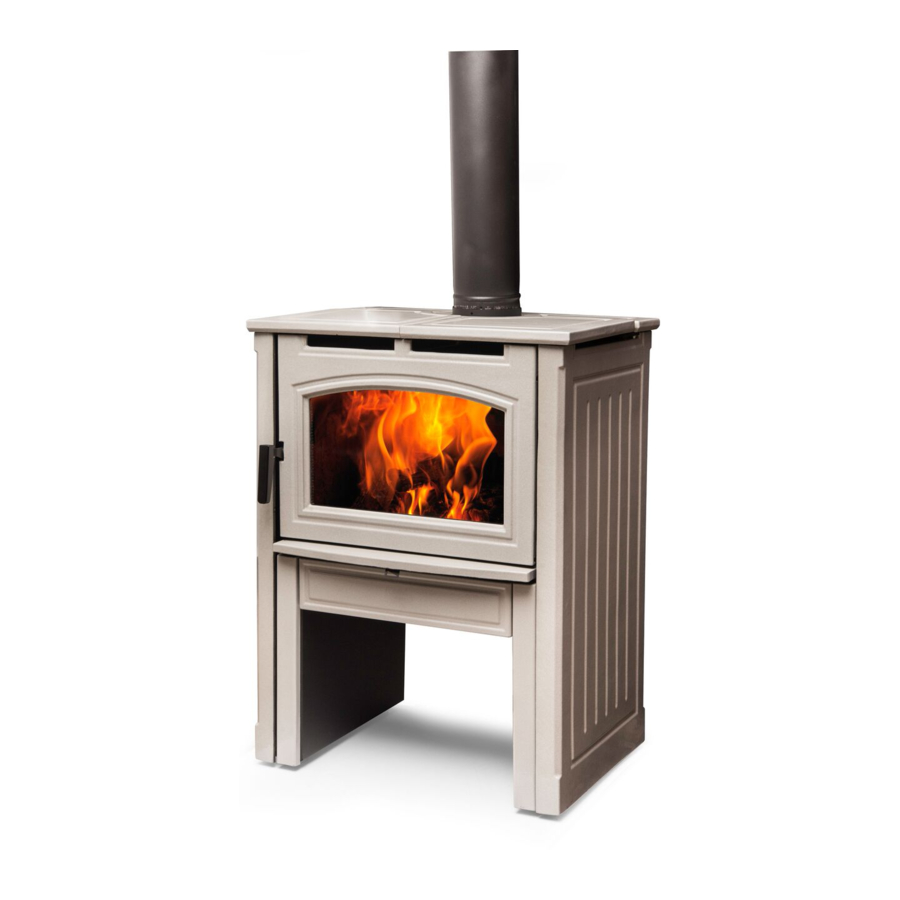
Operator Instructions Rating Label PLEASE SAVE THESE INSTRUCTIONS This manual describes the installation and operation of the Paci c Energy, NEWCASTLE 2.5 Freestanding wood wood stove. This wood stove meets the 2015 U.S. Environmental Protection Agency’s crib wood emission limits for wood wood stoves sold after May 15, 2015. Under speci c test conditions this wood stove has been shown to deliver heat at rates ranging from 11,500 to 32,600 Btu/hr. -
Page 4: Safety
Operator Instructions Safety Chimney Smoke and Creosote Formation When wood is burned slowly, it produces tar and other organic vapours, which combine with expelled moisture to form creosote. The creosote vapours condense in the relatively cool chimney ue of a slow burning re. As a result, creosote residue accumulates on the ue lining. -
Page 5: Avoiding A Chimney Fire
Operator Instructions Avoiding a Chimney Fire There are two ways to avoid chimney res: Do not let creosote build up to a point where a big chimney re is possible. 2. Do not have res in the wood stove that may ignite chimney res. These are hot res, such as when burning house- hold trash, cardboard, Christmas tree limbs, or even ordinary fuel wood;... -
Page 6: Operation
Keep all such liquids well away from the heater while it is in use. CAUTION: Hot while in operation. Keep children, clothing and furniture away. Contact may cause skin burns. Your PACIFIC ENERGY wood stove is designed for many years of trouble free operation. Over ring the appliance will shorten the life of the product. -
Page 7: Lighting A Fire
Operator Instructions Lighting a Fire WARNING: Never use chemicals or any other volatile liquid to start a fire. Adjust air control to “High” position (all the way to the left) and open door. Place crumpled newspaper in the center of the heater and crisscross with several pieces of dry kindling. Add a few small pieces of dry wood on top. -
Page 8: Restarting After Extended Or Overnight Burns
Operator Instructions Restarting After Extended or Overnight Burns Open door and rake hot embers towards the front of the heater. Add a couple of dry, split logs on top of embers, close door. Adjust air control to high and in just a few minutes, logs should begin burning. After wood has charred, reset air control to desired setting. -
Page 9: Storing Wood Beneath Unit
Operator Instructions Storing Wood Beneath Unit It is possible to store wood between the stove pedestals, underneath the unit. The wood must not extend further forward than ush with the pedestals. Do not store paper or other stove lighting devices within the pedestal area. Although storing wood under the unit is possible it is not recommended. -
Page 10: To Remove Broken Glass
Operator Instructions To remove broken glass Remove the door gasket and then undo the eight screws securing the gasket guides and glass retainers. Remove all particles of glass. Be careful as they are very sharp. Install new glass complete with gasket. Replace glass retainers and gasket guides then install new door gasket as per instructions provided with the door gasket kit. -
Page 11: Maintenance Checks
Operator Instructions Maintenance Checks Check the following parts for damage such as cracks, excessive corrosion, burned out sections and excessive warping: (See website for descriptions and more detail) Some warping of the baf e is normal(up to 1/4” or .65cm). Replace if the baf e has permanent warping greater than this or has signs of cracking or breakage. -
Page 12: Troubleshooting
Operator Instructions Troubleshooting Problem Cause Cure Glass is Dirty 1. Wood is wet - Use dry wood 2. Turning down air control - Do not turn down until or damper too soon a) there is a good bed of coals b) the wood is charred 3. -
Page 13: Warranty Information
Operator Instructions Warranty Information Pacific Energy Limited Lifetime Warranty Wood Products Paci c Energy extends the following warranty coverage to the original registered purchaser of the product: LTD Lifetime Coverage (10 years) Limited lifetime coverage is extended to the following components (parts only) porcelain nish, glass (glass for thermal breakage only, not impact), plating, rebox and baf e. -
Page 14: Neo 2.5 Dimensions
Installation Instructions NEO 2.5 Dimensions 24 3/4" 23 1/4" 29 3/4" 22 1/2" 6 1/8" 39" 39 3/4" 1008 Figure 2: Newcastle 2.5 dimensions. Crate Removal 1) Carefully remove wood top and supports. 2) Remove plastic cover. 3) Using a 7/16” (12mm) wrench, remove lag bolts that secure hold down brackets to bottom pallet. 4) Slide the hold down brackets away from the stove. - Page 15 Installation Instructions 3. Remove the screws securing the Top Rear piece to the rear shield and lift the piece off over the ue collar (Figure 4). 4. Open the door slightly and lift the door to disengage the hinge pins from the hinge bracket. 5.
- Page 16 Installation Instructions 9. Remove the stop screws in the ends of the curved brackets behind the leg adapter cover (Figure 7). 10. Lift and turn the leg adapter down as shown in Figure 8. Remove the screws securing the leg adapter cover to the mounting brackets on the left and right of the leg adapter cover (Figure 8).
-
Page 17: Ember Protection
Installation Instructions Ember Protection The stove may be installed on a combustible oor provided ember protection made from a non-combustible material with a minimum K value of 23.7 btu/ft h ˚F is used. Equivalent to 20GA steel. This protection must extend as follows: In Canada: 18”... -
Page 18: Combustion Air
Installation Instructions Combustion Air Intake or combustion air can be supplied to the stove in one of two ways. Consult your local building code or CAN/ CSA-B365, Installation Code for Solid-Fuel-Burning Appliances and Equipment before proceeding. 1. Outside air supply - (Necessary for mobile home installation, optional for residential installation.) Outside air may be drawn from either underneath the stove or from behind. -
Page 19: Residential Installation
Installation Instructions Residential Installation Warning: Under no circumstances is this wood stove to be installed in a makeshift or “temporary” manner. It may be red only after the following conditions have been met. • DO NOT ATTEMPT TO CONNECT THIS Wood stove TO ANY AIR DISTRIBUTION DUCT. •... -
Page 20: Single-Wall Connector
Installation Instructions Single-Wall Connector Smoke pipe must be: • As short and straight as possible, use six inch diameter, 24 gauge black pipe that is clean and in new condition. • Secured at every joint and collar with 3 sheet metal screws. •... -
Page 21: Installation Instructions
Installation Instructions Spark arrester rain cap Follow chimney manufacture specifcations for The chimney may incorporate distance between vent termination heigth and an offset. To do this safely, chimney at roof line. Also consult local building all sections of listed connector, Certi ed regulations. - Page 22 Installation Instructions Fireclay Flue liner Concrete cap Ensure that the Masonry chimney meets all National Fire Protection Association and local building codes. Have the chimney cleaned and inspected by a professional to ensure Chimney there are no cracks, weak mortar or other signs of deterioration.
-
Page 23: Mobile Home Installation
Installation Instructions Mobile Home Installation Additional Requirements: Warning: Under no circumstances is this wood stove to be installed in a makeshift or “temporary” manner. It may be red only after the following conditions have been met. • DO NOT CONNECT THIS UNIT TO A CHIMNEY FLUE SERVING ANOTHER APPLIANCE. •... -
Page 24: Optional Blower
Installation Instructions 2. Mark the position for the hole in the ceiling and roof by using a string and plumb-bob. 3. Check that the intended location will not interfere with oor joists, ceiling joists or rafters before proceeding further. Cut a hole in the ceiling and roof to suit the chimney system and frame in the sides. The chimney support is mounted to the framing. -
Page 25: Optional Outside Air Adapter
Installation Instructions Optional Outside Air Adapter The adapter(OAIR.1A) is only required if outside combustion air is being used. Installation(OAIR.1A): Place adapter over the desired hole in either the bottom or rear of the leg adapter and secure with #8 x 1/2” screws. Combustion air duct from outside can now be attached to the 4”(100mm) round collar. -
Page 26: Firebrick Installation Instructions
Installation Instructions Firebrick Installation Instructions This package contains 18 full-size rebricks, as well as 6 various cut-size bricks. With the heater in the upright position, install rebricks as follows: • Install the rear rebricks, 4 full-size, two on each side of the baf e tube. •... -
Page 27: Replacement Parts - Newcastle 2.5
Installation Instructions Replacement Parts - NEWCASTLE 2.5 (WHEN ORDERING, INCLUDE PART NUMBER WITH DESCRIPTION) ITEM DESCRIPTION PART NO. ITEM DESCRIPTION PART NO. Newcastle Side Panel - Cast ....CA25.710207xxx Ash Dump Assembly ........NE25.DUMPA Door Catch ............. CA16.710135 Ash Drawer ..........CA25.710204A Ash Lip - Cast ...........CA25.710209xxx Air Shutter Assembly ......... - Page 28 PACIFIC ENERGY PACIFIC ENERGY FIREPLACE PRODUCTS LTD. 2975 Allenby Rd., Duncan, B.C. V9L 6V8 For technical support, please contact your retailer. Web site: http://www.pacificenergy.net Printed in Canada...
Need help?
Do you have a question about the NEO 2.5 NEWCASTLE and is the answer not in the manual?
Questions and answers