Table of Contents
Advertisement
Quick Links
Advertisement
Table of Contents

Related Manuals for DAITEM 473-29X


Summary of Contents for DAITEM 473-29X
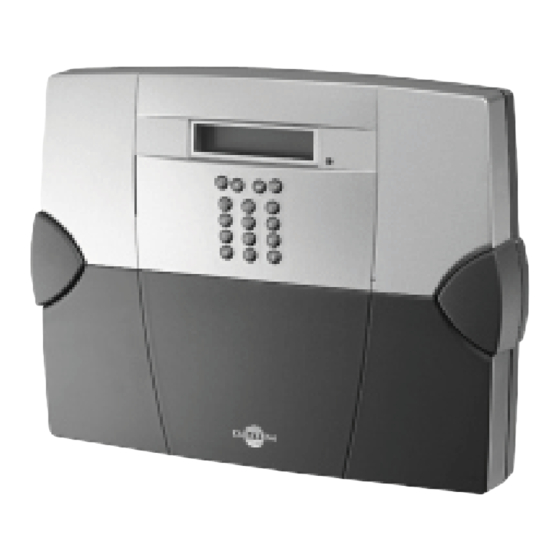
- Page 4 2. Description and operation 2.1 Content and description 2.1.1 Content of 473-29X • GSM/GPRS dialler • 910-21X power supply (ENG 3A-055WT05_5 V DC/1 A) • BATLi23 lithium power pack (2 x 3.6 V – 18 Ah) • Rechargeable battery 908-21X (BATT LiIon 3,6 V-700 mAh-FIL) •...
- Page 9 3.2 Guarantee sticker Remove the pre-cut part of the guarantee sticker and glue it to the extended guarantee request 473-29X Coller sur certif form supplied with the control panel (if you are adding to an existing system, use the extended A1142A047879 guarantee request form supplied with the dialler).
- Page 10 3. Select the date and hour using the L and M keys installation mode and displays: keys and then press OK. and then press OK. Bonjour Language General 473-29X English Date/hour then Langue Francais 4. Perform the following essential programming operations as shown below: Programming...
- Page 11 4.2 Programming the PIN code For the first programming operation, you will need the PIN code (you will find this on the subscription contract). Programming GSM/GPRS Programming Display Actions to be performed to be performed Select the Programming menu using the L and M keys, Programming Install mode the PIN code...
- Page 12 5. Recognition programming WITH an alarm control panel 5.1 Programming the dialler to recognise the control panel If the control panel has already been programmed to recognise another separate dialler (PSTN phone or video communicator), it will not at first be possible to add a GSM telephone dialler. A GSM dialler can be installed on top of a PSTN phone and/or video communicator if the control panel is a 1.12.0 version or later.
- Page 13 3. Press then on the dialler. Recog prog IIIIII then 4. Press and hold on the control panel keypad. The control panel confirms recognition programming by issuing “beep, control panel” “beep, dialler” the voice message “beep, dialler” and the dialler confirms by issuing the voice message “beep, control panel”.
- Page 14 5.2.2 Recognition programming with a control panel fitted with a software version below to 1.15.6 To perform recognition programming, the following steps must be followed: • Programming the control panel to recognise the detector “beep, detector “beeeep, beep, X, group?” “time delay?”...
- Page 15 5.3 Programming the dialler to recognise image transmission motion detectors IMPORTANT • Both the dialler (for image transmission) and the control panel (for intrusion event transmission) must be programmed to recognise the image transmission motion detectors. • The dialler can only be programmed to recognise the image transmission motion detectors (up to 40) if it has already been programmed to recognise the control panel.
- Page 16 6. Recognition programming WITHOUT an alarm control panel 6.1 Programming the dialler to recognise technical and fire detectors General Radio test Programming Display Actions to be performed to be performed Select the Programming menu using the L and M keys, Putting the GSM Install mode dialler in recognition...
- Page 17 7. Programming for calls to individual correspondents Procedure for a voice call to an individual 60-second listen-in and identification phone At correspondent’s speak-out/talk-back period n° answered home (repeatable up to 4 times) pre-recorded press “0” identification alarm Acknowledgement message message acknowledge and termination phone...
- Page 18 7.2 Programming the type of events transmitted Programming Communication Programming Display Actions to be performed to be performed Select the Programming menu using the L and M keys, Programming Install mode event type then press OK Programming Makes it possible to allocate alarm Select the Communication menu using the L and M keys, groups to the call...
- Page 19 7.4 Programming Arm/Disarm transmission via SMS Once enabled, this function is used for transmitting all Arm and Disarm commands to numbers programmed to receive SMS only. If no number has been programmed to receive SMS, Arm/Disarm commands will not be transmitted. General Arm/disarm trans Programming...
- Page 20 (1) These operator parameters may be modified at any time without Daitem being informed. DAITEM shall not be held liable for the direct or indirect consequences of technical and contractual modifications made by the mobile phone network operator chosen by the customer.
- Page 25 8.6 Dialler image transmission test Before switching to user mode, we recommend you test GSM/GPRS dialler image transmission for each image transmission detector. To do this, proceed as follows: 1. Dialler in installation mode. 2. Press twice on the 3. Move into the detector test button.
- Page 26 2. Programming the control panel to recognise the relay The control panel and radio repeater relay must be in installation mode. The relay and control panel are in installation mode when they are powered. Otherwise, enter the following codes on the control panel keypad or the control device interface following the order given below: then enter master code (by default: 0000) installer code (by default: 1111)
- Page 27 Programming Programming Display Actions to be performed GSM/GPRS to be performed Select the Programming menu using the L and M keys, Setting the Install mode “Credit Monitoring” then press OK Programming parameters Select the GSM/GPRS menu using the L and M keys, Programming then press OK GSM/GPRS...
- Page 29 Programming Inputs/Outputs Programming Display Actions to be performed to be performed Select the Programming menu using the L and M keys, Programming Install mode outputs then press OK Programming Each output can be individually Select the Inputs/Outputs menu using the L and M keys, programmed Programming then press OK...
- Page 30 9.6 Programming personalised voice messages for intrusion groups General Recording mess. Programming Display Actions to be performed to be performed Select the Programming menu using the L and M keys, Recording Install mode personalised voice then press OK messages for Programming intrusion groups Select the General menu using the L and M keys,...
- Page 31 Disabled Programming the IP parameters using the information provided by the network IP address administrator. 192.168.000.197 N.B. DAITEM is unable to provide assistance with the use of fixed IP parameters. Sub-net mask 255.255.255.000 Gateway addr 192.168.000.000 IMPORTANT: for the fixed IP address to be taken into account, the GSM dialler must be switched off and then back on (disconnect and then reconnect the power supplies).
- Page 32 10. Connecting and testing the connected Inputs/Outputs 10.1 Wiring diagram IMPORTANT: to ensure protection against lightning all products connected to the GSM dialler must be inside the home. 2 outputs 4 inputs C1 R1 T1 C2 R2 T2 E1 E2 0V E3 E4 0V Outputs: SELV 24 Inputs: SELV dry V/1A relay type...
- Page 34 For the dialler to operate properly: alarm sirens and other radio repeater relays belonging to the • never leave extra wiring inside the box, DAITEM range, • do not wind the cable around the box. • far away from any sources of electromagnetic disturbance (electricity meter or switchboard, telephone box, hi-fi...
- Page 35 12.3 Fixing the device in place IMPORTANT: only fix the dialler in place once the GSM network and radio repeater relay tests are satisfactory as described above. 1. Fix the bracket at the 3 points. 2. Hook the dialler on to the fixing bracket. Fixing hole without washer Œ...
- Page 37 Changing the GSM dialler power pack and battery 1. Put the dialler in Install mode Case 1: Case 2: if the installer code is still at the factory value 1111 the installer code has been modified Press any key on User code? Install mode User code?
- Page 39 18. Quick user guide 18.1 Summary table of voice messages and SMS Events Voice messages SMS messages Intrusion Dialler ID intrusion group N° System ID intrusion group N° Intrusion confirmed Dialler ID intrusion confirmed group N° System ID intrusion confirmed group N° Fire alarm Dialler ID fire alarm System ID fire alarm...
- Page 44 Address: F-38926 Crolles Cedex - France Product type: Image transmission GSM/GPRS telephone dialler Trade mark: Daitem We declare under our sole responsibility that the product to which this declaration relates is compliant with the essential requirements of the following directives: •...
Need help?
Do you have a question about the 473-29X and is the answer not in the manual?
Questions and answers