Table of Contents
Advertisement
Quick Links
Download this manual
See also:
Service Manual
Advertisement
Table of Contents

Subscribe to Our Youtube Channel
Related Manuals for MUND CLIMA MUPR-H5


Summary of Contents for MUND CLIMA MUPR-H5
- Page 1 INVERTER SERIE H5 Installation and User's manual MUPR-H5 CL20736 to CL20738 This unit must be installed by a professional according CE 795/2010. English...
-
Page 2: Table Of Contents
CONTENTS Safety Precautions WEEE Warning Name Of Each Part Operation Notices Care and aintenance Troubleshooting Installation Guide Selection of the installing position Installation of the indoor unit Installation of the outdoor unit Pipe connection Electrical connection Test running Packing list Remote controller IMPORTANT: Thank you for selectiong super quality Air Conditiones. -
Page 3: Safety Precautions
Safety Precautions Incorrect operation due to ignoring instruction will cause harm or damage. The seriousness is classified by the following indications: WARNING This symbol indicates the possibility of death or serious injury. CAUTION This symbol indicates the possibility of injury or damage to properties only. - Page 4 Children should be supervised to ensure that they do not play with the appliance. Don't share the socket with other electric appliance, and use the broken or unstandord cord. Otherwise, it can cause electric shock even fire. Clean the dust on the plug regularly. Otherwise the dust mixed, humidity will result in insulation fault even fire.
- Page 5 CAUTION 1.Don't install the indoor unit under sunshine directly. 2.Don't block air inlet or air outlet, otherwise, the cooling or heating capacity will be weakened, even cause system stop operating. 3.Don't apply the cold air to the body for a long time. It will deteriorate your physical conditions and cause health problems.
-
Page 6: Weee Warning
Attention! Through poor conditions of the electrical MAINS, shortly voltage drops can appear when starting the EQUIPMENT. This can influence other equipment (eg. Blinking of a lamp). If the MAINS-IMPEDANCE Zmax< OHM(See below form), such disturbances are not expected. (In case of need, you may contact your local supply authority for further information). -
Page 7: Name Of Each Part
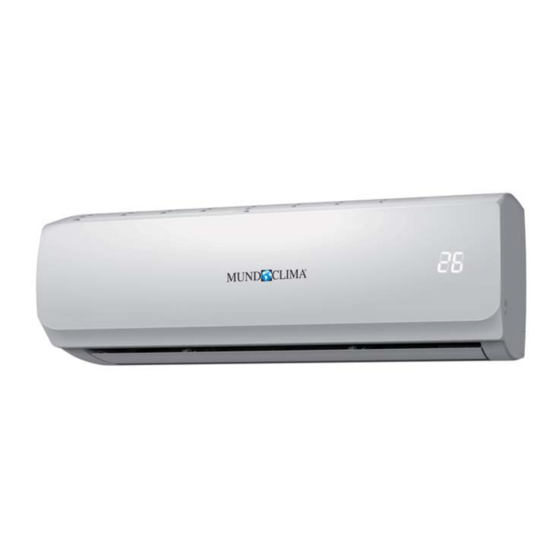
Name of Each Part ★ Indoor Unit Air inlet Indoor Unit 、 1 Fron t pan el 、 2 A ir filter 、 3 H andling switch 、 4 Louver Air outlet 、 5 S ign al receptor 、 6 S upply c ord 、... -
Page 8: Operation
Operation ★ Remote controller operation Se e " air conditioner remote con troller in struction " ★ Manual operation ☆ Manual op eration When the remote controller does not work or can not be found, please follow these steps: 1.As the unit is ope rating, you c an press the Auto button "... -
Page 9: Notices
Notices To prevent injury and property damage, Please pay attention to these following before operating the air conditioner. ★ Checking before operation 1.Make sure tha t the earth w ire is connected safely and reliably. 2. Make sure the filter net is properly fixed. Make sure that air outlet an d inlet are not blocked. -
Page 10: Care And M Aintenance
Care and aintenance ★ Cleaning ☆ Cleaning the indoor unit 1.Turn off the a ir-conditioner and re move the electrical p lug from the outle t. 2.Wipe the indoor unit with dry cloth or wet cloth which is dipped b y cold water. !... - Page 11 Troubleshooting Phenomenon Is the remote controller out of effective distance to the indoor unit? Remote controller is not availa ble Is the battery exhausted? Are there any obstructions between the controller and the signal receptor? Is the setting temperature suitable? Is the air inlet or outlet obstructed? Cooling (Heating)efficiency is not Are air filter dirty?
-
Page 12: Installation Guide
Installation Guide ★ Guide for customer 1.Please read the instructions carefully before installation of the air-conditioner. 2.The installation should be carried out by specialists. 3.Installation the air-conditioner and connecting the pipe and wires must be strict to reference the instructions. The wiring must be done by qualified electrician according to the electrical safety requirements. -
Page 13: Selection Of The Installing Position
Selection of the installing position ★ Indoor Unit ● There is no heating and Above steaming source nearby. 15cm ● No obstacles for insta lling position nearly. ● Keep good air circulation. ● Convenient to adopt Above 15cm meas ures to reduce noises. ●... -
Page 14: Installation Of The Indoor Unit
Installation of the indoor unit ●First make chan ges to wall a nd make sure that is hard + and secure. Using four " " type screws to fasten the installation board on to the wall. Keep it w ater lever horizontal direction and perpendicular in vertical direction. -
Page 15: Installation Of The Outdoor Unit
★ Check the water discharge 1. Take off the frame the unit cover. Take off the front frame for maintenance according to the follow ing steps: ● Turn perpendicular airflow direc tion handle " " from I to horizon tal direction. ●... -
Page 16: Pipe Connection
Pipe connection ● Connect the pipe to the unit: point to the center of pipe and fasten by wrench until it is tightly Torque The size of pipe fastened, the fastening 18N.m 6.35mm( Pipe direction is in the Indoor unit Connection screw following picture. -
Page 17: Expelling The Air In The Pipes And The Indoor Unit
★ Expelling the air in the pipes and the indoor unit Expelling the air: humid air in the Outdoor unit refrigerating system m ight cau se troub le of compre ssor. ● Take off the cover from the s top valve and T-branch valve. -
Page 18: Electrical Connection
Electrical connection Power wiring and interconnection must meet: model Specification of connection cables 2 x 2.5 + T 2 x 4 + T 2 x 2.5 + T 2 x 4 + T (mm ) The power supply (230V - 50Hz) is connected only to the indoor unit. Indo or c onn ection O pen the front panel, inset the con nection cables from the base of the air-co nditione r, conne ting to the te rminal board in order (according to th e gra ph),... - Page 19 Cover Te rm inal board Te rmin al boa rd Grou nde d w ire Electric bracket Electric bracket Pre ssing b oa rd Pre ssing b oa rd N OT E: ※ Conne ct th e gro unded w ire correctly, otherwise will c ause the ma lfunction of some electrical componet and sho ck o r fire ind eed.
-
Page 20: Test Running
Test running ● Make su re that p ipes and wire s are connected. ● Make su re that liquid side valve and air sid e valve both are completely open. 1. The con nection of p ower source ● Con nect the wire to in dependent power source socket. -
Page 21: Remote Controller
Remote Controller AIR-CONDITIONER REMOTE CONTROLLER INSTRUCTIONS 自动 自动 自动 AUTO 制冷 制冷 制冷 COOL HIGH 除湿 除湿 除湿 制热 制热 制热 HEAT ON/OFF MODE CLEAN SPEED FRESH STRONG SLEEP SWING DUST FEELING HEALTH FUNGUSPROOF SCREEN TIMER “ ” Read this instructions carefully so that ●... - Page 22 Remote Controller Buttons description LCD displays ins truction TRANSM IT DIGITAL O N/OFF 自动 自动 自 动 AU TO RUNN ING SE T ROO M 制冷 制冷 制 冷 MO DE COOL HIG H 除湿 除湿 除 湿 RUNNING MODE 制热...
- Page 23 Remote Controller “ ” FEELING button “ ” When it displays FEELING button Pres s this bu tton can be used to set the feeling function. The LCD sho ws the a ctual room temperature when the function set and it shows the setting temperature when the function cancelle d.
- Page 24 Remote Controller “ ” “ ” button “ ” “ ” Press the + or - button,you can set the temperature ℃ ℃ range from to 32 ,Display will change as you touch the button. “ ” CLEAN button “ ”...
- Page 25 Remote Controller ” button 13.“ SWING Press this button, the horizontal wind direction vanes can rotate automatically, when you have the desired vertical wind direction, press it again, the horizontal wind direction vanes will be stopped at th e situation of your choice. ”...
-
Page 26: Fix Batteries
Remote Controller Usage Fix batteries 1.Slide open the cover according the direction indicated by arrowhead. 2.Put into two brand new batteries (7#), position the & batteries to right electric poles (+ -). 3.Put back the cover. Automatic operation mode 1.Press the MODE button, select the automatic operation mode. -
Page 27: Fan Operation Mode
Remote Controller Fan operation mode 1.Press the MODE button, select the C ooling or Heating operation mode. 2.Press the SPEED button, you can select fan speed. You can select fan speed from LOW, MID, HIGH. 3.Press the ON/OFF b utton, th e operation indicator is o n, the air-condition er starts to operate the a utomatic mode. - Page 28 Remote Controller Attention 1.Aim the remote con troller toward s the receiver on the air- conditio ner. 2.The remote controller s hould be within 8 meters away from the receiver. 3.No obstacle s be tween the re mo te controller and receiver. 4.Do not drop or throw the remote con trolle r.
- Page 29 Notes...
- Page 30 ASK FOR MORE INFORMATION: Phone: +34 93 446 27 80 - Fax: +34 93 456 90 32 eMail: mundoclima@salvadorescoda.com TECHNICAL ASSISTANCE: Phone: +34 93 652 53 57 - Fax: +34 93 635 45 08...
Need help?
Do you have a question about the MUPR-H5 and is the answer not in the manual?
Questions and answers