Table of Contents
Advertisement
Quick Links
Advertisement
Table of Contents

Related Manuals for Nonin G02 ARCHIEVE


Summary of Contents for Nonin G02 ARCHIEVE
- Page 1 User Guide...
-
Page 2: Table Of Contents
Table of Contents Introduction ....................1 Contents of Package ..................1 Symbols ......................2 Intended Use ....................4 Installing the Battery..................8 Applying the GO Achieve to Your Finger .............10 Activating the Device ..................12 Verifying Operation ..................12 Reading Your Results ..................13 Care and Maintenance ..................15... - Page 3 Troubleshooting ....................16 Parts and Accessories ...................19 Specifications ....................20 Equipment Response Time ................23 Testing Summary ..................24 Accuracy Testing ................24 Low Perfusion Testing ................24 Warranty .......................25...
-
Page 4: Introduction
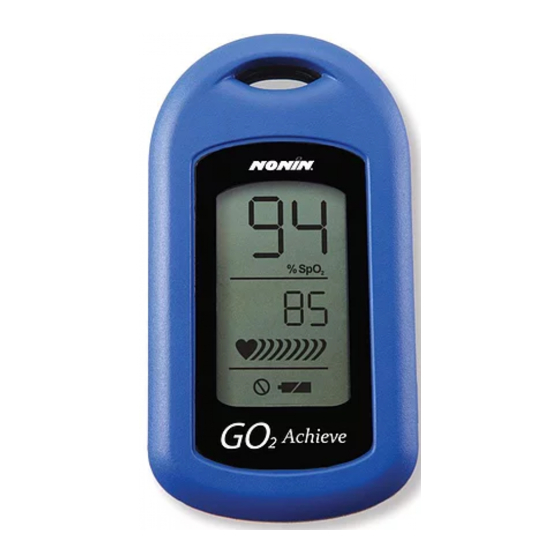
Introduction Thank you for buying the GO Achieve Fingertip Pulse Oximeter. This small, portable device will give you important information about your oxygen saturation (the amount of oxygen in your blood) and pulse rate at your fingertip! The GO Achieve is easy to use and needs no routine maintenance except battery replacement. -
Page 5: Symbols
Symbols The following symbols are associated with your GO Achieve. Symbol Definition of Symbol Consult Instructions for Use Follow Instructions for Use Caution! CE Marking: conformance to EC Directive No. 93/42/EEC for medical devices 0123 Type BF Applied Part (patient isolation from electrical shock). Not for Continuous Monitoring (no alarm for SpO UL Mark for Canada and the United States with respect to electric shock, fire, and mechanical hazards only in accordance with:... - Page 6 Symbol Definition of Symbol Battery Indicates separate collection for electrical and electronic equipment (WEEE). Protected against spraying water and against access to hazardous parts IP33 with a tool, per IEC 60529. Serial Number Sensor disconnect; the pulse signal is not detected or there is excessive motion. Authorized Representative in the European Community Temperature Limitation for storage/shipping Keep dry.
-
Page 7: Intended Use
Intended Use Achieve is intended to measure blood oxygen saturation (%SpO ) (the amount of oxygen in your blood) and pulse rate of both adults and children. It is designed for fingers (not the thumb) between 0.3 and 1.0 inch (0.8 – 2.5 cm) thick. The index finger (pointer finger) is most recommended. - Page 8 Cautions • The GO Achieve might misinterpret excessive movement as good pulse strength. Limit finger movement as much as possible when using the device. • The GO Achieve must be able to measure your pulse properly to give you an accurate reading.
- Page 9 • The GO Achieve may not work if you have poor circulation. Rub your finger to increase circulation, or place the device on another finger. • The GO Achieve measures oxygen saturation of functional hemoglobin. High levels of dysfunctional hemoglobin (caused by sickle cell anemia, carbon monoxide, etc.) could affect the accuracy of the measurements.
- Page 10 • Functional tester cannot be used to assess the accuracy of this pulse oximeter. • Follow local disposal and recycling laws for the GO Achieve and its components, including the battery. • The GO Achieve is a precision electronic instrument and must be repaired by Nonin Technical Service.
-
Page 11: Installing The Battery
Installing the Battery One 1.5 volt AAA-size (LR03) battery powers the GO Achieve for approximately 2400 measurements. Nonin recommends using alkaline batteries (one is included with each new GO Achieve). NOTE: You may use rechargeable batteries; however, they may require more frequent replacement. - Page 12 3. Carefully reposition the battery door. NOTE: Do not force it into place; it fits only when positioned correctly. When battery is low, the battery indicator symbol on the display will flash. Remove battery if the device will be stored for more than 30 days. Replace low battery as soon as possible.
-
Page 13: Applying The Go Achieve To Your Finger
Applying the GO Achieve to Your Finger Hold the GO Achieve with the display facing toward you; slide your finger into the opening at the bottom of the device, as shown at right, until the fingertip touches the built-in stop guide. The index (pointer) finger is recommended. - Page 14 NOTE: Correct positioning of the device on your finger is critical for accurate measurements. While on the finger, do not press the GO Achieve against any surface and do not squeeze or hold it together. The internal spring provides the correct pressure; additional pressure may cause inaccurate readings.
-
Page 15: Activating The Device
Activating the Device The GO Achieve automatically turns on when a finger is inserted. When a finger is inserted, the GO Achieve performs a brief self test, as shown at right. Verify that all segments of the LCD (Liquid Crystal Display) appear during the startup sequence.’... -
Page 16: Reading Your Results
Reading Your Results When you put your finger in the GO Achieve, you’ll notice an LCD display come on. The numbers you see show: • the amount of oxygen in your blood, displayed as %SpO ; and • your Pulse Rate, displayed as a 2 or 3 digit number, measuring the number of times your heart beats per minute. - Page 17 excessive motion. If this symbol does not turn off while your finger is in the device, reposition your finger or switch to a different finger. Percent Oxygen Saturation Pulse Quality Indicator Sensor Disconnect Indicator Pulse Rate Battery Indicator The Battery indicator symbol shows the battery strength (the less the symbol is filled –...
-
Page 18: Care And Maintenance
Care and Maintenance The GO Achieve requires no calibration or periodic maintenance other than battery replacement. Wipe the device with a soft cloth dampened with a mild detergent or 10% bleach solution. Do not use undiluted bleach or any cleaning solution other than those recommended here, as permanent damage could result. -
Page 19: Troubleshooting
(you should fingers. see a change to the Remove and replace battery. pulse indicator if the device is on the finger). If the problem persists, contact Nonin Technical Service. Display blank Finger not properly Reposition finger to activate inserted. the device. - Page 20 Dead battery. Replace battery. If the problem persists, remove the battery and contact Nonin Technical Service. Device may be too cold Allow device to sit at room to operate. temperature for at least 10 minutes.
- Page 21 Troubleshooting Problems Possible Cause Possible Solution No readings Low pulse quality If the indicator is visible and (no reading). the pulse quality bar graph does not show more than 2 bars, try the following: 1. Reposition finger. 2. Warm finger by rubbing. 3.
-
Page 22: Parts And Accessories
WARNING: Certain activities may pose a risk of injury, including strangulation, if the lanyard should become wrapped around your neck. Use the lanyard with caution. For more information about Nonin parts and accessories, contact your distributor, or contact Nonin at (877) 577-2635 (USA and Canada) or (763) 553-9968. -
Page 23: Specifications
Specifications Oxygen Saturation Display Range 0% to 100% Pulse Rate Display Range 18 to 321 beats per minute (BPM) Oxygen Saturation Declared Accuracy Range (A 70% to 100% SpO ± 2 digits Low Perfusion Oxygen Saturation Declared Accuracy Range (A 70% to 100% SpO ±... - Page 24 Temperature (Operating) +41°F to +104°F (5°C to +40°C) Storage/Transportation -22°F to +158°F (-30°C to +70°C) Time (from storage) for monitor to be ready for its intended use: 7 minutes to warm from -30 °C to 5 °C 12 minutes to cool from 70 °C to 40 °C. Device temperature will not exceed 41 °C as measured during a controlled environment test.
- Page 25 Classifications per ANSI/AAMI ES60601-1 and CAN/CSA-C22.2 No. 60601-1 Degree of Protection Type BF-Applied Part Enclosure Degree of Ingress Protection IP33 Mode of Operation Continuous This equipment complies with International Standard IEC 60601-1-2 for electromagnetic compatibility for medical electrical equipment and/or systems. This standard is designed to provide reasonable protection against harmful interference in a typical installation.
-
Page 26: Equipment Response Time
Equipment Response Time Reference 4 Beat Average Time in seconds Specific to this example: The response of the 4-beat average is 1.5 seconds. -
Page 27: Testing Summary
Testing Summary accuracy and low perfusion testing were conducted by Nonin Medical, Inc., as described below: Accuracy Testing During no-motion conditions at an independent research laboratory, SpO accuracy testing is conducted during induced hypoxia studies on healthy, male and female, non-smoking, light- to dark-skinned subjects that are 18 years of age and older. -
Page 28: Warranty
GO Achieve, shall void the warranty. The GO Achieve is warranted for consumer use only. All non-warranty work shall be done at Nonin’s standard rates and charges in effect at the time of delivery to Nonin. - Page 29 Nonin Medical, Inc. 13700 1st Avenue North Plymouth, MN 55441-5443 (763) 553-9968 (877) 577-2635 web site: www.nonin.com e-mail: info@nonin.com MPS, Medical Product Service GmbH Borngasse 20 D-35619 Braunfels, Germany ©2016 Nonin Medical, Inc. 7077-000-06...
- Page 30 Please take a moment to find and record the 9-digit serial number found on the back of your GO Achieve. You’ll need this number if you have to contact Nonin with technical service issues or if you have any questions regarding the use or performance of your pulse oximeter. Nonin’s technical service department can be reached at (877) 577-2635.
Need help?
Do you have a question about the G02 ARCHIEVE and is the answer not in the manual?
Questions and answers