Table of Contents
Advertisement
INSTALLATION
MANUAL
R22 SPLIT SERIES
MODELS
FHC20JEVLK
FHC25JEVLK
FHC30JEVLK
FHC40JEVLK
FHC50JEVLK
FHYC20JEVLK RYD20JEVLK
FHYC25JEVLK RYD25JEVLK
FHYC30JEVLK RYD30JEVLK
FHYC40JEVLK RYD40JEVLK
FHYC50JEVLK RYD50JETLK
RD20JEVLK
RD25JEVLK
RD30JEVLK
RD40JEVLK
RD50JETLK
Installation Manual
English
R22 Split Series
IM-CKE-0911(0)-DAIKIN(SASO)
Part No.: R08019037002
Advertisement
Table of Contents

Subscribe to Our Youtube Channel
Related Manuals for Daikin FHC20JEVLK


Summary of Contents for Daikin FHC20JEVLK
- Page 1 INSTALLATION MANUAL R22 SPLIT SERIES Installation Manual English R22 Split Series MODELS FHC20JEVLK RD20JEVLK FHC25JEVLK RD25JEVLK FHC30JEVLK RD30JEVLK FHC40JEVLK RD40JEVLK FHC50JEVLK RD50JETLK FHYC20JEVLK RYD20JEVLK FHYC25JEVLK RYD25JEVLK FHYC30JEVLK RYD30JEVLK FHYC40JEVLK RYD40JEVLK FHYC50JEVLK RYD50JETLK IM-CKE-0911(0)-DAIKIN(SASO) Part No.: R08019037002...
-
Page 3: Outline And Dimensions
OUTLINE AND DIMENSIONS Indoor Unit All dimensions are in mm Dimension Model FH(Y)C20/25/30JEVLK FH(Y)C40/50JEVLK Outdoor Unit All dimensions are in mm Dimension Model R(Y)D20JEVLK R(Y)D25/30JEVLK Dimension Model R(Y)D20JEVLK R(Y)D25/30JEVLK... - Page 4 Outdoor Unit All dimensions are in mm Dimension Model R(Y)D40JEVLK 1030 826 400 410 746 142 R(Y)D50JETLK...
-
Page 5: Safety Precautions
INSTALLATION MANUAL This manual provides the procedures of installation to ensure a safe and good standard of operation for the air conditioner unit. Special adjustment may be necessary to suit local requirements. Before using your air conditioner, please read this instruction manual carefully and keep it for future reference. This appliance is intended to be used by expert or trained users in shops, in light industry and on farms, or for commercial use by lay persons. - Page 6 For model R(Y)D20JEVLK, R(Y)D25JEVLK, R(Y)D30JEVLK, R(Y)D40JEVLK & R(Y)D50JETLK: 1. After take off the bands, pull out the carton box from the top side of the unit. * This product is not designed for re-packing. In case of re-packing, contact to Daikin Dealer.
-
Page 7: Installation Diagram
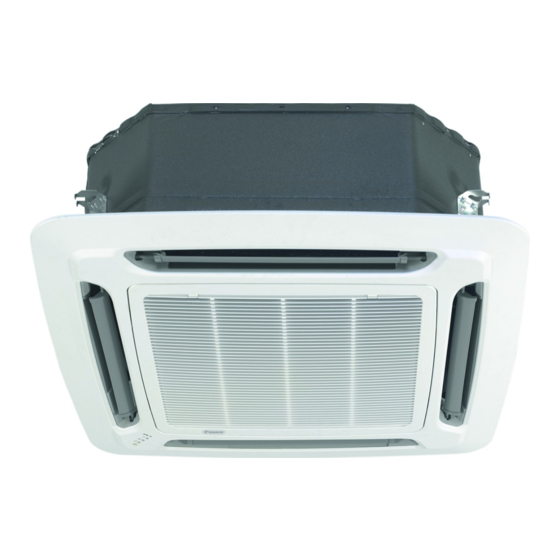
INSTALLATION DIAGRAM Thermal Insulation Indoor Unit Drain Piping Wrap the insulated pipe with the nishing tape from bottom to top Front Panel Air Filter (behind the grille) Air Intake Grille Air Discharge Louver Air Intake Air Intake Outdoor Unit Air Discharge INSTALLATION OF THE INDOOR UNIT Preliminary Site Survey Be sure to read this manual before installing the air-conditioner indoor unit. - Page 8 • Ensure a location where: Drainage can be done easily. Convenient for wiring and piping. Which have enough space for installation and service work. Where no risk of ammable gas leakage. When free from any obstacles in path of cool air discharge and warm air return and must allow spreading of air throughout the room (near the center of the room).
- Page 9 Drain Piping Work • Avoid installing the drain pipe in upward gradient after the drain connection. Flexible Hose • Ensure the height of drain pipe from ceiling is 700mm or Pipe Clamp less if it is necessary to increase the height of drain pipe to prevent water leak.
- Page 10 NOTE Install the front frame panel rmly to prevent cool air leakage which will cause condensation and water dripping. Indoor Unit Cool Cool Air Leak Air Leak Ceiling Board Ceiling Board Panel Panel Grille Lock Cover (The moving part protection for user direct touching) Grille lock cover must be installed as the gure below.
- Page 11 Wires Installation Figure A Figure A and Figure B shows the location of cover wire in FH(Y)C unit. Steps to install power supply wires and wires from outdoor unit. Remove wire cover by removing 2 screws as shown in Figure C. Wires will go through the hole as shown in Figure D and E respectively without crossing the height of the hole.
- Page 12 INSTALLATION OF THE OUTDOOR UNIT As condensing temperature rises, evaporating temperature rises and cooling capacity drops. In order to achieve maximum cooling capacity, the location selected for outdoor unit should fulfill the following requirements: • Install the condensing (outdoor) unit in a way such that the hot air distributed by the outdoor condensing unit cannot be drawn in again (as in the case of short circuit of hot discharge air).
-
Page 13: Installation Clearance
INSTALLATION CLEARANCE • Outdoor units must be installed such that there is no short circuit of the hot discharge air or obstruction to smooth air ow. Select the coolest possible place where intake air should not be hotter than the outside temperature (refer to operating range). - Page 14 Piping Works And Flaring Technique • Do not use contaminated or damaged copper tubing. If any pipings, evaporator or condenser had been exposed or had been opened for 15 seconds or more, the system must be vacuumed. Generally, do not remove plastic, rubber plugs and brass nuts from the valves, fittings, tubings and coils until it is ready to connect suction or liquid line into valves or fittings.
-
Page 15: Electrical Wiring Connection
IMPORTANT : * These values are for information only. They should be checked and selected to comply with local and/or national codes and regulations. They are also subject to the type of installation and size of conductors. ** The appropriate voltage range should be checked with data label on the unit. FHC20JEVLK - RD20JEVLK FHC25JEVLK - RD25JEVLK COMP... - Page 16 FHC40JEVLK - RD40JEVLK COMP COMP Outdoor Unit Terminal Block Interconnection Cable Indoor Unit Terminal Block Power Supply Cable There must be an all pole disconnection in the supply mains with a contact separation of at least 3mm. Model Indoor FHC40JEVLK Outdoor RD40JEVLK Voltage range**...
- Page 17 FHYC20JEVLK - RYD20JEVLK FHYC25JEVLK - RYD25JEVLK Outdoor Coil Sensor Interconnection Cable Indoor Unit Terminal Block COMP COMP Outdoor Unit Terminal Block Power Supply Cable There must be an all pole disconnection in the supply mains with a contact separation of at least 3mm. Model Indoor FHYC20JEVLK...
- Page 18 FHYC40JEVLK - RYD40JEVLK Outdoor Coil Sensor Outdoor Unit Terminal Block Indoor Unit COMP COMP Interconnection Cable Terminal Block Power Supply Cable There must be an all pole disconnection in the supply mains with a contact separation of at least 3mm. Model Indoor FHYC40JEVLK...
- Page 19 • All wires must be firmly connected. • Make sure all the wire do not touch the refrigerant pipings, compressor or any moving parts. • The connecting wire between the indoor unit and the outdoor unit must be clamped on the wire clamps. •...
-
Page 20: Vacuuming And Charging
VACUUMING AND CHARGING Vacuuming is necessary to eliminate all moisture and air from the system. The series II Outdoor Unit is provided with flare valve fittings. Vacuuming The Piping And The Indoor Unit Refrigerant Piping Allen key Flare nut Except for the outdoor unit which is pre-charged with refrigerant, the indoor unit and the refrigerant connection pipes must be air- purged because the air containing moisture that remains in the refrigerant cycle may cause malfunction of the compressor. -
Page 21: Additional Charge
Outdoor RYD50JETLK Additional charge [g/m] Example: FHC20JEVLK & RD20JEVLK with 13m piping length, additional piping length is 5.5m. Thus, Additional charge = 5.5[m] x 22[g/m] = 121[g] ! CAUTION * When connect with FHC25JEVLK and FHYC25JEVLK, additional 0.2kg refrigerant charge is needed for 3.0m to 7.5m piping length. - Page 22 SPECIAL PRECAUTIONS WHEN CHARGING UNIT WITH SCROLL COMPRESSORS These precautions are intended for use with Scroll compressors only with R22 refrigerants but are not applied to others competitive Scroll compressors. Scroll compressors have a very high volumetric efficiency and quickly pump a deep vacuum if there is insufficient refrigerant in the system or if refrigerant is added too slowly.
-
Page 23: Optional Functions
There are many ways of charging liquid in a “controlled manner” into the suction side:- Use valve A on the manifold gauge set Use the valve on the refrigerant cylinder Charge through a Shredder valve Use a hose with a Shredder valve depressor Charge into the suction side at some distance from the compressor All of the above Charging procedures –... -
Page 24: Fault Diagnosis
INDICATOR LIGHTS FAULT DIAGNOSIS Wireless Controller When there is infrared remote control operating signal, the signal receiver on indoor unit will make a <beep> for signal acceptance con rmation. Wired Controller If there is any abnormal condition detected, wired controller will blink the error code. Event Power LED Timer LED... -
Page 25: Overall Checking
OVERALL CHECKING • Ensure that: Is there any abnormal sounds from the unit? The unit has been mounted solidly and rigid in Is there any abnormal vibrations on the unit or the position. piping? The piping and connections are leak-proof after the Is the drainage of water smooth? charging. -
Page 26: Troubleshooting
TROUBLESHOOTING For any enquiries on spare parts, please contact your authorized dealer. If any malfunction of the air conditioner unit is noted, immediately switch off the power supply to the unit. Check the following fault conditions and causes for some simple troubleshooting tips. Fault Causes / Action The compressor does not start operate after 3 minutes... -
Page 27: Specifications
COUNTRY OF ORIGIN INDOOR UNIT Malaysia OUTDOOR UNIT NOTE: This product is not designed for repacking. In case of re-packing, contact to Daikin Dealer. ** Additional refrigerant charge of 0.2kg is needed in order to achieve the stated performance data. 1-25... - Page 28 7DB º C/6WB º C 3.40 3.08 NET WEIGHT INDOOR UNIT OUTDOOR UNIT REFRIGERANT 1.75 2.20 Malaysia COUNTRY OF ORIGIN INDOOR UNIT Malaysia OUTDOOR UNIT NOTE: This product is not designed for repacking. In case of re-packing, contact to Daikin Dealer. 1-26...
- Page 29 7DB º C/6WB º C 2.92 NET WEIGHT INDOOR UNIT OUTDOOR UNIT REFRIGERANT 2.60 Malaysia COUNTRY OF ORIGIN INDOOR UNIT Malaysia OUTDOOR UNIT NOTE: This product is not designed for repacking. In case of re-packing, contact to Daikin Dealer. 1-27...
- Page 30 MEMO...
- Page 32 Lot 60334, Persiaran Bukit Rahman Putra 3, Head offi ce: Taman Perindustrian Bukit Rahman Putra, Umeda Center Bldg., 2-4-12, Nakazaki-Nishi, Kita-ku, 47000 Sungai Buloh, Osaka, 530-8323 Japan Selangor Darul Ehsan, Tokyo offi ce: Malaysia. JR Shinagawa East Bldg., 2-18-1, Konan, Minato-ku, Tokyo, 108-0075 Japan http://www.daikin.com/global_ac/...
Need help?
Do you have a question about the FHC20JEVLK and is the answer not in the manual?
Questions and answers