Table of Contents
Advertisement
Quick Links
Advertisement
Table of Contents

Related Manuals for Zip HydroTap series


Summary of Contents for Zip HydroTap series
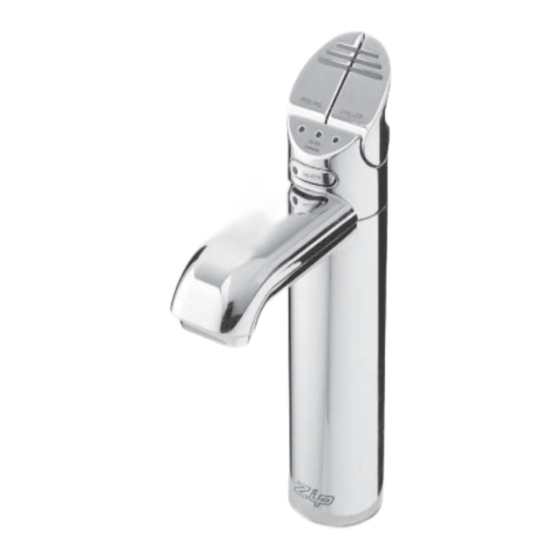
- Page 1 Installation and Operating Instructions ® Zip HydroTap Filtered chilled drinking water for kitchens and tea rooms. Affix Model Number Label Here 81759 HydroTap Disabled lever HydroTap Zip Hydro Tap Installation and Operating Instructions - 81759 - February 2013 v2.01 Page 1 of 16...
-
Page 2: Table Of Contents
Contact Details ........16 NOTE: All plumbing must comply with AS3500.4.1 & AS3500.4.2 All electrical must comply with AS/NZS3350.1, AS/NZS3350.2.75 All refrigeration must comply with AS/NZS3350.2.24 Page 2 of 16 Zip Hydro Tap Installation and Operating Instructions - 81759 - February 2013 v2.01... -
Page 3: Read These Warnings First
Read These Warnings First Safety Do not allow young children, handicapped or infirm persons, to use the Zip HydroTap without supervision. Refrigerant The Zip HydroTap Chilling unit contains 134A refrigerant under pressure. No part of the unit should be exposed to a naked flame. Maintenance of the refrigeration unit must be carried out by an accredited service provider or qualified refrigeration mechanic. -
Page 4: Models Covered By These Instructions
• Power supply 220-240 Volt AC, for connection to the heater via a 10 amp G.P.O. Page 4 of 16 Zip Hydro Tap Installation and Operating Instructions - 81759 - February 2013 v2.01... -
Page 5: Special Tools Required
Spider Clamp and the underside installation is complete. of the sink top. The Spider clamp must rest on a flat surface. See location as shown. Zip Hydro Tap Installation and Operating Instructions - 81759 - February 2013 v2.01 Page 5 of 16... -
Page 6: Step B - Installing The Undersink Unit
Before positioning the heater connect the braided water inlet hose (supplied) to the cold water inlet on the unit. This is located at the rear of the unit. Position the Zip HydroTap undersink unit as close as possible to directly beneath the Zip HydroTap tap head. -
Page 7: Step D - Connecting The Water Supply
Energy Saver Settings are required, the instructions for installing these are described on page 11 “Setting the Energy Saver Timer”. White Light Blue Light Filter Status Chilled Zip Hydro Tap Installation and Operating Instructions - 81759 - February 2013 v2.01 Page 7 of 16... -
Page 8: Font Installation Procedure
Font installation procedure A font kit installation is available for this product and is sold separately as an accessory. For details of the available font kits, please contact your Zip customer service provider. The font instalation instructions and mounting template are supplied with the font kit. -
Page 9: Replacing The Filter
After approx 10 seconds it will default to the consumption. selected mode. 14. Close the door to secure the appliance. Zip Hydro Tap Installation and Operating Instructions - 81759 - February 2013 v2.01 Page 9 of 16... -
Page 10: Setting The Energy Saver Timer
Note: The Hydrotap may be temporarily activated during the On / Off Mode. By operating the levers, the unit will go into normal operation and then remain in an “ON” cycle, until the next “OFF” cycle. Page 10 of 16 Zip Hydro Tap Installation and Operating Instructions - 81759 - February 2013 v2.01... -
Page 11: Auxilliiary Fan Attachment
Scroll through the Menu until the Dispense Cold screen is displayed, then use the adjust buttons to set the required dispensing time for the Cold Water. Zip Hydro Tap Installation and Operating Instructions - 81759 - February 2013 v2.01 Page 11 of 16... -
Page 12: Trouble Shooting
Do not spray water over the tap as it may damage the low-voltage electronics. Undersink units must never be located near or cleaned with water jets. Page 12 of 16 Zip Hydro Tap Installation and Operating Instructions - 81759 - February 2013 v2.01... -
Page 13: Exploded View Chiller Module And Spares
90041 ø35mm CHASSIS PUNCH 90635 LEVEL SENSOR KIT COLD TANK 99108 FILTER HEAD KIT 90636 RELAY COMPRESSOR KIT 91351 GLOBALPLUS FILTER HEAD KIT Zip Hydro Tap Installation and Operating Instructions - 81759 - February 2013 v2.01 Page 13 of 16... -
Page 14: Notes
Notes Page 14 of 16 Zip Hydro Tap Installation and Operating Instructions - 81759 - February 2013 v2.01... - Page 15 Notes Zip Hydro Tap Installation and Operating Instructions - 81759 - February 2013 v2.01 Page 15 of 16...
-
Page 16: Contact Details
The standard glass is 200 ml (7 fl oz). The terms “Zip” and “HydroTap” are registered trade marks of Zip Heaters (Aust) Pty Ltd. Zip products described in this publication are manufactured under one or more of the following patents: AU675601, AU637412, AU635979, GB0422305, GB2065848, US4354049, US5103859, and US5099825.
Need help?
Do you have a question about the HydroTap series and is the answer not in the manual?
Questions and answers