Toshiba T300MVi MEDIUM VOLTAGE Instruction Manual
Hide thumbs
Also See for T300MVi MEDIUM VOLTAGE:
- Specifications (6 pages) ,
- Interface manual (56 pages)

Related Manuals for Toshiba T300MVi MEDIUM VOLTAGE


Summary of Contents for Toshiba T300MVi MEDIUM VOLTAGE
- Page 1 T300MVi MEDIUM VOLTAGE ADJUSTABLE SPEED MOTOR DRIVE NSTRUCTION ANUAL TOSHIBA INTERNATIONAL CORPORATION Document Number: IF08CZ00 June, 2009...
- Page 2 TOSHIBA INTERNATIONAL CORPORATION 13131 WEST LITTLE YORK HOUSTON, TEXAS 77041 Tel: 1-713-466-0277 1-800-231-1412 Printed in U.S.A. - ii -...
- Page 3 Adjustable Speed Drive Please complete the Warranty Card supplied with the ASD and return it to Toshiba by prepaid mail. This will activate the 12 month warranty from the date of installation; but, shall not exceed 18 months from the date of purchase.
- Page 4 TOSHIBA is a registered trademark of the Toshiba Corporation. All other product or trade references appearing in this manual are registered trademarks of their respective owners.
- Page 5 General Safety Instructions DO NOT attempt to install, operate, maintain or dispose of this equipment until you have read and understood all of the product safety information and directions that are contained in this manual. Safety Alert Symbol The Safety Alert Symbol indicates that a potential personal injury hazard exists. The symbol is comprised of an equilateral triangle enclosing an exclamation mark.
- Page 6 Special Symbols To identify special hazards, other symbols may appear in conjunction with the DANGER, WARNING and CAUTION signal words. These symbols indicate areas that require special and/or strict adherence to the procedures to prevent serious injury to personnel or death. Electrical Hazard Symbol A symbol which indicates a hazard of injury from electrical shock or burn.
- Page 7 If the labels are damaged or if additional labels are required, contact your Toshiba representative for additional labels. Labels attached to the equipment are there to provide useful information or to indicate an imminently hazardous situation that may result in serious injury, severe property and equipment damage, or death if the instructions are not followed.
- Page 8 RATING labels that will be found on the equipment are shown below: Input Controller Rating Label Note: If no input controller is supplied, this label will not be present. Refer to label on upstream equipment for rating data. Adjustable Speed Drive Rating Label Inverter Power Module Rating Label Note: The above labels are shown blank.
- Page 9 INFORMATION labels that will be found on the equipment are shown below: Torque Label Service Label LISTED UL Label (for UL Listed drives) CE Label (for drives designed for use in the European Union) - ix -...
- Page 10 • Modification of this equipment is dangerous and must not be performed except by factory trained representatives. When modifications are required contact your Toshiba representative. • Inspections may be required before and after moving installed equipment.
- Page 11 Handling and Storage • Use proper lifting techniques when moving the ASD; including properly sizing up the load, getting assistance, and using a forklift if required. • Store in a well-ventilated covered location and preferably in the original carton if the equipment will not be used upon receipt.
- Page 12 Installation Precautions Location and Ambient Requirements • Adequate personnel working space and adequate illumination must be provided for adjustment, inspection, and maintenance of the equipment. In the U.S., refer to NEC Article 110-34 for requirements. Outside the U.S., follow applicable local electrical code requirements. •...
- Page 13 Conductor Routing and Grounding • Use separate metal conduits for routing the input power, output power, and control circuits. • A separate ground cable should be run inside the conduit with the input power, output power, and control circuits. • DO NOT connect control terminal strip return marked CC to earth ground. •...
- Page 14 Please contact Toshiba for application-specific information and for training support. • The Toshiba ASD is part of a larger system and the safe operation of the device will depend on observing certain precautions and performing proper system integration.
- Page 15 • Insulators, machine guards, and electrical safeguards may fail or be defeated by the purposeful or inadvertent actions of workers. Insulators, machine guards, and electrical safeguards are to be inspected (and tested where possible) at installation and periodically after installation for potential hazardous conditions.
- Page 16 System Setup Requirements • When using the ASD as an integral part of a larger system, it is the responsibility of the ASD installer or maintenance personnel to ensure that there is a fail-safe in place, i.e., an arrangement designed to switch the system to a safe condition if there is a fault or failure. •...
- Page 17 Wait for at least the minimum time indicated on the label and ensure that the Charge LED has gone out before opening the door of the ASD once the ASD power has been turned off. • Do Not attempt to disassemble, modify, or repair the ASD. Call your Toshiba sales representative for repair information.
- Page 18 This page intentionally left blank. - xviii -...
-
Page 19: Table Of Contents
CONTENTS INTRODUCTION........................ 1 INITIAL COMMISSIONING ....................2 Confirmation of Wiring..................... 2 Start-Up and Test......................2 Cautions on Changing Setting Parameters ..............3 INSPECTIONS AND MAINTENANCE ................4 Daily Inspections ......................4 Regular Inspections ......................4 Main Components ......................5 Cautions on Handling Printed Wiring Boards .............. 5 Parts to be Regularly Renewed.................. - Page 20 Control .......................... 34 Vector Control Block Diagram ..................34 Speed Reference ......................35 Speed Control ........................36 Simulator Follower Control (SFC, optional control used with a speed sensor)....37 Torque Reference and Current Reference ..............37 IQ Limit (Torque current limit)..................38 D-Q Axis Current Control ....................39 Output Voltage References ....................40 Speed Feedback (Option) ....................41 Resolver ........................
- Page 21 Frame G4P module lifting and installation..............66 Frame G4P module lifting and installation continued ............ 67 Frame H4P drive lifting and assembly................68 Frame H4P drive main cable installation............... 69 Frame H4P module lifting and installation ..............70 Frame H4P module lifting and installation continued ............ 71 Frame B2 2400V module lifting and installation Type 1 ..........
-
Page 22: Introduction
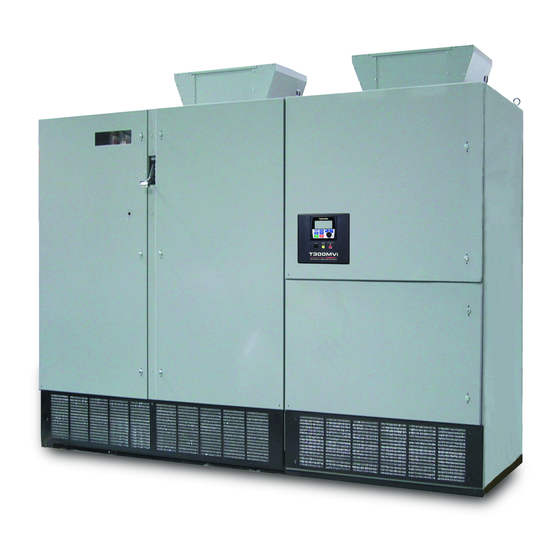
INTRODUCTION Thank you for purchasing the T300MVi Medium Voltage ASD. This adjustable frequency, solid- state AC drive features a 3φ input isolation transformer with a 24-pulse converter design, a 32-bit CPU, and a three-unit power module inverter section providing a 5 level output for 4160/3300V drives and 3 level output for 2400V drives. -
Page 23: Initial Commissioning
INITIAL COMMISSIONING CAUTION The drive should be commissioned by qualified personnel only. Below are some general steps required for commissioning. CAUTION Confirmation of Wiring Make the following final checks before applying power to the unit: 1) Confirm that source power is connected to terminals L1, L2, L3 (R, S, T). Connection of incoming source power to any other terminals will damage the drive. -
Page 24: Cautions On Changing Setting Parameters
CAUTION Cautions on Changing Setting Parameters The setting data of the T300MVi MV is saved in an EEPROM, non-volatile memory. When the micro controller initializes at power-up, it reads the EEPROM data and copies it to the RAM (Random Access Memory). From then on, the micro controller controls the drive using the values in the RAM. When the setting parameters are changed, by the display-keypad or personal computer ("support tool"), only the execution parameters in RAM are changed. -
Page 25: Inspections And Maintenance
INSPECTIONS AND MAINTENANCE CAUTION DANGER Maintenance and inspection is a particularly effective means to help prevent failures and reduce down time. Creating equipment specific inspection and maintenance check sheets can help to perform maintenance and inspection effectively. Detailed inspections and regular maintenance should be carried out in short cycles initially until a schedule reflecting the site-specific conditions can be determined. -
Page 26: Main Components
INSPECTIONS AND MAINTENANCE (cont’d) CAUTION Main Components 1) Cooling fan - Check to see if there is any abnormality with airflow, increased fan noise, etc. 2) Air filter - Visually check if the air filter is clogged. Gently tap it outside the room to remove loose dust. -
Page 27: Parts To Be Regularly Renewed
3 years Sooner if dust or dirt damages bearings Air filter 6 months Can also be cleaned. Aluminum Electrolytic 7 years Contact Toshiba for Capacitors replacement of these On Circuit Boards devices Oil-filled capacitor 20 years Main circuit Control power supply... -
Page 28: Recommended Spare Parts
This is a general list of spares. Check the specific job drawings for other components that may need to be spared. *** It is recommended that failed power modules be replaced as a unit and that the failed modules be returned to Toshiba for repair and testing. -
Page 29: Preparations For Inspection And Maintenance Of Equipment (Powering-Off)
Preparations for Inspection and Maintenance of Equipment (Powering-Off) 1) Stop the equipment and check that the motor has Stop the completely stopped. equipment 2) Press the interlock switch on the operation panel (See Fig. 1 in the next section). The light on the switch should turn on. Main power 3) Turn off the external main power supply. -
Page 30: Recovery After Inspection And Maintenance Of Equipment (Powering-On)
Recovery after Inspection and Maintenance of Equipment (Powering-On) 1) Check the drive to make sure no tools or other foreign objects were left in the Check for tools. drive. Remove the 2) Remove any grounding devices that may have been attached to the main grounding rod circuit input terminal. -
Page 31: Overview
OVERVIEW Display/Keypad (MVi-EOi) The following figure shows the display/keypad of the equipment. Refer to the keypad operation manual for more details on its use. MVi-EOI Diagram Figure 1. - 10... - Page 32 1. Graphical LCD – Displays user information in text and numerical form. 2. Local/Remote LED – This green LED is illuminated when in local mode, and extinguished while in remote mode. 3. Status LED: • Not ready and not running – Both Red and Green off. •...
-
Page 33: How To Handle Faults
Light Emitting Diode MCCB Molded Case Circuit Breaker Power electronics Processor for Various Inverter control Integration (VII=7). Toshiba dedicated power electronics control 32-bit micro-controller. Switching power supply that providing ±15 VDC and +5 VDC for boards. Random Access Memory Initialize Act of initialization. -
Page 34: General Specifications (Structure)
General Specifications (Structure) The general specifications (structure) of the equipment are shown in the following table. General Specifications (Structure) Item Standard specification Additional optional Remarks specification Applicable standard UL, NEMA Ambient Temperature 0 to 40°C conditions Humidity Max 95%, no condensation At no time should the drive be subjected to... -
Page 35: Altitude And Temperature De-Rating
7.5% 7,000’ 10.2% 8,000’ 12.9% 9,000’ 15.7% 10,000’ 18.4% ** Applications above 5000 feet may also require special magnetics. Consult Toshiba Engineering. Temperature Derate Chart Ambient Temperature % Amp Output Derate 40 C 0.0% 45 C 7.5% 15.0% 50 C Motor Cable Length Below are cable length guidelines for use with most standard industrial motors. -
Page 36: General Specifications (Electrical)
General Specifications (Electrical) The general (electrical) specifications of the equipment are shown in the following table. General (Electrical) Specifications Item Standard specification Standard Additional Remarks Optional Optional Specification Specification Frame Sizes 4160V Frame 0 See ratings table for Frame 1 specific kVA Frame 2 ratings... -
Page 37: General Specifications (Control)
General Specifications (Control) The general (control) specifications are shown in the following table. General Control Specifications Item Standard Additional Remarks specification optional specification Maximum output frequency 75 Hz 120 Hz Speed sensor (PG pulse output) Basic Basic control system Volts/Hertz Sensor Type Sensor type vector control... - Page 38 General Control Specifications Continued: General Control Specifications Item Standard specification Option Remarks Transmission PC interface None MODBUS Requires DEVICE_NET optional board. PROFIBUS TL-S20 Comissionin Ethernet (with modular jack attached to g/Maintenan keypad) ce Tool Cubicle LED 1 lamp READY: Operation preparation READY and display/ completed (Green)
-
Page 39: Rating Specifications
Rating Specifications NEMA Type 1 Standard Ratings Table Standard Input Motor Output Output Output Current Overload Current Output Voltage Model Voltage 100% 110~115%-60 s. Frame & Frequency M3A22030S 2400 V 0~2400 V M3A22035S 0~75 Hz M3A22040S M3A22045S M3A22050S M3A22060S M3A22070S M3A22080S M3A22090S M3A22100S... -
Page 40: Protective Functions
Protective Functions The main protective functions are shown in the following table. For other faults or more details, refer to the troubleshooting manual. Protective Function Table Medium Light Heavy Fault Hardware Software Fault Fault Start Item Abbreviation Interlock Detection Detection Coast Decel Stop Alarm... - Page 41 Overload alarm OL_A Overload (5 minutes) Overload (20 minutes) OL20 Over speed Output frequency high OSS_F0 DC bus over-voltage OV_xP positive/negative OV_xN Panel safety switch P_SW Parameter setting error PARA_ERR PLL phase error PHASE_ERR PLD error PLD_ERR PLL error Pre-charge CTT trip PRE_CTT Pre-charge CTT alarm PRE_CTT_F...
-
Page 42: General Cubicle Structure
General Cubicle Structure The configuration and dimensions of the equipment are described below. Cubicle Structure and Dimensions The equipment is made up of one or more cabinets containing the transformer, incoming terminals, converter section, and the inverter section. All components can all be accessed from the front. This outline is for the standard Frame 1 model. -
Page 43: Dimensions And Weights Of Equipment
Dimensions and Weights of Equipment Dimensions and weights of the complete drive, including the power modules Standard Model Dimensions – inches (mm) Number Input Conv Output Conv total Sect Sect 1 Sect Sect 2 Sect M3A22030-050S 103.7 (2634) 74 (1880) 74 (1880) 43.4 (1102) M3A22060-100S 103.7 (2634) - Page 44 Dimensions and weights of the inverter power modules Drive Model Number Module Dimensions – inches (mm) Weight lbs (kg) Width Depth Height M3A22030-050S 9.64 (245) 27.00 (686) 24.21 (615) 120 (54) M3A22060-100S 11.60 (295) 30.18 (767) 31.55 (801) 235 (107) M32A22060-100S 9.88 (251) 26.75 (679)
-
Page 45: Interface
INTERFACE The interface between the drive system and external devices is divided into two categories: power supply system and control system. Power Supply Interface and Ground The power supplies required are the main circuit input of 2400/4160V and (optional) control power supply of AC480V-60 Hz. -
Page 46: Motor Interface
INTERFACE (cont’d) Motor Interface If armored and shielded cables are to be used, be sure to connect the shield drain or armor to the ground bus provided in the drive equipment near the motor terminals (U, V, W). Ensure that the motor is connected properly at the junction box and properly insulated to protect against accidental shorting or grounding. -
Page 47: Pulse Signal Output
INTERFACE (cont’d) Pulse Signal Output If a speed sensor is used, speed feedback signals can be output as pulse signals. The PG pulse output circuit is shown in the following figure. The power supply for the pulses should supplied from an outside source in a range of 12 V to 24 V. - Page 48 INTERFACE (cont’d) Digital Input Descriptions ** Name Description Brake release command issued 1:Brake release sent, 0:Brake release not sent (Use when open command sent by other equipment) Brake answer back 1: Brake is open, 0: Brake is closed Brake closed 1: Brake function normal, 0:Brake forced closed Input breaker state 0:Breaker open, 1:Breaker closed (“a”...
- Page 49 QSTOP Quick stop command 1:Quick stop, 0:Normal stop R-TEN Reverse tension command 1:Reverse tension control on, 0:Forward tension control on SEL_DI Start/Stop/Reference/direction select 0:Use EXT0,START0,STOP0,SP_REF_AIN1,DIR0_DI 1:Use EXT1,START1,STOP1,SP_REF_AIN2,DIR1_DI SPA0 Spare 0 Spare 0 (For future use) SPA1 Spare 1 Spare 1 SPA2 Spare 2 Spare 2...
-
Page 50: Digital Output
INTERFACE (cont’d) Digital Output There are 6 programmable digital outputs (DO0-5). DO5 is used internally for control of the input contactor and should not be changed. The other 5 outputs are available for optional control or indication functions. These relays can be programmed to any bit in any word in the drive. The most commonly used bits can be found in the SSEQ_OUT1 and SSEQ_OUT2 words. -
Page 51: Analog Output
INTERFACE (cont’d) [Setting examples] • Example 1: When a 0~8V (0 to 100%) speed reference is input to AIN1. Set the input jumpers as per the drawings for single ended voltage input. Set a 0 to 100% (count 0 to 25000) speed reference signal at 0 to +8 V so that it is stored in SP_REF_AIN1. Input The input characteristic is shown in the right hand figure. -
Page 52: Additional Analog Outputs
INTERFACE (cont’d) Additional Analog Outputs Six channels (D/A1 to D/A5 and Amp A) are provided as additional analog outputs. These outputs are wired out to terminal block TB-AO. Channel A is direct current feedback from the U phase Hall CT. The other five channels are programmable ±10vDC outputs. -
Page 53: Circuit Operation
CIRCUIT OPERATION Main Circuit Configuration The following circuit shows the configuration of the T300MVi 4160V drive. Input AC is supplied through an input controller to transformer T1. The transformer has four (4) isolated secondary windings per output phase, each feeding a 3-phase full wave rectifier bridge. The output of the rectifiers is connected to three inverter power modules that produce 3-phase AC power at the frequency and voltage required by the motor. - Page 54 CIRCUIT OPERATION (cont’d) The AC output voltage of the each inverter power module is 2400V line to neutral. With phase voltages shifted 120° from one other, an output voltage of 4160V between phases is generated. The output voltage closely approximates a sine wave. This is shown in the output waveform below. This produces a sine wave motor current with low distortion.
-
Page 55: Control
CIRCUIT OPERATION (cont’d) Control The following figure shows the T300MVi Vector Control block diagram. Vector Control Block Diagram D/q axis D/q axis Speed Torque Voltage Speed current current control reference control reference reference reference reference limit Tension ld/lq current detection control Speed detection (Option) -
Page 56: Speed Reference
CIRCUIT OPERATION (cont’d) Speed Reference An external speed reference with count 25000/100% weighting is input by serial transmission or analog input and subjected to rate processing and limit processing to output an SP_R signal. The sign of the speed reference signal is "+" for normal rotation and "-" for reverse rotation. EXT=1 SEL_DI=1 25000 count/100%... -
Page 57: Speed Control
CIRCUIT OPERATION (cont’d) Speed Control The following figure shows the speed control block diagram. The speed reference signal SP_R and the filtered speed feedback are input and the deviation between these two is subjected to proportional/integral operations and output. After this signal is subjected to torque filtering and torque limit processing, a torque reference SFC_T_R is output. -
Page 58: Simulator Follower Control (Sfc, Optional Control Used With A Speed Sensor)
CIRCUIT OPERATION (cont’d) Simulator Follower Control (SFC, optional control used with a speed sensor) When the machine has torsional resonance, the (SFC) function may be used to try to reduce the torsional vibration and increase the speed response. With SFC, the speed regulator output signal is input to an inertia compensation block. This block produces an estimated speed signal. -
Page 59: Iq Limit (Torque Current Limit)
CIRCUIT OPERATION (cont’d) IQ Limit (Torque current limit) The IQ limit has a flat characteristic from 0 to base speed and tapers from base to top speed. The following settings are used to adjust the limits. LMT_IQ_BAS: Base speed torque current limit. Set 110%, 115%, etc. according to OL specification of the drive. -
Page 60: D-Q Axis Current Control
CIRCUIT OPERATION (cont’d) D-Q Axis Current Control The figure on the following page shows the block diagram of D-Q axis current control. This system controls the current of an induction motor by separating it into a magnetic flux (Field) component and a torque component. This drive controls the current on the D-Q coordinates. It can control the current to an AC motor as a DC value, achieving high performance control irrespective of output frequencies. -
Page 61: Output Voltage References
CIRCUIT OPERATION (cont’d) Output Voltage References (1) Output voltage references ED_R and EQ_R (the results of the current regulator) and the flux angle are input into a two to three phase conversion block. This block outputs the phase voltage references to the PWM (pulse width modulation) controller. -
Page 62: Speed Feedback (Option)
CIRCUIT OPERATION (cont’d) Speed Feedback (Option) As an option, a Resolver or a Pulse Generator (PG) can be selected for speed feedback. Speed control with a Tach Generator is not available because Tach Generator performance is poor. Resolver A resolver is an analog feedback device that used for speed feedback. Two sinewave excitation signals (sine and cosine) are sent to the resolver and two signals (sine and cosine) are returned to the drive. -
Page 63: Control Board Configuration
CIRCUIT OPERATION (cont’d) Control Board Configuration The boards in the following table are used in the drive. The figure below shows the control board configuration. Boards Used Board Name Device Main function ARND-3110(*) Main control circuit ARND-3126B GSD3+ Gate signal distribution circuit ARND-8205(*) Optical gate signal circuit (electrical/optical signal conversion) -
Page 64: Operation
OPERATION The powering-on operation must follow a certain sequence. Failing to observe the powering-on sequence described here may cause unnecessary stress on the equipment. Be sure to observe the powering-on sequence. WARNING While the equipment is in operation and the motor is running, do not turn off the main circuit power supply or control power supply under any circumstances. -
Page 65: Pre-Operation Check Points
OPERATION (cont’d) Pre-Operation Check Points Check the following points before starting the operation. 1) Wiring is correct. 2) A voltage of 2400 V, or 4160 V, ±10% can be supplied as the input power supply voltage. 3) A voltage of 480 VAC ±10% can be supplied as the control power supply voltage. 4) The ground bus and any shielded wires are grounded. -
Page 66: Data Control
This requires the use of the optional commissioning software. The software and training is available through Toshiba. FAULT AND RECOVERY Cautions when Handling Faults CAUTION When a fault occurs, before resetting, understand the fault code. -
Page 67: Repair
Cautions on Repair • Be sure to use only the renewal parts specified by Toshiba. Parts other than those specified by Toshiba may not only not demonstrate the stipulated performance but also affect the safety. If spare parts are not available, contact Toshiba to order them or ask for replacement of parts. -
Page 68: Drive Installation Drawings
DRIVE INSTALLATION DRAWINGS Frame 0 4160V module lifting and installation WARNINGS Power Module Removal LIFT HERE Disconnect power and wait 15 (cont'd) minutes to ensure capacitors are 8. Using module lifting discharged before performing attachment and lifter, inspection or maintenance. lift module from tray. -
Page 69: Frame 1 Drive Lifting And Assembly (Cont'd)
DRIVE INSTALLATION DRAWINGS (cont’d) Frame 1 drive lifting and assembly (cont’d) TO MOVE THE SECTIONS USE A FORKLIFT OF ADEQUATE CAPACITY LIFT FROM THE SLOTS IN THE CHANNEL BASE ON THE TRANSFORMER SECTION. THE INVERTER SECTION IS SHIPPED WITH 4x4 POSTS ATTACHED TO BOTTOM. MAKE SURE THE FORKS EXTEND ENTIRELY THROUGH THE SECTION. -
Page 70: Frame 1 2400V Module Lifting And Installation
DRIVE INSTALLATION DRAWINGS (cont’d) Frame 1 2400V module lifting and installation LIFT HERE WARNINGS Power Module Removal Inverter cabinet is top heavy. (cont'd) Cabinet must be anchored to 6. Pull slide tray out until LIFTING ATTACHMENT floor before withdrawing power slides lock. -
Page 71: Frame 2 Drive Lifting And Assembly
DRIVE INSTALLATION DRAWINGS (cont’d) Frame 2 drive lifting and assembly - 50... -
Page 72: Frame 2 Drive Main Cable Installation
DRIVE INSTALLATION DRAWINGS (cont’d) Frame 2 drive main cable installation - 51... -
Page 73: Frame 2 Module Lifting
DRIVE INSTALLATION DRAWINGS (cont’d) Frame 2 module lifting LIFTING PROVISIONS 2 LIFTING PROVISIONS ARE AVAILABLE Lift Here Lifting Attachment 1. Load or remove power module from truck GCI6723G055 using lifting attachment GCI6722G055 and a lifting device rated for 750 lbs or more. Secure lifting attachment to power module using (4) 3/8-16 bolts provided. -
Page 74: Frame 2 4160V Module Installation
DRIVE INSTALLATION DRAWINGS (cont’d) Frame 2 4160V module installation Control Wiring Cover Control Signal Cable & 120VAC Supply Cable Secure Truck to Cubicle Engage Latch Bus Link Assembly Power Module Truck Front Barrier Set Wheel GCI6723G055 Brakes POWER MODULE DISCONNECTION POWER MODULE REMOVAL WARNINGS Power Module Disconnection... -
Page 75: Frame 3 Drive Lifting And Assembly
DRIVE INSTALLATION DRAWINGS (cont’d) Frame 3 drive lifting and assembly - 54... -
Page 76: Frame 3 Drive Main Cable Installation
DRIVE INSTALLATION DRAWINGS (cont’d) Frame 3 drive main cable installation - 55... - Page 77 DRIVE INSTALLATION DRAWINGS (cont’d) Frame 3 module lifting LIFTING PROVISIONS LIFT HERE 2 LIFTING PROVISIONS ARE AVAILABLE LIFTING ATTACHMENT 1. LOAD OR REMOVE POWER MODULE FROM TRUCK GCI6723G055 USING LIFTING ATTACHMENT GCI6723G054 AND A LIFTING DEVICE RATED FOR 1000 LBS. OR MORE. SECURE BRACKET TO POWER MODULE USING (4) 1/2-13 BOLTS.
-
Page 78: Frame 3 2400V Module Installation
DRIVE INSTALLATION DRAWINGS (cont’d) Frame 3 2400V module installation WARNINGS Disconnect power and PM CABLEWAY wait 15 minutes to ensure capacitors are WIREWAY discharged before performing inspection or maintenance. Improper handling of the fiber optic cables and connectors may cause drive failure due to problems transmitting signals. -
Page 79: Frame 3 4160V Module Installation
DRIVE INSTALLATION DRAWINGS (cont’d) Frame 3 4160V module installation WARNINGS Disconnect power and PM CABLEWAY wait 15 minutes to ensure capacitors are WIREWAY discharged before performing inspection or maintenance. Improper handling of the fiber optic cables and connectors may cause drive failure due to problems transmitting signals. -
Page 80: Frame 4 Drive Lifting And Assembly
DRIVE INSTALLATION DRAWINGS (cont’d) Frame 4 drive lifting and assembly - 59... -
Page 81: Frame 4 Drive Main Cable Installation
DRIVE INSTALLATION DRAWINGS (cont’d) Frame 4 drive main cable installation - 60... -
Page 82: Frame 4 Module Lifting
DRIVE INSTALLATION DRAWINGS (cont’d) Frame 4 module lifting LIFTING PROVISIONS Lift Here 2 LIFTING PROVISIONS ARE AVAILABLE Lifting Attachment 1. Load or remove power module from truck GCI6724G054 using lifting attachment GCI6724G055 and a lifting device rated for 1000 lbs or more. Secure lifting attachment to power module using (4) 1/2-13 bolts provided. -
Page 83: Frame 4 2400V Module Installation
DRIVE INSTALLATION DRAWINGS (cont’d) Frame 4 2400V module installation Control Wiring Secure Truck Cover to Cubicle Control Signal Cable & 120VAC Supply Cable Bus Link Assembly Engage Latch Power Module Truck Set Wheel GCI6724G054 Front Barrier Brakes POWER MODULE DISCONNECTION POWER MODULE REMOVAL Power Module Disconnection Power Module Removal... -
Page 84: Frame 4 4160V Module Installation
DRIVE INSTALLATION DRAWINGS (cont’d) Frame 4 4160V module installation Control Wiring Secure Truck Cover to Cubicle Control Signal Cable & 120VAC Supply Cable Bus Link Assembly Engage Latch Power Module Truck Set Wheel GCI6724G054 Front Barrier Brakes POWER MODULE DISCONNECTION POWER MODULE REMOVAL WARNINGS Power Module Disconnection... -
Page 85: Frame G4P Drive Lifting And Assembly
DRIVE INSTALLATION DRAWINGS (cont’d) Frame G4P drive lifting and assembly - 64... -
Page 86: Frame G4P Drive Main Cable Installation
DRIVE INSTALLATION DRAWINGS (cont’d) Frame G4P drive main cable installation - 65... -
Page 87: Frame G4P Module Lifting And Installation
DRIVE INSTALLATION DRAWINGS (cont’d) Frame G4P module lifting and installation - 66... -
Page 88: Frame G4P Module Lifting And Installation Continued
DRIVE INSTALLATION DRAWINGS (cont’d) Frame G4P module lifting and installation continued Pin in front edge of lift tray Power Module support pan Power Module Installation 1. Lower lifter tray to ground. Roll Power Module onto tray. Secure with chains.(F) 2. Raise tray above Power Module support pan. Lower tray, inserting pins into holes in front edge of support pan. -
Page 89: Frame H4P Drive Lifting And Assembly
DRIVE INSTALLATION DRAWINGS (cont’d) Frame H4P drive lifting and assembly - 68... -
Page 90: Frame H4P Drive Main Cable Installation
DRIVE INSTALLATION DRAWINGS (cont’d) Frame H4P drive main cable installation - 69... -
Page 91: Frame H4P Module Lifting And Installation
DRIVE INSTALLATION DRAWINGS (cont’d) Frame H4P module lifting and installation - 70... -
Page 92: Frame H4P Module Lifting And Installation Continued
DRIVE INSTALLATION DRAWINGS (cont’d) Frame H4P module lifting and installation continued Pin in front edge of lift tray Power Module support pan Power Module Installation 1. Lower lifter tray to ground. Roll Power Module onto tray. Secure Power Module.(B) 2. Raise tray above Power Module support pan. Lower tray, inserting pins into holes in front edge of support pan. -
Page 93: Frame B2 2400V Module Lifting And Installation Type 1
DRIVE INSTALLATION DRAWINGS (cont’d) Frame B2 2400V module lifting and installation Type 1 Disconnect power and wait 15 Improper handling of the fiber Use module lifting attachment WARNINGS minutes to ensure capacitors are optic cables and connectors may GCI673BG055 and a lifting discharged before performing cause drive failure due to device rated 125 lbs minimum... -
Page 94: Frame B2 2400V Module Lifting And Installation Type 2
DRIVE INSTALLATION DRAWINGS (cont’d) Frame B2 2400V module lifting and installation Type 2 Disconnect power and wait 15 Improper handling of the fiber Use module lifting attachment WARNINGS minutes to ensure capacitors are optic cables and connectors may GCI673BG055 and a lifting device discharged before performing cause drive failure due to rated 125 lbs minimum for removal... - Page 95 TOSHIBA INTERNATIONAL CORPORATION 13131 WEST LITTLE YORK HOUSTON, TEXAS 77041 USA www.toshiba.com/ind Telephone: 713-466-0277 800-231-1412 800-527-1204 (Canada) Fax: 713-466-8773 Printed in U.S.A. - 74...
Need help?
Do you have a question about the T300MVi MEDIUM VOLTAGE and is the answer not in the manual?
Questions and answers
Where can I find Toshiba 3.3kV power fuse time-current curves