Table of Contents
Advertisement
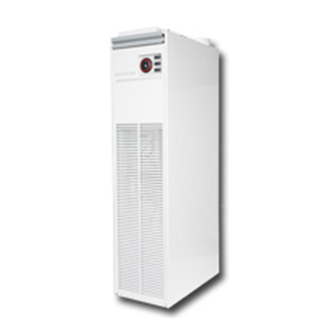
HI-SPEC M31
WARM AIR HEATER
System E-T & Basic Control
INSTALLATION,
COMMISSIONING &
SERVICING INSTRUCTIONS
G.C. NUMBERS: Air Heater 42 451 10
These instructions are to be left with the User or
adjacent to the Gas Meter
www.johnsonandstarley.co.uk
Johnson & Starley
R E L I A B I L I T Y Y O U C A N T R U S T
Publication No. ZZ 819-13
August 2010
Advertisement
Table of Contents

Related Manuals for Johnson & Starley HI-SPEC M31


Summary of Contents for Johnson & Starley HI-SPEC M31
- Page 1 Publication No. ZZ 819-13 August 2010 HI-SPEC M31 WARM AIR HEATER System E-T & Basic Control INSTALLATION, COMMISSIONING & SERVICING INSTRUCTIONS G.C. NUMBERS: Air Heater 42 451 10 These instructions are to be left with the User or adjacent to the Gas Meter www.johnsonandstarley.co.uk...
-
Page 2: Table Of Contents
CONTENTS Features Brief Description Heater Compartment & Clearances Ventilation & Combustion Air Duct System Installation Requirements Commissioning Instructions for User Maintenance Defect Diagnosis System E-T Defect Diagnosis Flow Charts Circuit Diagrams Functional Diagrams List of Spares Exploded Diagram Dimensions Notes Important Information Benchmark Log Book THE BENCHMARK SCHEME In order to comply with Building Regulations Part L (Part J in Scotland) the boiler MUST be fitted in accordance with the manufacturer’s instructions. -
Page 3: Features
BRIEF DESCRIPTION HI-SPEC M31 is an open-flued, fan assisted downflow, ducted warm air heater, which may be supplied with SYSTEM E-T or BASIC control. A HIJAN 6 circulator is available as an option. A rear rising duct kit is available for this air heater. -
Page 4: Heater Compartment & Clearances
Installation shall be in accordance with the current editions of:- Building Standards (Scotland) (Consolidation) Regulations Building Regulations Gas Safety (Installation and Use) Regulations (as amended) BS 7671 Institute of Electrical Engineers (I.E.E.) Wiring Regulations BS 6891 Installation of Low Pressure Gas Pipework of up to 28mm (R1) in domestic premises (2nd family gases). BS 5440 Pt. -
Page 5: Duct System
If any room or area from which air is drawn for ventilation or combustion contains an extract fan, the permanent vents must be sized to ensure that the operation of the appliance(s) at full rate is/are not adversely affected. A spillage test as specified in sub-para 7.8 (Safety Checks) is carried out and any remedial work undertaken. - Page 6 6.1.6 The flue shall be in accordance with the Building Regulations and British Gas Materials and Installations specification (3rd edition) with regard to clearance and shielding from combustible materials. 6.1.7 All materials shall be in accordance with Building Regulations requirements. 6.1.8 The flue should run as vertically as possible.
- Page 7 From table 2: Other resistance’s of actual flue: Terminal Pipe bend (2 x 0.61) 1.22 Pipe (4 x 1m @ 0.78) 3.12 (5 x 0.3m @ 0.78) 1.17 Sum K = 8.01 Equivalent height : From the formula (2.5 + 2.5) = 6.2 x (2.5 + 2.5) - (0.78 x 6.2) + 8.01 = 3.793 This flue exceeds 1.0m equivalent height and is therefore satisfactory.
- Page 8 Ridge Terminal 2 x 300mm Extensions 100mm Diameter Flue Pipe 4 x 1000mm Extensions 45˚ Elbow 300mm Extension 45˚ Elbow 2 x 300mm Extensions Appliance Draught Diverter FIGURE 2. WORKED EXAMPLE OF EQUIVALENT FLUE HEIGHT Note: Ventilation of the compartment, room or internal space in which the appliance is to be installed must be checked for compliance with the requirements of BS 5440 Part 2 ( Ref.
- Page 9 should ensure that the connection flue does not project beyond the internal wall of the flue blocks and that there is provision for examination and servicing. 6.1.15 Important: Before installing the appliance, carry out a visual check of the flue system as directed in the relevant section of BS 5440 Pt.
-
Page 10: Commissioning
7. COMMISSIONING PREPARATION 7.1.1 Ensure that: a. Gas and Electrical supplies are OFF. b. Filter, fan and fan compartments are free from obstructions. c. All registers or grilles are open and conform to design specifications. d. Return, relief and ventilation air installations are adequate. 7.2 SYSTEM BALANCING 7.2.1 Set the Air Heater electrical supply ON. - Page 11 MAIN BURNER PRESSURE TEST AND TEMPERATURE RISE CHECK NOTE: Air heater burners are factory set to provide a nominal high rate output as detailed in sub paragraph 2.2 74.1 Referring to Table 4 and Figure 4 below, ensure that the pressure test gauge indicates correct burner pressure, resetting if required as follows:.
- Page 12 7.7 AUTOMATIC CONTROLS CHECK 7.7.1 Ignite the Pilot and Main Burners and allow to operate for 15 minutes to ensure stability. 7.7.2 Set the TIME CONTROL to ‘ON’. 7.7.3 Turn the Thermista-stat or room thermostat slowly clockwise until the Main Burner ignites. 7.7.4 Ensure that the fan starts to operate after a short period (approx.
-
Page 13: Instructions For User
LOW RATE MEDIUM RATE HIGH RATE MJ/h Btu/h MJ/h Btu/h MJ/h Btu/h 10.40 37.4 35,500 11.4 41.0 38,900 12.5 45.0 42,640 INPUT 26.4 25,000 29.5 28,000 32.7 31,000 OUTPUT 0.98m³/h (34.5ft³/h) 1.06m³/h (37.5ft³/h) 1.16m³/h (41.1ft³/h) GAS RATE CV 1037 Btu/ft³ BURNER SETTING PRESSURE 10.1mbar (4.0 in wg) 12.4mbar (5.0 in wg) 14.3mbar (5.7 in wg) (HOT) BRAY CAT 23/850... -
Page 14: Maintenance
9. MAINTENANCE IMPORTANT: Ensure that the gas and electricity supplies are isolated before commencing any maintenance or replacement of components. After completion of any maintenance, always test for gas soundness and carry out a complete functional test of the appliance in accordance with the Commissioning Instructions at Section 7.1 to 7.8 inclusive. 9.1 ROUTINE MAINTENANCE 9.1.1 Operate the appliance and check for the correct function of the burner and controls. 9.1.2 Turn OFF the gas and electrical supplies to the appliance. 9.1.3 Remove the air heater front panel. 9.1.4 Remove and check the return air filter/cleaner for cleanliness, remove and clean the Air Circulation fan as detailed in paragraph 9.8. - Page 15 8.5.5 Release the Electrode securing nut from the Pilot Burner Assembly and withdraw the Electrode. 8.5.6 Release the two screws securing the Pilot Burner Assembly to the Main Burner, and remove the Pilot Burner Assembly. 8.5.7 Refitting or replacement is in reverse order. NOTE: When refitting or replacing Thermocouple, tighten only to FINGER TIGHT + 1 FLAT.
- Page 16 9.10 ELECTRONIC MODULE REMOVAL (SYSTEM E-T models only) 9.10.1 Ensure that the electrical supply is isolated. 9.10.2 Remove the appliance louvre door, release the securing screws and hinge down the fan chamber door. 9.10.3 Disconnect terminals ‘21’ through to ‘33’ from the Electronic module. 9.10.4 Release the 2 x screws and nuts securing Electronic module to Electrical Assembly and remove module.
-
Page 17: Defect Diagnosis
10. DEFECT DIAGNOSIS 10.1 IMPORTANT If an electrical defect occurs after installation of the appliance; preliminary earth continuity, polarity and resistance to earth checks should be carried out with a multi-meter. On completion of any maintenance/fault finding task that has required the breaking and remaking of electrical connections, then checks of c ontinuity, polarity, and resistance to earth must be repeated. 10.2 WARNINGS 10.2.1 When purging or checking gas supplies, ensure that ventilation to the room or cupboard is adequate, and that all naked lights are extinguished. 10.2.2 SYSTEM E-T MODELS When carrying out any electrical testing, a test meter MUST be used, since low resistance test devices can cause damage to the Electronics module. - Page 18 DEFECT DIAGNOSIS SYMPTOM POSSIBLE CAUSE REMEDY Check for gas at inlet pressure test point No gas supply to heater on Multifunctional Control Purge gas supply pipe in accordance with Gas supply pipe not purged BS 6891 Pilot will not light Pilot orifice restricted Clear pilot orifice or replace pilot injector Piezo system faulty Check igniter, lead and electrode Check that mains gas pressure is 20mbar...
- Page 19 SYMPTOM POSSIBLE CAUSE REMEDY Loose electrical connection at Fan Delay Control Check connections Fan Delay Control faulty Replace Mains burner lights but fails to run after approx. 3 minutes Replace, taking care not to damage Faulty fan assembly impellor Burner pressure setting incorrect Adjust pressure as necessary Check gas rate and burner pressure Gas rate or burner pressure setting too low setting Main burner operating with intermittent...
-
Page 20: System E-T Defect Diagnosis Flow Charts
11. SYSTEM E-T DEFECT DIAGNOSIS FLOW CHART MAIN BURNER NOT CYCLING (ROOM TEMPERATURE TOO HIGH) MAIN BURNER ON, BUT FAN NOT RUNNING www.johnsonandstarley.co.uk... - Page 21 FAN OPERATES. BUT BURNER CYCLES BEFORE REQUIRED TEMPERATURE IS REACHED FAN CONTINUES RUNNING, OR CYCLES AFTER HEATING IS TURNED OFF Telephone: 01604 762881...
- Page 22 FAN RUNS BUT MAIN BURNER NOT OPERATING www.johnsonandstarley.co.uk...
- Page 23 MAIN BURNER NOT OPERATING Telephone: 01604 762881...
-
Page 24: Circuit Diagrams
12. CIRCUIT DIAGRAMS www.johnsonandstarley.co.uk... - Page 25 Telephone: 01604 762881...
-
Page 26: Functional Diagrams
13. FUNCTIONAL DIAGRAMS *FELV Functional Extra-Low Voltage WIRE COLOUR CODE Pink Blue Black Brown White Grey Orange Violet Yellow Black/White bk/w Green/Yellow FIGURE 7a. HI-SPEC M31 SYSTEM E-T FUNCTIONAL DIAGRAM www.johnsonandstarley.co.uk... - Page 27 *FELV Functional Extra-Low Voltage WIRE COLOUR CODE Pink Blue Black Brown White Grey Orange Violet Yellow Black/White bk/w Green/Yellow FIGURE 7b. HI-SPEC M31 BASIC MODEL FUNCTIONAL DIAGRAM Telephone: 01604 762881...
-
Page 28: List Of Spares
14. LIST OF SPARES REFER TO THE EXPLODED DIAGRAM (Figure 8) ITEM G.C. No. PART No. DESCRIPTION E76429 1000-0500375 Fan Assembly 1000-0701130 Multifunctional Control (Honeywell) from serial No. 13010001 232 903 BOS 02061 ‘O’ Ring Seal 245 183 1000-0703150 Pilot Injector No. 38 from serial No. 13010001 1000-0709160 Pilot Body 1000-0701530... -
Page 29: Exploded Diagram
15. EXPLODED DIAGRAM FIGURE 8. HI-SPEC M31 EXPLODED DIAGRAM Telephone: 01604 762881... -
Page 30: Dimensions
16. DIMENSIONS FIGURE 9. HI-SPEC M31 DIMENSIONS www.johnsonandstarley.co.uk... -
Page 31: Notes
17. NOTES Telephone: 01604 762881... -
Page 32: Important Information
British Standard BS 5864 and the Heating Compliance Guide For further information contact Johnson & Starley on Telephone: 01604 762881 These kits are readily available from Johnson & Starley Ltd Telephone the Sales Office for further information HI-SPEC M31 ANCILLARY’S Description Product Code Cleanflow Air Filter CFM31H Return Air Plenums RAP31M Return Air Kits RAK31M... -
Page 33: Benchmark Log Book
19. BENCHMARK LOG BOOK HI-SPEC M31 LOG BOOK WARM AIR HEATER AND CIRCULATOR COMMISSIONING CHECKLIST This Log Book should be filled out at each annual service Telephone: 01604 762881... - Page 34 WARM AIR HEATER AND CIRCULATOR COMMISSIONING CHECKLIST This Commissioning Checklist is to be completed in full by the competent person who commissioned the warm air unit and associated equipment as a means of demonstrating compliance with the appropriate Building Regulations and then handed to the customer to keep for future reference. Failure to install and commission this equipment to the manufacturer’s instructions may invalidate the warranty but does not affect statutory rights.
-
Page 35: Service Record
Service Record It is recommended that your heating system is serviced regularly and that the appropriate Service Interval Record is completed. Service Provider Before completing the appropriate Service Interval Record below, please ensure you have carried out the service as described in the manufacturer’s instructions. - Page 36 Johnson & Starley are the leading UK & European manufacturers of a complete range of Domestic Warm Air Heaters. All the heaters suit both Replacement and Upgrade needs and are compliant with the new (2006) amendments to Part L of the Building Regulations. HOME COMFORT SOLUTIONS Company Details Website Address www.johnsonandstarley.co.uk Email...
Need help?
Do you have a question about the HI-SPEC M31 and is the answer not in the manual?
Questions and answers