Pioneer AVIC-EVO1 Operation Manual
Hide thumbs
Also See for AVIC-EVO1:
- Operation manual (2 pages) ,
- Installation manual (140 pages) ,
- Quick start manual (16 pages)
Table of Contents

Related Manuals for Pioneer AVIC-EVO1


Summary of Contents for Pioneer AVIC-EVO1
- Page 1 AVIC-EVO1 NAVIGATION AV SYSTEM Operation Manual Be sure to read Important Information for the User first! Important Information for the User includes the important information that you must understand before using this product.
-
Page 2: Table Of Contents
Contents Selecting a destination from stored Compatibility and connectivity ......27 Starting procedure .........40 Thank you for buying this Pioneer product. locations ...........14 ...40 Please read through these instructions so you B luetooth connection ... - Page 3 Contents Adjusting the equaliser curve automatically Detailed information regarding connected iPod M IXTRAX ......50 (Auto EQ) ..........57 devices ............74 Using app-based connected content ....75 Using MIXTRAX ..........50 T heme menu ....59 MHL ...
-
Page 4: Precaution
Precaution Basic operation Notes on internal memory Meanings of Symbols Used in This Checking part names and Manual functions Before removing the vehicle battery This indicates to touch an appropriate soft key If the battery is disconnected or discharged, the memory will be on the touch screen. -
Page 5: Plugging And Unplugging A Usb Storage Device
Basic operation 6 Touch the language that you want to use for 5 Touch Rotary Rotate clockwise or anticlockwise to go to the voice guidance messages, then touch [Next]. encoder next track (chapter) or return to the previous The “DAB ANTENNA POWER SETTING” screen appears. track (chapter). -
Page 6: How To Use The Screens
Basic operation How to use the screens Application menu screen Time and date setting screen Setting menu screen Top menu screen AV operation screen Map screen Phone menu screen Favourite source icons Navigation menu screen AV source selection screen... -
Page 7: Supported Av Source
Basic operation p By pressing the HOME button on any screen you can display the top menu screen. HOME p The character string “APPS” is replaced with “Apple CarPlay” when Apple CarPlay is running. p The character string “APPS” is replaced with “Android 2 Touch the source icon. -
Page 8: How To Use The Navigation Menu Screen
Basic operation How to use the Navigation menu Common touch panel keys screen : Returns to the previous screen. : Closes the screen. Operating list screens Searches for your destination by the address or coordinates, or searches for the selected place of interest, etc. Builds your route or edits the route currently set. -
Page 9: Operating The Navigation Menu Screen
How to use the Navigation menu screen 2 Displays route alternatives, parts of the route to avoid, or Configures the navigation-related specific roads in your planned route to avoid. 3 Suspends and resumes the route guidance. settings. 4 Displays the route in its full length on the map, and displays You can also access the “SyncTool”... -
Page 10: How To Use The Map
How to use the map Most of the information provided by your navigation system Smart Zoom can be seen on the map. You need to become familiar with how Your navigation system features “Smart Zoom” that works in information appears on the map. two ways: When the route is set: How to read the map screen... -
Page 11: Understanding The Route Guidance
How to use the map Control keys on the scrolled map Scrolling the map to the position you Frequently shown route events want to see The following are some examples of the maneuvers that are Changes the map view mode. displayed. -
Page 12: Searching For A
How to use the map Searching for a destination p Touching and holding the field allows you to display the setting screen for the field. Refer to Data Fields on page 25 CAUTION p The estimated time of arrival is an ideal value calculated based on the speed limit value set in “Max. -
Page 13: Searching For Points Of Interest (Poi)
Searching for a destination p Depending on the search results, some steps may be 3 Touch [Places]. 5 Touch [Around Here] and then select the area skipped. The preset search categories are as follows. in which the POIs should be searched for. Petrol Station 1 Press the MAP button and touch Category View:... -
Page 14: Selecting A Destination From Stored Locations
Searching for a destination Searching for providers nearby that 1 Press the MAP button and touch 3 Touch to show the next page. offer emergency or roadside assis 2 Touch [New Route]. 4 Touch [History]. tance services 3 Touch [Saved Location]. 5 Touch the entry. -
Page 15: Searching For A Location By The Coordinates
Searching for a destination When entering the coordinates in UTM format, touch , then [UTM Coordinates]. 6 Enter the longitude value and touch [Go!]. p When a value is already entered in the text field, delete the value first. The searched location appears on the map screen. 7 Touch [Select as Destination], and then touch [Start Navigation]. -
Page 16: C Hecking And Modifying The Current Route
Checking and modifying the current route Shows the selected location on the map. 4 Touch [Back to GPS Position] and then touch Modifying the route 4 Displays the shortcuts. [Delete Start Point]. Delete All: When navigation is already started, there are several ways to The starting position for route calculation returns to the current Deletes all waypoints and the destination. - Page 17 Checking and modifying the current route For information about route calculation conditions, refer Cancelling the current route to Route Planning Method on page 23 guidance 5 Touch [Select]. The selected route is applied as your current route. If you no longer need to travel to your destination, follow the steps below to cancel the route guidance.
-
Page 18: R Egistering And Editing Locations And Routes
Registering and editing locations and routes 1 Set a route to your destination. Storing a location in “Saved p In the on-screen keyboard, touching enables you to Refer to Searching for a destination on page 12 store the location as your home or workplace location. Location”... -
Page 19: Saving A Location As An Alert Point
Registering and editing locations and Receiving real- routes - 4 Set the necessary parameters. Saving a location as an alert If you touch and then touch [Delete], the point The Traffic Message Channel (TMC) provides real-time traffic selected alert point will be deleted. reports. -
Page 20: Information (Tmc)
Checking use- ful information about your trip p If a route is set, relevant events for your current route are shown in the upper section of the list. p Touching the desired item allows you to check its position on Displaying the “Useful ... -
Page 21: Recording Your Travel History
Checking useful information about your trip — Police: p If you want the system to always activate the trip logger Editing a trip log — Petrol Station: whenever the GPS signal is available, turn on “Enable Country Information: Auto-Saving”. 1 Display the “Useful Information” menu. Checks for useful driving information about the selected Refer to Setting the trip logger on page 21 Refer to Displaying the “Useful Information”... -
Page 22: Calculating The Fuel Consumption
Checking useful information about your Customising trip preferences of the navigation 4 Touch [Current Milometer Value] and then Calculating the fuel enter the current odometer value. consumption 5 Touch [Fuel Amount] to enter the amount of Customising the navigation ... -
Page 23: Information On Each Option Of " Settings
Customising preferences of the navigation To enhance the route accuracy, correctly select a vehicle Calculates a route with the shortest travel time to your Refer to the manual for AVICSYNC on our website type that is similar to the condition of your vehicle. destination as a priority. - Page 24 Customising preferences of the navigation Car Shuttle Trains Announce Streets and Roads in “Warnings” settings When this function is turned off, the route is calculated prioritiz- Foreign Language Area* ing the avoidance of car shuttle trains. Important You can select whether to have the navigation system read the Car shuttle trains are used to transport vehicles for relatively street names in a foreign country, only the road numbers, or only short distances and they usually connect places that are not...
- Page 25 Customising preferences of the navigation Route Progress Bar Turn to the suggested new direction and the route will be “Navigation Map” settings automatically recalculated. You can turn on the route progress bar to display the current route as a straight line located on the right side of the map. The Offer Real Time Alternative Routes Map Display arrow represents your current position and moves up the line as...
-
Page 26: Setting The Alert Point Warnings
Customising preferences of the navigation The unit of weight can be changed. Save Track Log Temperature Refer to Setting the trip logger on page 21 The unit of temperature can be changed. Coordinate Display Format “Online Services” settings The format of the coordinates can be changed. You can set to enable or disable the TMC receiver that can Currency receive real-time traffic information. -
Page 27: Getting The Map Update
[Dangerous Zone (HVA)] becomes avail- or smartphones if you connect an iPhone or a smartphone Pioneer is not liable for any issues that may arise from able instead. If [Dangerous Zone (HVA)] is set to on, alert (Android) that has the AVICSYNC App installed. -
Page 28: Bluetooth ® Connection
Customising preferences of the Bluetooth ® navigation connection 3 Connect your iPhone or smartphone (Android) AVICSYNC compatibility Displaying the “Bluetooth” to the navigation system via Bluetooth or USB screen AVICSYNC is available for the following models. cable connection. p Depending on the software version of the iPhone and For details of the Bluetooth connection, refer to Bluetooth ®... -
Page 29: Connecting A Registered Bluetooth Device Manually
Bluetooth connection ® Setting Bluetooth device auto Switching visibility Updating Bluetooth software connection This function sets whether or not to make this product visible to This function is used to update this product with the latest the other device. Bluetooth software. -
Page 30: Hands-Free Phoning
Hands-free phoning 4 Touch the desired entry on the list to make a Displaying the phone menu call. screen The dial screen appears and dialling starts. Using the preset dial lists 1 Press the HOME button. 2 Touch Registering a phone number Making a phone call You can easily store up to six phone numbers per device as presets. -
Page 31: Changing The Phone Settings
Hands-free phoning Registration and connection 1 Touch to turn private mode on or Mobile phone operations vary depending on the type of off. tion screen mobile phone. Refer to the instruction manual that came with your mobile phone for detailed instructions. Adjusting the other party’s listening ... -
Page 32: Setup
Setup for iPod / iPhone or smartphone When using an iPod / iPhone or a smartphone with this product, configure the settings of this product according to the device to be connected. This product supports only the following iPod / iPhone models This section describes the settings required for each device. -
Page 33: Information On The Connections And Functions For Each Device
Setup for iPod / iPhone or smartphone Information on the connections and functions for each device The settings and cables required for connecting each device, and the available sources are as follows. iPod / iPhone with a 30-pin connector Device connection method When connecting via Bluetooth When connecting via CD-IU201V (sold separately) Smartphone Setup... - Page 34 Setup for iPod / iPhone or smartphone Android device Device connection method When connecting via Bluetooth When connecting via CD-MU200 (sold separately) Smartphone Setup Device Others Others Connection Bluetooth USB2 — On (*1)/Off Android Auto Bluetooth connection Bluetooth connection is required. Bluetooth connection is required for using Android Auto.
-
Page 35: Radio
Radio 2 Touch [AV Source Settings]. Stores song information to an iPod. Displays the preset channel list. Refer to Storing song information to an iPod 3 Touch [Radio Settings]. (iTunes Tagging) on page 62 Select an item on the list ("1" to "6") to ®... -
Page 36: Digital Radio
Radio Digital Radio Gives priority to noise prevention. 2 Touch [TA Interrupt] repeatedly until the Displays the preset channel list. desired setting appears. Standard: Gives no effect. TA OFF (default) Select an item on the list to switch to the DAB+RDS TA preset service. -
Page 37: Digital Radio Tuner Operations
Digital Radio p By rotating the rotary encoder, you can also switch the Selecting a service component Setting the service follow preset service components. p By rotating and holding the rotary encoder and then releas- The default setting is “On”. You can select a service component. -
Page 38: Disc
Digital Radio Disc p This setting is available only when “Digital Radio” is To play the disc, an optional DVD player is required. Plays tracks in random order. selected as the source. p Depending on the model used, this menu may not be This function is available for music CD. - Page 39 Disc Video source screen 2 Video source screen 2 Hides the touch panel keys. To display again the keys, touch anywhere on the screen. Performs frame-by-frame playback. Performs slow-motion playback. HOLD Each time you touch it changes the speed in four steps in the following order: 1/16 →1/8 →...
-
Page 40: Starting Procedure
Disc Switches the media file type to CD (audio data (CD-DA)). p The way to display the menu differs depending on the disc. Switches the subtitle/audio language. Refer to Switching the subtitle/audio language on If you touch , the touch panel keys disappear Searching for the part you ... - Page 41 To play the disc, an optional DVD player is required. Plays files in random order. Hides the touch panel keys. : Does not play files in random order. To display again the keys, touch Audio source screen 1 (Example: USB) anywhere on the screen.
- Page 42 Video source screen (Example: Disc) Still image screen Hides the touch panel keys. To display again the keys, touch anywhere on the screen. Rotates the displayed picture 90° clockwise. Selects the previous or next folder. Still image screen Performs fast reverse or Performs fast reverse or fast forward.
-
Page 43: Starting Procedure (For Disc)
3 Touch the desired category to display the file Switches the media file type. list. Refer to Switching the media file type on page HOME 4 Touch the item. Switches the subtitle/audio language. Refine the item until the desired song title or file name is dis- p This function is available only for compressed 3 Touch [USB]. -
Page 44: Pod
iPod Audio source screen 1 Changes the audiobook speed. HOME : Normal playback : Fast playback 2 Touch [Time Per Photo Slide]. : Slow-motion playback 3 Touch the item. The following items are available: 5sec, 10sec, 15sec, Manual. Sets the shuffle play. : Plays randomly songs or videos within the selected list. -
Page 45: Connecting Your Ipod
iPod Refer to Selecting the video for the rear display on page Displays the link search screen. Hides the touch panel keys. Refer to Selecting a song from the list related to To display again the keys, touch the song currently playing (link search) on page Starting procedure anywhere on the screen. -
Page 46: Selecting A Song From The List Related To The Song Currently Playing (Link Search)
1 Touch those listed, subject to limitations while driving. Important PIONEER IS NOT RESPONSIBLE AND DISCLAIMS 2 Touch [Add to iTunes Wish List]. LIABILITY FOR THIRD PARTY (NON-PIONEER) APPS p If the song is already in the wish list, [Remove from iTunes... -
Page 47: Setting The Driving Position
1 Display the “System” setting screen. Android Auto allows access to applications other than those listed, subject to limitations while driving. PIONEER IS NOT RESPONSIBLE AND DISCLAIMS HOME LIABILITY FOR THIRD PARTY (NON-PIONEER) APPS AND CONTENT, INCLUDING WITHOUT LIMITATION ANY INACCURACIES OR INCOMPLETE INFORMATION. -
Page 48: Setting The Auto-Launch Function
Android Auto ™ p You can adjust the guidance volume and alert sound volume p Each touch of [+] or [–] increases or decreases the volume Setting the driving position separately from the main sound volume when Android level. Auto is used. To achieve optimum usability of Android Auto, set the driving Refer to Adjusting the volume on page 48 position setting correctly according to the vehicle. -
Page 49: Bluetooth Audio Player
Bluetooth audio player AUX source — A2DP and AVRCP (Audio/Video Remote Control Profile): Playback screen 1 Hides the touch panel keys. Playing back, pausing, selecting songs, etc., are possible. p Depending on the Bluetooth audio player connected to this To display again the keys, touch product, some functions may not be available. -
Page 50: Setting The Video Signal
AUX source Exits the MIXTRAX screen. Specifies the BPM. HOME Displays the LinkGate screen. Touch the desired item. Songs 5 Touch [AUX]. related to the selected item are Setting the video signal played. When you connect this product to an AUX equipment, select the suitable video signal setting. -
Page 51: Selecting An Item From The List
Vehicle equipment information Refer to Plugging and unplugging a USB storage device on Displaying obstacle detection Parking assist screen page 5 information 2 Display the AV source selection screen. CAUTION HOME This function is intended solely to assist the driver’s vision. It does not detect all dangers and obstacles and is not a substitute for your attentiveness, judgement, and care while 3 Touch [USB]. -
Page 52: Using The Multi-Function Display
Vehicle equip- System settings ment information Displaying the “System” set Setting the ever scroll ting screen When “Ever Scroll” is set to “On”, the recorded text information Updating the vehicle adapter scrolls continuously in the display while the vehicle is stopped. The default setting is “Off”. -
Page 53: Setting The Camera For Camera View Mode
System settings p When the screen changes to full-screen rear view camera 3 Touch [Back Camera: Reverse Video] to switch image during normal driving, switch to the opposite setting “On” or “Off”. in “Reverse Gear Setting.”. 50 cm p If you touch while the camera image is displayed, the Setting the parking assist guidelines displayed image will turn off temporarily. -
Page 54: Setting The Safe Mode
System settings p The time display of the dimmer duration adjusting bar is Setting the safe mode Auto: Switches the dimmer to on or off automatically according to depending on the clock display setting. your vehicle’s headlight turning on or off. Refer to Setting the time and date on page 62 You can set the safe mode that regulate operating some func- Manual:... -
Page 55: Displaying The Open Source Licences
System settings 2 Touch [System Information]. Refer to Displaying the “System” setting screen on page 3 Touch [Connection Status]. version 6 Touch [System Information]. GPS Antenna Displays the connection status of the GPS aerial (“OK” or 7 Touch [Firmware Update]. 1 Display the “System”... -
Page 56: Audio Adjustments
Audio adjustments Displaying the “Audio” setting Adjusting source levels Adjusting the cutoff frequency screen value SLA (source level adjustment) lets you adjust the volume level of each source to prevent radical changes in volume when switch- You can adjust the cutoff frequency value of each speaker. ing between sources. -
Page 57: Adjusting The Time Alignment
Audio adjustments 5 Touch [<] or [>] to input the distance between p If you trail a finger across the bars of multiple equaliser Adjusting the speaker output bands, the equaliser curve settings will be set to the value of the selected speaker and the listening position. - Page 58 Audio adjustments power to car phones or mobile phones in the vehicle, or 2 Fix the microphone for acoustical measurement Using the automatic sound levelizer remove them in advance. Surrounding sounds may prevent (sold separately) in the centre of the headrest correct measurement of the vehicle’s acoustics.
-
Page 59: T Heme Menu
3 Touch [Background]. Displaying the “Theme” setting Changing the preinstalled 4 Touch screen splash screen 5 Touch the desired external storage device. You can change the splash screen to other images preinstalled 1 Press the HOME button. 6 Touch the image. in this product. -
Page 60: Ideo Settings
Video settings the targets that the “Theme” settings are exported to or 2 Touch [Multi Angle] to switch “On” or “Off”. Setting up the video player imported from is as follows: 1 USB storage device (USB port 1) Setting the aspect ratio 2 USB storage device (USB port 2) Settings other than “DivX®... -
Page 61: Setting The Video Signal For The Rear View Camera
Video settings 5 Touch any number between [1] to [8] to select Your 8-digit deregistration code is displayed. p The video output format setting has no effect on “AUX”, p Make a note of the code as you will need it when you deregis- “AV”, and “iPod”... -
Page 62: Favourite Menu
Favourite menu Other functions Registering your favourite menu items in shortcuts allows you to Setting the time and date quickly jump to the registered menu screen by a simple touch on the “Favorites” screen. 1 Touch the current time on the screen. p Up to 12 menu items can be registered in the favourite menu. -
Page 63: Selecting The Video For The Rear Display
If you forgot your password, contact the nearest authorized Refer to Setting the password on page 63. will be transferred directly to your iPod every time you touch Pioneer Service Station. 3 Touch [Clear Password]. the song information. 4 Touch [Yes]. -
Page 64: Appendix
DVD-Video. Pioneer service facility. The system is paused or performing fast reverse or forwards 1 Display the “System” setting screen. during the disc playback. -
Page 65: Error Messages
The location display is not possible due to hardware failure. iPhone. charging. — Contact your dealer or an authorised Pioneer Station for — Update the iPod software version. — Disconnect the smartphone from the cable, and wait until assistance. - Page 66 Appendix Disc Unplayable File This type of file cannot be played on this product. The playback history for VOD contents cannot be saved for Error-02-XX/FF-FF — Select a file that can be played. some reason. The disc is dirty. Security for the connected USB storage device is enabled. —...
-
Page 67: Positioning Technology
The position of the speed detection circuit vary depending Pioneer Service Station. on the vehicle model. For details, consult your authorised Pioneer dealer or an installation professional. -
Page 68: Handling Large Errors
Appendix p Some types of vehicles may not output a speed signal while Without map matching Under elevated roads or similar structures driving at just a few kilometres per hour. In such a case, the current location of your vehicle may not be displayed cor- rectly while in traffic jam or in a car park. - Page 69 Appendix If you make a slight turn. If you take a recently opened road that is not on the map. If there is a loop or similar road configuration. If there is a parallel road. If you take a ferry. If you drive in zigzags.
- Page 70 Appendix If you are on a steep mountain road with many height If your vehicle’s wheels spin, such as on a rough track or in If you drive very slowly, or in a start-and-stop manner, as in a changes. snow. traffic jam.
-
Page 71: Route Setting Information
Appendix The number of roundabout exits displayed on the screen DVD-R DL (Dual Layer) discs which have been recorded with Route setting information may differ from the actual number of roads. Layer Jump recording cannot be played back. For detailed information about recording mode, please Route highlighting contact the manufacturer of media, recorders, or writing software. - Page 72 Appendix Maximum number of folders: 700 Firmly secure the USB storage device when driving. Do not The subtitles may not be displayed correctly if the displayed let the USB storage device fall onto the floor, where it may characters in the subtitle file include control code. Maximum number of files: 999 become jammed under the brake or accelerator.
-
Page 73: Bluetooth
Bluetooth SIG, Inc. and any use of such marks by .f4v Compatible audio codec: MP3, Dolby Digital PIONEER CORPORATION is under license. Other trademarks Compatible video codec: H.264/H.263 Bit rate (MP3): 8 kbps to 320 kbps (CBR), VBR and trade names are those of their respective owners. -
Page 74: Flac
iPod devices DivX iTunes Pioneer accepts no responsibility for data lost from an iPod, even if that data is lost while using this product. iTunes is a trademark of Apple Inc., registered in the U.S. and Please back up your iPod data regularly. -
Page 75: Using App-Based Connected Content
Content application(s) or service by its provider. Pioneer is not liable for any issues that may arise from incorrect or flawed app-based content. usage The content and functionality of the supported applications are the responsibility of the App providers. - Page 76 Do not use the LCD screen at temperatures higher or lower than the operating temperature range, because the LCD nearest authorised Pioneer Service Station. Slope ......... –6 dB /oct, –12 dB /oct, –18 dB /oct screen may not operate normally and could be damaged.
- Page 77 Appendix DAB tuner Frequency range .......174.928 MHz to 239.200 MHz (5A-13F) Band L Band ......1 452.960 MHz to 1 490.624 MHz (LA-LW) Usable sensitivity .............–100 dBm S/N RATIO ................85 dB Specifications and design are subject to possible modifica- tions without notice due to improvements.
- Page 78 Visitez www.pioneer-car.fr (ou www.pioneer-car.eu) pour enregistrer votre appareil. TEL: (0) 3/570.05.11 Si prega di visitare iI sito www.pioneer-car.it (o www.pioneer-car.eu) per registrare iI prodotto. Visite www.pioneer-car.es (o www.pioneer-car.eu) para registrar su producto. Zum Registrieren Ihres Produktes besuchen Sie bitte www.pioneer-car.de (oder www.pioneer-car.eu).
Need help?
Do you have a question about the AVIC-EVO1 and is the answer not in the manual?
Questions and answers
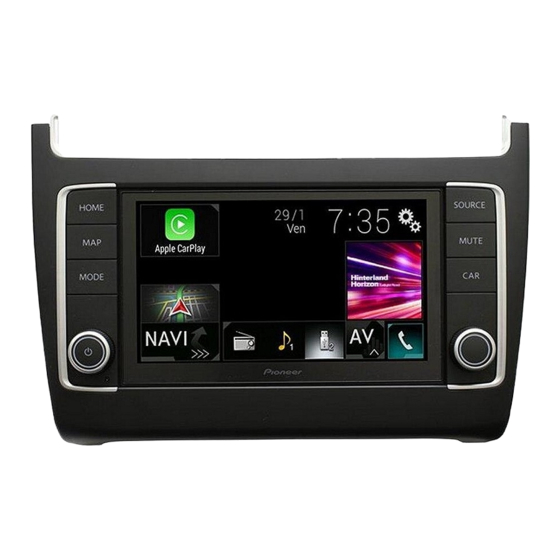
Does it support Apple Car play
Yes, the Pioneer AVIC-EVO1 supports Apple CarPlay.
This answer is automatically generated