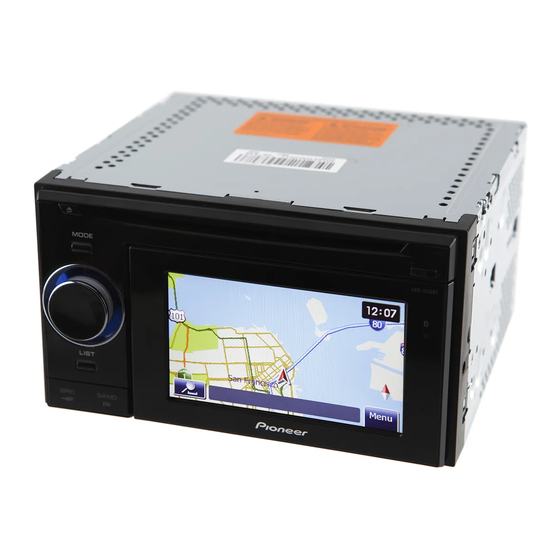
Pioneer AVIC U310BT - Navigation System With CD player Operation Manual
Flash memory navigation audio receiver
Hide thumbs
Also See for AVIC U310BT - Navigation System With CD player:
- Installation manual (45 pages)
Table of Contents
Advertisement
Quick Links
Operation Manual
FLASH MEMORY NAVIGATION AUDIO RECEIVER
AVIC-U310BT
Be sure to read "Important Information for the user" first!
"Important Information for the user" includes the
important information that you must understand before
using this navigation system.
This software requires that the navigation system is
properly connected to your vehicle's parking brake and
depending on your vehicle, additional installation may
be required. For more information, please contact your
Authorized Pioneer Electronics retailer or call us at
(800) 421-1404.
English
Advertisement
Table of Contents

Related Manuals for Pioneer AVIC U310BT - Navigation System With CD player


Summary of Contents for Pioneer AVIC U310BT - Navigation System With CD player
- Page 1 This software requires that the navigation system is properly connected to your vehicle’s parking brake and depending on your vehicle, additional installation may be required. For more information, please contact your Authorized Pioneer Electronics retailer or call us at (800) 421-1404. English...
-
Page 2: Table Of Contents
Contents Thank you for buying this Pioneer product. Please read through these operating instructions so you will know how to operate your model properly. After you have finished reading the instructions, keep this man- ual in a safe place for future reference. - Page 3 Contents – Setting “Close Up View” 28 Selecting a location you searched for – Setting the “Favorites” icon display 28 recently 40 – Setting the current street name Searching for a location by coordinates 41 display 28 Searching for a location by scrolling the –...
- Page 4 Contents – Making a phone call using missed call Adjusting the response positions of the history 52 touch panel (touch panel calibration) 62 – Dialing the entry in the “Favorites” 52 Correcting the current location 63 – Dialing a facility’s phone number 53 Checking the connections of leads 63 –...
- Page 5 Contents Storing and recalling broadcast Playback and Pause 88 frequencies 74 Using advanced sound retriever 88 Storing the strongest broadcast Using an iPod frequencies 75 Reading the screen 89 Tuning in strong signals 75 Operating by hardware buttons 90 Using the HD Radio (Digital Radio) Selecting a song from the list 90 Reading the screen 76 Setting a repeat play range 90...
- Page 6 Contents – Map matching 119 Switching between automatic and manual function 100 Handling large errors 119 – When positioning by GPS is Operate the external unit by using “Function1” — “Function4” 101 impossible 120 – Conditions likely to cause noticeable Using the AUX source positioning errors 120 Reading the screen 102...
-
Page 7: Introduction
Chapter Introduction Manual overview e.g.) [Address], [Settings]. ! Extra information, alternatives and other Before using this product, be sure to read “Im- notes are presented in the following for- portant Information for the user” (a separate mat: manual) which contains warnings, cautions, e.g.) and other important information that you p If the home location has not been stored... -
Page 8: Ipod Compatibility
Do not use the stylus for p When you use this navigation system with normal operations.) a Pioneer USB interface cable for iPod (CD- IU50) (sold separately), you can control an iPod compatible with this navigation sys- Resetting the microprocessor tem. - Page 9 Chapter Introduction % Press the RESET button with a pen tip or other pointed implement. RESET button p If you have connected other equipment to this navigation system with IP-BUS, be sure to reset that equipment too.
-
Page 10: Before You Start
Chapter Before you start Checking part names and functions This chapter gives information about the names of the parts and the main features using the buttons. 1 Disc loading slot = For more details, refer to the descriptions Insert a disc to play. from Chapter 13 to Chapter 27. -
Page 11: Inserting And Ejecting A Disc
! If data loss or corruption occurs on the sto- processor on page 8. rage device for any reason, it is usually not possible to recover the data. Pioneer accepts c Bluetooth connection status indicator no liability for damages, costs or expenses Lights up when your phone is paired to the arising from data loss or corruption. -
Page 12: Ejecting An Sd Memory Card
! If data loss or corruption occurs on the sto- rage device for any reason, it is usually not possible to recover the data. Pioneer accepts no liability for damages, costs or expenses arising from data loss or corruption. -
Page 13: Plugging In A Usb Storage Device
! If data loss or corruption occurs on the sto- from theft rage device for any reason, it is usually not possible to recover the data. Pioneer accepts The detachable device can be removed from no liability for damages, costs or expenses the head unit to discourage theft. -
Page 14: Flow From Startup To Termination
Chapter Before you start ! Keep the detachable device out of direct sun- light and high temperatures. ! After removing the detachable device, keep it in a safe place so it is not scratched or damaged. Flow from startup to termination Touch the language that you want to use for the voice guidance. -
Page 15: How To Use The Detachable Device
Chapter How to use the detachable device Removing the detachable device from the turns the audio source off and switches to head unit enables you to set routes and search display the map screen. locations even when you are out of your vehi- Press DETACH button to release the de- cle. -
Page 16: Installing The Battery
CAUTION ! Do not under any circumstances attempt to change the battery yourself. ! The battery should only be changed by Pioneer service personnel. Disposing of the battery WARNING ! Keep the battery pack out of the reach of small children to prevent them from acciden- tally swallowing it. -
Page 17: Turning On The Detachable Device
Chapter How to use the detachable device Detach the cable to disconnect the bat- The battery of the detachable device is tery. charged in the following situations. ! When the detachable device is attached to the head unit while the ignition switch is turned on (ACC ON). -
Page 18: Connecting With Your Pc
Chapter How to use the detachable device A message appears when the remain- ing battery life is getting low. When the battery nearly runs out, the navigation system automatically turns off after a message appears. Connecting with your PC It is available to connect the detachable device and your PC using the USB cable (supplied with the navigation system). - Page 19 Chapter How to use the detachable device...
-
Page 20: How To Use The Navigation Menu Screens
Chapter How to use the navigation menu screens Screen switching overview What you can do on each menu 4 “Phone Menu” screen 1 Map screen Press the MODE button to display the naviga- You can access the screen that is related to tion map screen. -
Page 21: Operating Menu Screens (E.g. "Navigation Menu" Screen)
Chapter How to use the navigation menu screens Operating menu screens (e.g. Operating the on-screen “Navigation Menu” screen) keyboard 1 Screen title 1 Text box Shows the next or previous page. Displays the characters that are entered. If there is no text in the box, an informative Returns the previous screen. -
Page 22: How To Use The Map
Chapter How to use the map Most of the information provided by your navi- gation system can be seen on the map. You need to become familiar with how the informa- tion appears on the map. How to read the map screen This example shows an example of a 2D map screen. -
Page 23: Displaying The Audio Information Bar
Chapter How to use the map Displaying the audio The direction towards your destination (next waypoint, or cursor) is indicated with a information bar straight line. You can check the current status on the se- a Current route* lected audio source. The route currently set is highlighted in bright color on the map. -
Page 24: Operating The Map Screen
Chapter How to use the map While driving on the freeway, freeway exit Touch to change the map numbers and freeway signs may be displayed scale. when in the vicinity of interchanges and exits. p If you do not operate the function for a few seconds, the display is automatically re- turned. -
Page 25: Scrolling The Map To The Position You Want To See
Chapter How to use the map p If you do not operate the function for a few Scroll the map and move the scroll cur- sor to the icon you want to view. seconds, the display is automatically re- turned. Scrolling the map to the position you want to see Display the map screen. -
Page 26: Displaying Poi On The Map
Chapter How to use the map Display the “Map” screen. Touch [Overlay POI]. The “Overlay POI” screen appears. Touch [Settings]. The “Settings Menu” screen appears. Touch [Display] to turn it [On]. p If you do not want to display the POI icon on the map, touch [Display] to turn it [Off]. -
Page 27: Switching The Map Between 2D And 3D
Chapter How to use the map Touch the subcategory. 3D map screen A red check mark appears next to the selected category. To cancel the selection, touch the entry again. # If you want to search with more detailed cate- gories, touch Touch the item and touch [OK]. -
Page 28: Changing The Road Color
Chapter How to use the map Touch [Favorites Icon]. You can change the colors of a map be- tween daytime and nighttime according to Each time you touch the key changes that set- whether the vehicle lights are On or Off. ting. -
Page 29: Setting A Route To Your Destination
Chapter Setting a route to your destination Your navigation system sets the route CAUTION to your destination, and the map of your For safety reasons, these route-setting functions surroundings appears. are not available while your vehicle is in motion. After releasing the parking brake, drive To enable these functions, you must stop in a in accordance with navigation guidance. -
Page 30: Modifying The Route Calculation Conditions
Chapter Setting a route to your destination Touch the desired items to change the When the route calculation is completed, “Route confirmation screen” appears. route calculation conditions and then touch [OK]. Route confirmation screen The route is recalculated, and “Route confir- mation screen”... -
Page 31: Checking The Current Itinerary
Chapter Setting a route to your destination Avoid Freeway This setting controls whether freeways may be included in the route calculation. [Off]*: Calculate a route that may include freeways. [On]: Calculate a route that avoids freeways. p The system may calculate a route that in- cludes freeway even if [On] is selected. - Page 32 Chapter Setting a route to your destination Search for a location. After searching for a point, display it on a map, then touch [OK] to add to the “Way- points List” screen. = For details, refer to Searching for and select- ing a location on page 36.
-
Page 33: Checking And Modifying The Current
Chapter Checking and modifying the current route You can check the route details. You can also culate the route so that is passes through recalculate the route in different conditions. these locations. To edit the waypoints, display the “Waypoints Display the “Navigation Menu” screen. List”... -
Page 34: Deleting A Waypoint
Chapter Checking and modifying the current route Touch [Sort]. The “Sort Waypoints” screen appears. = For details, refer to Searching for and select- ing a location on page 36. Touch [OK] on the “Waypoints List” Touch the waypoint or destination. screen. -
Page 35: Using The Demonstration Guidance
Chapter Checking and modifying the current route Touch [Cancel]. A message confirming the cancellation of the current route appears. = For details concerning operations, refer to Modifying the route calculation conditions on page 30. Touch [Yes]. The current route is deleted, and a map of Using the demonstration your surroundings reappears. -
Page 36: Searching For And Selecting A Location
Chapter Searching for and selecting a location CAUTION For safety reasons, these route-setting functions are not available while your vehicle is in motion. To enable these functions, you must stop in a safe place and put on the parking brake before setting your route. -
Page 37: Searching For A Name By Entering Multiple Keywords
Chapter Searching for and selecting a location Searching for a name by entering multiple keywords You can search for a name (such as a city name or a street name) by entering multiple keywords. p Up to three keywords can be entered. p Enter a space between keywords as you want to enter several ones. -
Page 38: Setting Up A Route To Your Home
Chapter Searching for and selecting a location Setting up a route to your home If your home location is stored, the route home can be calculated by touching a single key. Display the “Navigation Menu” screen. Touch [Go Home]. Touch [Zone]. If the home location has not been stored yet, The “State/Province Selection”... -
Page 39: Searching For A Nearby Poi
Chapter Searching for and selecting a location p Current order is displayed on the upper Display the “POI Search” screen. right of the screen. Touch [Around City]. The “Around City Input Menu” screen ap- Sorts the items in the list in order by dis- pears. -
Page 40: Selecting Destination From "Favorites
Chapter Searching for and selecting a location Touch [Search]. Searching for POIs by using The “Select City” screen appears. the data on the SD memory Touch the desired city name. card POI’s are divided into several categories. Creating a customized POI is possible by # Touch using the utility program “AVIC FEEDS”... -
Page 41: Searching For A Location By Coordinates
Chapter Searching for and selecting a location Touch [Latitude]. The “Enter Latitude” screen appears. Touch the entry you want. The searched location appears on the map screen. Enter the latitude, and then touch [OK]. The screen returns to the previous screen. p To enter N 5°1’2.5”... -
Page 42: Registering And Editing Locations
Chapter Registering and editing locations Registering a location into Touch The location is registered, and then the “Edit “Favorites” Favorite” screen appears. = For details, refer to Editing the entry in “Fa- Registering a location by “Favorites” vorites” on this page. Favorites can store up to 400 registered loca- Touch [OK]. -
Page 43: Sorting The Entry In "Favorites
Chapter Registering and editing locations Sorting the entry in “Favorites” Display the “Navigation Menu” screen. Touch [Favorites]. The “Select Favorite” screen appears. Touch [Sort]. Each time you touch [Sort] changes the sort order. # Touch [All]. p Current order is displayed on the upper Selects all entries. -
Page 44: Editing Your Home
Chapter Registering and editing locations Touch [Settings]. Touch next to the home location. The “Settings Menu” screen appears. The “Edit Favorite” screen appears. Touch [Set Home]. The “Set Home” screen appears. # Touch [Phone #]. You can edit the registered phone number. To dial the number, touch = For details, refer to Making a call home ea- Touch [Home]. - Page 45 Chapter Registering and editing locations # Touch [All]. Selects all entries. # Touch [None]. Displayed when all locations are selected. Can- cels all selected locations. Touch [Delete]. A message will appear asking you to confirm the deletion. Touch [Yes]. The data you selected is deleted. # Touch [No].
-
Page 46: Using Hands-Free Phoning
The default device name displayed on the Even when the connection is severed for cellular phone is “PIONEER NAVI”. The PIN some reason, the system automatically re- code is “1111”. connects the specified cellular phone (ex- cept when the connection is severed due to cellular phone operation). -
Page 47: Searching For Nearby Phones
Chapter Using hands-free phoning Searching for nearby phones Wait until your cellular phone appears in the list. The system searches for available cellular phones near the navigation system, displays them in a list, and registers them for connec- tion. Activate the Bluetooth wireless tech- nology on your cellular phone. -
Page 48: Pairing From Your Cellular Phone
Chapter Using hands-free phoning Enter the PIN code “1111” using the cel- Activate the Bluetooth wireless tech- nology on your cellular phone. lular phone. For some cellular phones, no specific action is When a connection is successfully estab- necessary to activate Bluetooth wireless tech- lished, a connection complete message ap- pears, the screen returns to the “Bluetooth nology. -
Page 49: Connecting And Disconnecting A Registered Cellular Phone
Chapter Using hands-free phoning Touch [Connections]. The “Connection List” screen appears. p If registration fails repeat the procedure from the beginning. Touch the name of the cellular phone that you want to connect. Connecting and disconnecting Connection starts. a registered cellular phone When a connection is successfully estab- lished, a connection complete message ap- Connecting a registered... -
Page 50: Making A Phone Call
Chapter Using hands-free phoning Touch [Settings]. Making a call home easily The “Bluetooth Settings” screen appears. You can call home without taking the time to enter the phone number if the phone number Touch [Connections]. has been registered. The “Connection List” screen appears. Display the “Phone Menu”... -
Page 51: Dialing Goog-411
Chapter Using hands-free phoning Alphabet tabs Makes the screen jump to the beginning of the page including the entry whose names start with any of selected alphabets. Touching [#ABCDE] also displays the page in- cluding the entry whose names start with pri- mary symbols or numbers. -
Page 52: Making A Phone Call Using The Dialed Number History
Chapter Using hands-free phoning Making a phone call using the Touch [Missed]. The “Missed Calls List” screen appears. dialed number history The dialed number history saves 30 calls per registered cellular phone. If the entries exceed 30, the oldest one will be deleted. Display the “Phone Menu”... -
Page 53: Dialing A Facility's Phone Number
Chapter Using hands-free phoning Dialing a facility’s phone number Receiving a phone call You can make a call to facilities with phone You can perform hands-free answering by number data. using the navigation system. p You cannot make a call to locations or POIs that have no phone number data. -
Page 54: Rejecting An Incoming Call
Chapter Using hands-free phoning p You can adjust volume when you are talk- p Each entry can hold up to 3 phone num- ing. To adjust volume, touch [Vol -] and bers. p Depending on the cellular phone that is [Vol +] displayed on the screen (like below) when you are talking. -
Page 55: Clearing Memory
Chapter Using hands-free phoning When the completion message ap- Touch [OK]. pears, check the message and touch [OK]. Data on the selected item is cleared from this navigation system’s memory. p If you do not want to clear memory that you have selected, touch [No]. -
Page 56: Stopping Bluetooth Wave Transmission
Chapter Using hands-free phoning Stopping Bluetooth wave Setting the automatic rejection transmission function You can stop transmission of electric waves by If this function is on, the navigation system turning off the Bluetooth function. If you do automatically rejects all incoming calls. not use the Bluetooth wireless technology, we Touch [Settings] on the “Phone Menu”... -
Page 57: Editing The Device Name
Registration and connection ! Cellular phone operations vary depending played on your cellular phone. (Default is [PIONEER NAVI].) on the type of cellular phone. Refer to the instruction manual that came with your cel- Touch [Settings] on the “Phone Menu”... -
Page 58: Updating The Bluetooth Wireless Technology Software
Chapter Using hands-free phoning ! If the phone number of the received call is Updating the Bluetooth not registered in the phone book, the wireless technology software phone number of the received call appears. ! During incoming and outgoing calls or talk- Update files will be available for download in ing on a phone, you can only do the follow- the future. -
Page 59: Modifying The General Settings For
Chapter Modifying the general settings for navigation functions Setting the volume for navigation system The sound volume for the navigation can be set. p When using a phone, the sound volume of the navigation system is dependent on the phone volume setting. Display the “Navigation Menu”... -
Page 60: Setting The Time Difference
Chapter Modifying the general settings for navigation functions Insert an SD memory card into the SD To set the time difference, touch [+] or card slot. [–]. = For more details of the operation, refer to In- The time difference between the time origin- ally set in the navigation system (Pacific Stan- serting and ejecting an SD memory card on dard Time) and the current location of your... -
Page 61: Changing The Virtual Speed Of The Vehicle
Chapter Modifying the general settings for navigation functions Changing the virtual speed of the vehicle When calculating the expected time of arrival and the number of hours to the destination, set the average speed for the freeway or ordin- ! [AZERTY]: ary roads using [+] and [–]. -
Page 62: Inputting The Fuel Consumption Information For Calculating The Fuel Cost
Chapter Modifying the general settings for navigation functions Inputting the fuel Setting the power-saving consumption information function for calculating the fuel cost You can select the setting of the screen back- light to save the battery power. You can estimate the fuel cost to your destina- Display the “Navigation Menu”... -
Page 63: Correcting The Current Location
Chapter Modifying the general settings for navigation functions Touch [Calibrate]. A message confirming whether to start the ca- libration appears. Touch and hold the target that point to the center and corners of the LCD screen. The target indicates the order. Touch anywhere on the screen. -
Page 64: Adjusting The Screen Brightness
Chapter Modifying the general settings for navigation functions Adjusting the screen Restoring the default setting brightness Resets various settings registered to the navi- gation system and restores them to the default You can set the screen brightness for each of or factory settings. -
Page 65: Other Functions
Chapter Other functions Exporting data for “AVIC FEEDS” You can export data to an SD memory card for browsing on the PC application. The following data can be exported. ! Gas Mileage ! Drive Log Enter the following settings: Gas Mileage ! [Distance]: Enter the distance traveled since the pre- Entering the fueling information... -
Page 66: Recording Your Travel History
Chapter Other functions Insert an SD memory card into the SD Insert an SD memory card into the SD card slot. card slot. = For more details of the operation, refer to In- = For more details of the operation, refer to In- serting and ejecting an SD memory card on serting and ejecting an SD memory card on page 11. -
Page 67: Importing "Favorites" Edited On "Avic Feeds
Chapter Other functions Insert an SD memory card into the SD Insert an SD memory card into the SD card slot. card slot. = For more details of the operation, refer to In- = For more details of the operation, refer to In- serting and ejecting an SD memory card on serting and ejecting an SD memory card on page 11. -
Page 68: Pc Mode" Function
Chapter Other functions Touch [Data In/Out]. Touch [OK]. The “Export/Import Menu” screen appears. The navigation system restarts. And then the navigation system changes to “PC Mode”. Canceling “PC Mode” Disconnect the detachable device from your PC. Touch [End]. “PC Mode” is canceled, and then the system Touch [Export] next to “Gas Mileage”. -
Page 69: Basic Flow Of Operation
Chapter Basic flow of operation Using the audio source You can play or use the following sources with the navigation system. ! XM (XM tuner) ! SIRIUS (SIRIUS tuner) ! HD Radio (HD Radio tuner) ! TUNER (FM, AM) ! CD ! ROM (MP3, AAC, WAV, WMA) ! USB ! iPod... -
Page 70: Screen Switching Overview
Chapter Basic flow of operation Screen switching overview : Press : Turn and press the center of : Press and hold for a few seconds MULTI-CONTROL : Press the center of MULTI-CONTROL Pressing LIST or EJECT button enables you to perform the equivalent operation. -
Page 71: What You Can Do On Each Menu
Chapter Basic flow of operation What you can do on each menu 1 Audio operation screen When you play the audio source, this screen appears. 2 Function select screen You can access the screen for selecting either “Function Menu” or “Audio Menu”. Depending on the source, “Function Menu”... -
Page 72: Using The Radio (Fm)
Chapter Using the radio (FM) Operating by hardware You can listen to the radio by using the naviga- tion system. This section describes operations buttons for radio (FM). Pressing BAND/ESC button % Press SRC/OFF button to display the Band can be selected from among FM1, FM2, “TUNER”... -
Page 73: Storing The Strongest Broadcast Frequencies
Chapter Using the radio (FM) FM: Level1 — Level2 — Level3 — Level4 Storing the strongest p The level “4” setting allows reception of only broadcast frequencies the strongest stations, while lower settings “BSM” (best stations memory) lets you auto- let you receive weaker stations. -
Page 74: Using The Radio (Am)
Chapter Using the radio (AM) Operating by hardware You can listen to the radio using this naviga- tion system. This section describes operations buttons for radio (AM). Pressing BAND/ESC button Press SRC/OFF button to display the Band can be selected from among FM1, FM2, “TUNER”... -
Page 75: Storing The Strongest Broadcast Frequencies
Chapter Using the radio (AM) AM: Level1 — Level2 Storing the strongest p The level “2” setting allows reception of only broadcast frequencies the strongest stations, while lower settings “BSM” (best stations memory) lets you auto- let you receive weaker stations. matically store the six strongest broadcast fre- quencies under the preset tuning keys and, once stored there, you can tune in to... -
Page 76: Operating By Hardware Buttons
Chapter Using the HD Radio (Digital Radio) You can listen to the radio by using the naviga- Shows the title of the song currently tion system. This section describes operations playing. for HD Radioä. : Program type p For details concerning operation, refer to Shows the type of current program. -
Page 77: Using The Hd Radio (Digital Radio)
Chapter Using the HD Radio (Digital Radio) Pressing and holding MULTI-CONTROL Press the center of MULTI-CONTROL to start “BSM”. left or right The tuner will scan the frequencies until a BSM begins to flash. While BSM is flashing, broadcast strong enough for good reception is the six strongest broadcast frequencies will be found. -
Page 78: Switching The Reception Mode
Chapter Using the HD Radio (Digital Radio) Turn MULTI-CONTROL to display “Seek Mode”. Press the center of MULTI-CONTROL to switch between “Seek All” and “Seek HD”. ! “Seek All”: Seeks stations from both analog and digital broadcasting. ! “Seek HD”: Seeks from digital broadcasting only. -
Page 79: Playing Audio Cds
Chapter Playing audio CDs You can play a normal music CD using the Shows the title of the track currently built-in drive of the navigation system. This playing (when available). 3 Repeat/Random/Scan indicator section describes how. Shows the current playback status. % Insert the disc you want to play into 4 Touch panel keys disc-loading slot. -
Page 80: Selecting A Track From The List
Chapter Playing audio CDs Setting a repeat play range Pressing it twice continuously will skip to the previous track. % Touch repeatedly until the desired Pressing and holding MULTI-CONTROL repeat range appears in the display. left Performs fast reverse. Repeats just the current track. p Fast reverse is canceled when it reaches ! No indicator (disc repeat): the beginning of the first track on the disc. -
Page 81: Playback And Pause
Chapter Playing audio CDs p If you touch during scan play, the scan play is automatically canceled and playback of the current track will be repeated. p If you touch during scan play, the scan play is automatically canceled and tracks will be played in random order. - Page 82 Chapter Playing music files on ROM You can play a disc that contains compressed Shows the track number currently play- audio files using the built-in drive of the navi- ing. ! Play time gation system. This section describes these operations. Shows the elapsed playing time within p In the following description, the MP3, the current track.
-
Page 83: Playing Music Files On Rom
Chapter Playing music files on ROM 6 Advanced sound retriever indicator Pressing LIST button = For details, refer to Using advanced Shows the list to select a track. = For details, refer to Selecting a track from sound retriever on the next page. the list on this page. -
Page 84: Setting A Repeat Play Range
Chapter Playing music files on ROM Scan folders and tracks When a folder is selected, it plays the first track in the selected folder. Scan play lets you hear the first 10 seconds of ! Pressing MULTI-CONTROL left each track. Scan play is performed in the cur- When the lower folder is listed, it returns to rent repeat play range. - Page 85 Chapter Playing music files on ROM % Touch [S.Rtrv] repeatedly to select the desired setting. Each touch of [S.Rtrv] changes the settings as follows: Sets to S.Rtrv1. Sets to S.Rtrv2. ! No indicator: Sets to off. p S.Rtrv2 is more effective than S.Rtrv1.
-
Page 86: Operating By Hardware Buttons
Chapter Playing music files on USB 4 Repeat/Random/Scan indicator Reading the screen Shows the current playback status. 5 Touch panel keys Changes the display in the text area. ! S.Rtrv: Sets advanced sound retriever function. = For details, refer to Using advanced sound retriever on page 88. -
Page 87: Playing Music Files On Usb
Chapter Playing music files on USB p Turning MULTI-CONTROL enables you Pressing MULTI-CONTROL left Skips to the start of the current file. to perform the equivalent operation. ! Pressing the center of MULTI-CONTROL Pressing it twice continuously will skip to the previous file. -
Page 88: Scan Folders And Files
Chapter Playing music files on USB % Touch Using advanced sound Random play begins. retriever p When you turn random play on, Advanced sound retriever function automati- pears. p To turn random play off, touch cally enhances compressed audio and re- again. -
Page 89: Using An Ipod
Chapter Using an iPod Using the USB interface cable for iPod en- Shows the artist name for the current ables you to connect your iPod to the naviga- song. tion system. : Album title (podcast title) p A USB interface cable for iPod (CD-IU50) Shows the title of the album for the cur- (sold separately) is required for connection. -
Page 90: Operating By Hardware Buttons
Chapter Using an iPod ! Artists (artists) Operating by hardware ! Albums (albums) buttons ! Songs (songs) ! Podcasts (podcasts) Pressing MULTI-CONTROL right ! Genres (genres) Skips to the start of the next song. ! Composers (composers) Pressing and holding MULTI-CONTROL ! Audiobooks (audiobooks) right ! Pressing MULTI-CONTROL up or down... -
Page 91: Playback And Pause
Chapter Using an iPod Turn MULTI-CONTROL to select “Play Mode”. Sets to S.Rtrv2. ! No indicator: Press the center of MULTI-CONTROL to Sets to off. set. p S.Rtrv2 is more effective than S.Rtrv1. Each press of MULTI-CONTROL changes the settings as follows: ! “Repeat All”: Operating this navigation Repeats all songs in the selected list. -
Page 92: Playing Songs In Random Order (Shuffle)
Chapter Using an iPod p To turn shuffle all off, set “Shuffle Mode” in When you select , operate the con- the “Function Menu” screen to off. nected iPod to select a song and play. = For details, refer to Playing songs in random p Switching the control mode to pauses order (shuffle) on this page. -
Page 93: Setting The Audiobook Play Speed
Chapter Using an iPod p If alphabet search is aborted, Not Found is displayed. On the song (or episode) list, turn MULTI-CONTROL to select the song you want to play. Press the center of MULTI-CONTROL to set. Press LIST button to display the top ca- tegory menu. - Page 94 Chapter Using the XM tuner You can use the navigation system to control Shows the XM channel number the an XM satellite digital tuner, which is sold se- tuner is currently tuned to. ! Preset number indicated next to parately. “P.CH”...
-
Page 95: Using The Xm Tuner
Chapter Using the XM tuner Operating by hardware Keep touching a preset tuning key until the XM preset number (e.g., buttons P.CH1) stops flashing. Pressing BAND/ESC button The selected station has been stored in mem- ory. Band can be selected from among XM 1, p Up to 18 stations, 6 for each of three XM XM 2, or XM 3. - Page 96 Shows what preset item has been se- system, Pioneer SIRIUS BUS INTERFACE is lected. required. For details concerning operation, ! Play time refer to the owner’s manual of Pioneer SIR- Shows the elapsed playing time within IUS BUS INTERFACE and SiriusConnect universal tuner. the stored broadcast.
-
Page 97: Using The Sirius Tuner
Chapter Using the SIRIUS tuner = For details, refer to Using the “Instant Pressing and holding MULTI-CONTROL Replay” function on the next page. left or right 5 Touch panel keys You can skip the broadcasting channels. Pressing the center of MULTI-CONTROL Recalls channels from the preset. -
Page 98: Using The "Instant Replay" Function
Chapter Using the SIRIUS tuner # Pressing and holding MULTI-CONTROL left : Channel mode Performs fast reverse. You can select a channel from all channels # Touching when you operate this function. : Category mode Switches between playback and pause. p During “Instant Replay”... -
Page 99: Switching The Game Alert On Or Off
Chapter Using the SIRIUS tuner Press the center of MULTI-CONTROL to Displaying Game Information store the selected team in memory. If games of your selected teams are currently The game alert function will start on that playing, you can display information of the team. -
Page 100: Using The External Unit (Ext1, Ext2)
Using the external unit (EXT1, EXT2) The term “external unit” refers to future p Operation varies depending on the ex- Pioneer devices that are not currently planned ternal unit connected. (In some cases, for, or to devices that allow control of basic... -
Page 101: Operate The External Unit By Using "Function1" - "Function4
Chapter Using the external unit (EXT1, EXT2) Operate the external unit by using “Function1” — “Function4” The external unit can be operated by transmit- ting the operating commands set to Function1 — Function4. Display the “Function Menu” screen. = For details, refer to Screen switching over- view on page 70. -
Page 102: Using The Aux Source
Chapter Using the AUX source A stereo mini plug cable lets you connect your navigation system to auxiliary equipment. For more details, refer to the stereo mini plug cable owner’s manual. Reading the screen 1 Source icon Shows which source has been selected. Switching the auxiliary setting Turn MULTI-CONTROL to select “AUX”... -
Page 103: Turning The Source Off
Chapter Turning the source off % Press SRC/OFF and hold until the audio source turns off. = For details, refer to Switching the audio op- eration screen on page 69. p To return to the display of each source, press SRC/OFF button. -
Page 104: Customizing The Initial Settings
Chapter Customizing the initial settings Press MULTI-CONTROL left or right to Using the initial settings, you can customize various system settings to achieve optimal per- select the desired color. White (white) — Light Green (light green) — formance from this navigation system. Green (green) —... -
Page 105: Setting The Rear Output
Chapter Customizing the initial settings Display the “Initial Setting” screen. Display the “Initial Setting” screen. = For details, refer to Displaying the = For details, refer to Displaying the “Initial Setting” screen on the previous “Initial Setting” screen on the previous page. -
Page 106: Audio Adjustments
Chapter Audio adjustments Displaying the Press MULTI-CONTROL up or down to adjust front/rear speaker balance. “Audio Menu” screen Each time MULTI-CONTROL is pressed up or To customize the audio settings, display the down, the front/rear speaker balance moves “Audio Menu” screen. towards the front or rear. -
Page 107: Adjusting The Equalizer Curves
Chapter Audio adjustments Display the “Audio Menu” screen. Vocal = For details, refer to Displaying the Vocal is a curve in which the midrange, which is the “Audio Menu” screen on the previous human vocal range, is boosted. page. Flat Flat is a flat curve in which nothing is boosted. -
Page 108: Using Subwoofer Output
Chapter Audio adjustments Turn MULTI-CONTROL to select “Loud- Press MULTI-CONTROL left or right to ness”. select cut-off frequency. Each time MULTI-CONTROL is pressed left or Press the center of MULTI-CONTROL to right, frequencies are selected in the following turn loudness on. order: Loudness level (e.g., Mid) appears in the dis- 50 Hz —... -
Page 109: Adjusting Source Levels
Chapter Audio adjustments Adjusting source levels SLA (source level adjustment) lets you adjust the volume level of each source to prevent ra- dical changes in volume when switching be- tween sources. p Settings are based on the FM tuner volume level, which remains unchanged. -
Page 110: Returning The Navigation System To The Default Or Factory Settings
Chapter Returning the Navigation System to the Default or Factory Settings You can return settings or recorded contents to the default or factory settings. There are four methods to clear user data, and the situa- tions and the cleared contents are different for each method. -
Page 111: Returning The Navigation System To The Default Or Factory Settings Setting Items To Be Deleted
Chapter Returning the Navigation System to the Default or Factory Settings Setting items to be deleted The items to be deleted vary depending on the reset method. The items listed in the following table return to the default or factory settings. Any items not listed below will be retained. - Page 112 Chapter Returning the Navigation System to the Default or Factory Settings — [Contacts] — [Volume] [Phone Menu] menu — [Settings] — Call histories Audio functions Method 1 Method 2 Method 3 Method 4 — — — Volume — — — Initial Settings All settings —...
-
Page 113: Appendix
While this list is not comprehen- sive, it should answer your most common problems. If a solution to your problem cannot be found here, contact your dealer or the nearest authorized Pioneer service facility. Problems with the navigation screen... - Page 114 Appendix Appendix [Day/Night Display] is set to [Day]. Check [Day/Night Display] setting and make sure [Automatic] is selected. (Page 27) The map color does not switch automatically between daytime and nighttime. The screen is too bright. An improper value has been set on Check the settings.
- Page 115 Appendix Appendix ! Reconnect the iPod with the USB interface The iPod is frozen. cable for iPod. Cannot be operated. ! Update the iPod software version. ! Reconnect the iPod with the USB interface An error has occurred. cable for iPod. ! Park your vehicle in a safe place, and apply the parking brake.
-
Page 116: Messages And How To React To Them
After the message is dis- maining battery power of the de- played, the navigation system restarts. ! Consult the nearest authorized Pioneer ser- tachable device is low. vice station if this message persists. ! Select a suitable item and format, then Dataloading failed. -
Page 117: Messages For Audio Functions
When problems occur in the audio source, a message may appears on the display. Refer to the table below to identify the problem, then take the suggested corrective action. If the error persists, contact your dealer or your nearest Pioneer Service Center. Built-in CD drive... - Page 118 Appendix Appendix Electrical or mechanical Turn the ignition switch OFF and back ON, or switch to a different source, then back to the CHK CDCORE USB source. ! Disconnect the cable from iPod. Once iPod Error-19 Communication failure main menu is displayed, connect the cable again.
-
Page 119: Positioning Technology
Appendix Appendix Positioning technology Map matching As mentioned, the positioning systems used Positioning by GPS by this navigation system are susceptible to The Global Positioning System (GPS) uses a certain errors. Their calculations may, on occa- network of satellites orbiting the Earth. Each sion, place you in a location on the map where of the satellites, which orbit at a height of no road exists. -
Page 120: When Positioning By Gps Is Impossible
Appendix Appendix When positioning by GPS is your vehicle may differ from the position dis- played on the map screen. impossible ! If you make a shallow turn. ! GPS positioning is disabled if signals can- not be received from more than two GPS satellites. - Page 121 Appendix Appendix ! If the road has a series of hairpin bends. ! If you enter or exit a multi-storey parking lot or similar structure using a spiral ramp. ! If there is a loop or similar road configura- ! If your vehicle is turned on a turntable or si- tion.
-
Page 122: Route Setting Information
Appendix Appendix ! During voice guidance, turns and intersec- ! When you drive around a traffic circle. tions from the freeway are announced. However, if you pass intersections, turns, and other guidance points in rapid succes- sion, some may delay or not be announced. ! It is possible that guidance may direct you off a freeway and then back on again. -
Page 123: Built-In Drive And Care
Appendix Appendix ! Despite our careful design of the product, Built-in drive and care small scratches that do not affect actual ! Use only conventional, fully circular discs. operation may appear on the disc surface Do not use shaped discs. as a result of mechanical wear, ambient conditions for use or handling of the disc. -
Page 124: Detailed Information For Playable Media
Appendix Appendix ! There may be a slight delay when starting Detailed information for playback of files on a USB storage device playable media with complex folder hierarchies. ! It may not be possible to play some music Compatibility files from USB because of file characteris- CD-R/CD-RW discs tics, file format, recorded application, play- ! Unfinalized discs cannot be played back. - Page 125 Appendix Appendix SD memory card and SDHC memory card = For more details about SD memory card compatibility with this navigation system, refer to Specifications on page 135. ! This system is not compatible with Multi Media Card (MMC). Handling guidelines and supplemental information ! Copyright protected files cannot be played back.
-
Page 126: Media Compatibility Chart
Appendix Appendix Media compatibility chart General Media CD-R/-RW USB storage device ISO9660 level 1, File system ISO9660 level 2, FAT16/FAT32 Romeo and Joliet Maximum number of folders Maximum number of files 15 000 Playable file types MP3, WMA, AAC, WAV MP3, WMA, AAC, WAV MP3 compatibility Media... - Page 127 Appendix Appendix WAV compatibility Media CD-R/-RW, USB storage device File extension .wav Format Linear PCM (LPCM), MS ADPCM LPCM: 16 kHz to 48 kHz Sampling frequency MS ADPCM: 22.05 kHz and 44.1 kHz AAC compatibility Media CD-R/-RW, USB storage device File extension .m4a Bit rate...
-
Page 128: Bluetooth
Licensing, Inc. gistered trademarks owned by Bluetooth SIG, Inc. and any use of such marks by Pioneer Corporation is under license. Other trademarks and trade names are those of their respective owners. AAC is short for Advanced Audio Coding and refers to an audio compression technology standard used with MPEG-2 and MPEG-4. -
Page 129: Detailed Information Regarding Connectable Ipods
Detailed information iPhone regarding connectable iPods CAUTION ! Pioneer accepts no responsibility for data lost from an iPod, even if that data is lost while using the navigation system. ! Do not leave the iPod in direct sunlight for ex- tended amounts of time. -
Page 130: Using The Lcd Screen Correctly
In that case, please consult your dealer or the nearest authorized PIONEER Liquid crystal display (LCD) screen Service Station. ! If the LCD screen is near the vent of an air conditioner, make sure that air from the air conditioner is not blowing on it. -
Page 131: Display Information
Appendix Appendix Display information “Navigation Menu” screen “Settings Menu” screen Page Page [Address] [Sound] [Go Home] [Region] [POI] [UI Language], [Voice Language] [Spell Name] [Time] [Near Me] [km / mile] [Near Dest.] [Speed] [Around City] [Keyboard] [AVIC FEEDS] [Map] [Favorites] 40, 42 [Overlay POI] [View Mode]... -
Page 132: Phone Menu" Screen
Appendix Appendix “Phone Menu” screen [Brightness] [F. Reset] [Screen Off] Page [Dial Pad] [Call Home] [Contacts] [Received] [GOOG-411] [Dialed] [Missed] [Transfer] [Volume] [Phone Ringtone] [Phone Voice] [Settings] [Connections] [Bluetooth On/Off] [Auto Answer Preference] [Refuse All Calls] [Echo Cancel] [Auto Connect] [Edit Name] [Clear Memory] [Bluetooth Software Update]... -
Page 133: Glossary
Appendix Appendix Glossary Guidance point These are important landmarks along your route, generally intersections. The next gui- AAC is short for Advanced Audio Coding and dance point along your route is indicated on refers to an audio compression technology the map by the yellow flag icon. standard used with MPEG-2 and MPEG-4. - Page 134 Appendix Appendix ! Level 2: Point of Interest (POI) Point Of Interest; any of a range of locations The file name can have up to 31 characters (including the separation mark “.” and a file stored in the data, such as railway stations, extension).
-
Page 135: Specifications
Appendix Appendix Power off ......–4 °F to +176 °F Specifications Audio General Maximum power output ..50 W × 4 Rated power source ....14.4 V DC Continuous power output ... 22 W × 4 (50 Hz to 15 kHz, (allowable voltage range: 5 %THD, 4 W LOAD, Both 10.8 V to 15.1 V DC) - Page 136 Appendix Appendix CEA2006 Specifications Signal-to-noise ratio ....94 dB (1 kHz) (IHF-A net- work) MP3 decoding format ... MPEG-1 & 2 Audio Layer 3 WMA decoding format ..Ver.7,7.1,8,9,10 (2 ch audio) (Windows Media Player) AAC decoding format .... MPEG-4 AAC (iTunes en- coded only) WAVE SIGNAL FORMAT ..
- Page 137 TEL: (03) 9586-6300 PIONEER ELECTRONICS OF CANADA, INC. 300 Allstate Parkway, Markham, Ontario L3R 0P2, Canada TEL: 1-877-283-5901 TEL: 905-479-4411 PIONEER ELECTRONICS DE MEXICO, S.A. de C.V. Blvd.Manuel Avila Camacho 138 10 piso Col.Lomas de Chapultepec, Mexico, D.F. 11000 TEL: 55-9178-4270 先鋒股份有限公司...
Need help?
Do you have a question about the AVIC U310BT - Navigation System With CD player and is the answer not in the manual?
Questions and answers