Table of Contents
Advertisement
Advertisement
Table of Contents

Subscribe to Our Youtube Channel
Related Manuals for Perfect Aire 4PAC15000


Summary of Contents for Perfect Aire 4PAC15000
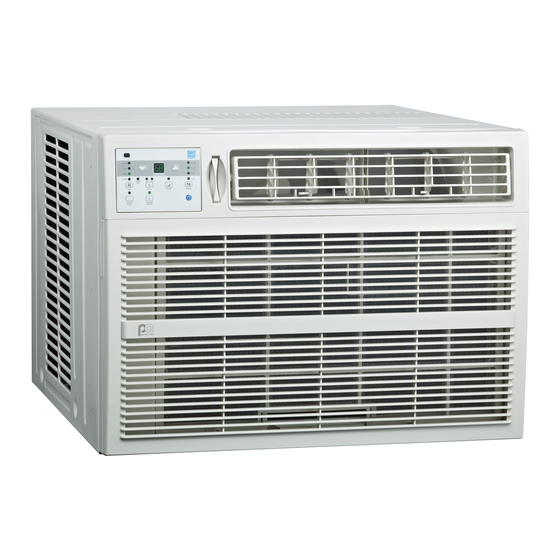
- Page 1 COMFORT...BUILT TO LAST 15,100, 18,000 & 25,000 BTU WINDOW AIR CONDITIONER USER MANUAL FOR MODELS: 4PAC15000 4PAC18000 4PAC25000 Before using your window air conditioner, please read this manual carefully and keep it for future reference, along with your receipt.
-
Page 2: Table Of Contents
CONTENTS SAFETY PRECAUTIONS .................. 2-3 IMPORTANT SAFETY INSTRUCTIONS ...............4 INSTALLATION INSTRUCTIONS ..............5-13 Window Mounting................7-11 Thru-the-wall Installation.............. 12-13 NORMAL SOUNDS ....................14 AIR CONDITIONER FEATURES ..............14-16 CARE AND CLEANING..................17 TROUBLESHOOTING TIPS ................18 This manual provides the information needed for proper use and maintenance of this air conditioner. -
Page 3: Safety Precautions
SAFETY PRECAUTIONS To prevent injury to the user or other people and property damage, the following instructions must be followed. Incorrect operation due to ignoring of instructions may cause harm or damage. The seriousness is classified by the following indications. WARNING This symbol indicates the possibility of death or serious injury. - Page 4 ! CAUTION When removing air filter, do not Ensure proper ventilation touch metal parts of the unit. especially in rooms with a stove or other appliances. Doing so may cause an injury. Water may enter the unit and Failure to do so may result in an degrade the insulation causing an oxygen shortage.
-
Page 5: Important Safety Instructions
IMPORTANT SAFETY INSTRUCTIONS For Your Safety WARNING! NOTE The power supply cord with this air conditioner contains a current DO NOT store or use gasoline or other flammable vapors or liquids in detection device designed to reduce the vicinity of this or any other appliance. the risk of fire. -
Page 6: Installation Instructions
INSTALLATION INSTRUCTIONS Required Tools/Hardware BEFORE YOU BEGIN Tools Required (Not Included) • Pencil Read these instructions completely • Level and carefully. • Tape measure IMPORTANT- Save these instructions. • Socket wrenches IMPORTANT- Observe all • Phillips screwdriver • Adjustable wrench or pliers governing codes and ordinances. -
Page 7: Preliminary Instructions
INSTALLATION INSTRUCTIONS (CONTINUED) Please read ALL instructions before installing. Two people are recommended to install this product. If a new electrical outlet is required, have the outlet installed by a qualified electrician before installing the unit. Preliminary Instructions Window Sash Seal Do the following before installing the unit. -
Page 8: Window Mounting
INSTALLATION INSTRUCTIONS (CONTINUED) Window Mounting Front Panel Remove Chassis 1. Pull down front grille and remove filter.(See Fig. 1.) Front Grille 2. Lift front grille upwards and place to one side. Fig. 1 Fig. 2 3. Locate and remove the four front screws. These screws will be needed to re-install the front panel later. - Page 9 INSTALLATION INSTRUCTIONS (CONTINUED) 3. Insert top and bottom legs of window filler panel Install Top Angle and frame into channel in the top angle and bottom Side Bracket rail. Do both sides. 1. Attach foam gasket to top angle above holes as 4.
- Page 10 INSTALLATION INSTRUCTIONS (CONTINUED) 1/2" Long Screws Left And Locknuts Locknut Bottom Rail Seal Sill Angle Right Bracket Flat Head Bolt 3/4" 1/2") Long 2 Each Required For Hex-head Screw Each Support Bracket Fig.13 Fig.15B Install Support Bracket 1. Hold each support bracket flush against outside of 3.
- Page 11 INSTALLATION INSTRUCTIONS (CONTINUED) Install Window Sash Seal and 4. Attach the top angle to window frame: Use a 3/32" drill bit to drill one hole through the hole in Safety Lock the middle of top angle into the window frame, 1.
- Page 12 INSTALLATION INSTRUCTIONS (CONTINUED) Install R1 Hardware Step 3: Slide the R1 insulation panel you just cut into the window filler panel. The side of the In order to minimize air leaks and ensure optimal insulation panel with the pattern on it should insulation, it is necessary to install the included R1 face indoors.
-
Page 13: Thru-The-Wall Installation
INSTALLATION INSTRUCTIONS (CONTINUED) Thru-The-Wall Installation Select Wall Location The air conditioner has a slide-out chassis so that it can be installed through an outside wall as specified below: Max. Wall Thickness: 12" or 10" never be blocked. 3-3/8" (8.6cm) frame construction at ends of windows, under truss- bearing points, etc. -
Page 14: Installation Instructions
INSTALLATION INSTRUCTIONS (CONTINUED) Fig. 5 Prepare and Install Cabinet of Window Mounting. NOTE: Check that air conditioner is tilted back about 1-1/2" to 1-5/8" (3º to 4º downward toward firmly on bottom board of wooden frame. the outside). If, after proper installation, condensation does not drain from the overflow... -
Page 15: Normal Sounds
NORMAL SOUNDS High Pitched Chatter High efficiency compressors may have a high pitched chatter Vibration during the cooling cycle. Unit may vibrate and make noise because of poor wall or window construction or incorrect installation. Sound of Rushing Air At the front of the unit, you may hear the sound of rushing air being moved by the fan Pinging or Switching... - Page 16 AIR CONDITIONER FEATURES (CONTINUED) TO ADJUST THE FAN SPEED: TO SELECT THE OPERATING MODE: Press to select one of four fan speeds: “Auto,” To choose operating mode, press the Mode button. “Low,” “Med” or “High.” Each time the button is Each time you press the button, a mode is selected in pressed, the fan speed mode is shifted.
- Page 17 If error repeats, call customer service. Evaporator temperature sensor error - Unplug the unit and plug it back in. If error repeats, call customer service. Perfect Aire Consumer Services: (“ ” is displayed as shown in left picture.) 877-365-6274 ADDITIONAL THINGS YOU SHOULD KNOW The Cool circuit has an automatic 3 minute time delayed start if the unit is turned off and on quickly.
-
Page 18: Care And Cleaning
CARE AND CLEANING CAUTION Clean air conditioner occasionally to keep it looking and operating like new. Be sure to unplug the unit before cleaning to prevent shock or fire hazards. Air Filter Cleaning The air filter should be cleaned at least every two weeks or as necessary. -
Page 19: Troubleshooting Tips
TROUBLESHOOTING TIPS Before calling for service, please review the chart below. Issue Possible Solutions • Be sure unit is not too large or too small for the area of the room. • Verify that all doors, windows, curtains and any other openings are closed off. Verify nothing is obstructing the front grille of unit, such as curtains, etc. - Page 20 COMFORT...BUILT TO LAST Distributed by: Perfect Aire, LLC 5151 Belt Line Rd. Suite 878 Dallas, TX 75254 877-365-6274 www.perfectaire.us Specification and performance data is subject to change without notice. Printed in China...
Need help?
Do you have a question about the 4PAC15000 and is the answer not in the manual?
Questions and answers