Table of Contents
Advertisement
Advertisement
Table of Contents

Related Manuals for Vivitar DVR 906 lifecam


Summary of Contents for Vivitar DVR 906 lifecam
-
Page 1: User Manual
DVR 906 LifeCam Wearable Camcorder User Manual © 2009-2016 Sakar International, Inc. All rights reserved. Windows and the Windows logo are registered trademarks of Microsoft Corporation. All other trademarks are the property of their respective companies. -
Page 2: Table Of Contents
CONTENTS Introduction ..........................2 What’s Included ..........................3 Parts of the Camcorder ........................ 4 Camcorder Technical Specifications ..................... 5 Initial Camcorder Setup ........................ 6 Main Camcorder Modes ......................11 Powering On Your Camcorder ....................12 LCD Display ..........................13 Changing Camcorder Mode ....................... 14 Video Capture Mode ........................ -
Page 3: Introduction
Introduction Thank you for purchasing the Vivitar DVR 906 LifeCam Wearable Camcorder. Everything you need to take high definition digital videos and photos is included with your camcorder. This unique, ultraportable camera design is adapted specifically for this camera and can be used to capture special moments in many different environments. -
Page 4: What's Included
What’s Included 1. LifeCam Camcorder 2. USB Cable 3. Vivitar Experience Installation CD 4. Clip Mount 5. Bicycle Mount 6. Neck Strap 7. Built-in Lithium Battery (not shown) NOTE: Micro SD Memory Card not included. -
Page 5: Components View
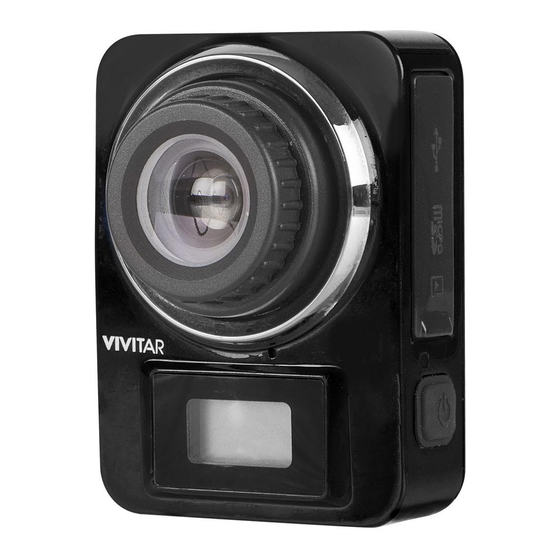
Parts of the Camcorder 1. Lens 8. Mode Button 2. Microphone 9. LED Light Busy Indicator 3. LCD Display 10. Shutter Button 4. USB Port / Micro SD Card Slot / Reset 11. SET Indicator 5. Power / Charger Light Indicator 12. -
Page 6: Camcorder Technical Specifications
White Balance Auto Light Exposure Auto Auto Power Off 3 minutes Auto Metering Center Interface USB 2.0 Battery 250mAH Built-in Lithium Battery System Requirements for WINDOWS XP (SP3), Vista (SP1), WINDOWS 7 or higher; Vivitar Experience MAC OSX v10.5.x and above... -
Page 7: Charging Battery
Initial Camcorder Setup CHARGING THE BATTERY To charge the lithium battery: 1. Power off the camcorder. 2. Connect the included USB cable to the camcorder and connect the other end of the cable to a power source such as a computer. Please refer to the images shown below for reference. -
Page 8: Installing Micro/Sd Memory Card
Battery Indicator: Battery Indicator Description The battery level is full. The battery level is half. When this icon flashes, this indicates that the battery level is low and the camcorder will then automatically turn off. Please recharge your camcorder. NOTE: When the battery capacity drops to a low level, the battery icon will flash on the display, indicating that the camcorder requires to be recharged. - Page 9 IMPORTANT: Please power the camcorder off before plugging in or taking out the memory card. If the card is inserted or removed while the camcorder's power is on, it may damage the card and/or any recorded data. Always confirm that the power is off before inserting the card into the camcorder.
-
Page 10: Setting Date And Time
- On a Windows computer, open an Internet browser. - Copy the link below and paste into in your browser or click on the link below to automatically download the DSC_Clock.zip file. http://www.vivitar.com/downloads/DSC_Clock.zip - After the DSC_Clock.zip file has been downloaded, extract/unzip the DSC_Clock.exe file. -
Page 11: Using The Camcorder
4. Click ‘Clock Sync’ on the DSC Clock window to synchronize the camera’s time with your computers time. The ‘PC Clock’ and ‘DSC Clock’ then display the same date and time setting. This indicates that the synchronization has successfully updated your camera’s date and time. Note: If you use this tooling on Win7 or Win 8, a reminder appears “User Account Control”. -
Page 12: Main Camcorder Modes
Main Camcorder Modes Press the MODE button to toggle between the Time Lapse, Video and Photo Capture Modes. Video Capture Mode Use this mode to capture videos with your digital camcorder. To record a video, please check that the camcorder is in Video Mode. If the video icon is not displayed on the LCD screen, press the Mode button repeatedly until it appears. -
Page 13: Powering On Your Camcorder
Powering On Your Camcorder TURNING POWER ON AND OFF 1. Press and hold the POWER button for about 3 seconds to turn on the camcorder. The LCD screen briefly displays ‘ON’ and opens the default Video Capture Mode. A beep can also be heard from the buzzer. -
Page 14: Lcd Display
LCD Display After turning on the Camcorder, the LCD displays the following: ICON DESCRIPTION Indicates that the camcorder is currently in Photo Capture Mode. CAMERA MODE ICON Indicates that the camcorder is currently in Video Capture Mode. VIDEO RECORDING ICON Flashing icon means the camcorder is recording a video. -
Page 15: Changing Camcorder Mode
Changing Camcorder Mode THREE MAIN MODES 1. Video Capture Mode - Use this mode to capture videos with your camcorder. 2. Time Lapse Mode – Use this mode to capture time lapse videos with your camcorder. 3. Photo Capture Mode - Use this mode to capture photos with your camcorder. SWITCHING MODES After turning on the camcorder, you can press the MODE (M) button to switch between the modes. -
Page 16: Video Capture Mode
Video Capture Mode The Video Capture Mode is the default mode when turning on the camcorder. The Video Capture Mode allows you to capture videos with your digital camcorder. TAKING A VIDEO 1. Power On: Press and hold the POWER button for about 3 seconds to power on the camcorder. 2. -
Page 17: Time Lapse Mode
After recording the video, the amount of available time left to capture additional videos as per your memory card size and selected resolution size appears on the LCD screen. If the memory card is full or the battery is low, the camcorder will automatically stop recording. -
Page 18: Photo Capture Mode
Photo Capture Mode The Photo Capture Mode allows you to capture photos with your digital camcorder. TAKING A PHOTO 1. Power On: Press and hold the Power button to power for about 3 seconds on the camcorder. 2. Enter Photo Capture Mode: When you first power on the camcorder, the Video Capture Mode will be active. -
Page 19: Playback Mode
Playback Mode Your captured videos and photos can be played back using your computer. PLAYBACK MODE: COMPUTER 1. Connect your camcorder to your computer using the supplied USB cable. Connect the smaller end of the USB cable to the USB interface of your camcorder and the other end to the USB port of your computer. - Page 20 DELETING CAPTURED IMAGES Files can be deleted while your camcorder is connected to your computer. DELETING IMAGE FILES WHILE CONNECTED TO THE COMPUTER: After connecting your camera to the computer with the USB cable and powering on your camera, the camera enters portable disc mode. ‘PCU’ displays on the LCD screen. 1.
-
Page 21: Computer System Requirements
Computer System Requirements To be able to download videos and photos to your computer using the ‘Vivitar Experience Image Manager’ Software, you will need the following minimum configuration: WINDOWS OS MICROSOFT® Windows XP with Service Pack 3, Windows Vista with Service Pack 1 or Windows 7 ... -
Page 22: Installing The Software
ROM or by accessing the software link online. INSTALLING THE SOFTWARE – USING THE CD ROM You must be connected to the Internet to install and run the Vivitar Experience Image Manager Software. 1. Insert the installation CD into your CD-ROM drive. The installation screen should automatically open. - Page 23 On MACINTOSH OS: Click the “Quit” button when the installation is complete. Click the “Launch Vivitar Experience Image Manager” to open the application. 13. If you close the application you can run the Vivitar Experience Image Manager from the Programs (PC) or Applications (Mac) menu on your computer.
-
Page 24: Connecting The Camcorder To The Computer
INSTALLING THE SOFTWARE – USING THE ONLINE LINK The Vivitar Experience Image Manager Software can also be downloaded and installed via the following online links: WINDOWS OS: http://tinyurl.com/viviwin MAC OS: http://tinyurl.com/vivimac 1. Enter the appropriate URL (shown above) into a web browser on your computer. -
Page 25: Getting Videos And Photos From The Camcorder To The Computer
Getting Videos and Photos from the Camcorder to the Computer The Micro SD Memory card needs to be inserted. Do not disconnect the cable during transfer. Doing so will cancel the transfer of any files on their way to your computer. 1. -
Page 26: Getting Started
Edit images using automatic and manual tools Use automatic “Geotagging” with built in Google Maps For more details on how to use the Vivitar Experience Image Manager open the Help file or click the “Take a Tour” button on the application’s Home screen. - Page 27 TRANSFERRING PHOTOS AND VIDEOS: MACINTOSH OS 1. Use the supplied USB cable to connect your camera to your computer. 2. ‘MSDC’ appears on the LCD. 3. The camera’s device icon appears on the desktop. 4. Click on the device icon and open the DCIM folder and the folder inside to view the media files.
-
Page 28: Troubleshooting
Q: I deleted images using the Vivitar Experience Image Manager. The images were also deleted from my computer. How do I recover images that I accidently deleted? All images deleted using the Vivitar Experience Image Manager are sent to your computer’s... -
Page 29: Camcorder Maintenance
Camcorder Maintenance Please read the information below carefully before using your camcorder for proper and safe operation, so as to use the camcorder to its fullest and maintain its performance. MEMORY CARD MAINTENANCE: For the first time of using a new memory card, or when there is unrecognized data for the camera or images with other cameras in the memory card, please make sure to firstly format the memory card. - Page 30 DEVICE MAINTENANCE: Keep the video camera free of dust and chemical materials. Place it in a cool, dry and well ventilated place. Do not place the video camera in a high temperature, moist or dusty place. If dirt or stains accumulate on the video camera or on its lens, use a soft, clean and dry rag to wipe it away gently.
-
Page 31: Sakar Warranty Card
08817 Coventry, CV3 4SU Technical Support For technical support issues please visit our website at www.vivitar.com. You can find manuals, software and FAQ’s at the website. Can’t find what you are looking for? E-mail us at support@vivitar.com and one of our technical support team members will answer your questions.
Need help?
Do you have a question about the DVR 906 lifecam and is the answer not in the manual?
Questions and answers