
Related Manuals for Impecca IWA25-QS30


Summary of Contents for Impecca IWA25-QS30
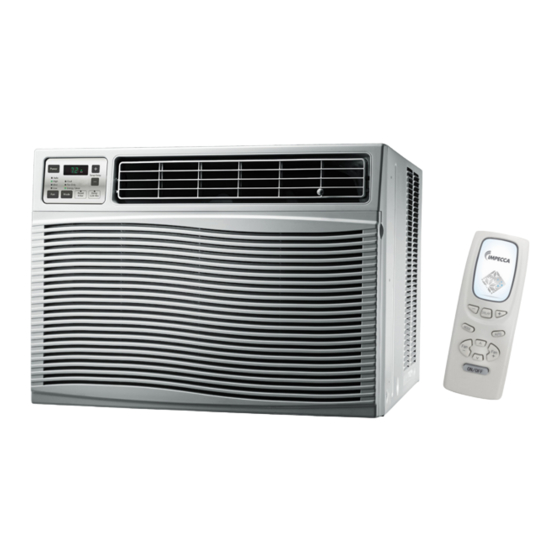
- Page 1 Window Air Conditioner—User Manual Aire acondicionado—Manual de usuario Model: IWA25-QS30 www.impecca.com V 1.1...
- Page 2 WARNING: To avoid permanent damage to unit: Ensure it is in the upright position for a MINIMUM of 6 hours and a RECOMMENDED time of 24 hours before powering on the first time. ADVERTENCIA: Para evitar daños permanentes a la unidad: Asegúrese de que está...
-
Page 3: Table Of Contents
TABLE OF CONTENTS Important Safety Notices Introduction Getting to Know Your Air Conditioner Using your Air Conditioner Remote Control Pre-Installation Instructions Installing Your Unit Energy Saving Panel Installation Cleaning & Maintenance Troubleshooting Unit Error Codes Customer Support SPANISH –iii–... -
Page 4: Important Safety Notices
READ THESE NOTICES CAREFULLY—THEY ARE IMPORTANT! WARNING Do not start or stop the unit by inserting Do not damage power cord or replace Plug in power plug completely. or pulling out the power plug. with a non-original power cord. •... - Page 5 CAUTION Unplug the power cord when not Stop operation and remove unit from Hold the plug by the head of the power using the unit for extended periods window in severe storm or hurricane. plug when unplugging unit. of time.
-
Page 6: Introduction
INTRODUCTION Thank you for purchasing this quality Impecca in-window air conditioner unit. To ensure the longest life and highest energy efficiency of your unit, please carefully follow these operating instructions. Keep these instructions in a safe place and consult them as needed. Please note... -
Page 7: Getting To Know Your Air Conditioner
OPERATING CONDITIONS • The air conditioner must be operated within the temperature range of 62°F to 95°F (16°C to 35°C). • A perimiter of 12′′(30cm) around the air conditioner should be free of all objets. • Do not operate the air conditioner in humid environments. •... -
Page 8: Using Your Air Conditioner
USING YOUR AIR CONDITIONER CONTROL PANEL OVERVIEW PRIMARY FUNCTIONS 1. Power ON/OFF button: Use this button to turn the unit on or off. 2. Mode button: Cycle between cooling mode, dehumidifier mode, and fan mode. 3. Fan button 4. Reset filter button 5. -
Page 9: Remote Control
REMOTE CONTROL ON/OFF button Fan +/- buttons Temperature ▲/▼ buttons Mode button Auto button Timer +/- buttons Timer (DELAY) button USING THE REMOTE CONTROL ON/OFF BUTTON Press the ON/OFF button to turn the unit on or off. FAN +/- BUTTONS Press the respective button to increase (+) or decrease (-) fan speed. - Page 10 TIMER (DELAY) BUTTON • When the unit is running, press this button to program a time when the unit will automatically turn off. Use the +/- buttons to change the air conditioners display to determine the delay (in hours) until the unit will shut down in 1 hour incre- ments.
-
Page 11: Pre-Installation Instructions
PRE-INSTALLATION INSTRUCTIONS TOOLS & ACCESSORIES FOR INSTALLATION Gather the following tools and unit accessories before beginning your installation: UNIT & ACCESSORIES 1. Air conditioning unit 9. Left & right mounting brackets 2. Flexible window adapter set 10. Supporters x2 3. Sealing strip (no adhesive) 11. -
Page 12: Installing Your Unit
TOOLS • Philips screwdriver • Scissors • Flat-head screwdriver • Level • Pencil • Measuring tape Note: • Always contact a local, qualified professional for installation. • Never use an underrated electrical cord or outlet! WEATHER-PROOF WINDOW MODIFICATIONS If you have weather proof windows, the exterior window frame will be slightly higher than the window sill, which results in a slanted air conditioning unit that will not properly drain. - Page 13 4. Remove the four screws on the outer case: two on the top of the case and a screw on the left and right sides. 5. With the help of another person holding the outer case, pull gently outward on the handle to remove the unit from its housing as illustrated above.
- Page 14 STEP 4: FOAM STRIP ON WINDOW FRAME • Affix the Foam seal (with adhesive) z to the bottom of the window sash and the Window Base foam seal { to the window base. . Sealing strip (with adhesive) STEP 5: MOUNT THE UNIT HOUSING IN THE WINDOW FRAME 1.
- Page 15 4. On the interior side of the window, fasten the upper left and right corners of the flexible screen with two Type C screws. STEP 6: SECURING THE WINDOW 1. To keep the window from being unintentionally opened and risk damaging the unit or injuring passerby, use one type C screw to fasten the security bracket to the window.
- Page 16 STEP 7: INSULATING FOAM SASH SEAL 1. Prevent warm or cold air from entering in between the partially opened window and the closed upper window by placing the non-adhesive foam sash seal in be- tween the window sash and the glass pane. STEP 8: MOUNT AIR CONDITIONER UNIT 1.
- Page 17 3. Replace the front case housing by posing the top of the casing on the unit and then pressing inwards on the base of the casing. Fasten the housing with the screws re- moved in step 1 of the installation. 4.
-
Page 18: Energy Saving Panel Installation
STEP 9: ENERGY SAVING R1 PANEL INSTALLATION • After the basic installation is complete, you’ll want to install the energy saving R1 panels which will ensure that your unit meets the Energy Start standard for effi- ciency. This will help prevent drafts coming in through the window filler panels by adding a layer of foam insulation. -
Page 19: Cleaning & Maintenance
CLEANING & MAINTENANCE SAFETY WARNING To avoid electric shock, fire, damage, or injury while performing maintenance on your unit: • Always turn off and disconnect the air conditioner from electric power. • Never submerge the unit in water or spray liquids directly on the unit. •... -
Page 20: Troubleshooting
CLEANING THE OUTER HOUSING AND INTAKE GRILLE If dust has accumulated on the unit, use a soft, dry dusting towel to wipe it off. If grease or other harder to remove substances is on the unit, use a wrung-out cloth dampened with warm, soapy water. - Page 21 The air conditioner unit starts and stops frequently. • Verify the rating of your electrical system and outlets. You may need a qualified electrician to troubleshoot and upgrade your electrical circuits if your air condi- tioner unit exceeds the rated capacity. •...
-
Page 22: Unit Error Codes
If you wish to contact us by phone, please be sure to have your model number and serial number ready and call us between 9:00am and 6:00pm ET, at +1 866-954-4440. Keep tabs on Impecca’s newest innovations & enter contests via our social network feeds: ... -
Page 23: Spanish
TABLA DE CONTENIDO Avisos Importantes De Seguridad 24-25 Introducción Conociendo Su Unidad De Aire Acondicionado Usando Su Aire Acondicionado Control Remoto Instrucciones De Preinstalación Instalando Su Unidad Instalación Del Panel De Ahorro De Energía Limpieza Y Mantenimiento Solución De Problemas Códigos De Error De La Unidad Soporte Técnico ENGLISH... -
Page 24: Avisos Importantes De Seguridad
LEA CUIDADOSAMENTE ESTAS INDICACIONES ¡ SON MUY IMPORTANTES! ADVERTENCIAS No encienda o apague la unidad al conec- No dañe el cable de suministro de Conecte completamente la clavija del tar o desconectar el cable de suministro energía o lo sustituya por otro que no suministro de energía de energía sea el original... - Page 25 PRECAUCIÓN Apague la unidad y desconéctela y Desconecte el cable de suministro Para conectar y desconectar la unidad retírela de la ventana durante tormentas eléctrico cuando la unidad no se utilice utilice la clavija del cable. severas y huracanes por periodos prolongados de tiempo •...
-
Page 26: Introducción
INTRODUCCIÓN Gracias por comprar esta unidad de aire acondicionado para ventana de calidad Impecca. Para asegurar una larga vida útil y la más alta eficiencia de energía de su unidad, siga cuidado- samente estas instrucciones. Mantenga estas instrucciones en un lugar seguro y consúltelas cuando lo requiera. - Page 27 disminuidas operen o estén cerca de la unidad sin la supervisión directa de un adulto. • No permita que los niños realicen la limpieza u otras operaciones de manteni- miento sin la supervisión directa de un adulto. • No intente reparar o desarmar usted mismo la unidad de aire acondicionado. •...
-
Page 28: Conociendo Su Unidad De Aire Acondicionado
CONOCIENDO SU UNIDAD DE AIRE ACONDICIONADO 1. Control panel 2. Salida del aire frío 3. Cuchillas direccionales de aire frío 4. Entrada de aire cálido 5. Cable de suministro de energía –28–... -
Page 29: Usando Su Aire Acondicionado
USANDO SU UNIDAD DE AIRE ACONDICIONADO DESCRIPCIÓN GENERAL DEL PANEL DE CONTROL NCIONES PRINCIPALES 1. Botón POWER: use este botón para encender y apagar su unidad de aire acondicionado 2. Botón MODE: Con este botón puede recorrer los diferentes modos de funciona- miento: modo de enfriamiento (cooling), modo de deshumidificador (dehumidi- fier), y ventilador (fan) 3. -
Page 30: Control Remoto
CONTROL REMOTO Botón ON/OFF Botones Fan +/- Botones de temperatura ▲/▼ Botón Mode Botón Auto Botones del Temporizador +/- Botón Timer (DELAY) USANDO EL CONTROL REMOTO BOTÓN ON/OFF Presione el botón ON/OFF para encender o apagar la unidad. BOTONES FAN +/- Presione el botón correspondiente para aumentar (+) o disminuir (-) la velocidad del ven- tilador. - Page 31 BOTÓN TIMER (DELAY) • Cuando la unidad está funcionando, presione este botón para programar el tiem- po en que la unidad se ha de apagar. Use los botones +/- para cambiar la pantalla del aire acondicionado para ajusta el tiempo (en horas, en incrementos de 1 hora) en que la unidad ha de apagarse.
-
Page 32: Instrucciones De Preinstalación
INSTRUCCIONES DE PRE-INSTALACIÓN Reúna las siguientes herramientas y accesorios de la unidad antes de comenzar la instalación: UNIDAD Y ACCESORIOS 1. Unidad de aire acondicionado de relleno de la ventana 2. Adaptador flexible para ventana Ménsulas de montaje derecha e izquierda 3. -
Page 33: Instalando Su Unidad
MODIFICACIÓN PARA VENTANAS RESISTENTES A LA INTEMPERIE Si cuenta con ventanas resistentes a la intemperie, el marco exterior estará ligeramente más alto que el alféizar de la ventana, lo cual resulta en una unidad de aire acondiciona- do inclinada que no podrá drenar la condensación adecuadamente. Realice estas mo- dificaciones para asegurar una adecuada operación de su unidad. - Page 34 4. Retire los cuatro tornillos en la parte exterior del chasis: dos en la parte superior del chasis y dos en la parte inferior izquierda y derecha. 5. Con la ayuda de otra persona sosteniendo el chasis, saque la unidad hacia afuera del chasis jalando de la manija, como se muestra en la figura anterior.
- Page 35 PASO 4: SELLO DE ESPUMA EN EL MARCO DE LA VENTANA • Fije el sello de espuma (con adhesivo) z a la parte inferior del antepecho de la ventana y el sello de espuma de la base de la ventana a la base de la ventana {. Tira selladora (con adhesivo) PASO 5: MONTANDO EL CHASIS DE LA UNIDAD EN EL MARCO DE LA VENTANA 1.
- Page 36 3. En la parte exterior de la ventana coloque las ménsulas de montaje izquierda y de- recha en contra del alfeizar de la ventana debajo de los rieles inferiores del chasis de la unidad. Ajuste los tornillos en las ménsulas de montaje como lo crea nece- sario permitiendo un ligero ángulo de inclinación (entre 3-5°) para drenar la con- densación que se forma durante la operación del aire acondicionado.
- Page 37 PASO 7: TIRA SELLADORA AISLANTE 1. Evite que el aire caliente o frío entre por la ventana parcialmente abierta colocan- do la tira selladora no adhesiva entre el bastidor de la ventana y el panel de vidrio. PASO 8: MONTANDO LA UNIDAD DEL AIRE ACONDICIONADO 1.
- Page 38 3. Coloque nuevamente en su lugar la parte frontal del chasis colocando primero de la parte superior de la unidad y presionando hacia adentro en la base del chasis. Asegure esta parte con los tornillos que se retiraron en la parte 1 de la instalación. 4.
-
Page 39: Instalación Del Panel De Ahorro De Energía
PASO 7: INSTALACIÓN DEL PANEL DE AHORRO DE ENERGÍA R1 • Después de que la instalación básica ha terminado, usted querrá instalar los pane- les de ahorro de energía R1 lo cual asegurará que su unidad cumple con la norma de eficiencia de Energy Star. -
Page 40: Limpieza Y Mantenimiento
LIMPIEZA Y MANTENIMIENTO ADVERTENCIAS DE SEGURIDAD Para evitar descargas eléctricas, incendios, daños y lesiones al realizar el mantenimiento de su unidad: • Siempre apague y desconecte del tomacorrientes la unidad de aire acondicionado • Nunca sumerja la unidad en agua o rocíe líquidos directamente sobre ella •... - Page 41 REVISIÓN DE LA UNIDAD EN LA POST TEMPORADA DE CALOR Después de utilizar su unidad de aire acondicionado en los cálidos meses del verano, siempre realice las siguientes revisiones: • Desconecte la unidad del tomacorrientes • Limpie el filtro y el chasis de la unidad •...
-
Page 42: Solución De Problemas
SOLUCIÓN DE PROBLEMAS El aire acondicionada no funciona para nada • ¿El cable de suministro de energía esta adecuadamente conectado en un toma- corrientes que funciona y está aterrizado? • ¿Existe alguna falla como un fusible quemado o se disparó el cortacircuitos? •... - Page 43 La unidad emite un sonido fuerte o inusual y vibraciones • Coloque la unidad en una superficie nivelada Se escucha un sonido de “estrujamiento” • Ocasionalmente la circulación del refrigerante dentro de la unidad puede cau- sar este ruido. Se escucha un sonido como de “palmaditas” •...
-
Page 44: Códigos De Error De La Unidad
9:00am y las 6:00pm hora del Este, al +1 866-954-4440. Manténgase al tanto de las innovaciones más recientes de Impecca y participe en con- cursos por medio de nuestras redes sociales.
Need help?
Do you have a question about the IWA25-QS30 and is the answer not in the manual?
Questions and answers