Hirschmann MACH 4000 Reference Manual
Web-based interface industrial ethernet (gigabit) switch
Hide thumbs
Also See for MACH 4000:
- User manual (240 pages) ,
- Reference manual (572 pages) ,
- Programming manual (116 pages)

Related Manuals for Hirschmann MACH 4000


Summary of Contents for Hirschmann MACH 4000
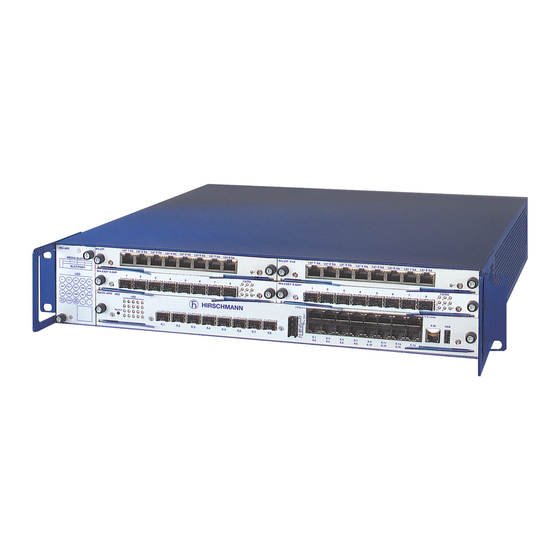
- Page 1 Reference Manual Web-based Interface Industrial ETHERNET (Gigabit) Switch PowerMICE, MACH 1040, MACH 4000 RM Web Technical Support Release 6.0 07/2010 HAC.Support@Belden.com...
- Page 2 In addition, we refer to the conditions of use specified in the license contract. You can get the latest version of this manual on the Internet at the Hirschmann product site (www.hirschmann-ac.de). Printed in Germany Hirschmann Automation and Control GmbH Stuttgarter Str.
-
Page 3: Table Of Contents
Contents About this Manual Opening the Web-based Interface Basic Settings System Network Software 1.3.1 View the software versions present on the device 1.3.2 TFTP Software Update 1.3.3 HTTP Software Update 1.3.4 Automatic software update by ACA Port Configuration Power over ETHERNET Loading/Saving the Configuration 1.6.1 Loading the configuration 1.6.2 Saving the Configuration... - Page 4 Contents IEEE 802.1X Port Authentication 2.6.1 IEEE 802.1X Global 2.6.2 IEEE 802.1X Port Configuration 2.6.3 IEEE 802.1X Port Statistics 2.6.4 RADIUS Server Settings for IEEE 802.1X Time SNTP configuration PTP (IEEE 1588) 3.2.1 PTP Global (MS20/MS30, PowerMICE, MACH 104, MACH 1040) 3.2.2 PTP Version 1 (MS20/MS30, PowerMICE, MACH 104, MACH 1040) 3.2.3 PTP Version 2 (BC) (MS20/MS30, PowerMICE,...
- Page 5 Contents Queue Management 5.5.1 Strict Priority 5.5.2 Weighted Fair Queuing 5.5.3 Maximum bandwidth Routing Routing Global Configuring Router Interfaces 6.2.1 Configuration 6.2.2 Configuring secondary addresses 6.3.1 Setting ARP parameters 6.3.2 ARP statistics display 6.3.3 ARP table display 6.3.4 Editing the ARP table Router Discovery Configuration 6.5.1 Configuration 6.5.2 Route distribution...
- Page 6 Contents 7.5.1 Global 7.5.2 MSTP (Multiple Spanning Tree) 7.5.3 Port VRRP/HiVRRP 7.6.1 VRRP/HiVRRP configuration 7.6.2 HiVRRP domains 7.6.3 Statistics 7.6.4 Tracking Advanced DHCP Relay Agent DHCP Server 8.2.1 Global 8.2.2 Pool 8.2.3 Lease Table Industrial Protocols 8.3.1 PROFINET IO 8.3.2 EtherNet/IP Command Line Diagnostics Syslog...
- Page 7 Contents 9.10 Report 9.11 IP address conflict detection 9.12 Self Test Appendix Readers’ Comments Index Further Support RM Web L3E Release 6.0 07/2010...
- Page 8 Contents RM Web Release 6.0 07/2010...
-
Page 9: About This Manual
About this Manual About this Manual The "Web-based Interface" reference manual contains detailed information on using the Web interface to operate the individual functions of the device. The "Command Line Interface" reference manual contains detailed information on using the Command Line Interface to operate the individual functions of the device. - Page 10 About this Manual The Network Management Software HiVision/Industrial HiVision provides you with additional options for smooth configuration and monitoring: Configuration of multiple devices simultaneously. Graphical interface with network layouts. Auto-topology discovery. Event log. Event handling. Client / Server structure. Browser interface ActiveX control for SCADA integration SNMP/OPC gateway RM Web...
-
Page 11: Key
The designations used in this manual have the following meanings: List Work step Subheading Link Indicates a cross-reference with a stored link Note: A note emphasizes an important fact or draws your attention to a dependency. ASCII representation in user interface Courier Symbols used: WLAN access point... - Page 12 A random computer Configuration Computer Server PLC - Programmable logic controller I/O - Robot RM Web Release 6.0 07/2010...
-
Page 13: Opening The Web-Based Interface
Opening the Web-based Interface Opening the Web-based Interface To open the Web-based interface, you need a Web browser (a program that can read hypertext), for example Mozilla Firefox version 1 or later, or Microsoft Internet Explorer version 6 or later. Note: The Web-based interface uses Java software 6 (“Java™... - Page 14 Opening the Web-based Interface The login window appears on the screen. Figure 2: Login window Select the desired language. In the drop-down menu "Login", you select – user, to have read access, or – admin, to have read and write access to the device.
- Page 15 Opening the Web-based Interface Note: The changes you make in the dialogs will be copied to the device when you click “Set”. Click “Reload” to update the display. To save any changes made so that they will be retained after a power cycle or reboot of the device use the save option on the "Load/Save"...
- Page 16 Opening the Web-based Interface The menu section displays the menu items. By placing the mouse pointer in the menu section and clicking the alternate mouse button you can use “Back” to return to a menu item you have already selected, or “Forward” to jump to a menu item you have already selected.
-
Page 17: Basic Settings
Basic Settings 1 Basic Settings The Basic Settings menu contains the dialogs, displays and tables for the basic configuration: System Network Software Port configuration Power over Ethernet Load/Save Restart RM Web L3E Release 6.0 07/2010... -
Page 18: System
Basic Settings 1.1 System 1.1 System The “System“ submenu in the basic settings menu is structured as follows: Device Status System data Device view Reloading data Figure 4: "System" Submenu Device Status This section of the website provides information on the device status and the alarm states the device has detected. - Page 19 Basic Settings 1.1 System Figure 5: Device status and display of detected alarms 1 - Symbol indicates the Device Status 2 - Cause of the oldest existing alarm detected 3 - Time of the oldest existing alarm detected System Data This area of the website displays the system parameters of the device.
- Page 20 Basic Settings 1.1 System Name Meaning Name System name of this device Location Location of this device Contact The contact for this device Basic module Hardware version of the device Media module 1 Hardware version of media module 1 Media module 2 Hardware version of media module 2 Media module 3 Hardware version of media module 3...
-
Page 21: Device View
Basic Settings 1.1 System 1 2 3 Figure 6: Availability of the media modules 1 - Module present 2 - Empty slot 3 - Module was removed. Click this check mark to define this slot as an empty slot. Device View The device view shows the device with the current configuration. - Page 22 Basic Settings 1.1 System Figure 7: Device View Meaning of the symbols: The port (10, 100 Mbit/s, 1, 10 Gbit/s) is enabled and the connection is OK. The port is disabled by the management and it has a connection. The port is disabled by the management and it has no connection.
- Page 23 Basic Settings 1.1 System Figure 8: Time until update RM Web L3E Release 6.0 07/2010...
-
Page 24: Network
Basic Settings 1.2 Network 1.2 Network With the Basic settings:Network dialog you define the source from which the device gets its IP parameters after starting, and you assign the IP parameters and VLAN ID and configure the HiDiscovery access. Figure 9: Network parameters dialog Under “Mode”, you enter where the device gets its IP parameters: In the BOOTP mode, the configuration is via a BOOTP or DHCP server on the basis of the MAC address of the device... - Page 25 Basic Settings 1.2 Network Enter the parameters on the right according to the selected mode. You enter the name applicable to the DHCP protocol in the “Name” line in the system dialog of the Web-based interface. The “VLAN” frame enables you to assign a VLAN to the agent. If you enter 0 here as the VLAN ID (not included in the VLAN standard version), the agent will then be accessible from all VLANs.
-
Page 26: Software
Basic Settings 1.3 Software 1.3 Software The software dialog enables you display the software versions in the device and to carry out a software update of the device via file selection, tftp or ACA. Figure 10: Software dialog 1.3.1 View the software versions present on the device You can view: Stored Version... -
Page 27: Tftp Software Update
Basic Settings 1.3 Software Running Version The currently loaded software version. Backup Version The previous software version stored in the flash memory. 1.3.2 TFTP Software Update For a tftp update you need a tftp server on which the software to be loaded is stored. -
Page 28: Automatic Software Update By Aca
Basic Settings 1.3 Software File not found (reason: file name not found or does not exist). Connection error (reason: path without file name). After the update is completed successfully, you activate the new software: Select the Basic settings: Restart dialog and perform a cold start. In a cold start, the device reloads the software from the non-volatile memory, restarts, and performs a self-test. -
Page 29: Port Configuration
Basic Settings 1.4 Port Configuration 1.4 Port Configuration This configuration table allows you to configure each port of the device and also display each port‘s current mode of operation (link state, bit rate (speed) and duplex mode). In the “Name” column, you can enter a name for every port. In the “Ports on”... - Page 30 Basic Settings 1.4 Port Configuration Note: The active automatic configuration has priority over the manual configuration. Note: If you are using link aggregation, pay attention to its configuration (see on page 158 “Link Aggregation“). Note: When you are using a redundancy function, you deactivate the flow control on the participating ports.
-
Page 31: Power Over Ethernet
The device therefore assumes a “nominal power” of 60 Watt per PoE media module for now. Nominal power for MACH 4000: The device provides the nominal power for the sum of all PoE ports plus a surplus. Should the connected devices require more PoE power than is provided, the device then switches PoE off at the ports. - Page 32 In the “POE on” column, you can enable/disable PoE at this port. The “Status” column indicates the PoE status of the port. In the “Priority” column (MACH 4000), set the PoE priority of the port to “low”, “high” or “critical”.
-
Page 33: Loading/Saving The Configuration
Basic Settings 1.6 Loading/Saving the Configuration 1.6 Loading/Saving the Configuration With this dialog you can: load a configuration, save a configuration, enter a URL, restore the delivery configuration, use the ACA for configuring, cancel a configuration change. Figure 12: Load/Save dialog RM Web L3E Release 6.0 07/2010... -
Page 34: Loading The Configuration
Basic Settings 1.6 Loading/Saving the Configuration 1.6.1 Loading the configuration In the “Load” frame, you have the option to load a configuration saved on the device, load a configuration stored under the specified URL, load a configuration stored on the specified URL and save it on the device, load a configuration stored on the PC as an editable and readable script or in binary form,... -
Page 35: Url
Basic Settings 1.6 Loading/Saving the Configuration If you change the current configuration (for example, by switching a port off), the Web-based interface changes the “load/save” symbol in the navigation tree from a disk symbol to a yellow triangle. After saving the configuration, the Web-based interface displays the “load/save”... -
Page 36: Using The Autoconfiguration Adapter (Aca)
Basic Settings 1.6 Loading/Saving the Configuration Reset the device to the state on delivery. After the next restart, the IP address is also in the state on delivery. 1.6.5 Using the AutoConfiguration Adapter (ACA) The ACAs are devices for saving the configuration data of a device. In the case of a device failure, an ACA enables the configuration data to be transferred easily by means of a substitute device of the same type. -
Page 37: Configuration Data
Basic Settings 1.6 Loading/Saving the Configuration Note: Before loading the configuration data from the ACA, the device compares the password in the device with the password in the ACA configuration data. The device loads the configuration data if the admin password matches or there is no password saved locally or the local password is the original default password or no configuration is saved locally. -
Page 38: Canceling A Configuration Change
Basic Settings 1.6 Loading/Saving the Configuration 1.6.6 Canceling a configuration change Function If the function is activated and the connection to the device is interrupted for longer than the time specified in the field “Period to undo while connection is lost [s]”, the device then loads the last configuration saved. Activate the function before you configure the device so that you will then be reconnected if an incorrect configuration interrupts your connection to the device. -
Page 39: Restart
Basic Settings 1.7 Restart 1.7 Restart With this dialog you can: initiate a cold start of the device. The device reloads the software from the non-volatile memory, restarts, and performs a self-test. In your browser, click on “Reload” so that you can access the device again after it is booted. - Page 40 Basic Settings 1.7 Restart Figure 13: Restart Dialog RM Web Release 6.0 07/2010...
-
Page 41: Security
Security 1.7 Restart 2 Security The “Security” menu contains the dialogs, displays and tables for configuring the security settings: Password/SNMPv3 access SNMPv1/v2 access Telnet/Web/SSH access Restricted management access Port security IEEE 802.1X port authentication RM Web L3E Release 6.0 07/2010... -
Page 42: Password / Snmpv3 Access
Security 2.1 Password / SNMPv3 access 2.1 Password / SNMPv3 access This dialog gives you the option of changing the read and read/write passwords for access to the device via the Web-based interface, via the CLI, and via SNMPv3 (SNMP version 3). Please note that passwords are case- sensitive. - Page 43 Security 2.1 Password / SNMPv3 access Note: When you change the SNMPv3 password for the read/write access, the device automatically synchronizes the readWrite community for the SNMPv1/v2 access to the same value. Similarly, when the read access password is changed, the device synchronizes the readOnly community for SNMPv1/v2 (see on page 45 “SNMPv1/v2 Access Settings“).
- Page 44 Security 2.1 Password / SNMPv3 access Note: For security reasons, the device does not display the passwords. Make a note of every change. You cannot access the device without a valid password. Note: For security reasons, SNMPv3 encrypts the password. With the “SNMPv1”...
-
Page 45: Snmpv1/V2 Access Settings
Security 2.2 SNMPv1/v2 Access Settings 2.2 SNMPv1/v2 Access Settings With this dialog you can select access via SNMPv1 or SNMPv2. In the state on delivery, both protocols are activated. You can thus manage the device with HiVision and communicate with earlier versions of SNMP. - Page 46 Security 2.2 SNMPv1/v2 Access Settings Binary notation of the mask 255.255.255.240: 1111 1111 1111 1111 1111 1111 1111 0000 mask bits Binary notation of the IP address 172.168.23.20: 1010 1100 1010 1000 0001 0111 0001 0100 The binary representation of the mask with the IP address yields an address range of: 1010 1100 1010 1000 0001 0111 0001 0000 bis...
- Page 47 Security 2.2 SNMPv1/v2 Access Settings Figure 15: SNMPv1/v2 Access Dialog RM Web L3E Release 6.0 07/2010...
-
Page 48: Telnet/Web/Ssh Access
Security 2.3 Telnet/Web/SSH Access 2.3 Telnet/Web/SSH Access This dialog allows you to switch off the Telnet server, the Web server and the SSH server on the device. Figure 16: Telnet/Web/SSH Access dialog RM Web Release 6.0 07/2010... -
Page 49: Description Of Telnet Access
Security 2.3 Telnet/Web/SSH Access 2.3.1 Description of Telnet Access The Telnet server of the device allows you to configure the device by using the Command Line Interface (in-band). You can deactivate the Telnet server if you do not want Telnet access to the device. On delivery, the server is activated. -
Page 50: Description Of Ssh Access
Security 2.3 Telnet/Web/SSH Access 2.3.3 Description of SSH Access The SSH server of the device allows you to configure the device by using the Command Line Interface (in-band). You can deactivate the SSH server to disable SSH access to the device. On delivery, the server is deactivated. -
Page 51: Restricted Management Access
Security 2.4 Restricted Management Access 2.4 Restricted Management Access This dialog allows you to differentiate (restrict) the management access to the device based on IP address ranges and individual management services. When you activate this function, you can only use the specified IP address ranges to access the management services activated for these address ranges. - Page 52 Security 2.4 Restricted Management Access In the state on delivery, the device provides you with a default entry with the IP address 0.0.0.0, the netmask 0.0.0.0 and all the management services. This allows access to all services from any IP address. This allows you full access to the device, even if a restriction is activated, e.g.
- Page 53 Security 2.4 Restricted Management Access Variable Meaning Possible values Default setting Function Switches the function on and On, Off off for the device. Index Sequential number of the entry. 1 - 16 1 (the preset When you delete an entry, this entry).
-
Page 54: Port Security
Security 2.5 Port Security 2.5 Port Security The device allows you to configure each port so that unauthorized access is prevented. Depending on your selection, the device checks the MAC address or the IP address of the connected device. In the “Configuration” frame, you set whether the port security works with MAC or with IP addresses. - Page 55 Security 2.5 Port Security Name Meaning Allowed MAC Addresses MAC addresses of the devices with which you allow data exchange at this port. The Web-based interface allows you to enter up to 10 MAC addresses, each separated by a space. After each MAC address you can enter a slash followed by a number identifying an address area.
- Page 56 Security 2.5 Port Security Figure 17: Port Security dialog Note: The IP port security operates internally on layer 2. The device internally translates an allowed IP address into an allowed MAC address when you enter the IP address. An ARP request is used for this. Prerequisites for the IP-based port security: –...
-
Page 57: Ieee 802.1X Port Authentication
Security 2.6 IEEE 802.1X Port Authentication 2.6 IEEE 802.1X Port Authentication 802.1x port authentication provides you with the following dialogs: “IEEE 802.1X Global“ “IEEE 802.1X Port Configuration“ “IEEE 802.1X Port Statistics“ “RADIUS Server Settings for IEEE 802.1X“ The port-based network access control is a method described in the standard IEEE 802.1X to protect IEEE 802 networks from unauthorized access. - Page 58 Security 2.6 IEEE 802.1X Port Authentication With "RADIUS Request Retransmissions” you specify, how often the device retransmits an unanswered request to the RADIUS server before the device transmits the request to another RADIUS server. With “RADIUS time-out” you specify how long (in seconds) the device waits for a response after a request to the RADIUS server before the device retransmits the request.
-
Page 59: Ieee 802.1X Port Configuration
Security 2.6 IEEE 802.1X Port Authentication 2.6.2 IEEE 802.1X Port Configuration Figure 19: Configuration table RM Web L3E Release 6.0 07/2010... - Page 60 Security 2.6 IEEE 802.1X Port Authentication Entries in the configuration table Variable Meaning Possible values State on delivery Port For resetting the initialization true, false false Initializatio function. Setting this attribute to "true" causes the device to reset this function. When the resetting process is concluded, the value is reset to "false".
- Page 61 Security 2.6 IEEE 802.1X Port Authentication Variable Meaning Possible values State on delivery Port Setting for the port access ForceAuthorized = ForceAuthorized Control control. access is granted without authentication. ForceUnauthorized = access is blocked even with authentication Auto = access according to the authentication result Idle Period Period in seconds in which the 0-65535...
-
Page 62: Ieee 802.1X Port Statistics
Security 2.6 IEEE 802.1X Port Authentication 2.6.3 IEEE 802.1X Port Statistics Figure 20: Statistics table RM Web Release 6.0 07/2010... - Page 63 Security 2.6 IEEE 802.1X Port Authentication Variable Meaning EAPOL received Number of EAPOL frames (both valid and invalid) of any type that frames have been received at this port. EAPOL transmitted Number of EAPOL frames of any type that have been received at this frames port.
-
Page 64: Radius Server Settings For Ieee 802.1X
Security 2.6 IEEE 802.1X Port Authentication 2.6.4 RADIUS Server Settings for IEEE 802.1X Figure 21: RADIUS Server dialog This dialog allows you to enter the data for up to three RADIUS servers. Click on “Create entry” to open the dialog window for entering the IP address of a RADIUS server. - Page 65 Security 2.6 IEEE 802.1X Port Authentication “Selected server” shows the server to which the Switch actually sends its queries. With “Delete entry” you delete the selected line in the table. RM Web L3E Release 6.0 07/2010...
- Page 66 Security 2.6 IEEE 802.1X Port Authentication RM Web Release 6.0 07/2010...
-
Page 67: Time
Time 2.6 IEEE 802.1X Port Authentication 3 Time With this dialog you can enter time-related settings independently of the time synchronization protocol selected. The “IEEE/SNTP time” displays the time with reference to Universal Time Coordinated (UTC). The time displayed is the same worldwide. Local time differences are not taken into account. - Page 68 Time 2.6 IEEE 802.1X Port Authentication Interaction of PTP and SNTP According to PTP (IEEE 1588) and SNTP, both protocols can exist in parallel in the same network. However, since both protocols affect the system time of the device, situations may occur in which the two protocols compete with each other.
-
Page 69: Sntp Configuration
Time 3.1 SNTP configuration 3.1 SNTP configuration The Simple Network Time Protocol (SNTP) enables you to synchronize the system time in your network. The device supports the SNTP client and the SNTP server function. The SNTP server makes the UTC (Universal Time Coordinated) available. UTC is the time relating to the coordinated world time measurement. - Page 70 Time 3.1 SNTP configuration Parameter Meaning Possible Values Default Setting Client Status Switches the SNTP client on and off. On, Off External server IP address of the SNTP server from which the Valid IPv4 address 0.0.0.0 address device periodically requests the system time. Redundant IP address of the SNTP server from which the Valid IPv4 address 0.0.0.0...
- Page 71 Time 3.1 SNTP configuration Parameter Meaning Possible Default Values Setting Server status Switches the SNTP server on and off. On, Off Anycast destination IP address, to which the SNTP server of the Valid IPv4 0.0.0.0 address device sends the SNTP packets (see address table...
- Page 72 Time 3.1 SNTP configuration Figure 23: SNTP Dialog RM Web Release 6.0 07/2010...
-
Page 73: Ptp (Ieee 1588)
Time 3.2 PTP (IEEE 1588) 3.2 PTP (IEEE 1588) Precise time management is required for running time-critical applications via a LAN. The IEEE 1588 standard with the Precision Time Protocol (PTP) describes a procedure that assumes one clock is the most accurate and thus enables precise synchronization of all clocks in a LAN. -
Page 74: Ptp Global (Ms20/Ms30, Powermice, Mach 104, Mach 1040)
Time 3.2 PTP (IEEE 1588) 3.2.1 PTP Global (MS20/MS30, PowerMICE, MACH 104, MACH 1040) The table below helps you to select the PTP version and the PTP mode. Version Mode Reference clock Device with PTP messages used timestamp Version 1 v1-simple-mode Version 1 —... - Page 75 Time 3.2 PTP (IEEE 1588) Parameter Meaning Possible Values Default Setting Function on/off Enable/disable the PTP function Table 15: Function IEEE 1588/PTP RM Web L3E Release 6.0 07/2010...
- Page 76 Time 3.2 PTP (IEEE 1588) Parameter Meaning Possible Values Default Setting PTP version/ Version and mode of the local clock. v1-boundary- mode clock Boundary Clock function based on v1-boundary-clock IEEE1588-2002 (PTPv1). Support for PTPv1 without special v1-simple-mode hardware. The device synchronizes itself with received PTPv1 messages.
- Page 77 Time 3.2 PTP (IEEE 1588) Parameter Meaning Possible Values Default Setting Bottom Bottom PTP synchronization 0-999.999.999 synchronization threshold value, specified in threshold [ns] nanoseconds. If the result of (reference time - local time) is lower than the value of the bottom PTP synchronization threshold, then the local clock is deemed as synchronous with the reference...
-
Page 78: Ptp Version 1 (Ms20/Ms30, Powermice, Mach 104, Mach 1040)
Time 3.2 PTP (IEEE 1588) 3.2.2 PTP Version 1 (MS20/MS30, PowerMICE, MACH 104, MACH 1040) You select the PTP version you will use in the Time:PTP:Global dialog. PTP Version 1, Global Settings Parameter Meaning Possible Values Default Setting Sync Interval Period for sending synchronization - sec-1 sec-2... - Page 79 Time 3.2 PTP (IEEE 1588) PTP Version 1, Port Settings Parameter Meaning Possible Values Default Setting Module Module number for modular devices, otherwise 1. Port Port to which this entry applies. The table remains empty if the device does not support the PTP mode selected PTP on Port sends/receives PTP...
-
Page 80: Ptp Version 2 (Bc) (Ms20/Ms30, Powermice, Mach 104, Mach 1040)
Time 3.2 PTP (IEEE 1588) 3.2.3 PTP Version 2 (BC) (MS20/MS30, PowerMICE, MACH 104, MACH 1040) PTP version 2 provides considerably more settings. These support - faster reconfiguration of the PTP network than in PTP version 1 - greater precision in some environments. You select the PTP version you will use in the Time:PTP:Global dialog. - Page 81 Time 3.2 PTP (IEEE 1588) Parameter Meaning Possible Values Default Setting Clock identifier Own UUID (unique identification number) Parent port UUID of the direct master identifier Grandmaster UUID of the reference clock identifier Table 23: Identifiers Parameter Meaning Possible Values Default Setting Priority 1 Display priority 1 of the current...
- Page 82 Time 3.2 PTP (IEEE 1588) Parameter Meaning Possible Values Default Setting Time source Source selected for own clock. atomicClock internalOsci llator terrestrialRadio handset other internalOscillat UTC Offset [s] Current difference between the PTP -2,147,483,648 to time scale (see below) and the UTC. 2,147,483,647 UTC Offset valid Specifies whether value of UTC Yes, No...
- Page 83 Time 3.2 PTP (IEEE 1588) Port Parameter Meaning Possible Values Default Setting Module Module number for modular devices, otherwise 1. Port Port to which this entry applies. If the device does not support the PTP mode selected, the table is empty.
- Page 84 Time 3.2 PTP (IEEE 1588) Parameter Meaning Possible Values Default Setting Announce Announce interval timeout for PTP 2-10 Timeout topology discovery in number of announce intervals. The standard settings of announce interval = 2 (2 per second) and announce timeout = 3 lead to a timeout of 3 x 2 seconds = 6 seconds.
-
Page 85: Ptp Version 2 (Tc) (Ms20/Ms30, Powermice)
Time 3.2 PTP (IEEE 1588) Parameter Meaning Possible Values Default Setting V1 Hardware Some devices from other auto, on, off auto Compatibility manufacturers require PTP messages of specific length. If the UDP/IPv4 network protocol is selected and the function is active, the device extends the PTP messages. - Page 86 Time 3.2 PTP (IEEE 1588) PTP Version 2 (TC), Global Settings Parameter Meaning Possible Values Default Setting Runtime Mechanism for measuring the Measuring message runtime. Mechanism Enter the same mechanism for the PTP device connected to this port. The device itself does not generate E2E (End-to-End): any messages in the runtime measurement.
- Page 87 Time 3.2 PTP (IEEE 1588) PTP Version 2 (TC), Port Settings Parameter Meaning Possible Values Default Setting Module Module number for modular devices, otherwise 1. Port Port to which this entry applies. If the device does not support the PTP mode selected, the table is empty.
- Page 88 Time 3.2 PTP (IEEE 1588) RM Web Release 6.0 07/2010...
-
Page 89: Switching
Switching 3.2 PTP (IEEE 1588) 4 Switching The switching menu contains the dialogs, displays and tables for configuring the switching settings: Switching Global Filters for MAC Addresses Rate Limiter Multicasts VLAN RM Web L3E Release 6.0 07/2010... -
Page 90: Switching Global
Switching 4.1 Switching Global 4.1 Switching Global Variable Meaning Possible Values MAC address Display the MAC address of the device (read only) Aging Time (s) Enter the Aging Time in seconds for 10-630 dynamic MAC address entries. In connection with the router redundancy, select a time ≥... - Page 91 Switching 4.1 Switching Global Variable Meaning Possible Values Address Number of MAC addresses that are 1 - 1,024 Relearn learned at different ports within a checking Threshold interval, so that if this number is exceeded, the device sees this as a relevant event.
- Page 92 Switching 4.1 Switching Global Collisions, late collisions: In full-duplex mode, the port does not count collisions or late collisions. CRC error: The device only evaluates these errors as duplex problems in the manual full duplex mode. No. Autonegotiati Current Detected error Evaluation of Possible causes duplex...
- Page 93 Switching 4.1 Switching Global Figure 24: Dialog Switching Global RM Web L3E Release 6.0 07/2010...
-
Page 94: Filters For Mac Addresses
Switching 4.2 Filters for MAC addresses 4.2 Filters for MAC addresses The filter table for MAC addresses is used to display and edit filters. Each row represents one filter. Filters specify the way in which data packets are sent. They are set automatically by the device (learned status) or manually. Data packets whose destination address is entered in the table are sent from the receiving port to the ports marked in the table. - Page 95 Switching 4.2 Filters for MAC addresses Figure 25: Filter Table dialog Note: For Unicast addresses, the device allows you to include multiple ports in a filter entry. Do not include any ports if you want to create a discard filter entry.
-
Page 96: Rate Limiter
Switching 4.3 Rate Limiter 4.3 Rate Limiter The device can limit the rate of message traffic during periods of heavy traffic flow. Entering a limit rate for each port specifies the amount of traffic the device is permitted to transmit and receive. If the data load transmitted at this port exceeds the maximum load entered, the device will discard the excess data at this port. - Page 97 Switching 4.3 Rate Limiter "Ingress Limiter (kbit/s)" allows you to enable or disable the ingress limiter function for all ports and to select the ingress limitation on all ports (either broadcast packets only or broadcast packets and Multicast packets). "Egress Limiter (Pkt/s)" allows you to enable or disable the egress limiter function for broadcasts on all ports.
-
Page 98: Multicasts
Switching 4.4 Multicasts 4.4 Multicasts 4.4.1 IGMP (Internet Group Management Protocol) With this dialog you can activate/deactivate the IGMP Snooping protocol, configure the IGMP Snooping protocol globally and per port. Figure 27: IGMP Snooping dialog Operation In this frame you can: RM Web Release 6.0 07/2010... - Page 99 Switching 4.4 Multicasts activate/deactivate the IGMP Snooping protocol. Parameter Meaning Value range Default setting Function Activate/deactivate IGMP Snooping On, Off globally for the device. If IGMP Snooping is switched off: the device does not evaluate Query and Report packets received, and it sends (floods) received data packets with a Multicast address as the destination address to all...
- Page 100 Switching 4.4 Multicasts Parameter Meaning Value range Default setting IGMP Querier IGMP Querier Switch query function on/off on/off enabled Protocol Version Select IGMP version 1, 2 or 3. 1, 2, 3 Send Interval Enter the interval at which the switch 2-3599 s 125 s sends query packets.
- Page 101 Switching 4.4 Multicasts Parameter Protocol Value range Default setting Version Max. Response Time, 1, 2 1-25 seconds 10 seconds 1-3,598 seconds Send Interval 1, 2, 3 2-3,599 seconds 125 seconds Group Membership Interval 1, 2, 3 3-3,600 seconds 260 seconds Table 34: Value range for - Max.
-
Page 102: Routing Protocols
Switching 4.4 Multicasts Parameter Meaning Value range Default setting Unknown Multicasts Send to Query Ports: Send to Query Send to All The device sends the packets Ports, Send to Ports with an unknown MAC/IP All Ports, Multicast address to all query Discard ports. - Page 103 Switching 4.4 Multicasts Settings per Port (Table) With this configuration table you can enter port-related IGMP settings. RM Web L3E Release 6.0 07/2010...
- Page 104 IGMP queries (default automatic setting). This column allows you to also send IGMP report messages to: other selected ports (enable) or connected Hirschmann devices (automatic). Prerequisite: The IGMP Snooping function is activated globally. Learned Query Shows at which ports the device has...
-
Page 105: Gmrp (Garp Multicast Registration Protocol)
Switching 4.4 Multicasts Note: If the device is incorporated into a HIPER-Ring, you can use the following settings to quickly reconfigure the network for data packets with registered Multicast destination addresses after the ring is switched: Switch on the IGMP Snooping on the ring ports and globally, and activate “IGMP Forward All”... - Page 106 Switching 4.4 Multicasts Operation In this frame you can: activate/deactivate the GMRP function globally. Parameter Meaning Default setting GMRP Activate GMRP globally for the entire device. If GMRP is switched off: the device does not generate any GMRP packets, does not evaluate any GMRP packets received, sends (floods) received data packets to all ports.
- Page 107 Switching 4.4 Multicasts Note: If the device is incorporated into a HIPER-Ring, you can use the following settings to quickly reconfigure the network for data packets with registered Multicast destination addresses after the ring is switched: Activate GMRP on the ring ports and globally, and activate “Forward all groups”...
-
Page 108: Vlan
Switching 4.5 VLAN 4.5 VLAN VLAN contains dialogs and attributes for configuring and monitoring the VLAN function in accordance with the IEEE 802.1Q standard. 4.5.1 VLAN Global With this dialog you can: display VLAN parameters activate/deactivate the VLAN 0 transparent mode activate/deactivate GVRP configure and display the learning mode reset the VLAN settings of the device to the original defaults. - Page 109 IEEE802.1Q. Note: When using the “Transparent Mode” in this way, note the following: For PowerMICE, MACH 104, MACH 1040 and MACH 4000: In “Transparent mode”, the devices ignore the VLAN tags and the priority tag on reception. Set the ports’ VLAN membership for all VLANs to "U“...
- Page 110 Switching 4.5 VLAN Parameter Meaning Value range Default setting Mode VLAN mode selection. Independent Independent "Independent VLAN“ subdivides the VLAN, VLAN forwarding database (see on page 94 “Filters Shared VLAN for MAC addresses“) virtually into one independent forwarding database per VLAN. The device cannot assign data packets with a destination address in another VLAN, and so floods it to all ports of the VLAN.
-
Page 111: Current Vlan
Switching 4.5 VLAN Figure 29: VLAN Global dialog 4.5.2 Current VLAN With this dialog you can: display VLAN parameters The Current VLAN table shows all – manually configured VLANs – VLANs configured via redundancy mechanisms – VLANs configured via GVRP The Current VLAN table is only used for information purposes. - Page 112 Switching 4.5 VLAN Parameter Meaning Value range VLAN ID Displays the ID of the VLAN. Status Displays the VLAN status. other: This entry solely appears for VLAN 1. The system provides VLAN 1. VLAN 1 is always present. permanent: A static entry made by you. This entry is kept when the device is restarted.
-
Page 113: Vlan Static
Switching 4.5 VLAN 4.5.3 VLAN Static With this dialog you can: Create VLANs Assign names to VLANs Assign ports to VLANs and configure them Delete VLANs Parameter Meaning Possible Values Default Setting VLAN ID Displays the ID of up to 256 VLANs that are simultaneously possible. - Page 114 Switching 4.5 VLAN Figure 31: VLAN Static Dialog Note: When configuring the VLAN, the management station must maintain access to the device after the VLAN configuration is saved. You achieve this by connecting the management station to a port with the VLAN ID 1.
-
Page 115: Vlan Port
RS20, RS30, RS40 (with software variants L2E, L2P) MICE (from rel. 3.0) PowerMICE MS20, MS30 RSR20, RSR30 MACH 100 MACH 1000 MACH 4000 MACH 3000 (from Rel. 3.3), OCTOPUS 4.5.4 VLAN Port With this dialog you can: assign ports to VLANs... - Page 116 Switching 4.5 VLAN Parameter Meaning Possible Default Setting Values Module Module of the device on which the port is located. Port Port to which this entry applies. Port VLAN ID Specifies the VLAN to which the port All allowed assigns a received untagged data VLAN IDs packet.
- Page 117 Switching 4.5 VLAN Network/Ring coupling Select the VLAN ID 1 for the coupling and partner coupling ports and deactivate “Ingress Filtering”. Figure 32: VLAN Port dialog RM Web L3E Release 6.0 07/2010...
- Page 118 Switching 4.5 VLAN RM Web Release 6.0 07/2010...
-
Page 119: Qos/Priority
QoS/Priority 4.5 VLAN 5 QoS/Priority The device enables you to set how it evaluates the QoS/prioritizing information of incoming data packets: VLAN priority based on IEEE 802.1Q/ 802.1D (Layer 2) Type of Service (ToS) or DiffServ (DSCP) for IP packets (Layer 3) which QoS/prioritizing information it writes to outgoing data packets (e.g. -
Page 120: Global
(class selector) or af11 to af43 (assured forwarding) and ef (expedited forwarding). display the maximum number of queues possible per port. The device supports 4 (8 for MACH 4000, MACH 104, MACH 1040 and PowerMICE) priority queues (traffic classes in compliance with IEEE 802.1D). - Page 121 QoS/Priority 5.1 Global Figure 33: Global dialog RM Web L3E Release 6.0 07/2010...
-
Page 122: Port Configuration
QoS/Priority 5.2 Port Configuration 5.2 Port Configuration This dialog allows you to configure the ports. You can: assign a port priority to a port, select the trust mode for a port, display the untrusted traffic class, assign a shaping rate to a port, Parameter Meaning Module... -
Page 123: Entering The Port Priority
QoS/Priority 5.2 Port Configuration 5.2.1 Entering the port priority Double-click a cell in the “Port priority” column and enter the priority (0-7). According to the priority entered, the device assigns the data packets that it receives at this port to a traffic class (see table 47). -
Page 124: Displaying The Untrusted Traffic Class
QoS/Priority 5.2 Port Configuration “trustDot1p”: The device prioritizes received packets that contain VLAN tag information according to this information (assigning them to a traffic class - see “802.1D/p mapping“). The device prioritizes received packets that do not contain any tag information (assigning them to a traffic class - see “Entering the port priority“) according to the port priority of the receiving port . -
Page 125: Shaping Rate
QoS/Priority 5.2 Port Configuration 5.2.4 Shaping rate The device allows you to limit the maximum bandwidth of a port (traffic shaping). Click once on a cell in the “Shaping rate” column to select one of the possible values for the bandwidth limit in the range from 5% to 95%, in steps of 5%. The value “off”... -
Page 126: D/P Mapping
QoS/Priority 5.3 802.1D/p mapping 5.3 802.1D/p mapping The 802.1D/p mapping dialog allows you to assign a traffic class to every VLAN priority. Figure 35: 802.1D/p Mapping dialog Enter the desired value from 0 to 7 in the Traffic Class field for every VLAN priority. - Page 127 QoS/Priority 5.3 802.1D/p mapping VLAN priority Traffic class (default setting) IEEE 802.1D traffic type Best effort (default) Background Standard Excellent effort (business critical) Controlled load (streaming multimedia) Video, < 100 ms of latency and jitter Voice, < 10 ms of latency and jitter Network control reserved traffic Table 48: Assigning the VLAN priority to the 8 traffic classes Note: Network protocols and redundancy mechanisms use the highest traffic...
-
Page 128: Ip Dscp Mapping
QoS/Priority 5.4 IP DSCP mapping 5.4 IP DSCP mapping The IP DSCP mapping table allows you to assign a traffic class to every DSCP value. Enter the desired value from 0 to 7 in the Traffic Class field for every DSCP value (0-63). - Page 129 QoS/Priority 5.4 IP DSCP mapping Assured Forwarding (AF): Provides a differentiated schema for handling different data traffic (RFC 2597). Default Forwarding/Best Effort: No particular prioritizing. DSCP value DSCP name Traffic class (default setting) Best Effort /CS0 9,11,13,15 10,12,14 AF11,AF12,AF13 17,19,21,23 18,20,22 AF21,AF22,AF23 25,27,29,31...
-
Page 130: Queue Management
QoS/Priority 5.5 Queue Management 5.5 Queue Management For every traffic class, the Queue Management table allows you to enable Strict Priority (= disable Weighted Fair Queuing), disable Strict Priority (= enable Weighted Fair Queuing), enter a value for the minimum bandwidth, enter a value for the maximum bandwidth. -
Page 131: Strict Priority
QoS/Priority 5.5 Queue Management 5.5.1 Strict Priority With the Strict Priority setting, the device first transmits all data packets that have a higher traffic class before transmitting a data packet with the next highest traffic class. The device transmits a data packet with the lowest traffic class only when there are no other data packets remaining in the queue. -
Page 132: Maximum Bandwidth
QoS/Priority 5.5 Queue Management 5.5.3 Maximum bandwidth By entering a maximum bandwidth you can limit the bandwidth for each traffic class to a maximum value, regardless of whether you selected "Weighted Fair Queuing" or "Strict Priority". Weighted Fair Queuing (see page 131) requires that the maximum bandwidth is at least as big as the minimum bandwidth. -
Page 133: Routing
Routing 5.5 Queue Management 6 Routing A router is a node for exchanging data on the layer 3 of the ISO/OSI layer model (network layer). The Routing section contains the dialogs for configuring the routing function. RM Web L3E Release 6.0 07/2010... -
Page 134: Routing Global
Routing 6.1 Routing Global 6.1 Routing Global With this dialog you can: switch on the routing function globally. display the default TTL (Time To Live). TTL is a value in an IP data packet. Every router that passes on a data packet reduces this value by 1. -
Page 135: Configuring Router Interfaces
Routing 6.2 Configuring Router Interfaces 6.2 Configuring Router Interfaces With these dialogs you can: Configure port-based and VLAN-based router interfaces. Assign a number of IP addresses for each router interface (multinetting). 6.2.1 Configuration This dialog allows you to configure the router interfaces. You can: Assign an IP address/netmask to a router interface. - Page 136 Routing 6.2 Configuring Router Interfaces Parameter Meaning Module Module of the Switch on which the port is located. The Switch uses the virtual module 9 for a VLAN-based router interface. Port Port to which this entry applies. Type Type of the router interface: –...
- Page 137 Routing 6.2 Configuring Router Interfaces “Untagged”: In this column you select the ports that you want to be members of the VLAN and that will send data packets without a tag. “Port VLAN ID”: Double-click on a cell in this column in order to change the port VLAN ID.
-
Page 138: Configuring Secondary Addresses
Routing 6.2 Configuring Router Interfaces 6.2.2 Configuring secondary addresses When you want to use the multinetting function, this dialog enables you to assign secondary IP addresses to a router interface. Use the left mouse-button to select a row that contains the port ID in the first column. -
Page 139: Arp
Routing 6.3 ARP 6.3 ARP The Address Resolution Protocol (ARP) determines the MAC address that belongs to an IP address. With this dialog you can: set parameters for the ARP, view statistical values and view the table of the ARP entries, delete the dynamic entries in the ARP table, and configure static entries. -
Page 140: Setting Arp Parameters
“Cache Size” enables you to limit the PowerMICE: Maximum maximum number of entries in the table. 192-2112 When the maximum number is reached, MACH 4000: ARP deletes the oldest entry. 212-2132 MACH 4000 24/48G: 212-3584 Dynamic Renew When the “Dynamic Renew” is switched... -
Page 141: Arp Statistics Display
Routing 6.3 ARP 6.3.2 ARP statistics display Parameter Meaning Total entry current count Current number of ARP entries in the ARP table Total entry peak count Highest number of ARP entries in the ARP table Static entry current count Current number of static ARP entries in the ARP table Static entry max count Maximum possible number of static ARP entries in the ARP table Table 52: ARP statistics... -
Page 142: Editing The Arp Table
Routing 6.3 ARP 6.3.4 Editing the ARP table Deleting dynamic entries By clicking on "Reset" you delete the dynamic entries from the ARP table. Editing static entries Using an assistant, you can add, edit and delete static entries. The prerequisites for adding static entries are: At least one router interface is configured, is in the network of the static entry and the routing function is switched on (see page... - Page 143 Routing 6.3 ARP OSPF Router OSPF distinguishes between the following router types: Internal Router: All OSPF interfaces of an internal router are within the same area. Area Border Router (ABR): ABRs have OSPF interfaces in a number of areas, including the backbone area.
-
Page 144: Router Discovery Configuration
Routing 6.4 Router Discovery Configuration 6.4 Router Discovery Configuration ICMP Router Discovery is a procedure for locating possible routers in the network for data transmission. The Switch supports this procedure by transferring presence messages when the function is active. Parameter Meaning Value range Default setting... -
Page 145: Rip
Routing 6.5 RIP 6.5 RIP The Routing Information Protocol (RIP) is a routing protocol based on the distance vector algorithm. It is used for the dynamic creation of the routing table for routers. 6.5.1 Configuration With this dialog you can enter both general settings and settings for each port for the routing information protocol. - Page 146 Routing 6.5 RIP Update interval Maximum number of routes 1000 Table 55: Recommendation for setting the update interval. Split Horizon: Select the split horizon mode. The split horizon mode is used to avoid the count-to-infinity problem. – none: Switch off the split horizon. –...
-
Page 147: Route Distribution
Routing 6.5 RIP Settings per port Parameter Meaning Module Module of the router Port Port of the module of the router Operation Switch the RIP function at this port on and off VLAN ID VLAN membership of the port Send Version RIP version that the Switch uses at this port to send RIP information. -
Page 148: Statistics
Routing 6.5 RIP Parameter Meaning Source Source from which RIP takes over routing information: – connected: The route points to a subnetwork that is connected directly to the interface. – static: The route is in the static routing table. – ospf: The route is from OSPF. Mode Use the mode to select whether RIP should take over routes from these sources. - Page 149 Routing 6.5 RIP Parameter Meaning Global Route Changes Number of route changes caused by RIP in the routing table Global Queries Number of responses sent to queries from other systems Module Module of the router Port Port to which this entry applies Received Bad Packets Number of received routing data packets that the router rejected for various reasons, such as different protocol version, unknown...
-
Page 150: Routing Table
Routing 6.6 Routing table 6.6 Routing table The routing table contains all the routes known by the device. If there are a number of routes to a destination, then the device chooses the route with the lowest value in the Metric column. Under Routing Table, you will find the following dialogs: Current Static... -
Page 151: Static
Routing 6.6 Routing table Parameter Meaning Module Module of the router Port Router interface Network Address IP address of the destination network Network Mask Network mask for the IP address of the destination network Next Hop IP Address IP address of the next router on the path to the destination network. Type Displays the type of the entry: –... -
Page 152: Preferences
Routing 6.6 Routing table To delete a row, select the row and click on “Delete entry”. Parameter Meaning Destination IP address of the destination network Network Destination Network mask for the IP address of the destination network Mask Next Hop IP address of the next router on the path to the destination network. - Page 153 Routing 6.6 Routing table Source Meaning Default setting connected Entry for routes/interfaces connected directly to the router. static Entry for routes from the static routing table. ospf-intra Entry for routes from the Open Shortest Path First (OSPF) protocol within an area ospf-inter Entry for routes from OSPF between areas ospf-ext-t1 These routes were imported from an Autonomous System...
-
Page 154: Tracking
Routing 6.7 Tracking 6.7 Tracking The tracking function gives you the option of monitoring certain objects, such as the availability of an interface. A special feature of this function is that it forwards an object status change to an application, e.g. VRRP, which previously registered as an interested party for this information. - Page 155 Routing 6.7 Tracking Parameter Meaning Identification number of this tracking object. Active Activate/deactivate this tracking object. Module.Port Port identification using module and port numbers of the device, e.g. 2.1 for port one of module two. Link up delay [s] An interface object is given the up status if the physical link holds for longer than the delay time.
-
Page 156: Applications
Routing 6.7 Tracking Parameter Meaning Identification number of this tracking object. Active Activate/deactivate this tracking object. Operator Operator for linking up to 8 operands (tracking objects). If the result of the link is true, then the status of this tracking object is Operand 1 to n Operand for the link with the operator. -
Page 157: Redundancy
Redundancy 6.7 Tracking 7 Redundancy Under Redundancy you will find the dialogs and views for configuring and monitoring the redundancy functions: Link Aggregation Ring Redundancy Ring/Network coupling Spanning Tree VRRP/HiVRRP RM Web L3E Release 6.0 07/2010... -
Page 158: Link Aggregation
Redundancy 7.1 Link Aggregation 7.1 Link Aggregation With this dialog you can: display an overview of all the existing link aggregations, create link aggregations, configure link aggregations, allow static link aggregations, and Delete link aggregations. The LACP (Link Aggregation Control Protocol based on IEEE 802.3ad) is a network protocol for dynamically bundling physical network connections. - Page 159 Redundancy 7.1 Link Aggregation Parameter Meaning allow static link When you connect devices using multiple lines, the Link Aggregation aggregations, and Control Protocol (LACP) automatically prevents loops from forming. Select Allow static link aggregation if the partner device does not support LACP (e.g.
- Page 160 Redundancy 7.1 Link Aggregation Figure 38: Setting the link aggregation Note: For PowerMICE and MACH 4000 To increase the availability of particularly important connections, you can combine HIPER-Ring (see on page 161 “Ring Redundancy“) and link aggregation. If you want to use a link aggregation in a HIPER-Ring, you first configure the link aggregation, then the HIPER-Ring.
-
Page 161: Ring Redundancy
– PowerMICE – MACH 100 – MACH 1000 – MACH 3000 – MACH 4000 Within an MRP-Ring, you can use devices that support the MRP protocol based on IEC62439. Depending on the device model, the Ring Redundancy dialog allows you to: Select one of the available Ring Redundancy versions, or change it. - Page 162 Redundancy 7.2 Ring Redundancy Delete the Ring Redundancy. Note: Enabled Ring Redundancy methods on a device are mutually exclusive at any one time. When changing to another Ring Redundancy method, deactivate the function for the time being. Parameter Meaning Version Select the Ring Redundancy version you want to use: HIPER-Ring Default setting is HIPER-Ring...
-
Page 163: Configuring The Hiper-Ring
Redundancy 7.2 Ring Redundancy 7.2.1 Configuring the HIPER-Ring For the ring ports, select the following basic settings in the Basic Settings:Port Configuration dialog: Port Type Bit Rate Autonegotiation Port Setting Duplex (Automatic Configuration) Mode Optical full 100 Mbit/s full 1000 Mbit/s Table 68: Port Settings for Ring Ports Note: Configure all the devices of the HIPER-Ring individually. - Page 164 Redundancy 7.2 Ring Redundancy Parameter Meaning Ring port X.X operation Display in “Operation” field: active: This port is switched on and has a link. inactive: This port is switched off or it has no link. Redundancy Manager Status information, no input possible: Status (Ring Manager) Active (redundant line): the redundant line was closed because a data line or a network component within the ring is...
- Page 165 – VLAN membership Untagged in the static VLAN table Note: If you want to use link aggregation connections in the HIPER-Ring (PowerMICE and MACH 4000), you enter the index of the desired link aggregation entry for the module and the port.
- Page 166 Redundancy 7.2 Ring Redundancy Note: When activating the HIPER-Ring function, the device sets the corresponding settings for the pre-defined ring ports in the configuration table (transmission rate and mode). If the HIPER-Ring function is switched off, the ports, which are changed back into normal ports, keep the ring port settings. Independently of the DIP switch setting, you can still change the port settings via the software.
-
Page 167: Configuring The Mrp-Ring
Otherwise you activate the advanced Manager mode. (Ring Manager) Note: All Hirschmann devices that support the MRP-Ring also support the advanced mode. Redundancy If there is exactly one device, you switch the Ring Manager function on at the Manager ends of the line. - Page 168 Redundancy 7.2 Ring Redundancy Parameter Meaning Operation When you have configured all the parameters for the MRP-Ring, you switch the operation on with this setting. When you have configured all the devices in the MRP-Ring, you close the redundant line. Ring For the device for which you have activated the ring manager, select the value Recovery...
- Page 169 Redundancy 7.2 Ring Redundancy Figure 40: Selecting MRP-Ring version, entering ring ports and enabling/disabling ring manager Note: For all devices in an MRP-Ring, activate the MRP compatibility in the Redundancy:Spanning Tree:Global dialog if you want to use RSTP in the MRP-Ring. If this is not possible, perhaps because individual devices do not support the MRP compatibility, you deactivate the Spanning Tree protocol at the ports connected to the MRP-Ring.
-
Page 170: Sub-Ring
– RSR20/RSR30 – PowerMICE – MACH 1000 – MACH 4000 In a Sub-Ring, you can integrate as participants the devices that support MRP - the Sub-Ring Manager function is not required. Note: Configure all the devices in the Sub-Ring before you close redundant line. -
Page 171: Sub-Ring Configuration
Switch RSTP off for the MRP-Ring ports used in the Sub-Ring. Assign the same MRP domain ID to all devices. If you are only using Hirschmann Automation and Control GmbH devices, you do not have to change the default value for the MRP domain ID. - Page 172 Redundancy 7.3 Sub-Ring Parameter Meaning Possible Default Setting Values Redundanc A symbol displays whether the redundancy y exists exists. Module.Por ID of the port that connects the device to the All available Sub-Ring. ports that do not already belong to the ring redundancy of the base ring, in...
- Page 173 All permitted 255.255.255. Domain members of a Sub-Ring. If you are only using MRP domain 255.255.255. Hirschmann devices, you can use the default names 255.255.255. value for the MRP domain; otherwise adjust it if 255.255.255. necessary. With multiple Sub-Rings, all the 255.255.255.
-
Page 174: Sub-Ring - New Entry
All permitted MRP 255.255.255. Domain the members of a Sub-Ring. If you are domain names 255.255.255. only using Hirschmann devices, you can 255.255.255. use the default value for the MRP domain; 255.255.255. otherwise adjust it if necessary. With 255.255.255. multiple Sub-Rings, all the Sub-Rings can use the same MRP domain name. - Page 175 Redundancy 7.3 Sub-Ring Figure 42: Sub-Ring - New Entry dialog RM Web L3E Release 6.0 07/2010...
-
Page 176: Ring/Network Coupling
Redundancy 7.4 Ring/Network Coupling 7.4 Ring/Network Coupling With this dialog you can: display an overview of the existing Ring/Network coupling, configure a Ring/Network coupling, switch a Ring/Network coupling on/off, create a new Ring/Network coupling, and Delete Ring/Network couplings 7.4.1 Preparing a Ring/Network coupling STAND-BY switch All devices have a STAND-BY switch, with which you can define the role of the device within a Ring/Network coupling. - Page 177 RS2-16M DIP switch MICE/Power MICE Selectable: DIP switch and software setting MACH 3000/MACH 4000 Software switch Table 74: Overview of the STAND-BY switch types Depending on the device and model, set the STAND-BY switch in accordance with the following table:...
- Page 178 Redundancy 7.4 Ring/Network Coupling Depending on the STAND-BY DIP switch position, the dialog displays those configurations that are not possible as grayed-out. If you want to select one of these grayed-out configurations, change the STAND-BY DIP switch on the device to the other position. One-Switch coupling On the device set the 'STAND BY' dip switch to the ON position or use the software configuration to assign the redundancy function to it.
- Page 179 Redundancy 7.4 Ring/Network Coupling Ring/Network Coupling dialog Parameter Meaning Selecting the Depending on your local conditions, select “One-Switch coupling”, configuration “Two-Switch coupling, Slave”, “Two-Switch coupling, Master”, “Two- Switch coupling with control line, Slave” or “Two-Switch coupling with control line, Master”. These options are presented as buttons from left to right.
- Page 180 MACH 1000 All ports (default setting: port 1.3) All ports (default setting: port 1.4) MACH 3000 All ports All ports MACH 4000 All ports (default setting: port 1.3) All ports (default setting: port 1.4) Table 77: Port assignment for one-Switch coupling RM Web...
- Page 181 Adjustable for all ports (default setting: port 1.4) MACH 1000 Adjustable for all ports (default setting: port 1.4) MACH 3000 Adjustable for all ports MACH 4000 Adjustable for all ports (default setting: port 1.4) Table 78: Port assignment for the redundant coupling (two-Switch coupling) Device Coupling port Control port RS2-./.
- Page 182 Redundancy 7.4 Ring/Network Coupling Note: For the coupling ports, select the following settings in the Basic Settings:Port Configuration dialog: – Port: on – Automatic configuration (autonegotiation): on for twisted-pair connections – Manual configuration: 100 Mbit/s FDX, 1 Gbit/s FDX or 10 Gbit/s FDX for glass fiber connections, depending on the port’s capabilities Note: If you have configured VLANS, note the VLAN configuration of the coupling and partner coupling ports.
-
Page 183: Spanning Tree
Redundancy 7.5 Spanning Tree 7.5 Spanning Tree Under Spanning Tree you will find the dialogs and views for configuring and monitoring the Spanning Tree function in accordance with the IEEE 802.1w (Rapid Spanning Tree, RSTP) and IEEE 802.1s (Multiple Spanning Tree, MSTP) standards. - Page 184 Redundancy 7.5 Spanning Tree Note: RSTP reduces a layer 2 network topology with redundant paths into a tree structure (Spanning Tree) that does not contain any more redundant paths. One of the Switches takes over the role of the root bridge here. The maximum number of devices permitted in a branch (from the root bridge to the tip of the branch) is specified by the variable Max Age for the current root bridge.
-
Page 185: Rm Web L3E
Redundancy 7.5 Spanning Tree Multiple Spanning Tree Protocol (MSTP) MSTP is a further development of the Rapid Spanning Tree Protocol used to increase the benefits of VLANs. MSTP allows you to define multiple groups of VLANs, and to configure a separate Spanning Tree Instance for each group. - Page 186 Redundancy 7.5 Spanning Tree The following tables show the selection options and default settings, and information on the global Spanning Tress settings for the bridge. Parameter Meaning Possible Values Default Setting Frame Switches the Spanning Tree function for „Function“ this device “On” or “Off”. If you switch off the Spanning Tree for a device globally, the device floods the Spanning Tree packets received like...
- Page 187 Redundancy 7.5 Spanning Tree In the “Protocol Configuration / Information” frame you can configure the following values and read information. In the context of MSTP, these are the settings for the Common Spanning Tree (CST). Parameter Meaning Possible Values Default Setting Column Information and configuration „Bridge“...
- Page 188 Redundancy 7.5 Spanning Tree Parameter Meaning Possible Values Default Setting Forward Sets the Forward Delay parameter. 4 - 30 s 15 s Delay In the previous STP protocol, the Forward See the note Delay parameter was used to delay the following this table.
- Page 189 Redundancy 7.5 Spanning Tree Parameter Meaning Possible Values Default Setting Switches the MRP compatibility on/off. compatibility MRP compatibility enables RSTP to be used within an MRP-Ring and when coupling RSTP segments to an MRP- Ring. The prerequisite is that all devices in the MRP-Ring must support MRP compatibility.
- Page 190 Redundancy 7.5 Spanning Tree Parameter Meaning Possible Values Default Setting Column Information on the device that is currently „Root“ the root bridge Bridge ID The Bridge ID of the current root bridge. The format is ppppp / mm mm mm mm mm mm, with: ppppp: priority (decimal) and mm: the respective byte of the MAC address (hexadecimal).
- Page 191 Redundancy 7.5 Spanning Tree If you have activated the “MRP Compatibility” function, the device displays the “Information” frame with additional information on MRP compatibility: Parameter Meaning Possible Values Default Setting Information If you have activated the MRP Message with bridge compatibility (RSTP over MRP) and one of ID or empty.
-
Page 192: Mstp (Multiple Spanning Tree)
Redundancy 7.5 Spanning Tree 7.5.2 MSTP (Multiple Spanning Tree) With this dialog you can: manage the global Multiple Spanning Tree Instance create or delete a Multiple Spanning Tree Instance assign VLANs to a Multiple Spanning Tree Instance and manage the MSTI. - Page 193 Redundancy 7.5 Spanning Tree Dialog Tab MSTP Global (CIST) This tab in the dialog allows you to configure the MST region and the global Multiple Spanning Tree Instance (IST) within the MST region, and to display information on IST and CST. Parameter Meaning Possible Values Default Setting...
- Page 194 Redundancy 7.5 Spanning Tree Parameter Meaning Possible Default Setting Values Frame „Global CIST Detailed information on the global Parameters“ MST instance (IST) for the region and CST. Maximum Hops Maximum number of bridges within the 1 - 127 MST region in a branch to the root bridge.
- Page 195 Redundancy 7.5 Spanning Tree Parameter Meaning Possible Default Setting Values Root path costs External path costs from the regional 0-200,000,000 root bridge of the MST region of the device to the current root bridge of the entire layer 2 network (CIST root). These are the same for all devices within an MST region.
- Page 196 Redundancy 7.5 Spanning Tree MSTI (Multiple Spanning Tree Instance) dialog tab These MSTI tabs in the dialog allow you to manage the individual Multiple Spanning Tree Instances. The tab is named MSTI, followed by the number of the instance, e.g. “MSTI 2”. Parameter Meaning Possible Values...
- Page 197 Redundancy 7.5 Spanning Tree Parameter Meaning Possible Values Default Setting Frame „Instance Detailed information on the selected Parameters“ Multiple Spanning Tree Instance. Priority The local bridge Priority for the 0 ≤ n*4096 ≤ 32,768 selected MST Instance. The bridge 61440 priority and its own MAC address make up this separate Bridge ID.
-
Page 198: Port
Redundancy 7.5 Spanning Tree 7.5.3 Port Note: Deactivate the Spanning Tree protocol for the ports connected to a HIPER-Ring, Fast HIPER-Ring, or Ring/Network coupling, because Spanning Tree and Ring Redundancy or Ring/Network coupling affect each other. Activate the MRP compatibility in an MRP-Ring if you want to use RSTP and MRP in combination. - Page 199 Redundancy 7.5 Spanning Tree Parameter Meaning Possible Values Default Setting Tab „CIST“ Port configuration and information on the global MSTI (IST) and the CST. STP active Here you can switch Spanning Tree On, Off on or off for this port. If Spanning Tree is activated globally and switched off at one port, this port does not send STP-BPDUs and...
- Page 200 Redundancy 7.5 Spanning Tree Parameter Meaning Possible Values Default Setting Received bridge Displays the remote bridge ID from Bridge ID ID (read only) which this port last received an STP- (format ppppp / BPDU. mm mm mm mm mm mm) In the stable condition (no topology change), this is usually the designated bridge ID, as only its port...
- Page 201 Redundancy 7.5 Spanning Tree Parameter Meaning Possible Values Default Setting Auto Edge Port The Auto Edge Port setting is only active (box selected), active considered when the Admin Edge inactive (box empty) Port parameter is deactivated. If Auto Edge Port is active, after a link is set up the device sets the port to the forwarding status after 1.5 ·...
- Page 202 Redundancy 7.5 Spanning Tree Figure 45: STP Port dialog, CIST tab RM Web Release 6.0 07/2010...
- Page 203 Redundancy 7.5 Spanning Tree Parameter Meaning Possible Values Default Setting Tab „Guards“ Protective settings for the ports. Root Guard The “Root Guard” setting is only relevant for active (box inactiv edge ports (ports with the “Admin Edge Port” selected), setting true). inactive (box If such a port receives an STP-BPDU with empty)
- Page 204 Redundancy 7.5 Spanning Tree Parameter Meaning Possible Values Default Setting Loop Guard The “Loop Guard” setting is only meaningful active (box inactiv for ports with the STP role alternate, selected), backup or root. If the “Loop Guard” setting is inactive (box active and the port has not received any STP- empty) BPDUs for a while, the device sets the port to...
- Page 205 Redundancy 7.5 Spanning Tree Parameter Meaning Possible Values Default Setting Transitions from Counts how often the device has set the port 0 - 4,294,967,295 Loop Status out of the loop status (“Loop Status” column true). BPDU Guard The “BPDU Guard Effect” status is only true, false Effect (read only) relevant for edge ports (ports with the “Admin...
- Page 206 Redundancy 7.5 Spanning Tree Parameter Meaning Possible Values Default Setting Port configuration and information „MSTI <ID>“ on the selected MSTI. Port status (read Displays the STP port status with discarding, only) regard to the current MSTI. learning, forwarding, disabled, manualForwarding, notParticipate Port role (read Displays the STP port role with...
- Page 207 Redundancy 7.5 Spanning Tree For alternative, back-up and root ports, this information is in the stationary condition (static topology), identically to that of the STP standard. If a port has no link, or if it has not received any STP-BDPUs for the current MSTI, the device displays the values that the port would send as a designated port.
-
Page 208: Vrrp/Hivrrp
If the current default gateway becomes inoperable, VRRP provides a redundant gateway for the terminal devices. The Hirschmann company has further developed the VRRP into the Hirschmann Virtual Router Redundancy Protocol (HiVRRP). With the appropriate configuration, HiVRRP achieves switch-over times less than 400 ms. -
Page 209: General Settings
Redundancy 7.6 VRRP/HiVRRP General settings Parameter Meaning Function Switch the VRRP function on and off Version Display the VRRP version Send VRRP Master As soon as the router takes over the VRRP master function, it sends a Trap master trap Send VRRP As soon as the router receives a VRRP message with an incorrect Authentication... - Page 210 Redundancy 7.6 VRRP/HiVRRP Parameter Meaning State VRRP state – initialize: VRRP is in the initialization phase. No master has been named yet. – backup: The Switch sees the possibility of becoming master. – maste”: The Switch is master. Priority VRRP priority set (value: 1 to 255; default: 100). The router with the highest value is the master.
- Page 211 Redundancy 7.6 VRRP/HiVRRP Setting up the VRRP router instance In the Redundancy:VRRP/HiVRRP:Configuration dialog, click “Wizard” at the bottom right. In the table in the Wizard dialog, select a port row and enter the virtual router ID in the VRID row. You can configure up to 8 virtual routers per interface.
- Page 212 Redundancy 7.6 VRRP/HiVRRP Note: As the IP address owner has the fixed VRRP priority 255 by definition, the VRRP tracking function requires the IP addresses of the VRRP router interfaces to differ from the virtual router IP address. Note: Activate the preempt mode so that, the backup router can take over the master role after the decrementation of the master’s VRRP priority via the tracking function.
-
Page 213: Hivrrp Domains
Redundancy 7.6 VRRP/HiVRRP 7.6.2 HiVRRP domains A HiVRRP instance is a router instance configured as HiVRRP with functions that HiVRRP contains. In a HiVRRP domain you combine multiple HiVRRP instances of a router into one administrative unit. You nominate one HiVRRP instance as the supervisor of the HiVRRP domain. -
Page 214: Statistics
Redundancy 7.6 VRRP/HiVRRP In the “Redundancy check per member” column, you can activate the function for a chosen domain as needed. Figure 49: HiVRRP domain dialog 7.6.3 Statistics The VRRP statistics window displays the numbers on counters that count events relevant to VRRP. RM Web Release 6.0 07/2010... - Page 215 Redundancy 7.6 VRRP/HiVRRP Parameter Meaning Checksum errors Number of VRRP advertisements received with the wrong checksum. Version errors Number of VRRP advertisements received with an unknown or unsupported version number. VRID errors Number of VRRP advertisements received with an invalid VRID for this virtual router.
-
Page 216: Tracking
Redundancy 7.6 VRRP/HiVRRP Figure 50: VRRP Statistics dialog 7.6.4 Tracking The VRRP Tracking window displays the status of all the tracking objects assigned to VRRP objects. RM Web Release 6.0 07/2010... - Page 217 Redundancy 7.6 VRRP/HiVRRP Parameter Meaning Port Port to which this entry applies, in the form <Slot>.<Port> VRID Virtual router ID of the assigned virtual router. Track ID Identification number of the tracking object for which you are registering this entry (see on page 156 “Applications“).
- Page 218 Redundancy 7.6 VRRP/HiVRRP Deleting a tracking object In the Redundancy:VRRP:Tracking dialog, select a row and click “Delete”. You thus delete the row. RM Web Release 6.0 07/2010...
-
Page 219: Advanced
Advanced 7.6 VRRP/HiVRRP 8 Advanced The menu contains the dialogs, displays and tables for: DHCP Relay Agent DHCP Server Industry Protocols Command Line RM Web L3E Release 6.0 07/2010... -
Page 220: Dhcp Relay Agent
Advanced 8.1 DHCP Relay Agent 8.1 DHCP Relay Agent This dialog allows you to configure the DHCP relay agent. Enter the DHCP server IP address. If one DHCP server is not available, you can enter up to 3 additional DHCP server IP addresses so that the device can change to another DHCP server. - Page 221 Advanced 8.1 DHCP Relay Agent In the “Hirschmann Device” column, you mark the ports to which a Hirschmann device is connected. Figure 52: DHCP Relay Agent dialog RM Web L3E Release 6.0 07/2010...
-
Page 222: Dhcp Server
Advanced 8.2 DHCP Server 8.2 DHCP Server The DHCP Server dialogs allow you to very easily include new devices (clients) in your network or exchange them in your network: When you select DHCP as the configuration mode for the client, the client gets the configuration data from the DHCP server. - Page 223 Advanced 8.2 DHCP Server Parameter Meaning Value range Default setting Global settings DHCP server mode Switching the DHCP server on and On, Off off globally on the device. Settings per port (table) Port Module and port numbers to which this entry applies. DHCP Server active Switch the DHCP server on and off at On, Off...
-
Page 224: Pool
Advanced 8.2 DHCP Server 8.2.2 Pool This dialog allows you to closely control the allocation of IP addresses. For this purpose, the DHCP server provides what is known as an IP address pool (in short “pool”) from which it allocates IP addresses to clients. The pool consists of a list of entries. - Page 225 Advanced 8.2 DHCP Server Parameter Meaning Value range Default setting Port Module and port numbers to which this Valid module entry applies. and port number For a dynamic address entry select or all. all. For a static address entry select all or one valid module and port number.
- Page 226 Circuit ID with which the client client that identifies itself. contains the static IP address Hirschmann Device Activate this setting if the device from On, Off this entry only serves devices from Hirschmann. Table 101: DHCP server pool settings, mode of address allocation –...
- Page 227 Advanced 8.2 DHCP Server Parameter Meaning Value range Default setting Configuration URL TFTP URL, from which the client can Valid TFTP URL - obtain additional configuration information. Enter the URL in the form tftp://server name or ip address/ directory/file. Default Gateway Default gateway entry for the client.
-
Page 228: Lease Table
Advanced 8.2 DHCP Server 8.2.3 Lease Table The lease table shows you the IP addresses that the DHCP server has currently allocated. The device displays the related details for every IP address allocated. Parameter Meaning Value range Port Module and port numbers to which this entry applies. - Page 229 Advanced 8.2 DHCP Server Figure 55: DHCP server lease table dialog RM Web L3E Release 6.0 07/2010...
-
Page 230: Industrial Protocols
Advanced 8.3 Industrial Protocols 8.3 Industrial Protocols The “Industry Protocols” menu allows you to configure the PROFINET IO protocol as well as the EtherNet/IP protocol. Detailed information on industrial protocols and PLC configuration is contained in the User Manual "Industrial Protocols“. 8.3.1 PROFINET IO This dialog allows you to configure the PROFINET IO protocol. - Page 231 Advanced 8.3 Industrial Protocols PROFINET IO Port settings: Select the port for which you want to set the DCP mode in detail, and in the column DCP Mode, select – none: The device sends received DCP frames. However, the CPU does not process them yet, it still generates DPC frames.
-
Page 232: Ethernet/Ip
Advanced 8.3 Industrial Protocols 8.3.2 EtherNet/IP This dialog allows you to activate the EtherNet/IP protocol. To integrate this in a control system, perform the following steps. General settings: In the Switching:Multicasts:IGMP dialog, check whether IGMP Snooping is activated (see on page 98 “IGMP (Internet Group Management Protocol)“). -
Page 233: Command Line
Advanced 8.4 Command Line 8.4 Command Line This window enables you to access the Command Line Interface (CLI) using the Web interface. You will find detailed information on CLI in the “Command Line Interface” reference manual. RM Web L3E Release 6.0 07/2010... - Page 234 Advanced 8.4 Command Line RM Web Release 6.0 07/2010...
-
Page 235: Diagnostics
Diagnostics 8.4 Command Line 9 Diagnostics The diagnosis menu contains the following tables and dialogs: Syslog Event Log Ports (statistics, utilization, SFP modules, TP cable diagnosis) Configuration Check Topology Discovery Port Mirroring Device Status Signal Contact Alarms (Traps) Report (log file, system information) IP Address Conflict Detection Self Test In service situations, they provide the technician with the necessary... -
Page 236: Syslog
Diagnostics 9.1 Syslog 9.1 Syslog The “Syslog” dialog enables you to additionally send to one or more syslog servers, the events that the device writes to its event log. You can switch the function on or off, and you can manage a list of up to 8 syslog server entries. You also have the option to specify that the device informs various syslog servers, depending on the minimum “level to report”... - Page 237 Diagnostics 9.1 Syslog Parameter Meaning Possible Values Default Setting Frame Switches the syslog function for this „Function“ device “On” or “Off” Frame „SNMP Settings for sending SNMP requests to Logging“ the device as events to the list of syslog servers. Log SNMP Creates events for the syslog for SNMP active,...
- Page 238 Diagnostics 9.1 Syslog Parameter Meaning Possible Values Default Setting Syslog server entries Index Sequential number of the syslog server 1 - 8 entry in the table. When you delete an entry, this leaves a gap in the numbering. When you create a new entry, the device fills the first gap.
- Page 239 Diagnostics 9.1 Syslog Note: When you activate the logging of SNMP requests, the device sends these as events with the preset level to report notice to the list of syslog servers. The preset minimum level to report for a syslog server entry is critical.
- Page 240 Diagnostics 9.1 Syslog Figure 56: Syslog dialog RM Web Release 6.0 07/2010...
-
Page 241: Event Log
Diagnostics 9.2 Event Log 9.2 Event Log The table lists the logged events with a time stamp. The “Load” button allows you to update the content of the event log, and with the “Delete” button you delete the content of the event log. Figure 57: Event log table You have the option to also send the logged events to one or more syslog servers... -
Page 242: Ports
Diagnostics 9.3 Ports 9.3 Ports The port menu contains displays and tables for the individual ports: Statistics table Utilization SFP Modules TP cable diagnosis 9.3.1 Statistics table This table shows you the contents of various event counters. In the Restart menu item, you can reset all the event counters to zero using "Warm start", "Cold start"... -
Page 243: Utilization
Diagnostics 9.3 Ports Figure 58: Port statistics table 9.3.2 Utilization This table displays the network load of the individual ports. In the “Upper Threshold[%]” column you enter the upper threshold value for network load. If this threshold value is exceeded, the device sets a check mark in the “Alarm”... - Page 244 Diagnostics 9.3 Ports Figure 59: Network load dialog RM Web Release 6.0 07/2010...
-
Page 245: Sfp Modules
Diagnostics 9.3 Ports 9.3.3 SFP modules The SFP status display allows you to look at the current SFP module connections and their properties. The properties include: Parameter Meaning Module Module of the device on which the port is located. Port Port to which this entry applies. -
Page 246: Tp Cable Diagnosis
Diagnostics 9.3 Ports 9.3.4 TP Cable Diagnosis The TP cable diagnosis allows you to check the connected cables for short- circuits or interruptions. Note: While the check is running, the data traffic at this port is suspended. Select the TP port on which you want to perform the check. Click "Set"... - Page 247 Diagnostics 9.3 Ports The check takes a few seconds. After the check, the "Result" row contains the result of the cable diagnosis. If the result of the check shows a cable problem, then the "Distance" row contains the cable problem location’s distance from the port.
-
Page 248: Configuration Check
Diagnostics 9.4 Configuration Check 9.4 Configuration Check This dialog enables you to compare the configuration for the device with the configurations of its neighbor devices. The device includes all neighbor devices it can determine with Topology Discovery (LLDP) in the evaluation. If the configuration for the device is not compatible with the configuration for the neighbor device or somehow different, you can display detailed information on this possible configuration problem/configuration error in the dialog. - Page 249 Diagnostics 9.4 Configuration Check Parameter Meaning Module Module number for modular devices, otherwise 1. Port Port to which this entry applies. Neighbour System name of the neighboring device (see on page 19 “System Data“) System Name Neighbour IP IP address of the neighboring device with LLDP function (see on page 24 Address “Network“)
-
Page 250: Topology Discovery
Diagnostics 9.5 Topology Discovery 9.5 Topology Discovery This dialog allows you to switch on/off the topology discovery function (LLDP). The topology table shows you the collected information for neighboring devices. This information enables the network management station to map the structure of your network. The option "Show LLDP entries exclusively"... - Page 251 Diagnostics 9.5 Topology Discovery When devices both with and without an active topology discovery function are connected to a port, the topology table hides the devices without active topology discovery. If only devices without active topology discovery are connected to a port, the table will contain one line for this port to represent all devices.
-
Page 252: Port Mirroring
The destination port forwards all data to be sent. On the devices PowerMICE, MACH 104, MACH 1040 and MACH 4000, the destination port blocks received data, on all other devices, the destinations port also forwards received data. - Page 253 Diagnostics 9.6 Port Mirroring Note: When port mirroring is active, the specified destination port is used solely for reviewing, and does not participate in the normal data traffic. Figure 63: Port Mirroring dialog RM Web L3E Release 6.0 07/2010...
-
Page 254: Device Status
Diagnostics 9.7 Device Status 9.7 Device Status The device status provides an overview of the overall condition of the device. Many process visualization systems record the device status for a device in order to present its condition in graphic form. Figure 64: Device State dialog (for PowerMICE) In the "Monitoring"... - Page 255 Diagnostics 9.7 Device Status The events which can be selected are: Name Meaning Power supply ... Monitor/ignore supply voltage(s). Temperature Monitor/ignore temperature thresholds set (see on page 18 “System“) temperatures that are too high/too low Module removal Monitor/ignore the removal of a module (for modular devices). ACA removal Monitor/ignore the removal of the ACA.
- Page 256 Diagnostics 9.7 Device Status Note: With a non-redundant voltage supply, the device reports the absence of a supply voltage. If you do not want this message to be displayed, feed the supply voltage over both inputs or switch off the monitoring (see on page 257 “Signal contact“).
-
Page 257: Signal Contact
Diagnostics 9.8 Signal contact 9.8 Signal contact The signal contacts are used for controlling external devices by manually setting the signal contacts, monitoring the functions of the device, reporting the device state of the device. 9.8.1 Manual setting Select the tab page "Alarm 1" or "Alarm 2" (for devices with two signal contacts). - Page 258 Diagnostics 9.8 Signal contact In the “Mode Signal contact” box, you select the “Monitoring correct operation” mode. In this mode, the signal contacts monitor the functions of the device, thus enabling remote diagnosis. A break in contact is reported via the potential-free signal contact (relay contact, closed circuit).
-
Page 259: Device Status
Diagnostics 9.8 Signal contact Note: If the device is a normal ring member and not a ring manager, it doesn't report anything for the HIPER-Ring; for the Fast HIPER-Ring and for MRP it only reports local configuration problems. The elimination of the reserve redundancy for the ring/network coupling (i.e. - Page 260 Diagnostics 9.8 Signal contact Figure 65: Signal contact dialog RM Web Release 6.0 07/2010...
-
Page 261: Alarms (Traps)
Diagnostics 9.9 Alarms (Traps) 9.9 Alarms (Traps) This dialog allows you to determine which events trigger an alarm (trap) and where these alarms should be sent. Select "Create entry“. In the "Address“ column, enter the IP address of the management station to which the traps should be sent. - Page 262 Diagnostics 9.9 Alarms (Traps) The events which can be selected are: Name Meaning Authentication The device has rejected an unauthorized access attempt (see on page 45 “SNMPv1/v2 Access Settings“). Link Up/Down At one port of the device, the link to another device has been established/ interrupted.
- Page 263 Diagnostics 9.9 Alarms (Traps) Figure 66: Alarms Dialog RM Web L3E Release 6.0 07/2010...
-
Page 264: Report
Diagnostics 9.10 Report 9.10 Report The following reports are available for the diagnostics: file. The log file is an HTML file in which the device writes important device- internal events. System information. The system information is an HTML file containing system-relevant data. Note: You have the option to also send the logged events to one or more syslog servers (see on page 236... - Page 265 Diagnostics 9.10 Report The device creates the file name of the applet automatically in the format <device type><software variant><software version)>_<software revision of applet>.jar, e.g. for a device of type PowerMICE with software variant L3P: “pmL3P06000_00.jar”. File Name Format Comments Log file event_log.html HTML System information...
-
Page 266: Ip Address Conflict Detection
Diagnostics 9.11 IP address conflict detection 9.11 IP address conflict detection This dialog allows you to detect address conflicts the device is having with its own IP address and rectify them (Address Conflict Detection, ACD). Select IP address conflict detection on/off under “Status” or select the mode (see table 113). - Page 267 Diagnostics 9.11 IP address conflict detection Figure 67: IP Address Conflict Detection dialog RM Web L3E Release 6.0 07/2010...
-
Page 268: Self Test
Diagnostics 9.12 Self Test 9.12 Self Test With this dialog you can: activate/deactivate the RAM test for a cold start of the device. Deactivating the RAM test cuts the booting time for a cold start of the device. allow or disable a restart due to an undefined software or hardware state. Figure 68: Self-test dialog RM Web Release 6.0 07/2010... -
Page 269: A Appendix
Appendix 9.12 Self Test A Appendix RM Web L3E Release 6.0 07/2010... - Page 270 Max. number of static address entries (in RM mode: 0 Unicast entries) VLAN VLAN ID 1 to 4,042 (MACH 4000: 3,966) Number of VLANs max. 256 simultaneously per device max. 256 simultaneously per port Number of VLANs in GMRP in VLAN 1 max.
- Page 271 Appendix A.1 Technical Data Router ARP entries up to 2,000 Routing entries up to 2,000 (1,500 for MACH 4002 24G/48G) Number of VLAN interfaces up to 32 Static routes Static ARP entries Number of tracking objects RM Web L3E Release 6.0 07/2010...
- Page 272 Appendix A.2 List of RFCs A.2 List of RFCs RFC 768 (UDP) RFC 783 (TFTP) RFC 791 (IP) RFC 792 (ICMP) RFC 793 (TCP) RFC 826 (ARP) RFC 854 (Telnet) RFC 855 (Telnet Option) RFC 951 (BOOTP) RFC 1112 (IGMPv1) RFC 1157 (SNMPv1) RFC 1155...
- Page 273 Appendix A.2 List of RFCs RFC 2574 (User Based Security Model for SNMP v3) RFC 2575 (View Based Access Control Model for SNMP) RFC 2576 (Coexistence between SNMP v1, v2 & v3) RFC 2578 (SMI v2) RFC 2579 (Textual Conventions for SMI v2) RFC 2580 (Conformance statements for SMI v2) RFC 2613...
- Page 274 Appendix A.3 Underlying IEEE Standards A.3 Underlying IEEE Standards IEEE 802.1AB Topology Discovery (LLDP) IEEE 802.1af Power over Ethernet IEEE 802.1D Switching, GARP, GMRP, Spanning Tree (Supported via 802.1S implementation) IEEE 802.1D-1998, Media access control (MAC) bridges (includes IEEE 802.1p Priority IEEE 802.1D-2004 and Dynamic Multicast Filtering, GARP, GMRP, Spanning Tree) IEEE 802.1Q-1998...
- Page 275 Appendix A.4 Underlying IEC Norms A.4 Underlying IEC Norms IEC 62439 High availability automation networks; especially: Chap. 5, MRP – Media Redundancy Protocol based on a ring topology RM Web L3E Release 6.0 07/2010...
- Page 276 Appendix A.5 Copyright of Integrated Software A.5 Copyright of Integrated Software A.5.1 Bouncy Castle Crypto APIs (Java) The Legion Of The Bouncy Castle Copyright (c) 2000 - 2004 The Legion Of The Bouncy Castle (http://www.bouncycastle.org) Permission is hereby granted, free of charge, to any person obtaining a copy of this software and associated documentation files (the "Software"), to deal in the Software without restriction, including without limitation the rights to use, copy, modify, merge, publish, distribute, sublicense, and/or sell copies...
- Page 277 Appendix A.5 Copyright of Integrated Software A.5.2 Broadcom Corporation (c) Copyright 1999-2007 Broadcom Corporation. All Rights Reserved. RM Web L3E Release 6.0 07/2010...
-
Page 278: B Readers' Comments
Readers’ Comments A.5 Copyright of Integrated Software B Readers’ Comments What is your opinion of this manual? We are always striving to provide as comprehensive a description of our product as possible, as well as important information that will ensure trouble-free operation. Your comments and suggestions help us to further improve the quality of our documentation. - Page 279 Date / Signature: Dear User, Please fill out and return this page as a fax to the number +49 (0)7127/14-1600 or by mail to Hirschmann Automation and Control GmbH Department AED Stuttgarter Str. 45-51 72654 Neckartenzlingen RM Web L3E Release 6.0 07/2010...
- Page 280 Readers’ Comments A.5 Copyright of Integrated Software RM Web Release 6.0 07/2010...
-
Page 281: Index
Index A.5 Copyright of Integrated Software C Index 802.1x Device status DHCP Option 82 DHCP Relay Agent DHCP relay agent 33, 262, 262, 262 DHCP Server (global) Accept SNTP Broadcast DHCP server (lease table) Acceptable Frame Types DHCP Server (overview) Access with Web-based interface, password DHCP server pool Diagnose... - Page 282 Index A.5 Copyright of Integrated Software Independent VLAN Port security (source for alarms) Industry Protocols Port State (Link) Industry protocols Port Statistics Ingress Filtering Port VLAN ID Interner Router Ports IP DSCP mapping 119, 128 Precedence IP-DSCP value Precision Time Protocol Priority queue PROFINET IO 9, 230...
- Page 283 Index A.5 Copyright of Integrated Software RIP statistics Time management RMON probe Time To Live Root bridge Timestamp unit Router Topology Router Discovery Topology Discovery Routing (global settings) Routing (interface settings) TP cable diagnosis Routing function Tracking 152, 154 Routing Information Protocol Tracking (VRRP) 154, 216 Routing table...
- Page 284 Index A.5 Copyright of Integrated Software VoIP VRRP 156, 157, 208 VRRP (configuration) VRRP advertisement interval VRRP instance VRRP router instance VRRP statistics VRRP Tracking 154, 216, 216 Web Access Web-based interface Web-based management Website Weighted Fair Queuing 125, 131, 131 Weighted Round Robin Write access RM Web...
-
Page 285: D Further Support
A.5 Copyright of Integrated Software D Further Support Technical Questions and competition scenario, the Training Courses Hirschmann Competence Center In the event of technical queries, is ahead of its competitors on please contact your local three counts with its complete...
Need help?
Do you have a question about the MACH 4000 and is the answer not in the manual?
Questions and answers