JVC VN-V686U Instructions Manual
Hide thumbs
Also See for VN-V686U:
- Instructions manual (121 pages) ,
- Startup manual (44 pages) ,
- Manual (105 pages)
Table of Contents
Advertisement
Quick Links
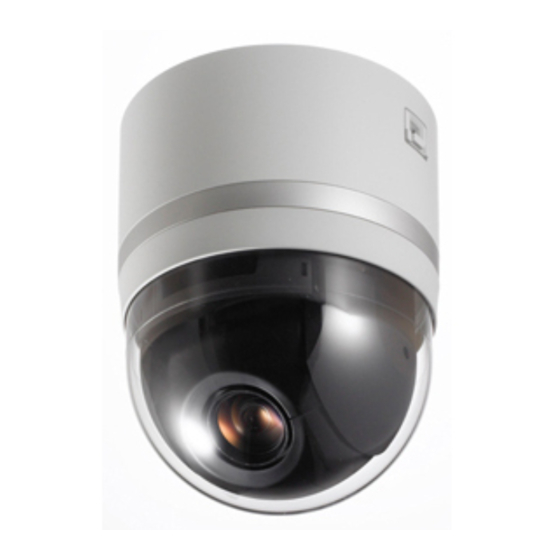
PTZ IP DOME CAMERA
VN-V686U
Thank you for purchasing this product.
Before beginning to operate this unit, please read
the instruction manual carefully in order to make
sure that the best possible performance is
obtained.
For Customer Use:
Enter below the Serial No. which is located on the
body.
Retain this information for future reference.
Model No.
VN-V686U
Serial No.
INSTRUCTIONS
LST0633-001B
Advertisement
Table of Contents

Related Manuals for JVC VN-V686U


Summary of Contents for JVC VN-V686U
- Page 1 PTZ IP DOME CAMERA VN-V686U INSTRUCTIONS Thank you for purchasing this product. Before beginning to operate this unit, please read the instruction manual carefully in order to make sure that the best possible performance is obtained. For Customer Use: Enter below the Serial No. which is located on the body.
-
Page 2: Getting Started
If you wish to dispose of this product, please visit our web page Union. www.jvc-europe.com to obtain information about the take-back of the product. [Other Countries outside the European Union] If you wish to dispose of this product, please do so in accordance with applicable national legislation or other rules in your country for the treatment of old electrical and electronic equipment. - Page 3 ● This installation should be made by a Due to design modifications, data given in this qualified service person and should conform instruction book are subject to possible change to all local codes. without prior notice. ● This installation shall be in accordance with the National Electrical Code, ANSI/NFPA 70.
- Page 4 Getting Started These are general IMPORTANT SAFEGUARDS and certain items may not apply to all appliances. IMPORTANT SAFEGUARDS 1. Read all of these instructions. 2. Save these instructions for later use. 3. All warnings on the product and in the operating instructions should be adhered to. 4.
-
Page 5: Table Of Contents
Registering Preset Positions ....111 Network Settings Auto Pan Setting........112 IP Address Settings........26 Auto Trace Setting ......... 113 Setting the IP address for VN-V686U..26 When the IP address of VN-V686U Others is known ............31 Troubleshooting......... 114 When the IP address of VN-V686U is Specifications .......... -
Page 6: Features
Built-in Web Server This manual contains the detailed You can configure the picture quality and instructions for using the VN-V686U communication settings using the Internet Explorer. camera. Please refer to [START-UP GUIDE] for description on the general usage of VN- HTTP-based API V686U. -
Page 7: Safety Precautions
Consult your dealer as special technique is Contents of this manual required when installing this product. Ensure that ● JVC holds the copyright to this manual. Any the fixing screws or nuts are tightened securely, part or all of this manual may not be otherwise, the unit may fall off. -
Page 8: Operating Environment
● To make use of the built-in MPEG4 Viewer of Inadequate heat ventilation may result in VN-V686U, install “ffdshow” that is open malfunction of this product. Be sure not to block source codec. You can download “ffdshow” vents around the product. This product from the Internet. - Page 9 Do not connect an AC 24 V cable to AC 110 V/AC AF function or reset the focus manually. 230 V power supply. The camera internal circuit will be damaged. Do not use the camera. Bring it to your nearest JVC dealer for repair (charged separately).
- Page 10 Getting Started Precautions (contiuned) Copyright Protection With the exception of the user being the copyright holder or when permission such as for duplication has been granted by the copyright holder, permission is required in principle for the Transporting the unit duplication, modification, or transmission of Remove the connecting cables when copyrighted video and audio data.
- Page 11 Auto Focus This unit is equipped with One Push Auto Focus and Easy AF Auto Focus functions. However, depending on the object and the camera setting, it might be out of focus. In this case, please adjust the focus manually. ●...
-
Page 12: Name And Function Of Parts
Getting Started Name and Function of Parts Ceiling mount section Terminal Reverse side Fixing holes (x3) Fall prevention wire fixing bracket This attaches to the fall prevention wire K of the This hole is for mounting the ceiling clamping bracket to the ceiling or the ceiling recessed camera. - Page 13 Camera Fall Prevention Wire This is fixed to the fall prevention wire fixing bracket E of the ceiling clamping bracket. Front Mask Lens Lens cannot be replaced. Camera fixing lock knob (x2) This mounts the camera on the ceiling and secures it so that it does not fall.
-
Page 14: Features
You can also lengthen the recording Surveillance Using Built-in Viewer time by lowering the frame rate, resolution, and VN-V686U comes with a built-in ActiveX JPEG picture quality settings for JPEG images. Viewer and MPEG4 Viewer. JPEG images and MPEG4 images of VN-V686U... -
Page 15: Camera Mounting Procedures
Camera Mounting Alarm Procedures VN-V686U comes with a motion detection feature and dual alarm input. Mount the camera using the following procedures. By motion detection or alarm input, actions such as mail delivery, message transmission via TCP/UDP, Step 1 Connection/Installation... -
Page 16: Mounting The Camera
Connection/Installation Mount the fall prevention wire that Mounting the Camera connects the ceiling clamping bracket to the ceiling 6 mm Fall Prevention Wire Preparation (15/64 inch) Be sure to put on protective glasses to protect 6 mm and below your eyes from falling objects when mounting the R6 mm and below camera. - Page 17 ● Do not connect an AC 24 V cable to AC 100 V power supply. The camera internal circuit will be damaged. Do not use the camera. Bring it to your nearest JVC service center for repair (charged separately). ● For safety reasons, turn on the power only after all the connection is complete.
- Page 18 Connection/Installation Mounting the Camera Mounting the camera to the ceiling (contiuned) Remove the tape on the lens section Remove the lens cap Mounting the ceiling clamping bracket to the ceiling Tape Secure the ceiling clamping bracket on the ceiling ● Install such that the ADFRONT markB of the Lens cap ceiling clamping bracket faces the front.
- Page 19 Note: Caution ● Before mounting the camera, check that the camera fixing lock knobs are not locked (i.e., ● The dome cover is an optical parts. Handle lock knobs are on top). The camera cannot with care. be mounted if the lock knobs are locked. ●...
-
Page 20: Power Connection
(at least 10 minutes) or power off and on all network devices under the same LAN environment. Otherwise, access to VN-V686U may fail. When using 2-core VVF (Vinyl-insulated vinyl- sheath cable), the connection distance is as... - Page 21 ● Do not connect an AC 24 V cable to AC 110 V/AC 230 V power supply. The camera internal circuit will be damaged. Do not use the camera. Bring it to your nearest JVC dealer for repair (charged separately). ● Turn on the power only after the connection for all the devices is complete.
-
Page 22: Lan Cable Connection
Alarm signal terminal Note: ● However, cross cables cannot be used with some computer models. When connecting VN-V686U directly to a computer, check the computer’s LAN specifications in advance. Note: ● Noises from an external source may cause the camera to malfunction even when the cable used is within 50 m. - Page 23 Alarm input signal Connects to sensors such as infrared sensors, door sensors, metal sensors and manual switches. ● To prevent noise from entering the internal circuit, supply non-voltage contact signal to the alarm input signal. ● Do not supply voltage. ●...
-
Page 24: Network Requirements
● Data volume to be sent by VN-V686U varies 30 KB × 30 fps 900 KB/s Approx. 7.2 Mbps with the settings and number of distributions. - Page 25 0.6 Mbps 12 Mbps When packet loss occurs during multicast sending and below from VN-V686U, the image frame rate may drop. In 3 Mbps and 12 Mbps the case of MPEG4, noise interference may occur below and playback may fail.
-
Page 26: Network Settings
(B) Assigning a static IP address to VN- V686U Default gateway : None Memo ● To set a static IP address for VN-V686U, (A) Assigning an IP address from the connect VN-V686U, the switching hub and DHCP server the computer for setting using a straight LAN ●... - Page 27 IP address setting at the computer Set the computer to an IP address that enables communication with VN-V686U. Click [Start] ● Select in the sequence of [Control Panel]-[Network Connection]-[Local Area]. The computer on which Internet Explorer is launched automatically selects the connected network ●...
- Page 28 Network Settings IP Address Settings (contiuned) Changing the IP address using the Internet Explorer Launch the Internet Explorer on the computer When proxy settings are enabled in the Internet Explorer, follow the steps below to disable the proxy of the Internet Explorer ●...
- Page 29 Launch the Internet Explorer B Click [Go]. Enter the following IP address into the address field. http://192.168.0.2 Memo ● If the proxy server settings for access to the Internet via the Internet Explorer is enabled, you may not be able to specify the IP address directly. In this case, change the proxy settings of the Internet Explorer.
- Page 30 Memo ● Access from this computer may fail when the IP address of VN-V686U is changed. To enable access to VN-V686U from the same computer, alter the IP address at the computer accordingly.
-
Page 31: When The Ip Address Of Vn-V686U Is Known
When the IP address of VN-V686U is known When the IP address of VN-V686U is known, it can be changed by accessing the built-in web page of VN-V686U via the Internet Explorer on the computer. Refer to [Setting Using Internet Explorer] (A Page 32). -
Page 32: Setting Using Internet Explorer
Setting Using Internet Explorer Preparation Internet Explorer Setup Launch the Internet Explorer on the computer When proxy settings are enabled in the Internet Explorer, follow the steps below to disable the proxy of the Internet Explorer ● Select in the order of [Tool]-[Internet Options]-[Connections]-[LAN Setting], followed by deselecting the check for [Use a proxy server for your LAN] in [Proxy Server] of the [Local Area Network (LAN) Settings] window. - Page 33 [Enable]. Enable also [Use the following IP address] under [Miscellaneous]. Disable pop-up block Connection of VN-V686U cannot be established when pop-up block in the Internet Explorer is set to AEnableB. Follow the steps below to set the pop-up block to AdisableB.
-
Page 34: Enter User Name And Password
Setting Using Internet Explorer Preparation (continued) Utility [Maintenance] [Miscellaneous] Status [Operation] [Settings] Enter user name and password [Position List] [Patrol Settings 0] User name and password entry will be required at [Patrol Settings 1] the beginning. [Patrol Settings 2] There are three access authorization levels to VN- V686U. - Page 35 ● Do not reset or turn off the power of VN- V686U immediately after the settings are changed. Otherwise, changes may not be saved, and VN-V686U may be restored to the factory settings. ● If settings are changed when sending JPEG or MPEG4, the transmission may be temporarily cancelled.
-
Page 36: Setting
Setting Using Internet Explorer Setting View Page This top page is displayed upon access using any of the user names AadminB, AoperatorB or AuserB. The current image is displayed as a still image. Links to each page are found at the left end. The links displayed vary according to the user name. For example, in the case of AadminB or AoperatorB, three links, namely [View], [Camera] and [Encoding] are displayed upon clicking [Image]. - Page 37 Internet Files, and select AEvery visit to the pageB. Note: ● When a firewall is installed between VN-V686U and the computer, still images may not be displayed on the Image View page of the web browser. For such systems, check the still images using Built-in viewer.
-
Page 38: Camera Page
Setting Using Internet Explorer Setting (continued) Camera Page This page is for setting the camera’s parameters. This page can be used during access using AadminB or AoperatorB. ● Press the [OK] button to enable the new settings. ● If the [OK] button is pressed upon entering an invalid value, a warning message will appear and the entry will be denied. - Page 39 Black Level For adjusting the black level. Lowering the value darkens the video image. Increasing the value brightens the image. [Setting range:0 to 2] Memo ● If the black level is set to A0B, this may be too low depending on the connected device, or dark area will become complete black.
- Page 40 Setting Using Internet Explorer Setting (continued) Camera Page (contiuned) Stabilizer This function prevents image shaking caused by vibration. Set this function to AOnB to control image shaking. : Disabled. : Enabled. Memo ● When the function is set to AOnB, the screen is enlarged to approximately 1.3 times.
- Page 41 This item allows you to set the adjustment level of the [Stabilizer] item H in 3 steps. Stabilizer Level The adjustment volume is larger if the value is set to AHighB rather than AMidB. When it is set to ALowB, the adjustment volume is lesser than compared to when it is set to AMidB.
- Page 42 Setting Using Internet Explorer Setting (continued) Camera Page (contiuned)
- Page 43 Shutter Speed This item sets the speed of the electronic shutter. When [Sense Up] item K is set to Ax2B or above, available setting value is A1/ 60B or A1/100B only. [Setting values:1/60,1/100,1/250,1/500,1/1000,1/2000,1/4000,1/10000] Memo ● Flickering of fluorescent lightings can be reduced when the shutter speed is set to A1/100B or A1/60B respectively in regions of commercial power frequency 50 Hz and 60 Hz.
-
Page 44: Encoding Page
● There is a maximum limit to the bit rate for transmission by VN-V686U. If a bit rate that exceeds the maximum limit is specified, this new setting will not be applied. For details on the maximum transmission limit, refer to [Network Requirements] (A Page 24). - Page 45 JPEG Quality/Size For specifying the rate control mode and target file size for JPEG. When AVFS1B to AVFS7B is selected, the quantization table during JPEG encoding will be maintained and the file size will increase/decrease according to the input signals. Stipulated values will be displayed in the Size field. When recording JPEG data to a recorder with a limited storage capacity, note that the maximum recording time may vary as the file size fluctuates under this setting.
-
Page 46: Alarm Page
Setting Using Internet Explorer Setting (continued) Alarm Page This page is for setting actions when there is an alarm. Up to 5 actions (No. 01 to No. 05) may be set. This page can be used during access using AadminB or AoperatorB. ●... - Page 47 Action For specifying the type of action. Disable : Does not trigger any action. Mail : Sends out e-mail. Specify the recipient’s mail address. The title of the mail will appear as [Alarm from VN-V686] and the sender as [Camera ID]. Enter the message to send in [Mail Text].
- Page 48 Setting Using Internet Explorer Setting (continued) Alarm Page (contiuned) This item specifies the first trigger to the operation set in [Action] A. 1st Trigger [Setting values: Input 1 Make, Input 2 Make, Input 1 Break, Input 2 Break, Motion Detection, Fan Stop, Position, BlackWhite →...
- Page 49 Max. Interval Enabled when both the first and second triggers are specified. Specify the maximum interval between the first and second triggers. An action will be invoked only if the interval between the first and second triggers is within the maximum interval. [Setting range:1sec to 3600sec] This item specifies the second trigger to the operation set in [Action] A.
-
Page 50: Alarm Environment Page
Setting Using Internet Explorer Setting (continued) Alarm Environment Page This page is for setting alarm-related environments. This page can be used during access using AadminB or AoperatorB. ● Press the [OK] button to enable the new settings. ● If the [OK] button is pressed upon entering an invalid value, a warning message will appear and the entry will be denied. - Page 51 For example, if the host name is AwwwB and the domain name is Ajvc.co.jpB, this will be denoted as Awww.jvc.co.jpB in FQDN. Japanese cannot be used in FQDN. For setting the FTP environment when AFTPB is specified as an [Action]A on the Alarm page.
- Page 52 Setting Using Internet Explorer Setting (continued) Alarm Environment Page (contiuned)
- Page 53 FTP (contiuned) Time Filter For specifying the periodic FTP transfer action with respect to each day of the week and setting the corresponding time of the day. Applicable day of week : Sunday, Monday, Tuesday, Wednesday, Thursday, Friday, Saturday Alarm action : Mask span Unmask span Mask All...
-
Page 54: Ptz Page
Setting Using Internet Explorer Setting (continued) PTZ Page If the camera is not operated over the duration that was set in AReturn TimeB, it Auto Return will automatically return to the state that was set in AModeB. Mode This item sets the operation after Auto Return. none : Auto Return is disabled. - Page 55 Auto Tracking This function automatically tracks and shoots moving objects when the camera is at home position. Memo ● Auto tracking may be difficult under the following conditions. ● When multiple moving objects are in the same screen. ● When there is a flickering light source in the screen. ●...
- Page 56 Setting Using Internet Explorer Setting (continued) PTZ Page (contiuned) Limit (contiuned) Pan Limit This item sets the movable range of the pan (horizontal) operation during manual operation when AOnB is selected. It is invalid when AOffB is selected. [Set Left], [Set Right] button : Click these buttons to set the current position to the left or right edge respectively.
- Page 57 Limit (contiuned) Pan Limit Basic operation of Pan Limit (contiuned) When [Pan Limit] is set to AOnB, panning is only available in the effective area. When the camera is moved to prohibited area by some operation that has priority over [Pan Limit] and manual panning is performed, it operates in the following manner.
- Page 58 Setting Using Internet Explorer Setting (continued) PTZ Page (contiuned)
- Page 59 Preset Position This item sets the speed of moving to the preset position. It is also applicable when moving to the preset position in Auto Patrol. Speed [Setting values:1 to 4] Speed Auto Flip Set this item when shooting objects that pass right under the camera. Otherwise, following operations are necessary to shoot objects that pass right under the camera.
-
Page 60: Auto Patrol Page
Setting Using Internet Explorer Setting (continued) Auto Patrol Page This function sets the Auto Patrol operation which patrols multiple positions at specified time intervals. You can set the order in which to view the determined positions. - Page 61 There are three screens in Auto Patrol. This is sequence number of the mode of Auto Patrol. Title This displays the title of the position. Position This sets the position number to be moved in sequence. [Setting values:0 to 99] Time This sets the duration of staying at the position.
-
Page 62: Privacy Mask Page
Privacy Mask Page Privacy Mask is a feature that enables masking of a portion of the image. You can set 8 rectangular privacy masks for VN-V686U. This page can be used during access using AadminB or AoperatorB. ● Press the [OK] button to enable the new settings. - Page 63 Privacy Mask For specifying whether to activate the Privacy Mask feature. When this is set to AOnB, the privacy mask specified using the following items will appear on the screen. Memo ● When setting privacy mask, zoom will be at the Wide edge and [Digital Flip] is set to AOffB.
-
Page 64: Motion Detection Page
Setting Using Internet Explorer Setting (continued) Motion Detection Page This page is for setting motion detection. ● The area valid for motion detection is displayed in blue. ● When motion is detected, the image screen edge is displayed in red. - Page 65 Our company shall not be liable for any accident or damage that occurs. ● When other client is getting JPEG/MPEG4 stream from the VN-V686U, video images may not appear on the [Motion Detection] page due to the maximum distribution limit of VN-V686U. Stop...
-
Page 66: Basic Page
Setting Using Internet Explorer Setting (continued) Basic Page This page is for performing basic setting related to the network. This page can be used during access using AadminB. ● Press the [OK] button to enable the new settings. ● If the [OK] button is pressed upon entering an invalid value, a warning message will appear and the entry will be denied. - Page 67 Connect VN-V686U to a network environment with a DHCP server when DHCP is to be enabled. If the DHCP server does not exist when DHCP is set to AEnableB, VN-V686U will start running with the 192.168.0.2 IP address and 255.255.255.0 subnet mask in about 2 minutes after startup.
-
Page 68: Details Page
[Setting range:1280 to 1500] Negotiation For setting the negotiation of the network. When a value other than AAutoB is selected, do not set the network device to be connected to AAutoB. Ensure that it is set to the same value as VN-V686U. -
Page 69: Protocol Page
● Press the [OK] button to enable the new settings. ● After changing, you will need to re-establish the connection if you are using the Internet Explorer. HTTP Server You can change the port number for the built-in web server of VN-V686U. (1- 65535) Port The default port number setting is A80B. -
Page 70: Streaming Page
Setting Using Internet Explorer Setting (continued) Streaming Page This page is for setting manual multicast transmission. This page can be used during access using AadminB or AoperatorB. ● Press the [OK] button to enable the new settings. ● If the [OK] button is pressed upon entering an invalid value, a warning message will appear and the entry will be denied. - Page 71 Multiple multicast streams cannot be received on a single computer when there are duplicate port numbers. Memo ● When the power of VN-V686U shuts down accidentally during multicast transmission, multicast transmission will restart automatically after VN-V686U is rebooted.
-
Page 72: Access Restrictions Page
Setting Using Internet Explorer Setting (continued) Access Restrictions Page This page is for setting client restrictions. This page can be used during access using AadminB. ● Press the [OK] button to enable the new settings. ● If the [OK] button is pressed upon entering an invalid value, a warning message will appear and the entry will be denied. - Page 73 ● Note that when AallowB is selected and all IP address fields are left blank, JPEG/MPEG4 acquisition by all IP addresses will be denied. Restrictions are not imposed on access to the Web Settings page. Additionally, VN-V686U will also deny access when instructions for transmission to the specified IP address are sent via API. Memo ●...
-
Page 74: Time Page
When this is set to AOnB, the system accesses the specified NTP server at regular intervals to acquire the time. In addition, time will be recorded in the JPEG headers distributed by VN-V686U. Discontinuity in JPEG header’s time may occur immediately before and after acquiring time from the NTP server. -
Page 75: Password Page
V686U is case sensitive. New Password Enter again to confirm the new password. Again Note: ● Be sure to handle the password carefully in case you forget it. ● If you have forgotten the password, please consult your nearest JVC dealer. -
Page 76: Maintenance Page
Setting Using Internet Explorer Setting (continued) Maintenance Page This page is for maintenance purposes. This page can be used during access using AadminB. - Page 77 Select the update target from [Streaming Manager], [PTZ Controller] or [Image Processor]. The settings of VN-V686U will be saved. Copy the new firmware file to the computer on which Internet Explorer is used, and specify this file using the [Browse...] button. Press the [Update] button to start the update. JPEG/MPEG4 transmission and all other services that are running will be discontinued.
-
Page 78: List Of Factory Settings Of Each Page
Setting Using Internet Explorer Encoding Page Setting (continued) Factory Settings Item JPEG Frame Size List of Factory Settings of Each Page MPEG4 Frame Size JPEG Quality VFS4 Camera Page MPEG4 Bitrate 2000 kbps MPEG4 Bitrate Control Item Factory Settings MPEG4 FPS 15 fps Camera ID VN-V686... - Page 79 Alarm Environment Page PTZ Page Item Factory Settings Item Factory Settings SMTP Server 0.0.0.0 Mode none Port Number Return Time 1 minute Send Mail Address Auto Tracking Restart Time POP before SMTP Auto Tracking Level POP Server 0.0.0.0 EZoom Limit Port Number Pan Limit Username...
- Page 80 Setting Using Internet Explorer Details Page Setting (continued) Item Factory Settings JPEG TOS List of Factory Settings of Each Page MPEG4 TOS (Cont’d) TTL (Unicast) Auto Patrol Page TTL (Multicast) 1500 Item Factory Settings Negotiation Auto Position (Preset position number) Time Protocol Page Item...
- Page 81 Access Restrictions Page Item Factory Settings Access Restrictions deny IP Address — Time Page Item Factory Settings SNTP NTP Server 192.168.0.1 Access Interval hour,1 Time Zone (GMT)UTC Password Page Item Factory Settings AadminB Username Current Password Blank Default passwords are: AadminB : vn-v686 AoperatorB : vn-v686...
-
Page 82: Miscellaneous Page
Setting Using Internet Explorer Setting (continued) Miscellaneous page This page is for acquiring information. This page can be used during access using AadminB, AoperatorB and AuserB. Open Source Press the [Show] button to display information of the software used by VN- V686U. -
Page 83: Operation Page
Operation Page Displays the operating status of VN-V686U. This page can be used during access using AadminB or AoperatorB. Total Sending Displays the total TCP/UDP bit rate sent by VN-V686U as well as the individual bit rates. Bitrate Destination Displays the destination that VN-V686U is sending data to. -
Page 84: Settings Page
Setting Using Internet Explorer Setting (continued) Settings Page This page displays the version information and settings of VN-V686U. This page can be used during access using AadminB or AoperatorB. - Page 86 Setting Using Internet Explorer Setting (continued) Settings Page (contiuned)
-
Page 87: Position List Page
Position List Page This page displays information on preset positions. This page can be used during access using AadminB or AoperatorB. - Page 88 Setting Using Internet Explorer Setting (continued) Position List Page (contiuned)
-
Page 89: Patrol Settings Page
Patrol Settings Page This page displays the information and settings of Auto Patrol. This page can be used during access using AadminB or AoperatorB. - Page 90 Setting Using Internet Explorer Setting (continued) Patrol Settings Page (contiuned)
-
Page 91: Settings And Operation Of Built-In Viewer
Settings and operation of Built-in Viewer Built-in Viewer This product comes with a JPEG Viewer and an MPEG4 Viewer. Each of these viewers functions separately. Using the JPEG Viewer enables display of a series of still images as well as saving of still images. -
Page 92: Preparation
Settings and operation of Built-in Viewer Preparation Internet Explorer Setup Launch the Internet Explorer on the computer When proxy settings are enabled in the Internet Explorer, follow the steps below to disable the proxy of the Internet Explorer ● Select in the order of [Tool]-[Internet Options]-[Connections]-[LAN Setting], followed by deselecting the check for AUse a proxy server for your LANB in [Proxy Server] of the [Local Area Network (LAN) Settings] window. - Page 93 When plug-in tools such as the Yahoo or Google toolbar are included in the Internet Explorer, disable the pop-up block function of these plug-in tools as well Memo ● To use the built-in MPEG4 Viewer of VN-V686U, install “ffdshow” that is open source codec. You can download “ffdshow” from the Internet.
- Page 94 Preparation (contiuned) Installing Built-in viewer Enter the URL of Built-in viewer in the address field of Internet Explorer For example, if the IP address of VN-V686U is 192.168.0.2, enter as follows: JPEG Viewer http://192.168.0.2/cgi-bin/v686viewing.cgi?v686monitor_j.html MPEG4 Viewer http://192.168.0.2/cgi-bin/v686viewing.cgi?v686monitor_m.html Click [Go] Enter the URL in Built-in viewer of this camera.
-
Page 95: Jpeg Viewer
The time denoted by the file name is based on the time at the computer and not the internal clock of VN-V686U. Motion images cannot be captured. Pause... - Page 96 This setting screen is used to set Built-in viewer as a software on the computer. Note: ● Settings on this setting screen do not affect settings of the VN-V686U unit. JPEG Viewer Configuration The viewer setting window appears upon clicking the [Setup] button of Built-in viewer.
- Page 97 Select AOnB to display [Camera ID]. (Up to 16 alphanumeric characters will Camera ID be displayed.) [Camera ID] can be specified on the Camera page of VN-V686U. (A Page 38) Select AOnB to display the title of the position that is being displayed.
- Page 98 (When the viewer is installed: VN-V686) Operator Password [Operator Password] is required to control VN-V686U and to get preset position title from VN-V686U. To use PTZ Controller or to display preset position title, enter [Operator Password]. [Enter user name and password] (A Page 34) When [Operator Password] has been entered under other settings, it will be displayed as ********.
- Page 99 ● During the next startup of the built-in viewer, launch the Internet Explorer and enter the URL of Built- in viewer in the address field. For example, if the IP address of VN-V686U is 192.168.0.2, enter as follows: http://192.168.0.2/cgi-bin/v686viewing.cgi?v686monitor_j.html ● After the [Security Settings] screen appears, press the [OK] button to proceed.
-
Page 100: Mpeg4 Viewer
Settings and operation of Built-in Viewer MPEG4 Viewer Screen Configuration of MPEG4 Viewer DisplaySize Switches the display size. (VGA or QVGA) Note: ● When the VGA JPEG is reduced to QVGA and when QVGA JPEG is enlarged to VGA, the load on the computer will increase. Pause Pauses/Resumes playback of motion images. - Page 101 ● Settings on this setting screen do not affect settings of the VN-V686U unit. Memo ● To use the built-in MPEG4 Viewer of VN-V686U, install “ffdshow” that is open source codec. You can download “ffdshow” from the Internet. MPEG4 Viewer Configuration...
- Page 102 Select AOnB to display [Camera ID]. (Up to 16 alphanumeric characters will Camera ID be displayed.) [Camera ID] can be specified on the [Camera] page of VN-V686U. (A Page 38) Select AOnB to display the title of the position that is being displayed.
- Page 103 Memo ● To use the built-in MPEG4 Viewer of VN-V686U, install “ffdshow” that is open source codec. You can download “ffdshow” from the Internet. ● The settings of the built-in viewer are stored in the file named Cookie.
- Page 104 Internet Explorer and enter the URL of Built-in viewer in the address field. For example, if the IP address of VN-V686U is 192.168.0.2, enter as follows: http://192.168.0.2/cgi-bin/v686viewing.cgi?v686monitor_m.html ● After the [Security Settings] screen appears, press the [OK] button to proceed.
-
Page 105: Shortcut For Built-In Viewer
Right-click on the shortcut icon on the Desktop screen and select Properties The setting screen appears. Enter the URL of Built-in viewer in the URL field For example, if the IP address of VN-V686U is 192.168.0.2, enter as follows: JPEG Viewer http://192.168.0.2/cgi-bin/ v686viewing.cgi?v686monitor_j.html MPEG4 Viewer http://192.168.0.2/cgi-bin/ v686viewing.cgi?v686monitor_m.html... -
Page 106: Ptz Controller Operation
Settings and operation of Built-in Viewer PTZ Controller Operation Operation The [PTZ Controller] window appears upon clicking the [PTZ] button of Built-in viewer. Configure settings for the camera manual operation, preset position registration and Auto Pan/Auto Trace operation in the [PTZ Controller] screen. - Page 107 Auto Function Function For selecting the operation. Click [Start] to start the selected Auto function. Click [Stop] to stop the running Auto function. Auto Pan : The configured Auto Pan operation is performed. (A Page 112) Auto Patrol The configured Auto Patrol operation is executed.
- Page 108 Settings and operation of Built-in Viewer PTZ Controller Operation (contiuned) Operation (contiuned) Pan/Tilt manual Click the arrow button to move the camera in that direction. Release the button to stop the movement. operation button, Click the [Home] button to move to the home position. [Home] button Speed This item sets the operation speed.
- Page 109 For selecting the backlight compensation feature. Set this feature when there is a bright light source in the same direction as the object. Enables unwanted light sources to be excluded from the photometry area. : No backlight compensation. Area1 to Area4 : For selecting a photometry area from the four available types.
- Page 110 Settings and operation of Built-in Viewer PTZ Controller Operation (contiuned) Operation (contiuned) White Balance (contiuned) One Push AWC Executes AWC (automatic white balance control). Execute by placing a white object around the center of the screen in a location with a lighting condition that is similar to the object to be shot.
-
Page 111: Registering Preset Positions
Registering Preset Positions The [PTZ Controller] window appears upon clicking the [PTZ] button. Click the [Position Memory] tab of the [PTZ Controller] screen and register the preset positions in the [Position Memory] screen. Note: ● When [Auto Flip] is set to ADigital FlipB, preset positions cannot be registered when the tilt angle is more than 90 degrees. -
Page 112: Auto Pan Setting
Settings and operation of Built-in Viewer PTZ Controller Operation (contiuned) Auto Pan Setting This item sets the Auto Pan operation which moves at a certain speed from the configured start position in a horizontal direction. Click the [Auto Pan] tab on the [PTZ Controller] screen and configure settings at the [Auto Pan] setting screen. -
Page 113: Auto Trace Setting
Auto Trace Setting This item stores and reproduces manual operation. Click the [Auto Trace] tab on the [PTZ Controller] screen and configure settings at the [Auto Trace] setting screen. Note: ● As Auto Trace performs simple saving of manual operation, the position may be shifted during playback. -
Page 114: Others
LAN in which a DHCP server does not exist. ● Search tool in attached CD-ROM is available to find VN-V686U from a PC in the same LAN. A Page 32 The web page of VN-V686U Check the Internet Explorer settings. - Page 115 Built-in viewer settings coincide with those on the [Streaming] page of VN-V686U. Make use of a network that supports IGMP v2 for multicast transmission. ● Multicast may be blocked by the WindowsXP firewall.
- Page 116 TCP images cannot be played The maximum number of images that can be sent by back VN-V686U via TCP is 20, and up to 20 built-in viewers can be connected to each VN-V686U unit. Make use of multicast for monitoring when the number of areas exceeds the above number.
-
Page 117: Specifications
Lens Specifications Zoom ratio : Approx. 36 times Focal length : 3.43 mm to 122 mm Maximum aperture ratio CAMERA HEAD : F1.6 (WIDE) to F4.5 (TELE) Image pickup device: 1/4 type, Interline Transfer CCD 768 (H) x 494 (V) Aperture range : F1.6 (Opened fully) to Equivalent to F360... - Page 118 Others Specifications (contiuned) Accessories : Start-up Guide ........1 CD-ROM ..........1 Ceiling Mount ........1 Dome Cover ........1 Template ..........1 Wire Clamp ......... 1 Warranty Card (For USA)....1 Service Information Card (For USA) ... 1 Ceiling mounting hole [Unit: mm (inch)] Dimension [Unit: mm (inch)] FRONT mark R160(6 1/4)
- Page 119 LST0633-001B © 2008 Victor Company of Japan, Limited...
Need help?
Do you have a question about the VN-V686U and is the answer not in the manual?
Questions and answers