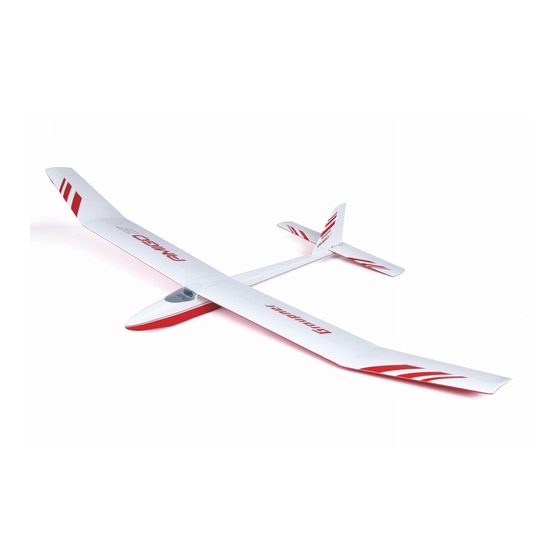
GRAUPNER AMIGO IV Instructions Manual
Model glider for bungee launch, slope soaring and electric flying
Hide thumbs
Also See for AMIGO IV:
- Assembly instructions manual (9 pages) ,
- Building instructions (14 pages)
Advertisement
Quick Links
Order No. 9546
Instructions
AMIGO IV
Model glider
for
bungee launch, slope soaring and electric flying
This model requires at least a two-function radio control system.
GRAUPNER GmbH & Co. KG D-73230 KIRCHHEIM/TECK GERMANY
Modifications reserved. No liability for printing errors
12.2010
1
Advertisement

Related Manuals for GRAUPNER AMIGO IV


Summary of Contents for GRAUPNER AMIGO IV
- Page 1 Order No. 9546 Instructions AMIGO IV Model glider bungee launch, slope soaring and electric flying This model requires at least a two-function radio control system. GRAUPNER GmbH & Co. KG D-73230 KIRCHHEIM/TECK GERMANY Modifications reserved. No liability for printing errors 12.2010...
- Page 2 This is the only method of obtaining durable glued joints involving GRP parts. Tools required to build the AMIGO IV Pencil (HB lead), felt-tip pen, setsquare, tape measure or metre rule, Lexan shears, Order No. 26, sharp, narrow-bladed knife, e.g. balsa knife, Order No. 980, small electric drill, set of twist drills.
- Page 3 If you believe you have grounds for complaint about any part, inform the model shop from whom you purchased the kit in the first instance. GRAUPNER GmbH & Co. KG D-73230 KIRCHHEIM/TECK GERMANY Modifications reserved. No liability for printing errors 12.2010...
- Page 4 Remove the fin and run a hot soldering iron along the edge of a steel ruler positioned just below the marked line, then peel the covering film from the joint areas. GRAUPNER GmbH & Co. KG D-73230 KIRCHHEIM/TECK GERMANY Modifications reserved. No liability for printing errors 12.2010...
- Page 5 Allow the glue to set hard, then insert the hinges in the slits in the rudder to a depth of about 1 mm once more. GRAUPNER GmbH & Co. KG D-73230 KIRCHHEIM/TECK GERMANY Modifications reserved. No liability for printing errors...
- Page 6 Drill 2 mm Ø holes for the rudder horn at the marked points on the rudder, and fix the horn in place using two pan-head screws and the plastic spreader plate. GRAUPNER GmbH & Co. KG D-73230 KIRCHHEIM/TECK GERMANY Modifications reserved. No liability for printing errors...
- Page 7 Slip the elevator pushrod into the guide tube, working from the tail end of the fuselage. Screw the locknut and clevis on the threaded end, and connect the clevis to the elevator horn as shown. GRAUPNER GmbH & Co. KG D-73230 KIRCHHEIM/TECK GERMANY Modifications reserved. No liability for printing errors 12.2010...
- Page 8 Don’t overtighten the screws: tighten them just to the point where the hook is fixed securely to the fuselage, and cannot shift. GRAUPNER GmbH & Co. KG D-73230 KIRCHHEIM/TECK GERMANY Modifications reserved. No liability for printing errors...
- Page 9 Fix the servos in place using the retaining screws supplied with them. Cut down the servo output levers to the shape shown in the photo below. GRAUPNER GmbH & Co. KG D-73230 KIRCHHEIM/TECK GERMANY Modifications reserved. No liability for printing errors...
- Page 10 GRAUPNER GmbH & Co. KG D-73230 KIRCHHEIM/TECK GERMANY Modifications reserved. No liability for printing errors...
- Page 11 The final step is to apply the decals in the arrangement shown in the kit box illustration and on the title page of the assembly instructions. GRAUPNER GmbH & Co. KG D-73230 KIRCHHEIM/TECK GERMANY Modifications reserved. No liability for printing errors...
- Page 12 (left stick: left rudder). Pull the elevator stick back towards you, and both elevators must deflect up (stick forward: elevator down). All that remains is to wish you many hours of pleasure flying your AMIGO IV. Yours - the team ! GRAUPNER GmbH &...
- Page 13 It is important to use only those parts included in the kit, together with other genuine Graupner accessories and replacement parts as recommended expressly by us. Even if you change a single component, you can no longer be sure that the whole system will work reliably, and such changes also invalidate your guarantee.
- Page 14 If you detect a control problem or interference during a flight, immediately land the model to prevent a potential accident. Model aircraft must GRAUPNER GmbH & Co. KG D-73230 KIRCHHEIM/TECK GERMANY Modifications reserved. No liability for printing errors...
- Page 15 Notes on the use of NiMH batteries Application All Graupner NiMH battery packs and single cells are designed exclusively for typical modelling applications in model aircraft, boats and cars. Charging 1. NiMH batteries must always be charged using a suitable standard charger or fast charger.
- Page 16 Notes on building and flying the AMIGO IV Before you start building the model: RC system components and the control surface linkages must be installed at the appropriate stage of construction, as it may be very difficult or even impossible to fit them later.
- Page 17 Flying the model Never fly your AMIGO IV in a nature reserve or any other protected site. Please don’t disturb the animals and plants which live in the countryside. Trees and bushes are the natural habitat of many birds, and also serve as nesting sites and general protection for them.
- Page 18 The following points are important and must be observed at all times: Before you fly the model check that the radio control system is working reliably, • and that all connections are secure. GRAUPNER GmbH & Co. KG D-73230 KIRCHHEIM/TECK GERMANY Modifications reserved. No liability for printing errors 12.2010...
- Page 19 • Clean the model carefully after every session. The model and RC components should only be cleaned using suitable cleaning agents. Ask your model shop for information. GRAUPNER GmbH & Co. KG D-73230 KIRCHHEIM/TECK GERMANY Modifications reserved. No liability for printing errors 12.2010...
Need help?
Do you have a question about the AMIGO IV and is the answer not in the manual?
Questions and answers