Table of Contents
Advertisement
Quick Links
This Noma® product carries a limited ten (10) year warranty against
defects in the motor, and a one (1) year warranty against defects in
workmanship and materials. Trileaf Distribution agrees to replace the
defective product free of charge within the stated warranty period,
when returned by the original purchaser with proof of purchase. This
product is not guaranteed against wear or breakage due to misuse
and/or abuse.
Imported by: Trileaf Distribution Trifeuil Toronto, Canada M4S 2B8
0
5
2
4 -
7
4
3
4 -
10
1 /
4
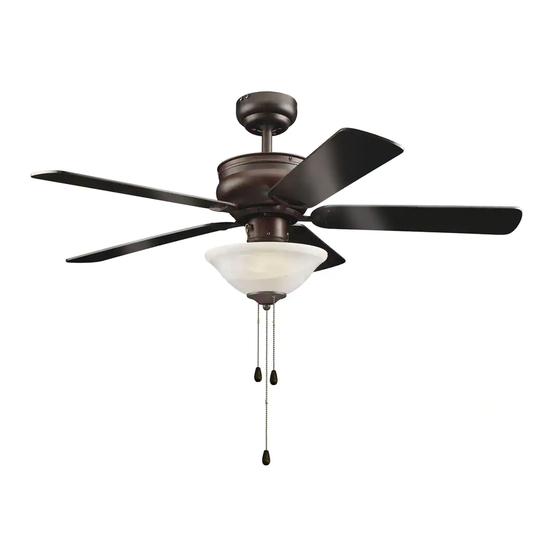
Austin 42" Ceiling Fan
I
N
S
T
A
L
L
A
T
I
N
S
T
A
L
L
A
T
Mounting Options : Hugger & Drop mount
Instructions PERTAINING TO RISK OF FIRE OR INJURY TO PERSONS
!
IMPORTANT SAFETY
SAVE THESE INSTRUCTIONS
TOOLS AND MATERIALS REQUIRED
- Phillips screwdriver
- Blade screwdriver
- Wiring supplies as required by electrical code
IMPORTANT: FOR YOUR FUTURE RECORDS
RECORD AND KEEP THE FOLLOWING INFORMATION
• Place of purchase: __________________________________
• Model on ca rton: ____________________________________
NOTE: FOR OPTIMUM QUIETNESS, FULLY ASSEMBLE FAN AND RUN 24 HOURS
I
O
N
I
N
S
T
R
U
C
T
I
O
N
S
I
O
N
I
N
S
T
R
U
C
T
I
O
N
S
READ ALL INSTRUCTIONS
INSTRUCTIONS
- Step ladder
- Wire cutters
Advertisement
Table of Contents

Subscribe to Our Youtube Channel
Related Manuals for NOMA Austin


Summary of Contents for NOMA Austin
- Page 1 This Noma® product carries a limited ten (10) year warranty against defects in the motor, and a one (1) year warranty against defects in workmanship and materials. Trileaf Distribution agrees to replace the Austin 42” Ceiling Fan defective product free of charge within the stated warranty period, when returned by the original purchaser with proof of purchase.
-
Page 2: Safety Precautions
SAFETY PRECAUTIONS 1. Turn off power at main electrical service box before starting installation. 2. Electrical connections must comply with local code ordinances, national electrical codes, CEC, NEC and ANSI/NFPA 70. 3. Make sure the installation site you choose allows the fan blades to rotate freely without any obstructions. - Page 3 TROUBLESHOOTING ASSEMBLY DRAWING TROUBLE SUGGESTIONS 1. Fan will not start - Check wiring connections to fan. 1. Wooden joist - Check fuses and circuit breakers. 2. Approved (CSA for Canada - Check wiring connections in switch housing. and UL for U.S.) ceiling fan box CAUTION: Turn power off for last two items.
-
Page 4: Mounting Options
NOTE: INST ALLA TION All set screws must be checked and INST ALLA TION retightened where necessary, before and after LIGHT KITS installation. - Remove light kit screws and washers. MOUNTING OPTIONS - Connect polarized connectors of light kit to corresponding connectors found in switch housing. - Page 5 INSTALL MOUNTING BRACKET MOUNT BLADE BRACKETS TO BLADES WARNING: TO REDUCE THE RISK OF FIRE, ELECTRIC SHOCK, OR PERSONAL INJURY, MOUNT TO UL/CSA LISTED OUTLET BOX - Take out hardware package. MARKED ACCEPTABLE FOR FAN SUPPORT AND USE MOUNTING - Place blade bracket screw through flat SCREWS PROVIDED WITH THE OUTLET BOX.
- Page 6 ELECTRICAL HOOK-UP (Continued) ELECTRICAL HOOK-UP CONNECTING BLACK, WHITE, AND (RED OR BLUE) WIRES CONNECTING THE (GREEN) GROUND WIRE - Connect white wire from outlet box to white DOWNROD MOUNT FLUSH MOUNT wire from fan using marrette (no t supplied). White Wire - Connect black wire from outlet box to black wire from fan plus (red or blue wire) using Black Wire...
Need help?
Do you have a question about the Austin and is the answer not in the manual?
Questions and answers