Table of Contents
Advertisement
Quick Links
Advertisement
Table of Contents

Related Manuals for Coway CHP-01AL


Summary of Contents for Coway CHP-01AL
- Page 1 A / S...
-
Page 2: Table Of Contents
Contents Important Safety Information Specification Features of CHP-01AL Names of Parts Wiring Diagram/Water Flow Diagram Coway’s Reverse Osmosis System Operation Method Cleaning Method Specifications of Main Parts Operational Principles Troubleshooting Caution to be Taken at Assemble and Disassemble Replacement of Each Component... -
Page 3: Important Safety Information
Important Safety Information Read all the installation precautions and instructions carefully and completely prior to beginning use. Periodic maintenance is required in order for this product to perform as advertised. For your safety, the information in this manual must be followed to minimize the risk of property damage or personal injury. - Page 4 Immediately plug out in the case of a smoke or smell of fire to call to A/S center of Coway. Electric shock or fire may occur as a result. Plug out and call to A/S center of Coway in the case of any leakage from the product.
-
Page 5: Specification
Specification Model CHP-01AL Rating Voltage Voltage rating on the rating plate Power Consumption 868 W Storage 23.7ℓ Tank Capacity Cold 4.9(14.5)ℓ Filtration Method Reverse Osmosis (With Pump) Plus-Sediment 14″, Polypropylene, Stainless Steel Pre-Carbon 14″, Activated Carbon Filter Membrane 50GPD 14″... -
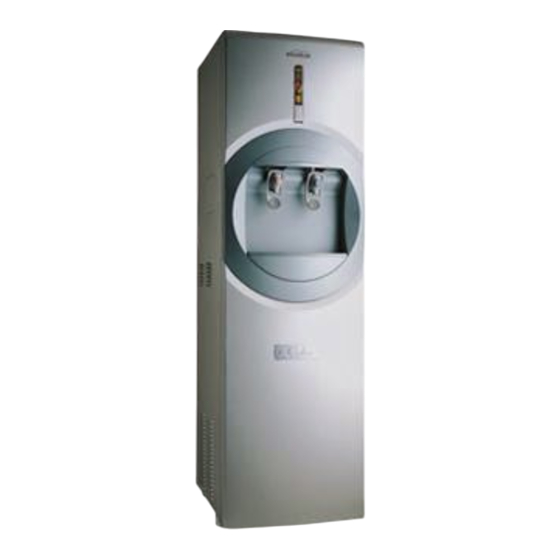
Page 6: Features Of Chp-01Al
Features of CHP-01AL As the waterspout can be easily attached or detached, it is very convenient when a large amount of water is taken at a time. -
Page 7: Names Of Parts
Names of Parts... - Page 8 Indication Parts/Operating Parts...
-
Page 9: Wiring Diagram/Water Flow Diagram
Wiring Diagram Water Flow Diagram... -
Page 10: Coway's Reverse Osmosis System
How does Coway's Water Filtration System Filter Out Wastes? The osmotic membrane phenomenon has been applied to Coway water filtration system, where a TFC membrane with pores of 0.0001㎛(1/1,000,000 of hair) is used to filter water. The components of our water filtration system are as follows;... - Page 11 Water Filtration Process Note Note Efficiency rating means the percentage of the influent water to the system that is available to the user as reverse osmosis treated water under operating conditions that approximate typical daily usage. The disposed water shall be used for cleaning a toilet, a house, dishes, and as water for sundry uses.
-
Page 12: Operation Method
Operation Method Installation of the water filtration system must comply with existing state or local plumbing codes. After installation the power supply cord and plug shall be accessible. Open the Adaptor and Connect to the Power Connect it to voltage rating that matches it on the rating plate. - Page 13 Operation Method How to Drink the Cold Water Turn on the cold water switch on The front and make sure that the Indicator of cold water is turned Continuous Extraction Pull forward the cup-touch lever of hot or cold water faucet to Extract continuously water Note Note...
- Page 14 How to Use Water Spout...
-
Page 15: Cleaning Method
Cleaning Method Note Note Keep the surrounding environment clean all the time and clean the inside of the tank once a month to get clean water After cleaning, drain the first filtered water before drinking the water. -
Page 16: Specifications Of Main Parts
Specifications of Main Parts Regulator - Use : It uniformly keeps the water pressure of the system inside. - Operation Principle : It keeps the pressure of supplying water under the setting pressure by utilizing the spring tension. Thermistor - Use : It controls the temperature of the cold water. - Page 17 Boost Pump(CHP-01AL) - Use : It pressurizes the feed water to the proper pressure. - Operation Principle : It keeps proper water pressure by pressurizing the feed water, and it helps exercise its ability of filtering a certain amount of water even in the low pressure area.
-
Page 18: Operational Principles
Power Part Rating Voltage 120Vac 60㎐ Power Transformer Model Primary Secondary S1 23.1Vac 1.5A ±15% of rating voltage CHP-01AL S2 12.5Vac 0.5A Fuse 15A 250Vac (Littelfuse : 65TS) Configurations of Main Part Component Specification Note - Hot Thermistor : 95℃±3%, Rth=15.78㏀... - Page 19 Operational Principles Power Part Power Part Component Specification Note - Feed Valve : Feed water control, 24Vdc 0.25A - NOS Valve : Feed water control when is overflow, 24Vdc 0.25A - UV Pump : Circulating the stored water, 12Vac 0.3A - Circulation Pump Output Controller : Circulating the cool water, 24Vac 0.5A...
- Page 20 Control of FND Display Classification of FND Shape and Cell Refer FND wiring diagram and dimension FND Operation < HOT Temperature segment > Segment Heater Display 73℃ 69℃ 73℃:Off / 69℃:On 67℃ 66℃ 59℃ 58℃ 50℃ 49℃ 40℃ 37℃ 65℃ mode 31℃...
- Page 21 < UV cycle segment > Segment Display condition Display Power is on, then U1, U2, U3 is “ON”. UV cycle mode is operation, then U1, U2, U3 is flickering. Cycle UV cycle mode is operation, then Cycle is “ON” < COLD II segment > Segment Display condition Display...
- Page 22 Control to Hot Water Temperature Heating Mode Selection Switch (Condition 1 of Heater “On”) On : Heater normally operates to value of thermistor sensor. : Lamp of heating mode lights) Off :Heater is stopped by the value of thermistor sensor Table of Temperature Control to Heater (Condition 2 of Heater “On”) Temperature of Sensor Operation...
- Page 23 Control to Cold Water Temperature Cooling Mode Selection Switch(Condition 1 of Compressor “On”) On : Compressor normally operates to value of thermistor sensor. COLD : Lamp of cooling mode lights) Off : Compressor is stopped by the value of thermistor sensor. Table of Temperature Control to Compressor(Condition 2 of Compressor “On”) Temperature of Sensor Operation...
- Page 24 Cooling Control Temperature Control of Compressor Temperature Range : 3.8℃ ± 0.5 ℃ - Compressor Stop Resistance Range of Thermistor : 138.4㏀(3.3 ℃)~134.9㏀ (3.8℃)~131.6㏀(4.3℃) - Compressor Re-operation Temperature Range : 6.4℃ ± 0.5 ℃ Resistance Range of Thermistor : 121.4㏀(5.9 ℃)~118.48㏀ (6.4℃)~115.6㏀(6.9℃) Cooling Selection Switch - On LED of Cooling : On...
-
Page 25: Troubleshooting
Trouble Shooting... - Page 26 Trouble Shooting...
- Page 27 Trouble Shooting...
- Page 28 Trouble Shooting...
- Page 29 Trouble Shooting...
- Page 30 Trouble Shooting...
- Page 31 Trouble Shooting...
- Page 32 Trouble Shooting...
- Page 33 Trouble Shooting...
- Page 34 Trouble Shooting...
-
Page 35: Caution To Be Taken At Assemble
Caution to be Taken at Assemble and Disassemble Be careful any component not to be damaged or deteriorated in the assembling and disassembling to prevent from any property damage or personal injury. Case Caution Before disassemble. Cut off feed water. Close the main water valve to cut off the feed water in A/S check up. -
Page 36: Replacement Of Each Component
Replacement of Each Component Plug out the power cord and close the main water valve before replacing each component to avoid electric shock and water leakage. Replacement of Filters Step Unscrew the front bottom enclosure Then, push the front bottom enclosure downward, pull the front bottom enclosure. - Page 37 Replacement of UV lamp Step Open the front bottom enclosure, then unscrew the front top enclosure. Step Unscrew the PCB cover. Then, separate the connector of UV module from PCB ass’y. Step Separate the silicon tube from UV module. then, It inserts the nipple on tank. (To avoid draining water away) Step Disassemble the UV module.
- Page 38 Clean the Main tank Step Open the top enclosure and tank cap. Step Disassemble the separate M and cold water supporter Step Clean the tank with fiber tissue.
- Page 39 Replacement of Main PCB Step Open the front bottom enclosure. Then, unscrew the front top enclosure Step Unscrew the PCB cover Step Separate the connector from PCB Step Replace the PCB ass’y...
- Page 40 Replacement of feed valve, LPS, N.O.S Step Open the front bottom enclosure Step Unscrew the right side of filter clips. Step Pull the filter clip. Then, replace LPS, Feed valve, N.O.S...
- Page 41 Replacement of compressor PTC,OLP Step Open the front bottom enclosure. Step Unscrew and open the protector. Then, separate the comp cable. Step Replace PTC, OL...
- Page 42 Replacement of fuse Step Open the front bottom enclosure. Step Unscrew the right side of filter clips. Step Open the fuse holder Step Replace the new one...
- Page 43 Replacement of boost pump Step Open the front bottom enclosure. Step Unscrew the right side of filter clips. Then, pull the filter clip Step Unscrew the boost pump. Then, disassemble the tube on the boost pump Step Replace boost pump with new one...
- Page 44 Replacement of circulation pump(cooling water) Step Open the front bottom enclosure. Then, disassemble the front top enclosure. Step Disassemble silicon tube of circulation pump after binding the silicon tube. Step Disassemble connector of circulation pump. Then, unscrew the circulation pump. Step Replace circulation pump with new one.
- Page 45 Replacement of bi-metal, thermistor Step Unscrew the side door on left side panel. Step Disassemble connector on the bi-metal Step Unscrew bi-metal and replace it with new one...
- Page 46 Replacement of transformer Step Unscrew the rear enclosures. Step Unscrew the transformer. Step Disassemble the connector of transformer on PCB Step Replace the transformer with new one.
- Page 47 Replacement of reed level sensor Step Open the top enclosure. Then, disassemble connector of overflow sensor. Step Disassemble the front top enclosure. Then, disassemble connector of reed level sensor which wanted to replace on PCB. Step Replace the reed level sensor what you want. When you change the reed level sensor , replace it accurate.
- Page 48 Replacement of overflow connector Step Open the top enclosure. Step Disassemble connector of overflow sensor. Then, remove connector cap and unscrew Step Replace the overflow connector with new one.
- Page 49 Installation of drain tube (to use) Step Disassemble the front bottom enclosure. Step Connect the drain tube to nipple on the tray. Then, bind it with clip. Step Pass the drain tube out of drain port.
-
Page 50: Harness Diagram
Harness Diagram... - Page 51 Harness Diagram...
- Page 52 Appendix : Installation Manual Contents Important Installation Recommendations ⅰ Electricity Safety ⅰ Installation Safety ⅱ Tools and Materials Required for Installation ⅲ How to Install ⅳ Filter Flushing Method ⅶ Important Installation Recommendations Read All Instructions Before Installation For your safety, the information in this manual must be followed to minimize the risk of property damage or personal injury.
- Page 53 Installation Manual Installation Safety Be sure to follow all applicable state and local codes. And do not use with water that is microbiologically unsafe or unknown quality without adequate disinfection before or after the system. Only connect the water Keep and install it in a firm filtration system to cold water level place at least 10cm away pipe.
- Page 54 Installation Manual Tools and Materials Required for Installation Tools/Materials Usage Outmoded Adaptor For connection from the water pipe to water filtration - Large Type system. - Middle Type - Small Type For connection from the water pipe to water filtration Body system.
- Page 55 Installation Manual How to Install Wall Mounted Type Faucet Step Step Close main water supply valve Use adjustable open-end or screw down the controller wrenches to separate the on the faucet like the left side faucet. figure. Do not turn the water pipe. Step Step Wind the teflon tape on the...
- Page 56 Installation Manual Saddle Valve Type Case ⅴ...
- Page 57 Installation Manual ⅵ...
- Page 58 Installation Manual Saddle Valve Type Case Note Refer the installation method, causations, and warnings previously mentioned. Filter Flushing Method Step Separate the tubing behind the plus-sediment filter. Step In the initial installation and filter replacement, connect the pre and/or post carbon filter behind the plus-sediment filter to flush it for 5 minutes.
- Page 59 CHP-01AL(cUL) PART LIST PART NO. PART NAME SPECIFICATION UNIT QUANTITY 000100180 COCK CAP SILICONE 000100700 SPRING Φ1.4 ×Φ14, 35mm 000200810 E-RING(SUS) Φ6 ×Φ12,0.8t,5.2h 000202290 SUPPORT ACETAL 000202800 TAP HOSE ASSY Ⅱ 000500410 PRE CARBON FILTER 14inch 14inch 000501720 POST CARBON FILTER 14inch...
- Page 60 CHP-01AL(cUL) PART LIST PART NO. PART NAME SPECIFICATION UNIT QUANTITY 004900180 SIDE DOOR ASSY ASSY 004601040 DOOR SPONGE PE FOAM,3t X 5.5 X19.5 004900190 SIDE DOOR 3t,SPRAY 004900200 DRAIN DOOR 3t,SPRAY 004900240 REAR COVER A 004900260 WINDOW ACRYL 004900270 FND COVER...
- Page 61 CHP-01AL(cUL) PART LIST PART NO. PART NAME SPECIFICATION UNIT QUANTITY 004900830 CAPILLARY TUBE 004900790 STYROFOAM C/T (L) 004900800 STYROFOAM C/T (R) 004900810 STYROFOAM C/T (B) 107293060 PRESS SEALANT 50X60(mm) 704900260 HEATING TANK ASSY(UL) ASSY 704900270 HEATER 120VAC,600W 004900870 HEATER INSULATION...
- Page 62 CHP-01AL(cUL) PART LIST PART NO. PART NAME SPECIFICATION UNIT QUANTITY 704900400 COOL COCK CHP-01AL,UL 104790070 CABLE TIE 100A DAMB-100A 004901330 HOT SAFTY COCK ASSY ASSY 004900580 SILICON(H/T->H/COCK) 004901450 HOT SAFTY COCK 104790120 CABLE TIE 140A 140A 704900410 GUIDE BOOK CHP-01AL,UL...
- Page 63 CHP-01AL(cUL) PART LIST PART NO. PART NAME SPECIFICATION UNIT QUANTITY 004900320 FILTER BRACKET 1 효성 004900330 FILTER BRACKET 2 효성 004901500 FILTER CLIP SUPPORT 004901560 REAR COVER B 704900450 CONDENSING UNIT ASSY(LG) CHP-01AL,UL,LG 000202190 FILTER DRYER OD 16 X 0.6t...
- Page 64 CHP-01AL(cUL) PART LIST PART NO. PART NAME SPECIFICATION UNIT QUANTITY 103101180 TUBE BLUE(1/4INCH) LLDPE,1/4 0.75 103501060 FITTING ELBOW(1/4INCH) 1/4inch 103504020 CHECK FITTING(1/4INCH) 1/4inch 103504030 FITTING STRAIGHT(1/4INCH) 1/4inch 104733010 DOOR LOCK 14.8X11X695,DL201 104790070 CABLE TIE 100A DAMB-100A 104790120 CABLE TIE 140A...
Need help?
Do you have a question about the CHP-01AL and is the answer not in the manual?
Questions and answers