
Related Manuals for NETGEAR Arlo Wire-Free


Summary of Contents for NETGEAR Arlo Wire-Free
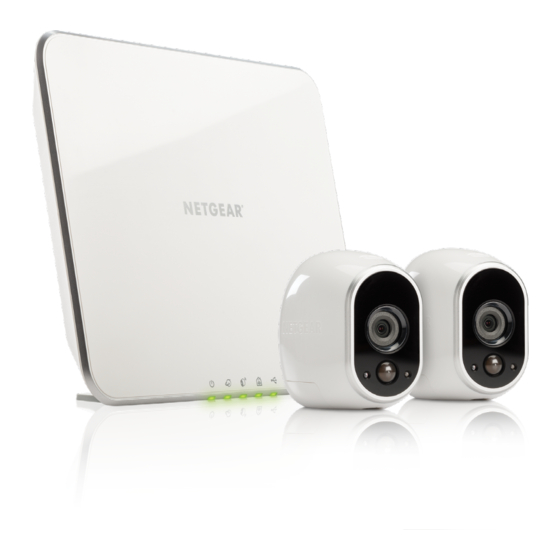
- Page 1 Arlo Wire-Free HD Security Camera System User Manual NETGEAR, Inc. 350 East Plumeria Drive June 2016 San Jose, CA 95134, USA 202-11380-07...
- Page 2 For product updates and web support, visit http://www.arlo.com/en-us/support/ Trademarks © NETGEAR, Inc., NETGEAR and the NETGEAR Logo are trademarks of NETGEAR, Inc. Any non-NETGEAR trademarks are used for reference purposes only. Compliance For the current EU Declaration of Conformity, visit http://support.netgear.com/app/answers/detail/a_id/11621/...
-
Page 3: Table Of Contents
Contents Set Up Your System Install Your Base Station �������������������������������������������������������������������������������������������������������������������������������������������������������6 Arlo Base Station LEDs ��������������������������������������������������������������������������������������������������������������������������������������������������������������7 Use the Arlo App to Set Up an Account ������������������������������������������������������������������������������������������������������8 Insert Batteries Into Your Cameras �������������������������������������������������������������������������������������������������������������������9 Sync Your Cameras �����������������������������������������������������������������������������������������������������������������������������������������������������������������������10 Arlo Camera Firmware Updates ����������������������������������������������������������������������������������������������������������������������������11 Place or Mount Your Cameras ����������������������������������������������������������������������������������������������������������������������������������12 Position Your Cameras ������������������������������������������������������������������������������������������������������������������������������������������������������������13 Position Mode �����������������������������������������������������������������������������������������������������������������������������������������������������������������������������������������15... - Page 4 Change Motion Sensitivity �����������������������������������������������������������������������������������������������������������������������������������������������31 Manage Alerts ����������������������������������������������������������������������������������������������������������������������������������������������������������������������������������������32 Set Up Geofencing �������������������������������������������������������������������������������������������������������������������������������������������������������������������������33 Geofencing With Multipe Mobile Devices ���������������������������������������������������������������������������������������������34 Geofencing Accuracy ���������������������������������������������������������������������������������������������������������������������������������������������������������������35 Geofencing First-In Last-Out �������������������������������������������������������������������������������������������������������������������������������������36 Schedule Your Camera Rules ��������������������������������������������������������������������������������������������������������������������������������������36 Add a Mode ��������������������������������������������������������������������������������������������������������������������������������������������������������������������������������������������������38 Settings Turn the Arlo App Fingerprint ID Login On and Off�������������������������������������������������������������40 Change the Time Zone ������������������������������������������������������������������������������������������������������������������������������������������������������������40 Video Settings ����������������������������������������������������������������������������������������������������������������������������������������������������������������������������������������41 Change the WiFi Network ������������������������������������������������������������������������������������������������������������������������������������������������43...
- Page 5 Battery Warnings and Safety Counterfeit and Inferior-Quality Battery Warning�������������������������������������������������������������56 Rechargeable Battery Warning �����������������������������������������������������������������������������������������������������������������������������56 Safe Battery Handling and Usage ���������������������������������������������������������������������������������������������������������������������57...
-
Page 6: Set Up Your System
1. Set Up Your System Setting up your Arlo system involves these steps: • Install your base station. • Get an account and link the base station. • Insert batteries into your cameras. • Sync your cameras to the base station. •... -
Page 7: Arlo Base Station Leds
Set Up Your System 4. Press the On-Off button on the back of the base station. The Power LED and Internet LED light green in about two minutes. Your base station is set up. Arlo Base Station LEDs See the following image for explanations for green, amber, and blinking LEDs: Power Internet Camera... -
Page 8: Use The Arlo App To Set Up An Account
¾ To set up an Arlo account: 1. Tap the Arlo icon on your mobile device. arlo.netgear.com If you are using a computer, enter in the address bar of a browser. If you are using a mobile device that supports Touch ID®, you are prompted to enable Touch ID or skip. -
Page 9: Insert Batteries Into Your Cameras
You can upgrade to a paid subscription plan to support more cameras. Insert Batteries Into Your Cameras We recommend that you use the batteries supplied by NETGEAR, or high-quality batteries from other established, well-known manufacturers such as Panasonic, Energizer, or Duracell, with your Arlo Wire-Free cameras. -
Page 10: Sync Your Cameras
Set Up Your System 4. Insert two batteries near the compartment hinge. Pay careful attention to the orientation of the batteries when you insert them. 5. Close the battery door. Safe Battery Handling and Usage For more information, see on page 57. Your cameras are ready to sync. -
Page 11: Arlo Camera Firmware Updates
Set Up Your System 3. Wait for the Sync Status LED on the base station to light green. 4. Press and release the Sync button on top of the camera. A blue LED on the camera blinks rapidly to confirm a successful sync. After the camera syncs, the Power LED on the base station might start blinking. -
Page 12: Place Or Mount Your Cameras
Set Up Your System Place or Mount Your Cameras You can place your camera on a shelf or other flat surface, or you can mount it to the wall. Note: Position Mode Use the Arlo app in Position mode to help aim the camera. See page 15. -
Page 13: Position Your Cameras
Set Up Your System Position Your Cameras Arlo’s Position mode allows you to see what your camera sees. Using Position mode, you can make sure that your Arlo camera is positioned to monitor the precise area Position Mode that you want. For more information, see on page 15. - Page 14 Set Up Your System • Aim with the cloud. Use Arlo’s Position mode to send video to the cloud as quickly as possible. This allows you to aim the camera while watching the video feed on your Arlo smartphone app to make near real-time adjustments to the camera’s position.
-
Page 15: Position Mode
¾ To place your camera in Position mode: 1. Tap the Arlo icon on your mobile device. If you are using a computer, enter arlo.netgear.com in the address bar of a browser. If you are using a mobile device that supports Touch ID, you are prompted to enable Touch ID or skip. -
Page 16: Add A Camera From Another Arlo Account
Add a Camera From Another Arlo Account ¾ To add a camera from another Arlo account: 1. Tap the Arlo icon on your mobile device. arlo.netgear.com If you are using a computer, enter in the address bar of a browser. -
Page 17: View Your Content
¾ To view camera feeds: 1. Tap the Arlo icon on your mobile device. If you are using a computer, enter arlo.netgear.com in the address bar of a browser. The Cameras page displays. The icons above each camera feed depend on the... -
Page 18: Record Clips From Live Video
Record Clips From Live Video ¾ To record clips from live video: 1. Tap the Arlo icon on your mobile device. arlo.netgear.com If you are using a computer, enter in the address bar of a browser. The Cameras page displays. -
Page 19: Take A Snapshot From Live Video
Take a Snapshot From Live Video ¾ To take a snapshot from live video: 1. Tap the Arlo icon on your mobile device. arlo.netgear.com If you are using a computer, enter in the address bar of a browser. The Cameras page displays. - Page 20 Your settings are saved. Zoom a Camera Image ¾ To zoom a camera image: 1. Tap the Arlo icon on your mobile device. arlo.netgear.com If you are using a computer, enter in the address bar of a browser. The Cameras page displays.
-
Page 21: Cloud Recording
You can use the library to find and view recordings based on the date. ¾ To use the library: 1. Tap the Arlo icon on your mobile device. arlo.netgear.com If you are using a computer, enter in the address bar of a browser. - Page 22 You can use the filter to find and view recordings based on criteria that you select. ¾ To use the filter to view your library: 1. Tap the Arlo icon on your mobile device. arlo.netgear.com If you are using a computer, enter in the address bar of a browser.
- Page 23 ¾ To turn off filtering for your library: 1. Tap the Arlo icon on your mobile device. If you are using a computer, enter arlo.netgear.com in the address bar of a browser. The Cameras page displays. 2. Click or tap Library.
-
Page 25: Personalize Your System
You can easily customize your cameras by renaming them. ¾ To rename your camera: 1. Tap the Arlo icon on your mobile device. If you are using a computer, enter arlo.netgear.com in the address bar of a browser. The Cameras page displays. 2. Click or tap Settings. - Page 26 ¾ To change your password and user name: 1. Tap the Arlo icon on your mobile device. If you are using a computer, enter arlo.netgear.com in the address bar of a browser. The Cameras page displays. 2. Click or tap Settings.
-
Page 27: Grant Access To Friends
¾ To add a friend to your Arlo Account: 1. Tap the Arlo icon on your mobile device. If you are using a computer, enter arlo.netgear.com in the address bar of a browser. The Cameras page displays. 2. Click or tap Settings. - Page 28 ¾ To edit a friend’s access privileges: 1. Tap the Arlo icon on your mobile device. If you are using a computer, enter arlo.netgear.com in the address bar of a browser. The Cameras page displays. 2. Click or tap Settings.
- Page 29 Personalize Your System 4. Select the friend, and click or tap Edit The Edit page displays. 5. Click or tap Delete Friend. 6. Click or tap Yes. The friend is deleted.
-
Page 30: Modes, Rules, And Smart Alerts
The Arlo Q camera is always in a mode, even if that mode is set to do nothing. ¾ To select a mode for a camera: 1. Tap the Arlo icon on your mobile device. If you are using a computer, enter arlo.netgear.com in the address bar of a browser. The Cameras page displays. -
Page 31: Change Motion Sensitivity
¾ To change the sensitivity level for a camera: 1. Tap the Arlo icon on your mobile device. If you are using a computer, enter arlo.netgear.com in the address bar of a browser. The Cameras page displays. 2. Click or tap Mode. -
Page 32: Manage Alerts
¾ To change the alert settings for a camera: 1. Tap the Arlo icon on your mobile device. arlo.netgear.com If you are using a computer, enter in the address bar of a browser. The Cameras page displays. -
Page 33: Set Up Geofencing
Modes, Rules, and Smart Alerts 8. For email notifications, make sure that the Email Alerts check box is selected. 9. To specify an email address, click or tap Edit next to Email Alerts and enter the email address. 10. Click or tap the Save button. Your settings are saved. -
Page 34: Geofencing With Multipe Mobile Devices
Modes, Rules, and Smart Alerts 6. Tap the Address field, type the address for your location. and then tap Next. The geofence radius displays as Medium. 7. (Optional) To change your radius setting, tap the radius icon, select a radius size, and tap Next. -
Page 35: Geofencing Accuracy
Modes, Rules, and Smart Alerts • (Required when your friend wants to participate in geofencing) Your friend is logged in to the Arlo App on their mobile device. • (Required when your friend wants to participate in geofencing) Your friend’s mobile device has the GPS or location service enabled. -
Page 36: Geofencing First-In Last-Out
All other times. All motion sensors are off. Add a Schedule ¾ To add a schedule for a camera: 1. Tap the Arlo icon on your mobile device. arlo.netgear.com If you are using a computer, enter in the address bar of a browser. The Cameras page displays. - Page 37 ¾ To edit a schedule for a camera: 1. Tap the Arlo icon on your mobile device. If you are using a computer, enter arlo.netgear.com in the address bar of a browser. The Cameras page displays. 2. Click or tap Mode.
-
Page 38: Add A Mode
¾ To add a mode for a camera: 1. Tap the Arlo icon on your mobile device. If you are using a computer, enter arlo.netgear.com in the address bar of a browser. The Cameras page displays. 2. Click or tap Mode. - Page 39 Modes, Rules, and Smart Alerts 9. When prompted, specify what you want the camera to do when motion is detected and click or tap Next. You can select Record video, Take snapshot, or Do nothing. 10. When prompted, specify if you want to be notified with alerts when motion is detected.
-
Page 40: Settings
Tapping this button turns Log in with Touch ID on and off. Change the Time Zone ¾ To change the time zone: 1. Tap the Arlo icon on your mobile device. arlo.netgear.com If you are using a computer, enter in the address bar of a browser. The Cameras page displays. -
Page 41: Video Settings
¾ To turn night vision on and off: 1. Tap the Arlo icon on your mobile device. arlo.netgear.com If you are using a computer, enter in the address bar of a browser. - Page 42 ¾ To adjust the power management setting: 1. Tap the Arlo icon on your mobile device. If you are using a computer, enter arlo.netgear.com in the address bar of a browser. The Cameras page displays. 2. Click or tap Settings.
-
Page 43: Change The Wifi Network
Change the WiFi Network ¾ To change the WiFi network that Arlo connects to: 1. Tap the Arlo icon on your mobile device. arlo.netgear.com If you are using a computer, enter in the address bar of a browser. The Cameras page displays. -
Page 44: Restart The Camera
Restart the Camera ¾ To restart the camera: 1. Tap the Arlo icon on your mobile device. If you are using a computer, enter arlo.netgear.com in the address bar of a browser. The Cameras page displays. 2. Click or tap Settings. -
Page 45: Turn The Arlo Camera On And Off
Settings 2. Click or tap Settings. The Settings page displays. 3. Click or tap My Devices. A list of cameras displays. 4. Click or tap the camera. The settings for the camera display. 5. Scroll down and click or tap Remove Device. The camera is removed from your account and its settings are deleted. -
Page 46: Manage Your Subscription Plan
¾ To select a Premier or Elite subscription plan: 1. Tap the Arlo icon on your mobile device. You can also enter arlo.netgear.com in the address bar of a browser. The Cameras page displays. 2. Click or tap Settings. The Settings page displays. - Page 47 Manage Your Subscription Plan 4. Click or tap Change Subscription. The Subscription Plan page displays. 5. To change to a Premier or Elite plan, click or tap SELECT. 6. Follow the onscreen instructions to change your subscription. After your payment is processed, your service level information is updated on the Subscription page.
-
Page 48: Faqs And Troubleshooting
7. FAQs and Troubleshooting Battery FAQs What do the battery bars indicate? The battery bars indicate battery capacity: • 3 bars. 61–100% • 2 bars. 17–60% • 1 bar. 1–16% • 0 bars. 0% What do I need to know about using Arlo cameras in cold weather? Cold temperatures can affect any battery’s capacity, due to the chemistry of batteries. -
Page 49: Manage Bandwidth For Streaming
FAQs and Troubleshooting What is the battery life for NETGEAR Arlo Wire-Free cameras? The NETGEAR Arlo Wire-Free camera battery life lasts 4 to 6 months with normal usage and can be extended for optimal usage if you use key settings and follow certain tips. -
Page 50: Not Receiving Push Notifications
You receive Arlo alerts even if your device is sleeping. If you did all of the following and are still not getting Arlo alerts, contact NETGEAR support. - Page 51 Armed mode or in a custom mode if you created one. ¾ To check push notification in the Armed mode setting: 1. Tap the Arlo icon on your mobile device. arlo.netgear.com If you are using a computer, enter in the address bar of a browser.
-
Page 52: Verify That The Arlo Base Station Is Online
If you are not at the same location as your Arlo base station, log in to your Arlo account: • If you can review the video feed from each of your Arlo Wire-Free cameras, your base station is connected to the Internet. -
Page 53: Base Station Is Offline
• If you see an error message (such as “Base Station Offline” or something similar) instead of video feed, your base station is not connected to the Internet. Base Station Is Offline If you are not sure whether the base station is offline, see Verify That the Arlo Base Station Is Online on page ¾... - Page 54 FAQs and Troubleshooting 6. If you were previously able to connect your base station to the Internet but now cannot connect, check the router’s security settings and firmware to ensure that no changes were made since the last time it successfully connected.
-
Page 55: Reset The Arlo Base Station To Factory Settings
2. When the Power and Internet LEDs both light solid green, tap the Arlo icon on your mobile device and log in to your Arlo account. If you are using a computer, enter netgear.com in the address bar of a browser. 3. Click or tap New System Setup. - Page 56 Because many rechargeable batteries on the market are counterfeits or of inferior quality, WE STRONGLY DISCOURAGE the use of any rechargeable batteries with your Arlo Wire-Free cameras, as they may pose a fire or burn hazard. They may also damage your camera.
- Page 57 DO NOT store batteries with hazardous or combustible material; store in a cool, dry, ventilated area. While your Arlo Wire-Free camera is weatherproof and safe to use outside, DO • NOT allow the batteries or battery compartment to get wet prior to or during installation.
Need help?
Do you have a question about the Arlo Wire-Free and is the answer not in the manual?
Questions and answers