Table of Contents
Advertisement
Quick Links
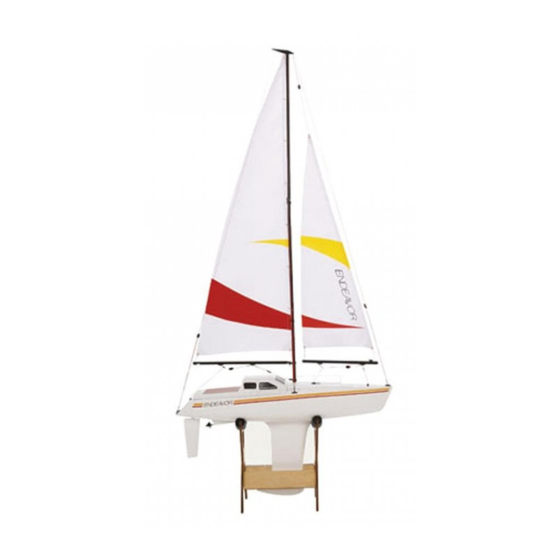
EP RTR Sailboat
Owners Manual
Specifications
Length (Hull):
24 in (610mm)
Height (Mast):
36.5 in (927mm)
Beam:
6.25 in (158.75mm)
Radio:
Spektrum DX2M 2.4GHz
Motor:
380-size
Sail area:
Overall:
264 sq in (17.03 sq dm)
Main:
170 sq in (10.97 sq dm)
Jib (Front):
94 sq in (6.06 sq dm)
The Pro Boat
Endeavor
®
comes with the fiberglass hull
built and painted and the RC
equipment installed. All that's
left is rigging the sails. The
two-piece mast makes
disassembly and transport
quick and easy.
There is no better way to start
enjoying the fun and
excitement of RC sailing than
with the Endeavor. The
Endeavor features an electric
back-up motor that ensures
that you won't have any
problems returning to shore in
case of wind loss. The
Endeavor also features a
standard sail servo with no
complicated pull-pull winch
servo cables and comes ready-
to-run with battery, charger
and transmitter. Just connect
the pre-numbered sail rigging
and start sailing. Head to the
lake and begin sailing today
with the perfect choice for any
RC enthusiast.
™
®
Advertisement
Table of Contents

Related Manuals for Pro Boat Endeavor


Summary of Contents for Pro Boat Endeavor
- Page 1 There is no better way to start enjoying the fun and excitement of RC sailing than with the Endeavor. The Endeavor features an electric back-up motor that ensures that you won't have any problems returning to shore in case of wind loss.
- Page 2 NOTICE All instructions, warranties and other collateral documents are subject to change at the sole discretion of Horizon Hobby, Inc. For up-to-date product literature, visit www.horizonhobby.com and click on the support tab for this product. Meaning of Special Language: The following terms are used throughout the product literature to indicate various levels of potential harm when operating this product: NOTICE: Procedures, which if not properly followed, create a possibility of physical property damage AND little or no possibility of injury.
-
Page 3: Table Of Contents
Table of Contents ..........3 Items Required to Complete your Endeavor ....... . 3 Section 1 –... -
Page 4: Section 1 - Inspection
Section 1 – Inspection Carefully remove the boat, boat stand and radio transmitter from the box. Inspect the boat and make certain that no damage is present. If any damage is found, please contact the Pro Boat retailer where the model was purchased. Section 2 –... -
Page 5: Section 2 - Rigging Installation
Section 2 – Rigging Installation 5. Locate the main sail boom. Slide the 6. Locate the end of the main sail marked screw through the eyelet and use a "G". Pass the line tied to the main sail Phillips screwdriver to secure the end of through the hole in the rear end of the the boom. -
Page 6: Section 2 - Rigging Installation
Section 2 – Rigging Installation 8. Carefully unwrap the top, side rigging 10. Open the rigging clip and attach it to lines. the eye plate marked "C, D." Close the wire clip. 11. Carefully unwrap the mid-line rigging marked "D." 9. -
Page 7: Section 2 - Rigging Installation
Section 2 – Rigging Installation 13. Locate the jib sail boom. The end of 15. Repeat Step 17 for the other end of the jib boom with the cleat should be on the jib sail. the top and nearest the front of the boat. Pass the rigging line from the front of the jib sail into the hole on the end of the boom. -
Page 8: Section 3 - Main Sail Luft Ring Installation
Section 3 – Main Sail Luft Ring Installation 1. Locate one main sail luft ring. Open the 3. Repeat Steps 1 and 2 for the remaining ring and insert the small loop of the ring luft rings. through the eyelet in the main sail. The rigging for the main and jib booms are shown in the photos below. -
Page 9: Section 4 - Adjusting The Rigging Cables
Section 4 – Adjusting the Rigging Cables 1. Locate the jib stay on rigging lines "C" 2. Adjust the jib stay on the rigging line at and "D" on either side of the boat. Pull up the bow "A" and stern "B" of the boat. carefully on the jib stay to adjust the Tension the rigging lines so the mast is tension so there is no slack in the line. -
Page 10: Section 6 - Checking The Radio System
Section 6 – Checking the Radio System Turn on the radio system and test it to make certain it is functioning correctly. First, turn on the transmitter. Next, turn on the switch that controls the receiver. • Moving the right stick of your transmitter will control the rudder. -
Page 11: Section 7 - Sailing Tips
Section 7 – Sailing Tips The following will help you get started in sailing. Follow the instructions and understand it takes some practice to become an accomplished yachtsman. Do not sail if the winds are too strong. Best results will occur with winds between 5 and 12 mph. WIND Starboard Tack Port Tack... -
Page 12: Section 7 - Sailing Tips
Section 7 – Sailing Tips WIND Wind Abeam Sails: Each at a position of 45° Bearing Away Rudder: In center position Sails: Let both out so as not to shiver Quarter Lee Rudder: To the left Sails: Letting both out a little more Rudder: To the left... -
Page 13: Section 8 - Performance Tips
It is manually push the main sail and jib sail often necessary to briefly sail the Endeavor in open. You should be able to open the sails order to see how the sails need to be to at least a 60-degree angle. -
Page 14: Section 8 - Performance Tips
Section 8 – Performance Tips 3. With the radio system on, move the left 4. Bend the opening of each of the luft stick of your transmitter "down" to close rings after you have secured the main sail the sails. The sails should close, with the to the mast, so they will not be pulled out jib sail being tighter than the main sail. -
Page 15: Plastic Parts
Plastic Parts Spreader Masthead Crane Cleat Rigging Line Eye Plate Grommet Boom Plug Mast Holder Gooseneck Boom Pivot Mast Joiner Jib Stay... -
Page 16: Basic Glossary
Basic Glossary Beam Reach Port Sailing at approximately 90 degrees to the The left side of the boat (when facing wind source with the wind coming from forward). abeam. Rudder Beating Vertical plate attached at the stern, Sailing toward the wind source or against the controlling the movements of the boat. -
Page 17: Diagram Of Sailboat Rigging
Diagram of Sailboat Rigging 49.25 in [1250mm] 42.5 in [1080mm] 65.35 in [1660mm] 42.5 in [1080mm] 19.68 in [500mm] 9.84 in [250mm] 22.83 in [580mm] 11 in [280mm]... -
Page 18: Warranty And Repair Policy
Warranty and Repair Policy Warranty Period: Product on which liability is asserted. As Horizon has no control over use, setup, fi nal assembly, Exclusive Warranty- Horizon Hobby, Inc., (Horizon) modifi cation or misuse, no liability shall be warranties that the Products purchased (the assumed nor accepted for any resulting damage "Product") will be free from defects in materials or injury. -
Page 19: Warranty And Service Contact Information
RMA number are clearly written on the outside of or estimate of the expense unless the the shipping carton. expense exceeds 50% of the retail purchase Notice: Do not ship batteries to Horizon. If cost. By submitting the item for repair you you have any issue with a battery, please are agreeing to payment of the repair without contact the appropriate Horizon Product... - Page 20 ® © 2011, Horizon Hobby, Inc. www.horizonhobby.com Printed 01/2011 15242.1...
Need help?
Do you have a question about the Endeavor and is the answer not in the manual?
Questions and answers