
Related Manuals for Total Gym 1600


Summary of Contents for Total Gym 1600
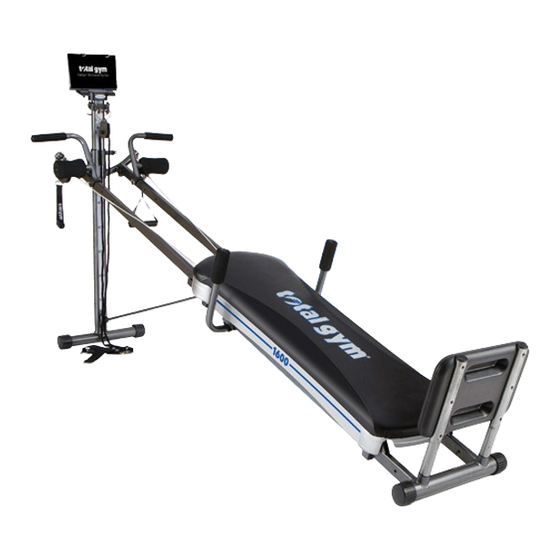
- Page 1 Owner’s Manual For maximum effectiveness and safety, please read this owner’s manual and view the video before using your Total Gym 1600.
-
Page 2: Table Of Contents
TOTAL GYM 1600 OWNER’S MANUAL ® Table of Contents EQUIPMENT WARNING / CAUTION LABELS ................... 3 SAFETY INSTRUCTIONS ......................... 3 PRODUCT SPECIFICATIONS ........................4 SET UP ..............................5-6 ACCESSORIES: HOW TO’S .........................7-9 Multi Function Attachments ............................7-8 Dip Bars ..................................8 Leg Pulley..................................9 STARTING OUT ............................ -
Page 3: Ordering Replacement Parts
It’s easy - all you have to do is spend 15 to 20 minutes a day, 3 to 4 days per week on your Total Gym to start realizing the benefits. -
Page 4: Equipment Warning / Caution Labels
AWAY FROM HINGES AND OTHER MOVING PARTS TO AVOID OR QUESTIONS. FRAME WHEN NOT SERIOUS INJURY. ALSO, BE SURE TO HAVE ALL PINS LOCKED IN REQUIRED FOR THE PLACE BEFORE GETTING ON YOUR TOTAL GYM ® 4 locations SPECIFIC EXERCISE. AVOID SEVERE INJURY. -
Page 5: Product Specifications
TOTAL GYM 1600 OWNER’S MANUAL | PRODUCT SPECIfICATIONS ® Product Specifications LABEL LOCATIONS AND PARTS IDENTIfIER Total Gym 1600 includes Workout DVD ® WARNING Arm Pulley/Cable Assembly LABEL 1 Height Adjustment Tube Squat Stand Spring Loaded Pin WARNING (Located on Left Side of Rail) - Page 6 TOTAL GYM 1600 OWNER’S MANUAL | SET UP ® Set Up Your product comes with: • Safety hitch Pin to be inserted into the bottom of the vertical column after set up. • height Adjustment Quick Release Pin located on side of Vertical Column for raising and lowering rails.
- Page 7 TOTAL GYM 1600 OWNER’S MANUAL | SET UP ® 5. A. Next remove plastic packing ties from the top and bottom NOTE: Insert Safety hitch Pin in the side hole located at of the Vertical Column. Pull out the Spring Loaded Pin Knob the bottom of the Vertical Column.
-
Page 8: To Attach Multi-Function Attachments
TOTAL GYM 1600 OWNER’S MANUAL | ATTAChMENTS: hOW TO’S ® How to Attach the Multi Function Attachments The Multi Function Attachments provided with your unit has been uniquely designed to serve several purposes. It can be placed at the top or bottom of the exerciser and angled toward you or away from you depending upon what is comfortable for you. -
Page 9: Dip Bars
TOTAL GYM 1600 OWNER’S MANUAL | ATTAChMENTS: hOW TO’S ® How to Attach the Dip Bars 1. Attach each Dip Bar to the frame with the Short Hitch Pins included with your Total Gym®. Note: Hitch Pins are included in Miscellaneous Parts. Simply line up each bar with the holes in the upper portion of the bottom frame. -
Page 10: Leg Pulley
ATTAChMENTS: hOW TO’S ® How to Attach the Leg Pulley Accessory Kit NOTE: Be sure you have plenty of free space around the exerciser so that performing on the Total Gym , as well as getting on and off, is ®... -
Page 11: Starting Out
Begin using the product at a low incline. As your fitness level progresses, increase the incline to increase the intensity and improve your muscle strength. Don’t be in a hurry to exercise at a high intensity level; start out easily and build gradually. The Total Gym ®... -
Page 12: Inspection, Maintenance & Storage
• Make sure the Glideboard is gliding smoothly along the frame. ROUTINE MAINTENANCE B. Fold Vertical Column down towards the center of the unit. • Wipe down your Total Gym on a regular basis using a clean ® cloth and alcohol or alcohol-based products like Windex ®... -
Page 13: Inspection, Maintenance & Storage
TOTAL GYM 1600 OWNER’S MANUAL | INSPECTION, MAINTENANCE & STORAGE ® TO REMOVE ThE GLIDEBOARD top of the Glideboard and slowly pull the unit up allowing the rollers to bring the back of the unit towards the center. Keep You can also remove the Glideboard if you need to fit the exerciser approximately 12”... -
Page 14: Parts Overview & List
TOTAL GYM 1600 OWNER’S MANUAL | PARTS OVERVIEW & LIST ® Total Gym 1600 Parts Visual Overview ® 13 To order optional accessories, please go to TotalGymCatalog.com... -
Page 15: Parts Overview & List
TOTAL GYM 1600 OWNER’S MANUAL | PARTS OVERVIEW & LIST ® Total Gym 1600 Parts List ® ITEM # PART# DESCRIPTION ITEM # PART# DESCRIPTION R1010 Glideboard Assembly R1014 Slide Pivot Assembly R1010-11 Roller Spacer R1014-2 End Cap R1010-12 8 x 55 Hex Bolt... - Page 16 Save your sales receipt. You may wish to staple into this manual. To order optional accessories, please go to TotalGymCatalog.com © 2012 Total Gym Fitness, LLC. All rights reserved. Total Gym ® is a registered trademark. U.S. Patent #5,967,955. No part of this booklet may be reproduced in any form, by any means, electronic, mechanical or otherwise, without the express written consent of the copyright holder.
Need help?
Do you have a question about the 1600 and is the answer not in the manual?
Questions and answers