Table of Contents
Advertisement
Advertisement
Table of Contents

Subscribe to Our Youtube Channel
Related Manuals for Singer SEQS-6700


Summary of Contents for Singer SEQS-6700
- Page 1 SEQS-6700 INSTRUCTION MANUAL...
-
Page 2: Important Safety Instructions
IMPORTANT SAFETY INSTRUCTIONS When using an electrical appliance, basic safety precautions should always be followed, including the following. Read all instructions before using this sewing machine. DANGER-- To reduce the risk of electric shock: 1. This sewing machine should never be left unattended when plugged in. Always unplug this sewing machine from the electric outlet immediately after using and before cleaning. -
Page 3: Table Of Contents
TABLE OF CONTENTS 1. GETTING TO KNOW YOUR MACHINE 3. PREPARATION FOR EMBROIDERY SEWING ---------------------------------------------------2 Before attaching embroidery unit ---------------------------- 34 - 35 Accessories ----------------------------------------------------------------3 Attaching embroidery foot, Inserting the bobbin, Set up your machine ----------------------------------------------------4 Threading the top thread, Extension table, Spool pins ------------------------------------------------------------------4 Attaching embroidery unit -------------------------------------------- 36 Winding bobbin -----------------------------------------------------------5... -
Page 4: Getting To Know Your Machine
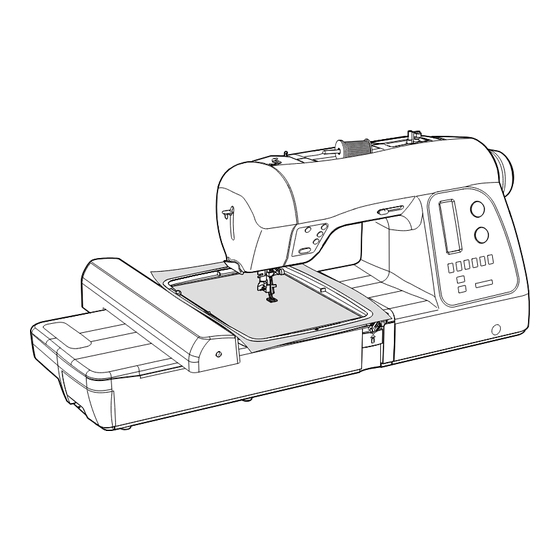
1. GETTING TO KNOW YOUR MACHINE MACHINE IDENTIFICATION 1. Pre-tension guide 2. Bobbin winding tension disk 3. Threading lever 4. Face cover 5. Thread cutter/holder 6. Extension table (Accessory box) 7. Bobbin winder spindle 8. Bobbin winder latch 9. Operation buttons 10. -
Page 5: Accessories
ACCESSORIES FOR SEWING MACHINE Sewing machine accessories are located in the storage compartments of the removable extension table, as indicated by the diagram. 1. Needles 2. Bobbins 3. Auxiliary spool pin 4. Spool pin felt disc 5. Spool pin cap (mini) 6. -
Page 6: Set Up Your Machine
SET UP YOUR MACHINE Be sure to wipe off any surplus oil from needle plate area POWER LINE CORD/FOOT CONTROL Set power/light switch at “OFF” Connect the plug of the power line cord into the cord Machine socket socket (1) and your wall outlet (2) as illustrated. Connect the foot control plug into the machine socket (3), when using sewing machine only. -
Page 7: Winding Bobbin
WINDING BOBBIN Be sure to use Class 15 J bobbins. 1. Place a spool of thread on the spool pin, and secure it with the spool pin cap. Pull the thread out from the spool and place it through thread guides as shown in illustration. 2. -
Page 8: Threading The Bobbin Thread
THREADING THE BOBBIN THREAD 1. Raise the needle to its highest position by rotating the hand wheel counter clockwise (toward you). 2. Remove the bobbin cover plate by pushing the release allow you to remove the cover. 3. Insert the bobbin making sure the bobbin rotates counter- clockwise when you pull the thread. -
Page 9: Threading The Top Thread
THREADING THE TOP THREAD A. Raise the presser foot lifter. Always be sure to raise the presser foot lifter before threading the top thread. (If the presser foot lifter is not raised, correct thread tension cannot be obtained.) B. Turn the hand wheel counter clockwise (toward you) until the needle is in its highest position. -
Page 10: Using Automatic Needle Threader
USING AUTOMATIC NEEDLE THREADER Be sure to raise the presser foot lifter and raise the needle to its highest position before threading. 1. Thread the machine with your left hand while gripping the NOTE: thread with your right hand. Hook thread to the thread For smooth threading, it is recommended that the guide on the needle bar and pull it toward you leaving machine be set for straight stitch (in center needle... - Page 11 HELPFUL SUGGESTIONS: If the machine is not used frequently, put a drop of sewing machine oil onto the felt disc. Felt disc If the threading hook is deviated from needle hole, adjust the position of the hook using a small screw driver.
-
Page 12: Needle, Thread And Fabric Chart
IMPORTANT: Use only SINGER brand needles for best results. The use of alternative brand needles can cause tension issues or unsatisfactory results. -
Page 13: Adjusting Top Thread Tension
ADJUSTING TOP THREAD TENSION Under side Helpful Hint: A slight adjustment to a higher number or a lower number may improve sewing appearance. Well balanced STRAIGHT STITCHING The correct appearance of your stitching is largely determined Top side by the balanced tension of both top and bobbin threads. The tension is well balanced when these two threads ‘lock’... -
Page 14: Control Panel Function
CONTROL PANEL FUNCTIONS 1. LCD DISPLAY When turning on the machine without the embroidery unit attached, straight stitch number 00, is selected. The information on the display changes for regular sewing, programming and embroidering. For regular sewing, the LCD display shows the number of the selected stitch, an image of the stitch, and stitch width and stitch length settings. - Page 15 4. STITCH SELECTION DIAL There are two main categories of stitches: (buttonholes are also included here) programmed into longer sequences. Turn the dial to browse the available stitches one by one. Press the center of the dial to step ten stitches at a time. Example: To select stitch number 52, press the center clockwise.
- Page 16 Twin Needle button again or turn the machine off. Twin Needle sewing is only active when the LED light next to the Twin Needle button is lit. It is recommended that you use SINGER Style 2025 twin needles. 7. THREAD CUTTING MODE Press this button to activate Thread Cutting Mode.
-
Page 17: Functions Of Operation Switch Panel
FUNCTIONS OF OPERATION SWITCH PANEL 1. TACKING STITCH MODE BUTTON Press Tacking Stitch Button and the sewing machine makes START/STOP to sew. Press Tacking Stitch button when the machine is stopped so tacking stitch will be activated. The position of the tacking stitches will be at the exact spot in the pattern where the Tacking Stitch button is pushed. -
Page 18: Starting To Sew
2. STARTING TO SEW QUICK REFERENCE TABLE OF STITCH LENGTH AND WIDTH LENGTH NEEDLE POSITION STITCH AUTO MANUAL AUTO MANUAL CENTER LEFT - RIGHT 0.5 - 4.8 CENTER LEFT - RIGHT 1.5 - 3.0 CENTER 2.0 - 4.0 LENGTH WIDTH LENGTH WIDTH STITCH... - Page 19 LENGTH WIDTH LENGTH WIDTH STITCH STITCH AUTO MANUAL AUTO MANUAL AUTO MANUAL AUTO MANUAL 1.5 - 3.0 3.5 - 7.0 0.5 - 1.0 2.0 - 6.0 1.0 - 3.0 1.0 - 6.0 0.5, 0.8 2.0 - 7.0 1.5 - 3.0 1.0 - 2.0 3.8 - 6.3 1.0 - 2.5...
- Page 20 LENGTH WIDTH LENGTH WIDTH STITCH STITCH AUTO MANUAL AUTO MANUAL AUTO MANUAL AUTO MANUAL 1.5 - 2.5 3.5 - 7.0 0.5 - 1.5 3.5 - 7.0 1.3 - 3.0 3.0 - 7.0 0.5 - 3.0 3.0 - 7.0 1.5 - 3.5 2.0 - 7.0 0.5 - 3.0 3.0 - 7.0...
- Page 21 LENGTH WIDTH LENGTH WIDTH STITCH STITCH AUTO MANUAL AUTO MANUAL AUTO MANUAL AUTO MANUAL 1.5 - 3.0 2.0 - 7.0 0.5 - 1.5 3.0 - 7.0 1.5 - 3.0 1.0 - 7.0 1.5 - 2.5 3.5 - 7.0 1.5 - 3.0 3.0 - 6.0 1.0 - 2.5 2.0 - 7.0...
-
Page 22: Straight Stitching
STRAIGHT STITCHING Straight stitch is most frequently used for all types of sewing. Let’s begin by following the steps below. 1. SETTINGS Presser foot - All Purpose Foot NOTE: Based upon the weight of the fabric, slight A. Thread cutter B. -
Page 23: Hand-Look Quilt Stitch
INSERTING ZIPPERS AND PIPING Use the zipper foot to sew to the right or left of the zipper or to sew close to a cord. Needle to left of foot Needle to right of foot INSERTING ZIPPERS To sew down the right side, attach left side of zipper foot to presser foot holder so that the needle passes through the opening on the left side of the foot. -
Page 24: Zigzag Stitching
ZIGZAG STITCHING 04 05 Under side SETTINGS :Presser foot - All Purpose Foot The top thread may appear on the bottom depending on the thread, fabric, type of stitch and sewing speed, but the bobbin thread must never appear on the top of the fabric. Top side STITCH WIDTH 0 0.5 1.0 1.5 2.0 2.5 3.0 3.5 4.0 4.5 5.0 5.5 6.0... -
Page 25: Blind Stitch
BLIND STITCH SETTINGS :Presser foot - Blind Hem Foot Medium to heavyweight fabric - Regular blind stitch for normal fabrics - Elastic blind stitch for soft, stretchable fabrics Under side Under side fabrics or overcasting it on medium to heavyweight fabrics. Then turn the hem up the required depth, press and pin in Fine fabric place. -
Page 26: Stretch Stitches
STRETCH STITCHES SETTINGS :Presser foot - All Purpose Foot Stretch stitches are mainly for use on knit or stretchable fabrics, but can also be used on woven fabrics. STRAIGHT STRETCH STITCH Straight stretch stitch is far stronger than an ordinary straight stitch because it locks three times - forwards, backwards and forwards. -
Page 27: Honeycomb Stitch
HONEYCOMB STITCH 1. Make several rows of gathers across the fabric that you wish to smock. 2. With a narrow strip of fabric directly under the line of gathering, stitch over the gathers. The design will be a series of small diamonds. SLANT OVEREDGE STITCH This stitch seams and overcasts in one operation to produce a narrow, supple seam, particularly suited to swimwear,... - Page 28 ENTREDEUX STITCH Useful for decorative stitching on borders and for use in heirloom sewing. The Entredeux stitch is most often sewn with a Wing Needle (SINGER Style 2040) to create holes in the stitch pattern.
-
Page 29: Ladder Stitch
LADDER STITCH The Ladder stitch is primarily used for drawn thread hemstitching. It can also be used for sewing over thin tape in an opposite or same color. Place the stitch in the center and a special effect will be obtained for decoration. Another use for the ladder stitch is couching over narrow ribbon, yarn or elastic. -
Page 30: Buttonholes
BUTTONHOLES USING BUTTONHOLE FOOT Tab B Tab A 1. Insert a button in between tab A and tab B. 2. Buttonholes can be sewn to match the size of the button. It is helpful to remove the extension table when sewing a buttonhole, to keep the foot from vibrating when moving across the table. - Page 31 5. Carefully mark the position of buttonhole on your garment. 6. Place the fabric under the foot. Pull out the bobbin thread underneath the fabric to a length of about 4 inches to the rear. 7. Align the buttonhole mark on the fabric with the mark on the buttonhole foot, and then lower the buttonhole foot.
- Page 32 up the fabric in the center of the buttonhole. Be careful not to cut any of the bartack threads. CORDED BUTTONHOLES Spur spur and pull both ends of the cord forward under the foot and tie off the cord as shown in the illustration. Sew buttonhole so that zigzag stitches cover the cord.
-
Page 33: Manual Buttonhole
MANUAL BUTTONHOLE * Use the automatic buttonhole stitches (#94-99) and automatic buttonhole foot for buttons up to 1 3/4 ” (45mm) in length. For larger buttons use the satin foot and the manual buttonhole stitches (#91-93). * Use the satin foot to create larger buttonholes. 1. -
Page 34: Decorative Sewing
DECORATIVE SEWING Presser foot: Satin Foot. Different types of decorative stitches are available. The following are examples of how to use and sew these stitches. You can use other stitches in the same way. to check the stitch pattern to be used. wound onto the bobbin to make sure that the thread will not run out during sewing. -
Page 35: More Sewing Examples
MORE SEWING EXAMPLES See the sample to the right for more examples on how to use the decorative stitches. -
Page 36: Preparation For Embroidery Sewing
3. PREPARATION FOR EMBROIDERY SEWING BEFORE ATTACHING EMBROIDERY UNIT ATTACHING EMBROIDERY FOOT Foot holder Always be sure to turn off power to machine before changing presser foot. CAUTION Screw * Raise presser foot lifter. * Turn the hand wheel counter clockwise (toward you) until the needle is in its highest position. -
Page 37: Extension Table
THREADING THE TOP THREAD Refer to page 7 - 9. NOTE: It is recommended to thread the upper thread before transmitting a design to the machine for embroidery. EXTENSION TABLE 1. Turn off power to machine. 2. Slide the extension table to left to remove it from machine. (Refer to page 54.) -
Page 38: Attaching Embroidery Unit
ATTACHING EMBROIDERY UNIT Connector cap Always be sure to turn off power to machine before installing embroidery unit. CAUTION 1. Turn off the machine. Turn connector cap to the right to open. Connector Carriage on the machine and embroidery unit. Slide the embroidery unit as far as it will go until it clicks into place. -
Page 39: Securing Fabric In Embroidery Hoop
SECURING FABRIC IN EMBROIDERY HOOP NOTE: For information about using appropriate stabilizer, see page 38. 1. Loosen hoop adjusting screw and place fabric between inner and outer frame. Pull fabric edges to remove slack. NOTE: Apply stabilizer when appropriate, see page 38. side (large hoop only). -
Page 40: Using Fabric And Stabilizer
USING FABRIC AND STABILIZER FABRIC Use stabilizer to produce best results when embroidering on the following fabrics. Fabrics which lack firmness or stability for embroidery, such as cotton, polyester, rayon, etc. Lightweight fabrics such as this, may lack firmness or stability and when embroidered may pull in, which may result in problems such as shrinkage and puckering of the fabric around the embroidery area. - Page 41 When embroidering onto fabric which is smaller than the hoop size, or when embroidering close to the edge of the fabric, attach the stabilizer as illustrated. Embroidery surface at fabric edge WHEN EMBROIDERING ALONG THE EDGE OF FABRIC SUCH AS A HANDKERCHIEF Stabilizer (Adhesive surface facing) Hoop inner frame...
-
Page 42: Preparing The Machine Before Installing The Hoop
PREPARING THE MACHINE BEFORE INSTALLING THE HOOP 1. Turn hand wheel counter clockwise (toward you) until the needle comes to its highest position. ATTACHING AND REMOVING EMBROIDERY HOOP ( A ) 1. Raise presser foot and needle, and push up lever (A) of under it. -
Page 43: Installation Of Software
INSTALLATION OF SOFTWARE install the contents of the CD to your PC. This procedure is refered to as instructions below in order to successfully install the software for your FUTURA sewing & embroidery machine on your personal computer. The software for your FUTURA sewing & embroidery machine comes on a CD-ROM disc. - Page 44 Now you are prompted to select the Program Folder where the shortcut for the software will be stored. Simply click on to continue. during the installation set-up. Pressing the "Next" button will finally start the copy and to the given directory on the hard disk.
-
Page 45: Function Buttons When Embroidering
FUNCTION BUTTONS WHEN EMBROIDERING Thread Cutter OPERATION SWITCHES THREAD CUTTER Press Thread Cutter to automatically cut the top and bobbin threads whenever the machine is stopped. If Thread Cutting Mode is active (see page 14), the machine Forward stitch button will automatically cut the top and bobbin thread every time the machine stops at the end of a color block. -
Page 46: Troubleshooting
TROUBLESHOOTING EMBROIDERY PATTERN IS MIS-ALIGNED SKIPPED STITCHES AND THREAD BREAKAGES OCCUR MACHINE SIDE HOOP SIDE Needle tip is broken. Thread path is No stabilizer attached Embroidering is incorrect. when using light or continuing when stretch fabric. thread is tangled. Refer to page 7 - 9. Replace needle. -
Page 47: Helpful Information For Embroidering With Futura
HELPFUL INFORMATION FOR EMBROIDERING WITH FUTURA Embroidered section Embroidering direction 1. If stitches are missing If the embroidery machine detects that the thread has broken, it may continue to embroider up to about eight stitches without any thread (blank stitches) before it automatically stops. -
Page 48: Resizing Individual Letters
4. Will the density of a design be adjusted when resizing design ? When sizing designs in the software you can resize designs from the Library in the hoop on screen and keep the design integrity. All other formats should be changed in the DESIGN/CHANGE SIZE menu in order to change the stitch count. - Page 49 9. TOP THREAD DOES NOT STAY IN THE NEEDLE EYE If embroidering several color blocks in the same color the machine might cut the top thread too short. If that happens, deactivate Thread Cutting Mode (see page 28- 29) to make sure the top thread stays in the needle eye. 10.
-
Page 50: Multi Hoop
Multi-Hoop Multi-Hooping is a special feature in the software that will allow Fig. 1 embroidery data which is larger than a single embroidery hoop to be sent to the machine to stitch out, while making it easy to rehoop the fabric so that each part of the design lines up exactly. This embroidery data may be a single design that is too large for the hoop or a combination of smaller embroidery elements and/ or lettering, that when combined together make a much larger... - Page 51 3. Select a large design or individual design elements and arrange them in the hoop area on the screen. The example shown uses lettering and designs from the Design Library that is built into the software. (Additional 4. The design data is sent to the machine for sewing one section at a time.
- Page 52 6. The next screen prompts you to input the first of three alignment points, A, B, and C. These alignment points will inform the machine exactly where the crosslines are positioned in the hoop. It is extremely important that the points are accurately input on the cross lines.
- Page 53 8. Once point A is entered, the PC screen and machine display will prompt you to enter in points B and C. Follow the same procedures for inputting points B and C. In a case where the three points were input wrong, and they do not form an exact right angle, the software will show the following error message and give you an opportunity to enter the alignment points again.
-
Page 54: Control Panel When Embroidering
CONTROL PANEL WHEN EMBROIDERING Go to stitch position When embroidering, the dials on the control panel are used to step through the design color by color and within a color block. After transferring desired design(s) to your FUTURA sewing and embroidery machine, the display shows number of current color block and total number of color blocks as illustrated. -
Page 55: Helpful Messages When Embroidering
HELPFUL MESSAGES WHEN EMBROIDERING Display on control panel Situation Embroidery unit is mounted, but USB cable is not connected. USB cable is disconnected after transferring embroidery data. In this case, the image is displayed for a few seconds, and then changed back to normal display. The transferred embroidery data is still available in the machine. -
Page 56: Other Things You Should Know
4. OTHER THINGS YOU SHOULD KNOW PRESSER FOOT LIFTER There are three positions for your presser foot. 1. Lower the presser foot to sew. 2. Raise the lifter to the middle position to insert or remove fabric. 3. Lift it to its highest position to change the presser foot or to remove thick fabric. -
Page 57: Performance Checklist
PERFORMANCE CHECKLIST GENERAL PROBLEMS Machine does not sew. * Power switch is turned off.- Turn on the switch. (see page 4). * Buttonhole lever is not raised when sewing stitch patterns. – Raise buttonhole lever. (see page 28 - 29). * Buttonhole lever is not lowered when sewing buttonhole. -
Page 58: Cleaning Hook Area And Feed Dogs
Put one drop of sewing machine (optional) oil on the hook race as indicated by the arrows. (A, B) NOTE: SINGER(page 57) Brand Sewing Machine Oil suited for sewing machine lubrication. 5. Replace the bobbin case with the projection (3) positioned against the spring (4). -
Page 59: Oiling Inside The Face Cover
For the machine used after a long interval : It should be oiled before it is used. CAUTION: Always remove the dust and lint before oiling. For best results always use SINGER Brand Sewing Machine Oil. Use of oil other than Sewing Machine Oil will cause damage to your machine. -
Page 60: Special Accessories
SPECIAL ACCESSORIES SATIN FOOT The Satin stitch foot is grooved on the bottom to permit dense stitching to pass under it easily. It is most useful for sewing satin stitches. It can also be used as an alternative to the All Purpose or All Purpose Foot when sewing stretch stitches. -
Page 61: Open Toe Foot
OPEN TOE FOOT This foot provides a more visible view of the area that you will be stitching. Because of its open area at the front, you can see markings much more easily. 1. Set machine to desired stitch. 2. With a marking pencil or chalk, trace the outline for your design or pattern on the right side of the garment. -
Page 62: Cording Foot
CORDING FOOT Sew over one, two or three standards of cord to embellish used for cording. Single cording 1. Mark the design on the fabric. Insert the cord in the center groove of the cording foot from the right side opening. Pull the cord about 5cm (2 inches) behind the foot. -
Page 63: Even Feed Foot
DARNING / FREEHAND EMBROIDERY FOOT For designs and monograms This foot is used to create freehand embroidery, monograms and stippling when the machine is set in regular sewing mode 3.0 - 5.0 (embroidery unit not attached). 1. Drop the feed dogs. To do so, remove the free arm. On the backside of the exposed area, move the lever from the right to the left. -
Page 64: Twin Needle
This will prevent broken needles and damage to your machine, regardless of the stitch you have selected. Use of a SINGER Brand twin needle (Style 2025) is strongly recommended. The twin needle is not included with the SEQS-6700. -
Page 65: Helpful Messages
HELPFUL MESSAGES Messages are displayed with LED lamps above stitch pattern numbers on control panel and/or PC screen. When a message is Sewing Embroidery On control panel Problem Correction Machine is locked up due to thread entangled with bobbin case or rotation interrupted forcibly. Turn off power switch and eliminate the problem that caused the machine to stop. - Page 66 Sewing Embroidery On control panel Problem Correction Breakage of top thread is detected. supply or rethread top thread and restart. Unable to start with needle lowered. Raise needle and restart. Unable to start with presser foot lifted. Lower presser foot and restart. Hoop size is too small to move hoop to original position.
- Page 67 MEMO...
- Page 68 5/12 © Part No. 83959 9/14 ( 1 )
Need help?
Do you have a question about the SEQS-6700 and is the answer not in the manual?
Questions and answers
How do I backstitch with the serpentine stitch? It won't backstitch properly for me. The back stitch goes off to the side
To backstitch with the Singer SEQS-6700 using the serpentine stitch, press the Reverse Stitch button. Pressing it once will back up one stitch at a time, and pressing and holding it will reverse continuously through the design.
This answer is automatically generated