Singer Sewing Machine Instruction Manual
Semi-industrial upholstery & leather craft sewing machine
Hide thumbs
Also See for Sewing Machine:
- Instruction manual (96 pages) ,
- Manual (6 pages) ,
- User manual (1 page)
Table of Contents
Advertisement
Advertisement
Table of Contents

Related Manuals for Singer Sewing Machine


Summary of Contents for Singer Sewing Machine
-
Page 1: Instruction Manual
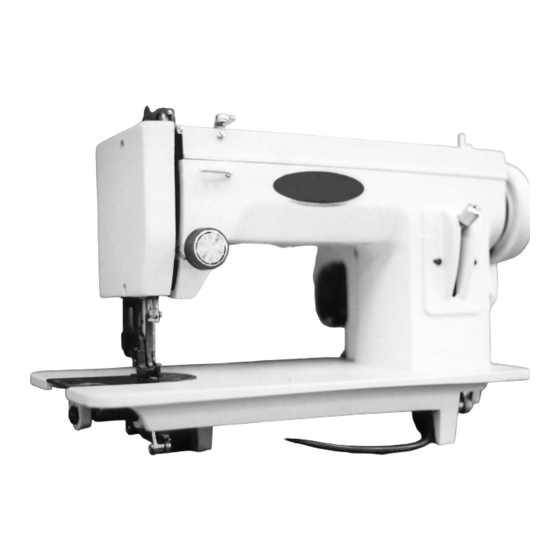
INSTRUCTION MANUAL Semi-Industrial Upholstery & Leather Craft Sewing Machine... -
Page 3: Warranty
5–Year Limited Warranty All Parts are fully guaranteed against defects in workmanship and material for 5 years under normal use excluding the following: Exclusions: • Needles, bobbins, belts, light bulbs, needle plates, feed dogs, and shuttle hooks. • Electrical equipment (except light bulbs) is guaranteed for 2 years. -
Page 4: Table Of Contents
CONTENTS Warranty............Preface............. Getting Ready to Use Your Machine... 6–7 Packaging The Portable Case Needles Machine Lubrication Getting Ready to Sew........8–13 Winding the Bobbin Threading the Machine Bobbin & Bobbin Case Installation Picking up the Bobbin Thread Adjusting the Stitch Length Reverse Sewing Straight Stitch &... -
Page 5: Preface
It can also be used for home sewing where even feed on both the upper and lower threads are necessary. The Semi-Industrial Sewing Machine’s feeding mechanism is composed of upper and lower feed dogs which are synchronized to feed the material either forward or reverse. -
Page 6: Getting Ready To Use Your Machine
Getting Ready to Use Your Machine Packaging Your machine comes in a special container, designed to protect the machine from any shipping damage. Please save the container with the enclosed packing materials in case you would need to return the machine for repairs. -
Page 7: Machine Lubrication
It should be oiled frequently. Oil in all areas where there is metal to metal working parts. Refer to fi g. 2 – 5. Arrows indicate lubrication points. USE ONLY SEWING MACHINE OIL ON YOUR MACHINE! fi g. 2 fi g. 3 fi... -
Page 8: Getting Ready To Sew
Getting Ready to Sew Winding the Bobbin Thread comes off the top of the cone to thread stand arm Thread through the thread post Wrap thread around the bobbin tensioner as shown Release the clutch prior to winding bobbins Run thread through the side of the bobbin and place bobbin on post. -
Page 9: Threading The Machine
Threading the Machine and Needle Thread comes off the top of the cone to thread stand arm Through holes in the thread post Through the pig tail of bobbin tensioner bracket Loop thread through ear holes Through upper tension (see separate diagram) Through take–up lever–then under end cover Under the thread guide Through the needle (left to right) -
Page 10: To Thread Bobbin Case
To Thread Bobbin Case Holding the bobbin case in your left hand, turn the open side up and place the threaded bobbin into it (Fig. 1). Guide the thread into the slot in the edge of the bobbin case (Fig. 2). Pull it under the tension spring and then into the delivery eye (Fig. - Page 11 Drawing Up The Lower Thread After threading machine and placing fi lled bobbin in case into shuttle: 1 Hold the end of the upper thread loosely with your left hand, so that thread remains slack. 2 Turn fl y wheel slowly toward you until needle goes down and comes up again to its...
-
Page 12: Reverse Sewing
To Regulate the Stitch Length Most sewing will be done with the maximum stitch length. How- ever, the length of the stitch can be adjusted as follows: (1) Loosen the thumb nut on the stitch length lever. (2) Raise the stitch length (feed regulator) lever until the desired stitch length is obtained. -
Page 13: Adjusting Bobbin Thread Tension
Adjusting Upper Thread Tension The correct stitch can usually be obtained by varying the upper thread tension. NOTE: TENSION ADJUSTMENT SHOULD BE MADE WITH THE PRESSER FOOT DOWN. To increase the tension, turn the tension dial clockwise (Fig. 32). To decrease the tension, turn the tension dial counter clockwise (Fig. -
Page 14: Adjusting The Shuttle Hook
Remove the Hook to: Clean the Race Free of Jams In performing these operations,DO NOT FORCE ANY OF THESE OPERATIONS. (see fi g. 9) Turn the balance wheel by hand until the needle is at its highest point. Remove the bobbin and bobbin case Turn clasp (A) outward Turn clasp (B) outward Remove the retaining ring (C) and hook (D) by grasping the... -
Page 15: Troubleshooting
Replace the race cover (C) polished side out so that both pins are under knobs (A) and (B). Lock the race cover (C) with knobs (A) and (B). 10 Replace bobbin case and bobbin, and resume sewing. fi g. 10 Instructions to repair machine should the Balance Wheel and Motor run But the Machine will not. -
Page 16: Common Sewing Problems
In order to adjust the machine properly, here are the fundamental operations of a lock stitch sewing machine. A shuttle hook rotates around the cage that holds the bobbin thread under the machine. The hook passes right next to the needle as it rises and catches the loop that is formed in the upper thread beside the needle as it comes up. - Page 17 2) Adjust the Foot Pressure Check to make sure the there is proper foot pressure. Closely–woven materials such as vinyl, and canvas can make it diffi cult for the needle to be withdrawn from the fabric. If the presser foot is lifting as the needle comes out of the fabric the effect is the same as if the needle were not going far enough into the cloth.
-
Page 18: Timing And Hook
fi g. 11 fi g. 12 Screwdriver insertion location Needle to adjust needle bar height hook point behind needle 4) To Check the Hook Distance If poor stitching still occurs after the needle bar height has been set properly, then the distance or the position of the hook must be checked. - Page 19 Another way to view the hook position in relation to the needle is to remove only the bob- bin case and shuttle hook retainer ring. With your left hand hold the hook in place and with the right hand rotate the hand wheel. You should be able to determine the distance between them by looking at the needle and hook from the bottom.
- Page 20 Shuttle Race Rotation If it becomes necessary to change the hook distance you must fi rst make a mark on the hook shaft to reference where the proper rotation of the race must be. To provide a reference point, make a mark on the shaft just to the right of the shuttle race clamp (See fi...
- Page 21 fi g. 15 Shuttle Center Lower Shaft Cast Iron Leg Clamp Left Collar Right Collar To adjust the hook to the right, loosen the two screws in the right collar. Move the collar to the left on its shaft. Move the shaft to the right. You will notice that the shaft, hook and shuttle will all move together.
- Page 22 Moving the Hook Closer to the Needle To adjust the hook to the left is done by loosening the compressible clamp screw and moving the shaft to the left. The shaft, hook and shuttle all move together. Rotate the balance wheel so that the hook is at its highest point at the top, where is crosses the needle.
- Page 23 needle is at bottom dead center. (See fi g. 16A) The hook rotation is critical, and the range of rotation is small, if set too far outside this range the machine may not sew at all or have skipped stitches. When the point can not catch the loop of thread formed by the needle, the hook point is set too close to the needle.
-
Page 24: Schematics
GROUP 1: CONSTRUCTION EXTERNAL GROUP... - Page 25 GROUP 1 PART PART NAME KEY NO TOP PLATE WO47 BO71 TOP PLATE SET SCREW BOBBIN WINDER STOPPER EO66 EO66–2 BOBBIN WINDER STOPPER SET SCREW SMALL PLATE COVER WO47–1 SMALL PLATE COVER SEW SCREW AO92 BOBBIN WINDER ASSEMBLY SET SCREW E070–1 BOBBIN WINDER TENSION ASS.
- Page 26 GROUP 2: SEWING TRANSMISSION GROUP...
-
Page 27: Needle Bar
GROUP 2 KEY NO. PART NO. PART NAME QTY. E053 ARM SHAFT B007 FEED CAM B051 ARM SHAFT BUSHING A012 THREAD TAKE–UP ASSEMBLY SET SCREW ARM SHAFT BUSHING SET SCREW TENSION RELEASE LEVER DRAG LINK PIN SET SCREW B048 THREAD TAKE–UP LEVER CAM A029 THREAD TAKE–UP ASSEMBLY SET SCREW E048–1... - Page 28 GROUP 3: SHUTTLE TRANSMISSION GROUP...
- Page 29 GROUP 3 PART PART NAME QTY. B139 CRANK CONNECTING ROD A027A CRANK CONNECTING ROD SET SCREW A027B CRANK CONNECTING ROD SET NUT A023 OSCILLATING SHAFT SET SCREW & NUT A024 OSCILLATING SHAFT A018 SHUTTLE DRIVE SET SCREWS A021 OSCILLATING SHAFT CRANK SET SCREW B179 OSCILLATING SHAFT CRANK WITH SLIDE BLOCK...
- Page 30 GROUP 4: FEED TRANSMISSION GROUP...
- Page 31 GROUP 4 KEY NO PART NO PART NAME W109 FEED REGULATOR THUMB NUT W105 FEED REGULATOR LEVER A053B–2 FEED REGULATOR LEVER NUT W107 FEED REGULATOR FEED REGULATOR SPRING W106 B010 FEED REGULATOR SCREW SET SCREW W108 FEED REGULATOR SCREW A069B FEED CONNECTION SLIDE BLOCK A069A FEED CONNECTION SLIDE BLOCK STUD...
- Page 32 GROUP 5: DRIVING & REVERSING MECHANISM GROUP...
- Page 33 GROUP 5 KEY NO. PART NO. PART NAME QTY. W042 PRESSER BAR LIFTER W042–3 PRESSER BAR LIFTER HINGE SCREW W026 LIFT BAR W052–2 UPPER LIFT BAR SCREW W042–1 SPACER W026–1 LIFT BAR GUIDE SCREW W018 PRESSER BAR TRACK W018–1 PRESSER BAR TRACK HINGE SCREW W020 REAR PRESSER BAR BRACKET A029...
- Page 34 GROUP 6: ELECTRIC POWER & DYNAMIC TRANSMISSION...
- Page 35 GROUP 6 PART NO. PART NAME A0004 STOP MOTION CLAMP STOP SCREW A002–1 STOP MOTION CLAMP SCREW A005 STOP MOTION CLAMP WASHER A003 BALANCE WHEEL BUSHING A006 BALANCE WHEEL BUSHING SET PIN W060 HAND WHEEL W006 BELT (130XLO.18) W007 BELT (80XLO.25) D116 E5 RING W061–5...
-
Page 36: Helpful Hints
HELPFUL HINTS REASONS CORRECTIONS WHEN THE SHUTTLE HOOK BECOMES JAMMED It occasionally happens that a) Remove the bobbin case. loose threads become b) Push the pins sideways. entangled and impede c) Remove the shuttle cover the free movement of the from the shuttle. - Page 37 REASONS CORRECTIONS MAKES LOOSE STITCHES AND LOOPS ON UNDERSIDE OF FABRIC. a) Threading is incorrect. a) Correctly thread machine. b) Presser foot is not b) Check whether Presser foot is completely lowered. down. c) Insuffi cient needle thread c) Adjust thread tension. tension.
- Page 38 REASONS CORRECTIONS IF THE MACHINE DOES NOT FEED PROPERLY a) The stitch regulator lever a) Do not set the lever at ‘O’ is at ‘O’. position. b) Insuffi cient pressure is ap- b) Increase the pressure by plied to the presser foot. turning the pressure regulating thumb screw clockwise.
- Page 39 REASONS CORRECTIONS IF THE MACHINE STOPS WHILE SEWING The stop motion knob has not been tightened suffi ciently. IF THE MACHINE SKIPS STITCHES a) The needle is inserted a) Correct the insertion of needle. incorrectly. b) Change needle. b) The needle is bent or blunt.
Need help?
Do you have a question about the Sewing Machine and is the answer not in the manual?
Questions and answers