Table of Contents
Advertisement
Advertisement
Table of Contents

Summary of Contents for VeriFone ruby2
- Page 1 Ruby2 Hardware Installation Guide P/N: DOC169-001-01-A Revision: A01...
- Page 3 VeriFone, Inc. Commander Site Controller, Ruby2, Sapphire, Topaz, HPV-20, Ruby Manager, Everest, E ID, Electronic Journal On-site, and Ruby Card are trademarks of VeriFone, Inc. in the U.S. and/or other countries. All other trademarks or brand names are the properties of their respective holders.
-
Page 4: Safety Instructions
■ only damp cloth for cleaning. Do not use any attachments not specifically recommended by ■ VeriFone as they can result in the risk of fire, electric shock, or injury. Do not use the Ruby2 near water. ■ Do not place this unit on an unstable cart, stand, or table. The unit may... - Page 5 Battery Charging Notification The unit should be powered up for at least 24 hours prior to initial application download. This is to prevent loss of data and to ensure that the battery pack is fully charged.
- Page 6 Ruby2 Hardware Installation Guide Revision History Revision Date Description April 12, 2013 Initial Documentation Release April 25, 2013 Added a More than Two Workstation diagram, edits to the copyright page...
-
Page 7: Table Of Contents
Ruby2 Rear Panel........ - Page 8 Ruby2 Hardware Installation Guide October 01, 2013...
-
Page 9: Introduction
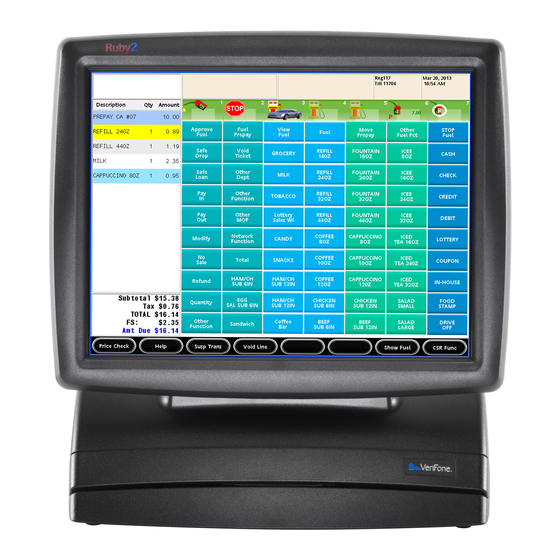
The Ruby2 has a 15-inch touch screen and a color display. Online help is available to support the user and promote quick responses. The Ruby2, ™... -
Page 10: Requirements
RS-232 cable between peripherals, such as printers ■ Null Modem Adapter ■ Recommended Equipment Uninterruptible Power Supply (UPS) - VeriFone recommends that ■ the Ruby2 be connected to a UPS with a rating of 200VA or greater. Customer Display Pole ■ Cash Drawer ■ PINpad ■... -
Page 11: Unpacking
■ Note: The cash drawer, customer display pole, thermal printer, and VeriFone MX Series PINpad, which complete the Ruby2 workstation, are ordered and shipped separately. Remove any protective plastic wrapping from the components and place the components on a table or countertop. Be sure that you have all the parts required for your specific installation before you begin. - Page 12 Ruby2 Hardware Installation Guide October 01, 2013...
-
Page 13: Installation
Installing one or two Ruby2 workstations requires Ethernet cables to connect the Ruby2 to a router to create an in-store LAN. The printers, customer display, and cash drawers use RS-232 cables to connect to the Ruby2, and an additional Ethernet cable to connect the router to a corporate WAN/Intranet. - Page 14 Configuring More Than Two Ruby2 Workstations Installing more than two Ruby2 workstations requires a WAN/intranet or a network switch as well as a router. The Ruby2 workstations use Ethernet cables to connect to the network switch. network switches are available in various sizes and usually support four or more workstations.
-
Page 15: Choosing A Location
Non-operating: -4 to 140° F (-20 to 60° C) Humidity: 15% to 95% relative humidity at 40° C (non-condensing) ■ Avoid locations with the following characteristics: Warning: To reduce the risk of fire, do not place the Ruby2 near objects that produce excessive heat. Direct sunlight ■ Moisture ■... -
Page 16: Diagnostic Panel
Ruby2 Hardware Installation Guide Diagnostic Panel The Diagnostic Panel is located on the right side of the Ruby2 and can be accessed by loosening the screw that holds the cover in place. From left to right, this panel contains the following: Reset Button: Reboots the Ruby2 workstation without shutting ■... -
Page 17: Thermal Receipt Printer Configuration
Lift the cover up and remove it. 2. For use with Ruby2, SW1 switches should all be in the OFF position. 3. SW2 switches should be in the OFF position, with the exception of switch 6, which should be in the ON position. -
Page 18: Ruby2 Rear Panel
Ethernet Speaker (out) COM Ports Cash Drawers (2) DC Power Microphone (in) Printer Power The rear panel of the Ruby2 workstation has the following ports: 8 Serial Ports ■ – COM1 - not assigned – COM2 - not assigned –... -
Page 19: Installing The Ruby2 Workstation
Thermal Receipt Printer. 2. Plug the other end of the RS-232 cable into COM4 on the Ruby2 workstation. 3. Plug the printer power cable into the printer with the flat side facing Note: The connector slides down to lock or unlock the cable. - Page 20 Note: To prevent loss of data and to ensure that the battery pack is fully charged, the Ruby2 should be powered up for at least 24 hours prior to initial application download. During operation, avoid blocking the perimeter of the Ruby2 touch screen with any objects, including paper and hands, as they can block the sensors and prevent the touch screen from operating properly.
-
Page 21: Service And Parts
ARTS Service Do not attempt to repair, service, or adjust the Ruby2. If you have questions related to installation or troubleshooting, the VeriFone Technical Support Center is available for assistance 24 hours a day, seven (7) days a week, at 800-777-3536. -
Page 22: Magnetic Stripe Cleaner
Ruby2 Hardware Installation Guide Magnetic Stripe Cleaner The following is the MSR cleaning method: Dirt can lead to magnetic stripe card reading problems. The magnetic stripe reader (MSR) should be cleaned on a regular basis (daily to once a week depending on usage) using commercially available card reader cleaning cards or VeriFone part number 02746-02. -
Page 23: Specifications
Ruby2 Hardware Installation Guide Specifications Ruby2 Specifications The table below gives the power requirements, dimensions, and other specifications of the Ruby2 workstation. Specification Description Safety UL, cUL FCC Class A (USA) and CISPR22 Class A (Europe) IEC 1000 4-2 (8 KV contact, 4 KV air) Temperature Operating range: 0-40°... - Page 24 Ruby2 Hardware Installation Guide October 01, 2013...


Need help?
Do you have a question about the ruby2 and is the answer not in the manual?
Questions and answers
How to change the Header