Agilent Technologies U3401A User's And Service Manual
4 1/2 digit dual display
multimeter
Hide thumbs
Also See for U3401A:
- User's manual and service manual (117 pages) ,
- Quick start manual (62 pages)

Related Manuals for Agilent Technologies U3401A


Summary of Contents for Agilent Technologies U3401A
- Page 1 Agilent U3401A 4 1/2 Digit Dual Display Multimeter User’s and Service Guide Agilent Technologies...
- Page 2 FAR 12.211 (Technical Data) and 12.212 (Computer Software) and, for the Department of Defense, DFARS 252.227-7015 (Technical Data - Commercial Items) and DFARS 227.7202-3 (Rights in Commercial Computer Software or Com- puter Software Documentation). U3401A User’s and Service Guide...
-
Page 3: Safety Symbols
IEC Measurement Category II. CAT II Measurement performed on circuits that 300 V are directly connected to the low voltage installation (up to 300 VAC) under Category II overvoltage conditions U3401A User’s and Service Guide... -
Page 4: Regulatory Markings
Cet appareil ISM est conforme à la indicates that you must not discard norme NMB-001 du Canada. this electrical/electronic product in domestic household waste. The CSA mark is a registered trademark of the Canadian Standards Association. U3401A User’s and Service Guide... -
Page 5: General Safety Information
Agilent Technologies assumes no liability for the customer’s failure to comply with these requirements. U3401A User’s and Service Guide... - Page 6 Remove power and do not use the product until safe operation can be verified by service-trained personnel. If necessary, return the product to Agilent Technologies Sales and Service Office for service and repair to ensure the safety features are maintained.
- Page 7 • Never measure voltage when current measurement is selected. • Use the instrument with the cables provided. • Repair or service that is not covered in this manual should only be performed by qualified personnels. U3401A User’s and Service Guide...
-
Page 8: Environmental Conditions
–20 °C to 60 °C (Non-operating) Altitude Operating up to 2,000 metres (6,562feet) Pollution degree Pollution Degree 2 The Agilent U3401A dual display complies with the following EMC CAU T ION requirements: • IEC 61010-1:2001/EN61010-1:2001 (2nd Edition) • Canada: CAN/CSA-C22.2 No. 61010-1-04 •... - Page 9 “Monitoring and Control Instrument” product. The affixed product label is shown as below: Do not dispose in domestic household waste To return this unwanted instrument, contact your nearest Agilent office, or visit www.agilent.com/environment/product for more information. U3401A User’s and Service Guide...
- Page 10 5-Mar-09 Tay Eng Su Date Quality Manager For further information, please contact your local Agilent Technologies sales office, agent or distributor, or Agilent Technologies Deutschland GmbH, Herrenberger Straße 130, 71034 Böblingen, Germany. Template: A5971-5302-2, Rev. E.00 U3402A DoC Revision A...
- Page 11 Regulatory Information for Canada ICES/NMB-001:2004 This ISM device complies with Canadian ICES-001. Cet appareil ISM est confomre à la norme NMB-001 du Canada. Regulatory Information for Australia/New Zealand This ISM device complies with Australian/New Zealand AS/NZS CISPR11:2004 U3401A User’s and Service Guide...
-
Page 12: In This Guide
Operations and Features Chapter 2 contains detailed information on how to take measurements using the U3401A. It also describes the various multimeter function and features available in the multimeter. Measurement Tutorial Chapter 3 describes the advanced features and applications for effective operation of the multimeter. -
Page 13: Table Of Contents
Regulatory Markings General Safety Information Environmental Conditions viii In This Guide ... 1 Getting Started Introduction the Agilent U3401A Dual Display Multimeter Initial Inspection Connecting Power to the Instrument Adjusting the Handle Product at a Glance Product Dimensions The Front Panel at a Glance... - Page 14 Test Considerations Input Connections Performance Verification Tests Overview Performance Verification Tests DC Voltage Verification Test DC Current Verification Test Resistance Verification Test Diode Verification Test Frequency Verification Test AC Voltage Verification Test AC Current Verification Test U3401A User’s and Service Guide...
- Page 15 AC Current (true RMS, AC+DC Coupling mode) Resistance / Continuity Diode Test/ Continuity Frequency Decibel Calculation Supplemental Specifications Display Counts and Reading Rates Measurement Specifications To Calculate Total Measurement Error Accuracy Specifications Transfer Accuracy One-Year Accuracy Temperature Coefficients U3401A User’s and Service Guide...
- Page 16 Connection terminal when measuring DC voltage and AC ripple 51 Figure 3-2 Connection terminal when using DC current and AC ripple 52 Figure 3-3 Connection terminal when measuring AC Voltage and Frequency 53 Figure 3-4 Connection terminal when measuring Resistance 54 U3401A User’s and Service Guide...
- Page 17 Frequency resolution and accuracy [± (% of reading + count)] 91 Table 6-10 Sensitivity for voltage measurement 91 Table 6-11 Sensitivity for current measurement 92 Table 6-12 Range and accuracy (dB) 92 Table 6-13 Full scale display counts 93 Table 6-14 Supplemental measurement specifications 93 U3401A User’s and Service Guide...
- Page 18 U3401A User’s and Service Guide...
-
Page 19: Getting Started
The Keypad at a Glance The Terminal at a Glance The Rear Panel at a Glance This chapter prepares the U3401A digital multimeter for use and contains brief description of the digital multimeter front panel, display, keypad, terminal and rear panel. Agilent Technologies... -
Page 20: Introduction The Agilent U3401A Dual Display Multimeter
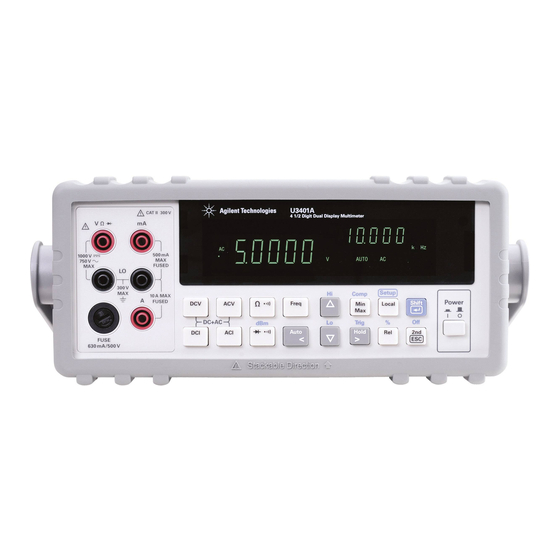
Getting Started Introduction the Agilent U3401A Dual Display Multimeter The key features of the U3401A dual display multimeter are: • 4 1/2- digit dual display measurement • Ten Measurement functions: • AC voltage • DC voltage • AC current •... -
Page 21: Initial Inspection
N O TE contents have been checked mechanically and electrically. If there is mechanical damage, notify the nearest Agilent Technologies office. Keep the damaged shipping materials (if any) for inspection by the carrier and Agilent representative. If required, you can find a list of Agilent Sales and Service Offices on the last page of this guide. - Page 22 Original packaging Containers and materials identical to those used in the factory packaging are available through Agilent Technologies office. If the instrument is being returned to Agilent Technologies for servicing, attach a tag indicating the type of service required, return address, model number, and serial number.
-
Page 23: Connecting Power To The Instrument
• Before turning on the multimeter, make sure the line voltage selector is set to the CAU T ION correct position for the applied line voltage to the power line cord connector. • Do not apply a line voltage that exceeds the specified range of the line cord connector. U3401A User’s and Service Guide... -
Page 24: Figure 1-1 Stacking The U3401A
The U3401A is provided with specially designed anti- slip protective bumpers on the front and rear panel. The multimeters will not slide off when stacked on top of each other. To be able to stack the U3401A multimeters, ensure the attached bumpers are in correct orientation. See Figure 1- Figure 1-1 Stacking the U3401A U3401A User’s and Service Guide... -
Page 25: Adjusting The Handle
Figure 1-2 Type of handle position To attach or detach the handle, rotate the handle upright and pull it out from the sides of the instrument. See Figure 1- 3 Figure 1-3 Attaching and detaching the handle U3401A User’s and Service Guide... -
Page 26: Product At A Glance
Getting Started Product at a Glance Product Dimensions Front View 226.0 mm Side View 105.0 mm 305.0 mm Figure 1-4 U3401A dimensions U3401A User’s and Service Guide... -
Page 27: The Front Panel At A Glance
The Front Panel at a Glance Primary display Secondary display Measurement Autoranging, Input terminals Math Shift Power function manual range, and current fuse operation on/off keypads and comparator keypads switch operation Figure 1-5 Front panel U3401A User’s and Service Guide... -
Page 28: The Display At A Glance
Table 1-1 Display annunciators Annunciator Description Primary display Reading rate: Slow. Not applicable for the U3401A. Reading rate: Medium. Not applicable for the U3401A. Reading rate: Fast. Not applicable for the U3401A. PEAK Peak measurement. Not applicable for the U3401A. - Page 29 Duty cycle measurement Voltage unit: mV, V μmA Current unit: μA, mA, A Shift mode Resistance unit: Ω, kΩ, MΩ MkΩ Secondary display is enabled. Not applicable for the U3401A. AUTO Autoranging Direct current Alternating current DCAC AC + DC...
-
Page 30: The Keypad At A Glance
Figure 1-7 Keypad Table 1-2 Keypad functions Description System related operation Press to power-on or power-off the U3401A multimeter. Press to select Shift. Press to return the multimeter to front panel operation when it is in remote state. Press to step through the Setup menu. See “Using the Setup... - Page 31 Press to toggle between resistance or resistance continuity. Press to select dBm measurement. Press to toggle between manual ranging and autoranging. Press to select a higher range and disable autoranging. See “Selecting a Range” on page 30 for more information. U3401A User’s and Service Guide...
- Page 32 43 for more information. Press to select the reference impedance for dBm measurement. Press to enable the MinMax math operation. Press to select the Relative math operation. Press to select the Percentage operation. U3401A User’s and Service Guide...
-
Page 33: The Terminal At A Glance
However, transient overvoltages are also present on circuits that are isolated from mains. The Agilent U3401A is designed to safely withstand occasional transient overvoltages up to 2500 V PEAK. Do not use this multimeter to measure circuits where transient overvoltages could exceed this level. -
Page 34: Table 1-3 Input Terminal For Different Functions
>10 A DC RMS for 20 seconds maximum Resistance (Ω) 500 VDC or AC RMS Diode test, continuity test 500 VDC or AC RMS All functions Any terminal to earth 1000 VDC or AC PEAK U3401A User’s and Service Guide... -
Page 35: The Rear Panel At A Glance
The Rear Panel at a Glance AC line Line voltage fuse voltage selector selection table AC power AC line fuse Chassis RS232 interface connector connector ground lug (For calibration use only) Figure 1-9 Rear panel U3401A User’s and Service Guide... - Page 36 Getting Started U3401A User’s and Service Guide...
- Page 37 Selecting Local Operation Mode Operating Math Functions MinMax Comp Hold Percentage (%) Trigger Mode This chapter contains detailed information on how to take measurements using the U3401A. It also describes the various multimeter function and features available in the multimeter. Agilent Technologies...
-
Page 38: Operations And Features
DC measurements of volts, amperes, or ohms; to achieve accurate measurement. This is due to the thermal voltages generated during the high current measurements that may cause errors when measuring the low-level measurements. U3401A User’s and Service Guide... -
Page 39: Performing Voltage Measurements
Figure 2- 3 Probe the test points and read the display. In autoranging mode, the multimeter automatically selected the appropriate range and the measurement is displayed. voltage source – Figure 2-1 ACV terminal connection and display U3401A User’s and Service Guide... -
Page 40: Figure 2-2 Dcv Terminal Connection And Display
3 Probe the test points and read the display. In autoranging mode, the multimeter automatically selects the appropriate range and the measurement is displayed. DCV voltage source – Figure 2-2 DCV terminal connection and display U3401A User’s and Service Guide... -
Page 41: Performing Current Measurements
4 Probe the test points in series with the circuit. 5 Power on the measured circuit and read the display. ACI or DCI current source – Figure 2-3 ACI RMS or DCI (mA) terminal connection and display U3401A User’s and Service Guide... -
Page 42: Figure 2-4 Aci Rms Or Dci (10A) Terminal Connection And Display
4 Probe the test points in series with the circuit. 5 Power on the measured circuit and read the display. – ACI or DCI current source Figure 2-4 ACI RMS or DCI (10A) terminal connection and display U3401A User’s and Service Guide... -
Page 43: Performing Frequency Measurements
Figure 2- 3 Probe the test points and read the display. In autoranging mode, the multimeter automatically selects the appropriate range and the measurement is displayed. Frequency source – Figure 2-5 Frequency terminal connection and display U3401A User’s and Service Guide... -
Page 44: Performing Resistance/Continuity Measurements
3 Probe the test points (by shunting the resistor) and read the display. In autoranging mode, the multimeter automatically selects the appropriate range and the measurement is displayed. Test current Resistance – Figure 2-6 Resistance /continuity terminal connection and display U3401A User’s and Service Guide... -
Page 45: Performing Diode And Continuity Test
Figure 2- 7 Figure 2- 8 respectively. 3 Connect the red test lead to the positive terminal (anode) of the diode and the black test lead to the negative terminal (cathode). Refer to Figure 2- U3401A User’s and Service Guide... -
Page 46: Figure 2-7 Forward-Biased Diode/Continuity Test Terminal Connection And Display
• A diode is considered open if the multimeter displays OL in both forward and reverse bias modes. Test current Forward bias – Figure 2-7 Forward-biased diode/continuity test terminal connection and display U3401A User’s and Service Guide... -
Page 47: Figure 2-8 Reverse-Biased Diode/Continuity Terminal Connection And Display
Operations and Features Reverse bias – Figure 2-8 Reverse-biased diode/continuity terminal connection and display U3401A User’s and Service Guide... -
Page 48: Selecting A Range
• Autorange thresholds - The multimeter shifts ranges as follows: • Down range at < 5% of current range • Up range at > full scale of current range • Table 2- 1 shows the summary of range scale values respectively. U3401A User’s and Service Guide... -
Page 49: Table 2-1 Range Scale Value
Diode test Fixed Range ✔ 500.000, 5.000 k, 50.000 k, 500.000 k, 5.000 M, 50.000 M Continuity (Continuity Mode) You are required to select the range manually when a signal is applied to the A terminal. U3401A User’s and Service Guide... -
Page 50: Selecting Secondary Display
Figure 2-9 Secondary display To disable the secondary display mode: 1 Press The display remains in primary display mode. Repeatedly pressing cycles through the secondary display choices for the present math operation as shown in Table 2- U3401A User’s and Service Guide... -
Page 51: Table 2-2 Description For Dual Display Combination
In autoranging mode, the ranges setting of both the primary and secondary display are corresponding to the higher range of two displays. Whereas in manual range, the ranges of secondary display are the same as the primary display. U3401A User’s and Service Guide... -
Page 52: Using The Setup Menu
100, 200, 300, 400, 500, Count Variation count. 600, 700, 800, 900, 1000. For calibration use only. Variation count is used to recognize new value will be updated once the variation of measuring value is esceeded the setting value. U3401A User’s and Service Guide... -
Page 53: Changing The Configurable Settings
5 Press to confirm the selected parameter. 6 Press to quit from the tier menu and press again to quit from the Setup menu. 7 The configuration settings is saved and main display is displayed. U3401A User’s and Service Guide... -
Page 54: Selecting Local Operation Mode
Operations and Features Selecting Local Operation Mode Press to return the operation from remote mode to local mode. U3401A User’s and Service Guide... -
Page 55: Operating Math Functions
• All math operations are automatically turned- off when changing the measurement functions. • Range changing is allowed for all math operations. U3401A User’s and Service Guide... -
Page 56: Dbm
Procedure 1 1 Press to enter dBm modifier mode. 2 Use to select the desired reference impedance. 3 Press to enable the dBm operation and read the display. U3401A User’s and Service Guide... -
Page 57: Rel
Primary Display = Reading – Rel # When the Rel operation is enabled in autoranging mode, enabling the Comp or Percentage operation will disable the Rel operation. Procedure 1 Press to exit the relative mode. Figure 2-11 Typical Rel operation display U3401A User’s and Service Guide... -
Page 58: Minmax
(if the beeper is enabled) and briefly turns on the appropriate MAX or MIN annunciator. Accumulated statistics are: • MAX—maximum reading since MinMax was enabled • MIN—minimum reading since MinMax was enabled • MINMAX—actual readings U3401A User’s and Service Guide... - Page 59 2 Press continuously until the desired operation appear. The MinMax operation will display MINMAX > MAX > MIN > MINMAX in sequence when this key is press continuously. 3 Press to disable the MinMax operation. U3401A User’s and Service Guide...
-
Page 60: Comp
34), the beeper beeps three tones on the transition from PASS to HI or LO. When transitioning from HI or LO to PASS it will only beep once. • Press to enable Comp operation. U3401A User’s and Service Guide... - Page 61 The lower limit is shown on primary display while the LO annunciator is shown on secondary display. 5 Use , and to modify the lower limit. 6 Press to store the specified LO limit value. 7 Press to disable the Comp operation or exit. U3401A User’s and Service Guide...
-
Page 62: Hold
Procedure 1 Press to access to the Setup menu. 2 Use to select the rHold. 3 Press to enter the second tier menu. Use to set the state to ON. 4 Press to confirm. U3401A User’s and Service Guide... -
Page 63: Figure 2-16 Typical Refresh Hold Operation Display
• For voltage and current measurements, the held value will not be updated when the reading below N O TE 500 counts. • For resistance and diode measurements, the held value will not be updated of the reading at OL or open state. U3401A User’s and Service Guide... -
Page 64: Percentage (%)
• The secondary display shows OL when readings exceed the maximum display of 999.99%. • When autoranging is enabled, this operation will be used to lock the current range. U3401A User’s and Service Guide... -
Page 65: Trigger Mode
The external trigger is used with a delay settling that has been set by the multimeter automatically. The amount of trigger delay varies depending on different function. When external trigger is enabled, the multimeter determines the range for the primary display based on the input at that time. U3401A User’s and Service Guide... -
Page 66: Figure 2-18 Typical Trigger Mode Display
• All math operations will be disabled when external trigger is enabled. N O TE • Press may disable external trigger also. • Both the primary and secondary display will only appear when frequency operation is selected in trigger mode. U3401A User’s and Service Guide... -
Page 67: Measurement Tutorial
U3401A 4 ½ Digit Dual Display Multimeter User’s and Service Guide Measurement Tutorial Applications for Using Dual Display Dual Display Operation Examples Measure DC Voltage and AC Ripple on a Rectification Circuit Measure AC and DC Current on a Rectification Circuit... -
Page 68: Applications For Using Dual Display
• Measuring AC ripple and DC current of power supply. • Measuring current dissipation for power ACI + DCI supply analysis. • Setting dB reference impedance and show Reference Ω dBm. • Indicating DC voltage and dBm. • Indicating AC voltage and dBm. U3401A User’s and Service Guide... -
Page 69: Dual Display Operation Examples
• Press to disable the secondary display. N O TE • Press to select the suitable range if DCV+ACV ripple is above the scale of the current range. U3401A User’s and Service Guide... -
Page 70: Measure Ac And Dc Current On A Rectification Circuit
AC current measurement for primary display. 3 Press to enable the DC current measurement for secondary display. 4 Press to select autoranging or manual range for secondary display. Press to disable the secondary display. N O TE U3401A User’s and Service Guide... -
Page 71: Measuring Ac Voltage And Frequency On An Ac Circuit
AC voltage measurement for primary display. 3 Press to select frequency measurement for secondary display. 4 Press to select autoranging or manual range for secondary display. Press to disable the secondary display. N O TE U3401A User’s and Service Guide... -
Page 72: Measuring Resistance
LO input terminals as shown in Figure 3- Resistance – Figure 3-4 Connection terminal when measuring Resistance 2 Press to select resistance measurement. 3 Press . Use to select autoranging or manual range for primary display. U3401A User’s and Service Guide... -
Page 73: Measure True Rms Ac + Dc
AC+DC RMS value using the quation below: AC+DC (RMS) = + AC When AC+DC voltage measurement is selected, the DCV input impedance is paralleled N O TE with the AC coupled 1.1 MΩ AC divider. U3401A User’s and Service Guide... - Page 74 Measurement Tutorial U3401A User’s and Service Guide...
-
Page 75: Performance Test
U3401A 4 ½ Digit Dual Display Multimeter User’s and Service Guide Performance Test Calibration Overview Agilent Technologies Calibration Services Calibration Interval Recommended Test Equipment Test Considerations Input Connections Performance Verification Tests Overview Performance Verification Tests DC Voltage Verification Test DC Current Verification Test... -
Page 76: Calibration Overview
Agilent Technologies Calibration Services When your instrument is due for calibration, contact your local Agilent Service Center for a low- cost recalibration. The U3401A is supported on automated calibration systems, which allow Agilent to provide this service at competitive prices. -
Page 77: Recommended Test Equipment
Fluke 5520A < 1/5 instrument 1 year spec AC current Fluke 5520A < 1/5 instrument 1 year spec Frequency Fluke 5520A < 1/5 instrument 1 year spec Diode Fluke 5520A < 1/5 instrument 1 year spec U3401A User’s and Service Guide... -
Page 78: Test Considerations
Shielded, twisted- pair, Teflon interconnect cables of minimum length are recommended between the calibrator and the multimeter. Cable shields should be earth ground referenced. This configuration is recommended for optimal noises and settling time performance during calibration. U3401A User’s and Service Guide... -
Page 79: Performance Verification Tests Overview
3 Make a measurement and observe the result. Compare measurement results to the appropriate test limits shown in the Table 4- 2. (Be certain to allow for appropriate source settling when using the Fluke 5520A). U3401A User’s and Service Guide... -
Page 80: Dc Current Verification Test
Table 4- 3 Make a measurement and observe the result. Compare measurement results to the appropriate test limits shown in Table 4- 3. (Be certain to allow for appropriate source settling when using the Fluke 5520A). U3401A User’s and Service Guide... -
Page 81: Table 4-3 Dc Current Verification Test
0.0000 A ±0.5 mA 0.000 A 10 A ±5 mA 4.5000 A ±11.7 mA 9.000 A 10 A ±27 mA Connect calibrator to multimeter’s A and Lo terminals before applying 10 A. CAU T ION U3401A User’s and Service Guide... -
Page 82: Resistance Verification Test
50 kΩ ±480 Ω 450.00 kΩ 500 kΩ 4.5000 MΩ 5 MΩ ±4.8 kΩ 30.000 MΩ 50 MΩ ±93 kΩ Specifications are for 2-wire ohms function using the Rel operation enabled to eliminate lead resistance. U3401A User’s and Service Guide... -
Page 83: Diode Verification Test
Table 4- 6. (Be certain to allow for appropriate source settling). Table 4-6 Frequency verification test Function Voltage Input frequency Range Error from nominal one year Frequency 4.5 kHz 5 kHz ±0.7 Hz U3401A User’s and Service Guide... -
Page 84: Ac Voltage Verification Test
±2.4 V 75.0 V 1 kHz 750 V ±1.8 V 675.0 V 1 kHz 750 V ±4.8 V Set the calibrator output to 0 V before disconnecting it from the multimeter input CAU T ION terminals. U3401A User’s and Service Guide... -
Page 85: Ac Current Verification Test
450.00 mA 1 kHz 500 mA ±2.45 mA 0.5000 A 1 kHz ±5.5 mA 1.000 A 1 kHz 10 A ±35 mA 4.5000 A 1 kHz ±25.5 mA 9.000 A 1 kHz 10 A ±75 mA U3401A User’s and Service Guide... - Page 86 Performance Test U3401A User’s and Service Guide...
- Page 87 U3401A 4 ½ Digit Dual Display Multimeter User’s and Service Guide Disassembly and Repair Operating Checklist Types of Service Available Repackaging for Shipment Cleaning To Replace the Power Line Fuse To Replace a Current Input Fuse Electrostatic Discharge (ESD) Precautions...
-
Page 88: Disassembly And Repair
Verify that the power cord is connected to the multimeter and to AC line power. ✔ Verify the front panel power switch is depressed. page 73 Is the mutimeter’s current input inoperative? ✔ Verify the current input fuse. U3401A User’s and Service Guide... -
Page 89: Types Of Service Available
If you have such a service contract and your instrument fails during the covered period, Agilent Technologies will repair or replace it in accordance with the contract. Obtaining Repair Service (Worldwide) -
Page 90: Repackaging For Shipment
Agilent suggests that you always insure shipments. Cleaning Clean the outside of the multimeter with a soft, lint- free, slightly dampened cloth. Do not use detergent. Disassembly is not required or recommended for cleaning. U3401A User’s and Service Guide... -
Page 91: To Replace The Power Line Fuse
2 and pull the fuse holder from rear panel. 4 Replace fuse holder assembly in rear 2 Rotate the line voltage selector and reinstall panel. it back, so that the correct voltage appears in the fuse holder window. U3401A User’s and Service Guide... -
Page 92: To Replace A Current Input Fuse
• Minimize handling. • Keep replacement parts in original static- free packaging. • Remove all plastics, foam, vinyl, paper, and other static- generating materials from the immediate work area. • Use only anti- static solder suckers. U3401A User’s and Service Guide... -
Page 93: Mechanical Disassembly
General Disassembly 1 Remove power and all cables from the instrument. 2 Remove the carrying handle by rotating the handle upright and pulling out from the sides of the instrument. U3401A User’s and Service Guide... - Page 94 3 Remove the instrument bumpers. Pull from a corner and stretch the bumpers off the instrument. 4 Remove the rear bezel. Loosen the two captive screws in the rear bezel and remove the rear bezel. U3401A User’s and Service Guide...
- Page 95 1 Remove on/off switch push rod. Gently move the power switch push rod toward the front of the instrument to disengage it from the switch. Be careful not to twist or bend the push rod. U3401A User’s and Service Guide...
- Page 96 Disassembly and Repair 2 Remove the screw holding the front panel. 3 Disconnect the two ribbon cable connectors from the front panel. U3401A User’s and Service Guide...
- Page 97 4 Disconnect the individual front panel wires shown below. 25 A current fuse 5 There is now enough play to allow the side of the front panel to be pried from the chassis and removed as an assembly. U3401A User’s and Service Guide...
- Page 98 1 Remove the keyboard and display assembly. Remove the two screws holding the circuit board. Lift the keyboard and display assembly from the plastic housing. a The rubber keypad can now be pulled from the plastic housing. U3401A User’s and Service Guide...
-
Page 99: Replaceable Parts
25 A, 440 V Fast acting fuse (A input) A02-62-25592-3U 0.25 A, 250 V time-lag, low breaking, line power fuse A02-62-25648-1U 0.125 A, 250 V time-lag, low-breaking, line power fuse A02-62-25604-1 Front panel fuse holder 34405-40001 Fuse holder assembly on rear panel U3401A User’s and Service Guide... -
Page 100: Rack Mounting
76) before rack mounting the multimeter. To rack mount a single instrument, order adapter kit 5063- 9240. To rack mount two instruments side- by- side, order lock- in kit 5061- 9694 and flange kit 5063- 9212. U3401A User’s and Service Guide... -
Page 101: Specifications And Characteristics
Diode Test/ Continuity Frequency Sensitivity for Voltage Measurement Sensitivity for Current Measurement Decibel Calculation Supplemental Specifications Display Counts and Reading Rates Measurement Specifications To Calculate Total Measurement Error Accuracy Specifications This chapter specifies the characteristics and specifications of the U3401A. Agilent Technologies... -
Page 102: General Characteristics
• Relative humidity up to 80% at 28°C RH (non-condensing) • Altitude up to 2000 meters • Pollution degree 2 • For indoor use only STORAGE COMPLIANCE • –20°C to 60°C • Relative humidity at 5% to 90% RH (non-condensing) U3401A User’s and Service Guide... - Page 103 • 226.0 x 105.0 x 305.0 mm (with bumpers) • 215.0 x 87.0 x 282.0 mm (without bumpers) WEIGHT 3.44 Kg (with bumpers) WARRANTY • One year for U3401A • Three months for standard shipped accessories CALIBRATION CYCLE One Year WARM UP TIME At least 30 minutes U3401A User’s and Service Guide...
-
Page 104: Measurement Category
Specifications and Characteristics Measurement Category The U3401A is intended to be used for measurement under Measurement Category II, 300 V for altitude up to 2000 m. Measurement Category Definitions Measurement CAT I Measurements performed on circuits that are not directly connected to MAINS. -
Page 105: Specifications
<0.6 V / 0.01 Ω 1 mA 0.25% + 5 10 A 20.000 Typical at full scale reading and voltage across the input terminals. In 10 A range, >10-20 Adc is readable for 20 seconds maximum with audio warning. U3401A User’s and Service Guide... -
Page 106: Ac Voltage (True Rms, Ac Coupling Mode)
1% + 30 In 750 V range, 1000.0 V is readable with audio warning. Accuracy specified at input >5% of range. Input Voltage <200 V RMS. For 5 kHz to10 kHz, the accuracy is 0.7% + 25. U3401A User’s and Service Guide... -
Page 107: Ac Current (True Rms, Ac Coupling Mode)
In 10 A range, >10-20 Aac is readable for 20 seconds maximum with audio warning. Input Current < 3 A RMS. Input Current >35 μA RMS. Accuracy specified at input >5% of range and >1 A for 10 A range except other specified. U3401A User’s and Service Guide... -
Page 108: Ac Current (True Rms, Ac+Dc Coupling Mode)
In order to eliminate the noise interference, which might be induced to the test leads, it is recommended to use a shielded test cable for measuring resistance above 500 KΩ. Use relative operation. If relative operation is not used, add 0.2 Ω additional error. U3401A User’s and Service Guide... -
Page 109: Diode Test/ Continuity
5 Hz to 100 kHz 100 kHz to 500 kHz 35 mV 200 mV 500 mV 0.25 V 0.5 V 2.5 V 50 V 25 V NO SPEC 500 V 50 V NO SPEC 750 V U3401A User’s and Service Guide... -
Page 110: Decibel Calculation
In 1000 V (dc) range, 1200 V is readable. In 750 V (ac) range, 1000 V is readable. Reading displayed in dB when Rel operation is used. For input voltage at frequemcy between 50 Hz to 1 kHz. Input Voltage <200 V RMS. U3401A User’s and Service Guide... -
Page 111: Supplemental Specifications
500 μA to 10 A ranges Shunt resistance 0.01 to 100 DC current Approximate 1.0 second when the displayed Response time reading reaches 99.9% DC value of the tested input signal at the same range. U3401A User’s and Service Guide... - Page 112 Overload is reported in manual ranging. Input protection 1000 V RMS on all ranges Approximate 1.5 second when the displayed Response time reading reaches 99.9% AC value of the tested input signal at the same range. U3401A User’s and Service Guide...
- Page 113 0.05 Ω or less(excluding test lead resistances) in Zeroing error each range when Rel operation is used Input protection 500 V DC or AC RMS Approximately 1.5 seconds for 5 MΩ and ranges Response time below 5 MΩ. U3401A User’s and Service Guide...
- Page 114 50/60 Hz ± 0.1% : DC >90 dB Noise Rejection unbalanced LO lead Normal mode rejection 50/60 Hz ± 0.1% : >50 dB ratio (NMRR) Approximately 1 second when the displayed Response time reading reaches 99.9% of frequenct value. U3401A User’s and Service Guide...
- Page 115 Reference impedance is displayed on the secondary display. Reading displayed in watts (Audio power). For calibration use only. When V measurement function is selected, the VDC input impedance is parallel with ac+dc N O TE an AC-couples 1.1 MΩ divider. U3401A User’s and Service Guide...
-
Page 116: To Calculate Total Measurement Error
• If you are operating the multimeter outside the temperature range specified, apply an additional temperature coefficient error. • For AC voltage and AC current measurements, you may need to apply an additional low frequency error or crest factor error. U3401A User’s and Service Guide... -
Page 117: Accuracy Specifications
0 °C to 18 °C and 28 °C to 50 °C temperature range (the specification is per °C). Temperature Coefficient = add ± 0.15 x [the applicable accuracy/°C] U3401A User’s and Service Guide... - Page 118 Specifications and Characteristics U3401A User’s and Service Guide...
- Page 119 Product specifications and descriptions in this document are subject to change without notice. Always refer to the Agilent Web site for the latest revision. © Agilent Technologies, Inc. 2009 Printed in Malaysia First Edition, May 29, 2009 U3401-90001 Agilent Technologies...