Table of Contents
Advertisement
Advertisement
Table of Contents

Related Manuals for VTech T1100


Summary of Contents for VTech T1100
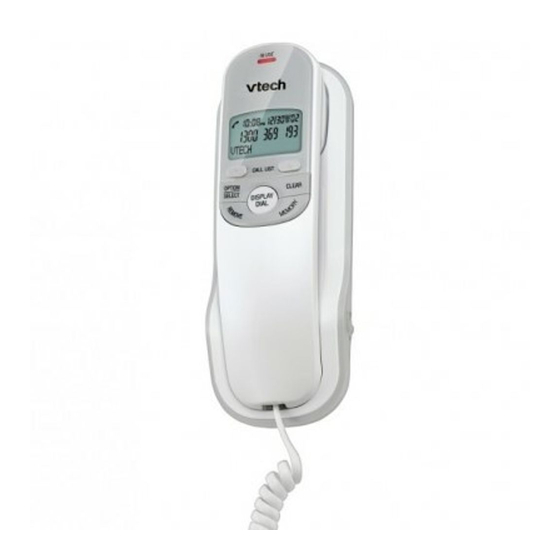
- Page 1 User Guide For product support Model: VTech T1100 please call: 1 300 369 193...
- Page 2 INTRODUCTION To your VTech T1100 Corded Phone • Calling Number Display* lets you see who’s calling. Your phone stores details of the last 80 callers in the Call List. * IMPORTANT You need to subscribe to a Network Calling Number Display service to be able to see the caller’s number or...
- Page 3 GOT EVERYTHING? The package contains the following items: • VTech T1100 handset • VTech T1100 telephone base with telephone line cord and mounting bracket • Coiled handset cord • 4 AA 1.5V alkaline batteries (required for Calling Number Display) •...
-
Page 4: Table Of Contents
IN THIs GUIDE Important safety instructions Getting started Location Setting up Installation options Using your VTech T1100 phone on a broadband ADSL line? Date and time Getting to know your phone Handset overview (front) Handset overview (rear) Telephone base overview... - Page 5 Memory keys Speed dial memory location Telephone settings Set date and time Set contrast Home area code Local area code Language Telephone Network Services* Calling Number Display Call list display screen message Review the call list Dial from the call list Delete an entry in the call list Delete the entire call list Copying a call list entry into memory...
-
Page 6: Important Safety Instructions
IMPORTANT sAfETY INsTRUCTIONs When using your telephone equipment, basic safety precautions should always be followed to reduce the risk of ire, electric shock and injury, including the following: Read and understand all the instructions in the user guide. Follow all warnings and instructions marked on the product. - Page 7 Do not open the casing of thids product otherwise there is a risk of electric shock. There are no user serviceable parts and you should contact TecHelp on 1300 369 193 should you experience any product dificulties. Unplug this product from the telephone wall socket and contact TecHelp on 1300 369 193 under the following conditions: •...
- Page 8 16. Exercise care when handling batteries. Do not allow contact of conductive materials such as rings, bracelets, or keys with the batteries. The batteries may overheat and cause injuries. 17. Observe proper polarity orientation between the batteries and the metallic contacts. 18.
-
Page 9: Getting Started
GETTING sTARTED LOCATION Place your VTech T1100 within 2 metres of telephone socket so that the telephone line cord will reach. Make sure it is at least 1 metre away from other electrical appliances to avoid interference. -
Page 10: Setting Up
sETTING UP Battery installation Before using the telephone, install four AA alkaline batteries to provide memory backup, and to enable features such as Calling Number Display and the IN USE light. If good batteries are not installed, the display only works when you lift the handset. - Page 11 Install four new AA alkaline batteries (included) in the battery compartment according to the engraved labels, + and -, in the compartment. Place the batteries above the battery strap. Close the battery compartment cover. Make sure it clicks into place. Note: •...
- Page 12 Telephone base installation Plug one end of the coiled handset cord into the handset jack on the left side of the telephone base. Plug the other end into the handset.
- Page 13 Plug one end of the telephone line cord into the telephone jack at the bottom of the telephone base. Route the telephone line cord through the slot as shown. Plug other end of the telephone line cord into a telephone wall jack. If you have ADSL high speed internet service, a ADSL ilter (not included) is required.
-
Page 14: Installation Options
INsTALLATION OPTIONs Your telephone base is ready for desktop use. If you want to mount your telephone on a wall, use the provided mounting bracket to connect with a standard dual-stud telephone wall mounting plate. If you do not have this mounting plate, you can purchase one from many hardware or consumer electronic retailers. - Page 15 Remove the mounting bracket from the base. Hold the telephone base with both hands and then slide the bracket upwards as the arrows indicate. Rotate the bracket 180 degrees to the wall mounting position. Push the bracket upwards as shown until it clicks into place.
- Page 16 4. Route the telephone line cord through the slot as shown and plug the other end of the cord into a telephone wall jack. To mount the telephone on the wall, position the mounting holes A and B over the telephone outlet mounting studs.
- Page 17 Wall mount to tabletop installation To change the telephone base from the wall mount position to tabletop position, follow the steps below. Remove the telephone base from the mounting plate. Unplug the telephone line cord from the telephone wall jack and remove the cord from the slots under the telephone base.
- Page 18 4. Rotate the bracket to the desktop installation position. Push the bracket down as shown below until it clicks into place. 5. Follow steps 2-4 in Telephone base installation in page 12-13 to install your telephone for desktop use.
-
Page 19: Using Your Vtech T1100 Phone On A Broadband Adsl Line
Check for a dial tone by lifting the handset. If you hear a dial tone, the installation is successful. WARNING Do not place your VTech T1100 in the bathroom or other humid areas. IMPORTANT Only use the telephone cords supplied with the product, and good AA batteries included. - Page 20 Set the date and time manually Press OPTION/SELECT repeatedly until the screen displays SET TIME/DATE. When the hour is lashing, use the keys to scroll through the list of numbers from 1 to 12 to select the right number for the hour and AM or PM. Press DISPLAY DIAL to move on to set the minute.
-
Page 21: Getting To Know Your Phone
GETTING TO kNOw YOUR PHONE HANDsET OVERVIEw (fRONT) IN USE LIGHT • Flashes quickly when there is an incoming call. • Flashes slowly when the telephone line cord is not plugged into a wall jack or another telephone on the same line is in use. •... - Page 22 CALL LIST • When the telephone is idle, press to display Calling Number Display information. OPTION/SELECT • Press to display the setting options. • While in the option menu, press to save the selection and move to the next feature. •...
-
Page 23: Handset Overview (Rear)
HANDsET OVERVIEw (REAR) 1. SWITCH HOOK • When held down, the telephone is in idle mode. • When released, the telephone is ready to make a call. 2. M1/M2/M3 • When the handset is lifted, press to dial a number from the one-touch memory. - Page 24 4. RECALL • Press to activate Recall for use with Telephone Network Services such as Call Waiting during a call. 5. MUTE • During a call, press and hold to mute the handset. Release again to resume your conversation. 6. PAUSE/REDIAL •...
-
Page 25: Telephone Base Overview
TELEPHONE bAsE OVERVIEw RINGER VOLUME Slide to adjust the base ringer volume to OFF, LO • or HI . -
Page 26: Navigating The Menus
NAVIGATING THE MENUs Your VTech T1100 has an easy to use menu system. The Table below provides a summary of the feature menu. Use the instructions below to change the settings: Press OPTION/SELECT repeatedly until the screen displays the desired feature when the phone is not in use. -
Page 27: Using The Phone
UsING THE PHONE MAkE, ANswER OR END A CALL To make a call: Lift the handset and wait for a dial tone. Use the dialing keys to enter the number you want to dial. • Place the handset on the telephone base to hang up after the call. -
Page 28: Mute
MUTE The mute function allows you to hear the other party but the other party cannot hear you. • During a call, press and hold MUTE to mute the microphone. • Release MUTE again to resume the conversation. CALL wAITING If you subscribe to call waiting service from your telephone service provider, you hear a beep if someone calls you while you are already on a call. -
Page 29: Memory Operation
MEMORY OPERATION This telephone has 13 memory locations with 3 one-touch memory location keys (M1, M2, M3) and 10 speed dial memory locations (0 through 9). Each location can hold a number up to 32 digits. MEMORY kEYs To store a number in a one-touch memory location: Lift the handset and press PROG. -
Page 30: Speed Dial Memory Location
To dial a number in a one-touch memory location To dial a number in a one-touch memory location, lift the handset and then press a one-touch key (M1, M2 or M3). sPEED DIAL MEMORY LOCATION You can store up to 10 numbers in the speed dial memory locations (0 through 9). - Page 31 To dial a number in a speed dial memory location: Lift the handset and press MEMORY. Use the dialing keys (0 through 9) to choose the desired speed dial memory location. The telephone automatically dials the telephone number stored in the selected speed dial memory location.
-
Page 32: Telephone Settings
TELEPHONE sETTINGs sET DATE AND TIME When the telephone is idle, the screen shows the date and time. If you subscribe to a Network Calling Number Display service, the date and time are set automatically with each incoming call. You may also set the date and time manually by following the steps below. -
Page 33: Set Contrast
- OR - Press DISPLAY DIAL to return to step 2 above to make any corrections. - OR - Press CLEAR to exit without saving your selection and return to idle mode. sET CONTRAsT You can adjust the screen contrast level for different lighting conditions. -
Page 34: Home Area Code
HOME AREA CODE Note: The home area code feature is for users in the United States of America and Canada only. Home area code is the area code associated with your telephone number. It is necessary to program a home area code so the telephone can properly display incoming calls and dial the telephone numbers from the call list. -
Page 35: Language
You can program up to four local area codes. Do not program area codes for which you must dial 1. Press OPTION/SELECT repeatedly until you see LOCAL AREA CODE?. to set the irst digit of the local area Press code in LAC 1. Press DISPLAY DIAL to move on to set the next digit. -
Page 36: Telephone Network Services
TELEPHONE NETwORk sERVICEs* *Subscription and/or usage charges may apply to use these services. Some features may not operate as described. Call your Network Service Provider for more information. CALLING NUMbER DIsPLAY If you have subscribed to a Network Calling Number Display service, you will be able to see your caller’s number on your handset display (provided it is not blocked) prior to answering the call. -
Page 37: Call List Display Screen Message
CALL LIsT DIsPLAY sCREEN MEssAGE With some incoming calls, if the telephone number is not available, the handset may display one of the following explanations: With some incoming calls, if the telephone number is not available, the handset may display one of the following explanations: UNAVAILABLE This caller’s number is unavailable. -
Page 38: Review The Call List
REVIEw THE CALL LIsT Review the call list to ind out who called, or to return the call. Press to access the call list and display the latest call list entry. Press repeatedly to scroll through the call list, which is in reverse chronological order (from the newest entry to the oldest entry), or press repeatedly to scroll through the call list in chronological order. -
Page 39: Delete The Entire Call List
DELETE THE ENTIRE CALL LIsT Press and hold REMOVE when reviewing the call list entries. The screen displays REMOVE ALL?. Press REMOVE again to delete all the entries. The screen displays -END OF LIST- and automatically returns to idle mode. - OR - Press CLEAR to exit without deleting any entries and return to idle mode. -
Page 40: Help
HELP There is no dial tone. • Inspect the telephone line cord connection at the telephone wall jack. Make sure the cord is connected properly and securely. • Inspect the handset cord connections at both ends. • If the previous suggestions do not work, disconnect the telephone base from the telephone jack and connect to a different telephone. - Page 41 • Try calling the number to be stored in memory. When the call ends, press PROG, PAUSE/REDIAL, then a one-touch key (M1, M2 or M3), or MEMORY and a memory location (0-9). IN USE light does not go on. • Make sure four new AA batteries have been installed properly.
- Page 42 • The caller may not be calling from an area that supports Calling Number Display. Both your and the caller’s telephone service providers must use equipment which are compatible with Calling Number Display service. • Make sure your service provides Calling Number Display information when on a call.
- Page 43 Wait for the handset to reestablish its connection with the telephone base. Allow up to one minute for this to take place. TecHelp line 1300 369 193 Call TecHelp: if you are having dificulties using your VTech T1100. • • if you need replacement batteries.
-
Page 44: General Information
Please note VTech accepts no responsibility for damage caused to your VTech T1100 handset by using any other type of batteries. Never dispose of batteries in a ire. There is a •... -
Page 45: Cleaning
CLEANING Simply clean the handset and base with a damp (not wet) cloth, or an anti-static wipe. Never use household polish as this will damage the product. Never use a dry cloth as this may cause a static shock. ENVIRONMENTAL •... -
Page 46: Customer Service & Product Warranty
Customer Service If you require assistance in operating this product please call the TecHelp Information Line on 1300 369 193 or contact VTech by e-mail at: tcpsupport_au@vtech.com. If you are trying to access a Telephone Network Service and require assistance speciically related to the network service or would like to subscribe to the service, contact your service provider. - Page 47 VTech do not warrant that the product will be free from defects if defects are caused by an accident, misuse, abuse, improper installation or operation, vermin infestations, lack of reasonable care, unauthorised modiication, loss of parts, tampering or attempted repair by a person not authorised by VTech; or where the product has been damaged by lightning or a mains power surge.
- Page 48 Warranty in no way limit your rights which arise as a result of your Statutory Rights. This Voluntary Product Warranty is given by: VTech Telecommunications (Australia) Pty Ltd ABN 70 136 672 627 Address: 24 Gilby Road, Mount Waverley 3149...
- Page 49 IMPORTANT NOTE: THIS IS NOT A PRODUCT RETURN OR SERVICE ADDRESS – PLEASE CONTACT TECHELP BY PHONE OR EMAIL FOR PRODUCT AND WARRANTY SUPPORT. NO LIABILITY WILL BE ACCEPTED BY VTECH FOR PRODUCTS RETURNED TO THIS ADDRESS UNDER THIS VOLUNTARY PRODUCT WARRANTY.
- Page 50 VTech is the registered trademark of VTech Holdings Limited. Copyright © 2015 for VTech Telecommunications (Australia). All rights reserved. Printed in China. Version A FOR MORE INFORMATION CALL: TECHELP ON 1300 369 193 OR EMAIL: TCPSUPPORT_AU@VTECH.COM...
Need help?
Do you have a question about the T1100 and is the answer not in the manual?
Questions and answers