
Related Manuals for Sinclair ASH-09AF


Summary of Contents for Sinclair ASH-09AF
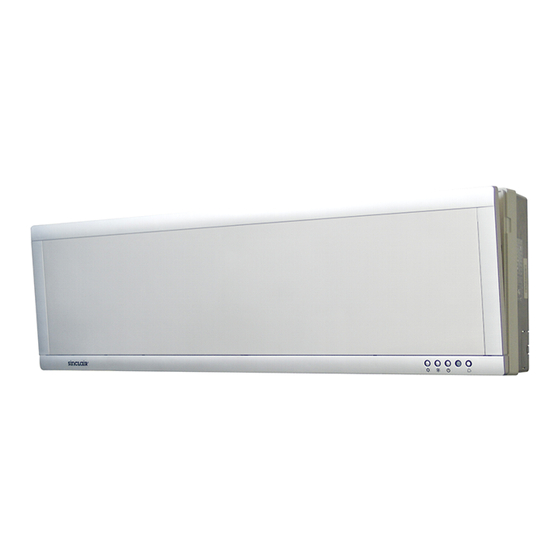
- Page 1 A I R C O N D I T I O N I N G OPERTIONAL MANUAL ASH-09AF, ASH-12AF FLAT SERIE Before operation please carfully read this manual. WALLMOUNTED SPLIT AIR CONDITIONER SINCLAIR...
-
Page 2: Table Of Contents
Contents Structure and Function 1 Important Advice 2 Specificate Model and Technical Data 5 Name and Function of Every Button of Wireless Remote Control Operation Guide 8 Install Note Items Install of Indoor Unit Install of Outdoor Unit Trial Run Repair and Maintenance When the unit cannot run normally... -
Page 3: Structure And Function
Structure Principle and Usage ◆ Structure and Function Filter Panel Air in Indoor Wire connection unit cover plate Air out Power plug Wireless remote control :Heat :Cool/Dry :Run Drainage hose :Auto Air in Front grill of air outlet vent Outdoor unit Air out... -
Page 4: Important Advice
Structure Principle and Usage Important Advance (Read the follwoing items carefully before using the unit) WARNING Insert power plug firm enough Don't plug out power plug Don't damage wire or use the For loose insert may cause electric when unit is operating. wire that is not appointed. - Page 5 Structure Principle and Usage ★ Cut off power when cleaning ★Plug out power plug when the ★ Earthing: Earth must be reliable! Earth wire should be unit will not be used for a long time. the unit. Otherwise, electric shock connected on special earth settings....
- Page 6 Structure Principle and Usage NOTICE ● Adjust airflow and direction properly Indoor temperature should be set properly Proper set temp. can save electricity. When the unit is running, adjust up and down adjusting plate by wireless remote control can adjust vertical direction of Temp.
-
Page 7: Specificate Model And Technical Data
Structure Principle and Usage Specificate Model and Technical Data... -
Page 8: Remote Control Operation Procedure
Remote control operation procedure Name and Function-Remote control Note: Be sure that there are no obstructions between receiver and remote controller. The remote control signal can be received at the distance of up to about 10m. Don’t drop or throw the remote control. Don’t let any liquid in the remote controller and put the remote controller di- rectly under the sunlight or any place where is very hot. - Page 9 Name and Function-Remote control. (Remove the cover) Note: This type of remote controller is a kind of new controller. some buttons of the controller which are not available to this Air condi- tioner will not be described below. Operate on unmentioned buttons would not impact on the normal use. Liquid crystal displayer It shows all set contents.
-
Page 10: Cool Mode Operation Procedure
COOL mode operation procedure According to difference between room temp. and set temp., microcomputer can control cooling on or not. If room temp. is higher than set temp., compressor runs at COOL mode. If room temp. is lower than set temp., compressor stops and only indoor fan motor runs. SET TEMP. -
Page 11: Heat Mode Operation Procedure
HEAT mode operation procedure If room temp. is lower than set temp., compressor runs at HEAT mode; If room temp. is higher than set temp., compressor and outdoor fan motor stop, only indoor fan motor runs, louver motor makes the louvers horizontal. SET TEMP. -
Page 12: Dry Mode Operation Procedure
DRY mode operation procedure If room temp. is lower than set temp., compressor ,outdoor and indoor fan motor stop. If room temp. is between of set temp., Air conditioner is drying.If room temp. is higher than set temp., it’s at COOL mode. -
Page 13: Auto Mode Operation Procedure
AUTO mode operation procedure Under Auto mode operation, standard SET TEMP. is 25 for COOL mode and 20 for HEAT mode. 1.Plug in,Press ON/OFF but- ton (1/0 is used in some models), then air conditioner is turned on. 2.According to room temp.,micro- computer can automatically set operation mode,so as for best effect. - Page 14 TIMER mode operation procedure TIMER ON button At stopping, press TIMER ON button, set ON TIME in range of 0 to 24 hour to start the unit automatically. Timer cancellation 1/0 is used in some models TIMER OFF button At operating, press TIMER OFF button, set OFF TIME in range of 0 to 24 hour to stop the unit automatically.
-
Page 15: Sleep Mode Operation Procedure
SLEEP mode operation procedure As the unit is cooling or drying, if SLEEP operation is set, SET TEMP. would increase 1 in 1 hour and 2 in 2 hours. As the unit is heating , if SLEEP operation is set, SET TEMP. would decrease 1 in 1 hour and 2 2 hours. - Page 16 How to insert batteries 1.Remove the cover from the back of the remote control. 2.Insert the two batteries ( Two AAA dry - cell batteries ) and press but- ton “ACL”. 3.Re - attach the cover. NOTE: Don’t confuse the new and worn or different types of batteries.
-
Page 17: Install Note Items
Install Part ◆ Install Note Items Select of install location Indoor unit 1.The air inlet and outlet vent should be far away from obstruction to ensure the air is blowed to the entire room. 2.Select where is easy to drain condensate or connect with outdoor unit. 3.Far away from heat resource, steam and flammable gas. - Page 18 Earth wire Capacitance Power wire of unit Model of air switch min section min. section ASH-07AF 2 2 10A 1.0mm 1.0mm ASH-09AF 2 2 10A 1.0mm 1.0mm ASH-12AF 2 2 15A 1.5mm 1.5mm Earthing requirements 1.Air conditioner is type I appliance, please do conduct reliable earthing measure.
- Page 19 Install Part Install Dimension Diagram Distance between unit and ceiling Distance between unit and wall Distance between unit and wall Air out side Distance between unit and floor Important Advance ★ The installation must be done by professional personnel with reliability according to this manual. ★...
-
Page 20: Install The Connection Pipes
Install Part ◆ Install the indoor unit ☆ Install the rear panel 1.Always mount the rear panel horizon- tally.As the water drainage pipe at the left,this side should not be too high when adjusting the rear panel.it Fig.1 had better to adjust this side a little lower. 2.Fix the rear panel on the selected location. -
Page 21: Install Of Indoor Unit
Install Part 4.Connect blue wire in power connect wire onto "N(1)" terminal, brown wire onto "2" terminal, yellow-green wire (i.e. earth wire) onto " " terminal (as shown in fig.3); and press the power connect wire by wire groove that in front of line bank that installed in electric box. 5.To heat pump type unit, signal control wire connect with indoor unit through connector as (shown in fig.3), and tighten the control wire by wire clamp on bottom of case. -
Page 22: Install Of Outdoor Unit
Install Part Methods ①、②、③ are recommended piping ways. 2.After wrapped pipe and wire, pull them though the pipe hole (as shown in fig.5). 3.Hang the mounting slot behind indoor unit on the pothook of the rear panel and move it to check if it is firm enough (as shown in fig.6). 4.Ensure the install height of indoor unit is 2m or higher. - Page 23 Install Part Tightening torque table Torque wrench Hex nut Tightening torque table(N・m) 15~20 Ф6 Spanner 9.5 31~35 12 50~55 Nut of connection pipe Joint Fig.7 ☆ Electric wiring connection 1.Take off handle on right side plate of outdoor unit (1 bolt). 2.Take off clamp, then connect and fix the power connect wire to wiring terminal board.Wiring allocation should be in accordance with that of indoor unit.
- Page 24 Install Part ☆ Air purging and leakage test Screwdriver 1. Remove the nuts cap from the cut-off valves Gas pipe Flurine charging nuzzle of the outdoor unit. 2. Aim at the center of the tubing, screw the Liquid Gas valve pipe cone-shaped nuts by hand. 3. Tightening the cone-shaped nuts with wrench. Liquid valve 4. Remove the valve caps of the gas valve and Hex wrench liquid valve and the service port nut. Fig.8 5. Loosen the valve srem of the liquid valve with a hex wrench.push the check valve core of the gas valve to discharge air . Vacuum valve 6. After 15 seconds, stop pushing the valve core as soon as the refrigerant starts to be discharged, and reinstall the service port nut. Valve cap 7. Open the liquid valve caps and gas valve entirely (shown in Fig.8) 8. Tighten the valve caps and test leakage at all joints of the piping(both indoor and...
-
Page 25: Trial Run
Install Part ◆ Trial run and check items after installation ☆ Trial Run 1. Preparation for trial run (1) Don't turn on power supply if entire installations are not completed. (2) Connect of control circuit should be correct Heating indicator ON/OFF button all wire connect should be firm. Cooling indicator Running indicator (3) Cut-off valves of both thick and thin pipes should be turned on. (4) All scattered components, especially metal scrap thrum etc., should be cleared from unit. -
Page 26: Repair And Maintenance
Repair and Maintenance Repair and Maintenance ◆ Warning ▲ Stop the unit and pull out the plug before cleaning the unit,or electic shock will be happened. ▲ Don't get wet the unit,for it will cause the electric shock,make sure don't wash the unit by water. ▲... -
Page 27: When The Unit Cannot Run Normally
Repair and Maintenance Check before use 1. Be sure that nothing obstructs the the air outlet and intake vents. 2. Check that whether ground wire is properly connected or not. 3.Check that whether the batteries of air connectioner are changed or not 4.Check that whether the installation stand of the outdoor unit is damaged or not.if damaged, please contact the dealer. Maintenance after use 1. Clean filters and other parts. 2. Turn main power off. 3. Clear dust from the outdoor unit. 4. Repaint the rubiginous place on the outdoor unit to prevent it from spreading. ◆ When the unit cannot run normally Warning: Don't attempt to repair the air condotioner by yourself, it can cause an electric shock or fire. please check the following items before asking for repair,it can save your time and money. P h e n o m e n o n T r o u b l e s h o o t i n g Compressor do not operate when... - Page 28 Repair and Maintenance P h e n o m e n o n T r o u b l e s h o o t i n g Sound of water flow can be heard This is caused by the refrigerant during operation. flowing inside the unit. Mist is emmitted from the airout vent...
- Page 29 Repair and Maintenance When the following circumstance occur, stop the unit from running Please contact Gree immediately and plug out power plug, then contact Gree Service Center. Service center if there is any problem ▲ Harsh noise is heard when the unit is running; ▲...
-
Page 30: Environmental Information
ENVIRONMENTAL INFORMATION This unit contains fluorinated gases with greenhouse effect covered by the Kyoto Protocol. Maintenance and disposal must be carried out by qualified persons only. Refrigerant gas R410A, GWP = 1730 EXTRA REFRIGERANT CHARGE Pursuant to Regulation EC 842/2006 on certain fluorinated greenhouse gases, in case of extra refrigerant charge, it is compulsory to: Fill in the label accompanying the unit inserting the factory quantity of refrigerant charge (see the technical label), the extra refrigerant charge and the total charge.
Need help?
Do you have a question about the ASH-09AF and is the answer not in the manual?
Questions and answers