Table of Contents
Advertisement
Advertisement
Table of Contents

Subscribe to Our Youtube Channel
Related Manuals for Sinclair ASH-09AQ


Summary of Contents for Sinclair ASH-09AQ
- Page 1 USER'S MANUAL QUEEN SERIES ASH-09AQ, ASH-13AQ, ASH-18AQ...
-
Page 3: Usage Notice
Usage Notice (Please read the following notice carefully before usage) WARNING Ensure power plug had Don't plug out power plug Don't damage wire or use be inserted firmly. when unit is operating. the wire that is not appointed. Otherwise electric shock or Otherwise electric shock or Otherwise electric shock or fire may occur. - Page 4 ★ Earthing: Earth must ★ Plug out power plug when ★ Cut off power when cleaning be reliable! Earth wire the unit will not be used for a the unit. Otherwise, electric should be connected on special long time. shock or damage may occur. earth settings in the building.
-
Page 5: Name Of Every Part Of The Unit
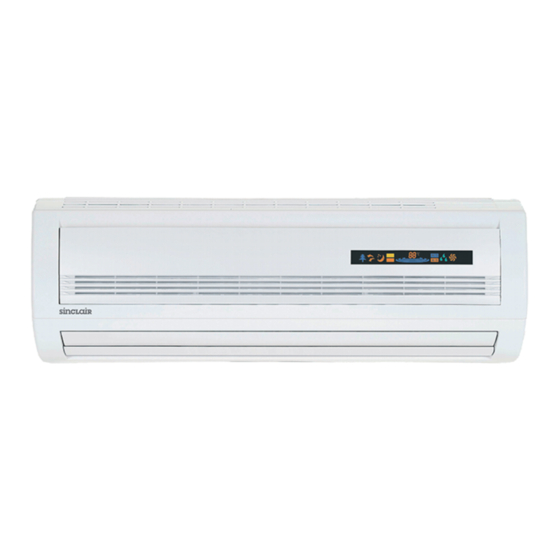
Name of Every Part of The Unit ◆ Air in Displayer Power plug Panel Button ON/OFF Indoor Unit Static dust catcher Wire connection Filter cover plate Air out Guide louver Wireless remote control Displayer High Medium Connecting pipe and connecting wire Sleep Receive... -
Page 6: Usage Method Of Wireless Remote Control
Usage Method of Wireless Remote Control Name and Function of Every Button on Wireless Remote Control Note: Ensure the control is aligning receive window, and there is no obstruction between the two sides; don't drop or throw the control; don't flow any liquid into it or place it under direct sun burn or where there is extrimely hot. - Page 7 ◆ Name and Function of Every Button on Wireless Remote Control (Remove Cover) Note: This kind of wireless remote control is the general one that is suitable for several models (functions). Please understand that we won't introduce the buttons that are not available to this unit.
- Page 8 ◆ Operation Guideline Common process: 1. After connecting with power, buzzer sounds and indoor unit displayer displays all signs. Several seconds later all indicator signs off automatically except power indicator sign, then only power indicator light on and displays in green. The unit is in waiting state (Note: When every electrified or received signal from wireless remote control, buzzer sounds;...
-
Page 9: Users' Notice
Users' Notice ★ Align proper airflow and direction Indoor temperature should be set in proper Align proper set temp. can avoid electric When unit is running, press the Swing on wireless remote control for left and right swing can align airflow horizontal wasting. -
Page 10: Maintenance
Maintenance ◆ Turn off the unit and take out the power plug before cleaning the unit, or ▲ electric shock may occur. Don't make the unit wet, or electric shock may occur, ensure that the unit ▲ would not be washed by water under any circumstance. Volatile liquid like thinner or gasoline would damage the appearance of the ▲... - Page 11 2. Clean air filter Adopt ductcollector or water to clean filter. If the filter is too dirty (like oil spot), clean it by warm water (lower than 45℃) melted with neutral cleaning fluid then dry it in shade as shown in right figure. Note: Don't wash it by hot water whose temp.
-
Page 12: Troubleshooting
Troubleshooting ◆ Warning: Please don't repair the unit by yourself for incorrect repair would cause electric shock or fire; please contact our service center to have the unit repaired by prefessional personnel. Check the following items before requesting on service center would saves your time and cost. Phenomenon Troubleshooting The unit cannot be restarted immediately after... - Page 13 Phenomenon Troubleshooting The unit cannot run ・ Is power supply cut off? ・ Is power cord loosen? Is circuit protect setting triped? ・ ・ Is voltage too high or too low? Is Timer On set by wireless remote control? ・ Trips Trip Bad cooling (heating) effect of the unit...
-
Page 14: Select Of Install Location
Install Service ◆ Select of Install Location Indoor unit 1. Air intake and outlet vent should be far away from abstruction so that airflow could be blown to the whole room; 2. Select the place where is easy to drain condensate and connect with outdoor unit; 3. - Page 15 Min. section Min. section of Capacity of Usage Models of earth wire power cord air switch 10A 2 2 ASH-09AQ 1.0mm 1.0mm ASH-12AQ 16A 2 2 1.5mm 1.5mm 16A ASH-18AQ 2...
-
Page 16: Install Dimension Diagram
Install Dimension Diagram ◆ Distance to ceiling or more 15cm or more Distance to wall 15cm or more Distance to wall or more or more Exhaust side Distance to floor Important Notes ★To ensure good usage, install the unit by professional personnel according to this instruction. ★Please contact our local service center before installation, malfunction caused by the unit that was not installed by our service center would be hard to deal with in time for inconvenient business contact. - Page 17 Install of Indoor Unit ◆ ☆ Install Rear Plate 1. Measure horizon by hanging line or horizontal measurement. Since drainage pipe hole is on left, it is better to make left side lower. 830mm Wall Wall Shown in middle Gradienter 2.
-
Page 18: Electric Wiring
☆ Electric Wiring 1. Open panel upwardly (as shown in fig. 2): 2. Take off fixing bolts of wire cover plate to take off the plate (as shown in fig.3). 3. Make power connect wire goes through the single wire hole at rear side of indoor unit and pull it in front side. -
Page 19: Install Indoor Unit
☆Install Indoor Unit Pipe can be led from 4 directions of right, rear right, left and rear left. ● 1. When routing pipe (wire) at right side or left side, cut off tailings of pipe left on chassis of main unit in necessary (as shown in fig. - Page 20 ☆ Vacummize and Leakage Detect Screwdriver Gas pipe Freon charge 1. Take off nut cover on cut-off valve of outdoor unit. nozzle 2. Align the center of wire, tighten it the flare nut Liquid valve pipe enough by hand. 3. Tighten flare nut by spanner. Liquid valve 4.
-
Page 21: Trial Run And Check Item After Installation
◆ Trial Run and Check Items after Installation ☆ Trial Run 1. Preparation for trial run (1) Don't turn on power before entire installation AUTO/STOP are completed. (2) Ensure the correct connect of control wire, all wire should be connected firmly. (3) Both cut-off valve of thin and thick pipe should ON/OFF button be opened. -
Page 23: Table Of Contents
Install Indoor Unit 15 Install Outdoor Unit 17 19 Trial Run and Check Item after Installation Instruction of Health Function Appendix 20 Thank you for choosing SINCLAIR Air conditioner, For correct use, please keep this owner's manual carefully for consultation. -
Page 24: Environmental Information
ENVIRONMENTAL INFORMATION This unit contains fluorinated gases with greenhouse effect covered by the Kyoto Protocol. Maintenance and disposal must be carried out by qualified persons only. Refrigerant gas R410A, GWP = 1730 EXTRA REFRIGERANT CHARGE Pursuant to Regulation EC 842/2006 on certain fluorinated greenhouse gases, in case of extra refrigerant charge, it is compulsory to: Fill in the label accompanying the unit inserting the factory quantity of refrigerant charge (see the technical label), the extra refrigerant charge and the total charge.
Need help?
Do you have a question about the ASH-09AQ and is the answer not in the manual?
Questions and answers