Table of Contents
Advertisement
Quick Links
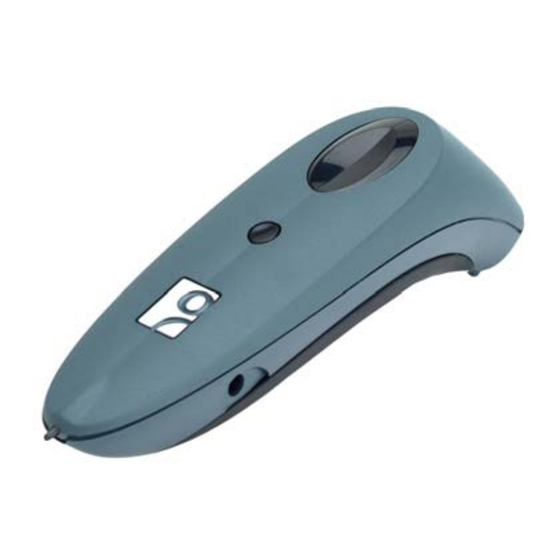
Cordless Hand Scanner Series 7
®
with Bluetooth
Featuring a Bluetooth enabled bar code scanner and SocketScan
software for wirelessly adding bar code scanning to Bluetooth
enabled mobile computers running:
•
Windows Mobile 2003, 2003SE or 5.0
•
Palm OS 5.2 or later
•
Windows XP or XP Tablet Edition
User's Guide
Wireless Technology
Advertisement
Table of Contents

Subscribe to Our Youtube Channel
Related Manuals for Socket CX2821-656


Summary of Contents for Socket CX2821-656
- Page 1 Cordless Hand Scanner Series 7 ® with Bluetooth Wireless Technology Featuring a Bluetooth enabled bar code scanner and SocketScan software for wirelessly adding bar code scanning to Bluetooth enabled mobile computers running: • Windows Mobile 2003, 2003SE or 5.0 • Palm OS 5.2 or later •...
-
Page 2: Copyright Notice
Document # 6410-00233 H Copyright Notice Copyright © 2006 Socket Communications, Inc. All rights reserved. Socket, the Socket logo and Battery Friendly are registered trademarks of Socket Communications, Inc. Cordless Hand Scanner with Bluetooth Wireless Technology, SocketScan, Mobility Friendly, Connect!Agent, and Error Proof Protocol are trademarks of Socket Communications, Inc. -
Page 3: Table Of Contents
Table of Contents COPYRIGHT NOTICE 1 | INTRODUCTION About the Software About Combining Scanning with Bluetooth System Requirements Package Contents Product Registration Hardware Features 2 | HARDWARE PREPARATION Installing Batteries and Attaching the Tether Charging the Scanner 3 | SETUP FOR WINDOWS MOBILE STEP 1: Install the Software STEP 2: Configure Scanner Settings STEP 3: Connect CHS to Host Device with Bluetooth... - Page 4 APPENDICES A | SPECIFICATIONS B | SAFETY AND USAGE TIPS C | BAR CODE LABEL SPECIFICATIONS D | ENABLING OR DISABLING SYMBOLOGIES E | DECODE ZONE F | TROUBLESHOOTING G | TECHNICAL SUPPORT LIMITED WARRANTY REGULATORY COMPLIANCE...
-
Page 5: Introduction
1 | Introduction If you need to collect bar coded data but don't want to be tied to your mobile or desktop computer, Socket's Cordless Hand Scanner (CHS) Series 7 with Bluetooth wireless technology is just what you're looking for. This... -
Page 6: About Combining Scanning With Bluetooth
The most likely source of errors in any cordless scanning system is not in the scanning and decoding process, but in the transmission of the data to the host. For this reason, the Cordless Hand Scanner features Socket’s exclusive Error Proof Protocol (patent pending), which ensures that scanned data is correctly received by the host computer and allows for real- time validation of data and notifies the user in case of errors. -
Page 7: System Requirements
Any of the following Bluetooth stacks: * − Socket Drakar v1.4 (from Socket SDIO and CF Connection Kits) − IVT BlueSoleil v1.4.7 or later (from Socket CF Connection Kit with Adapter or Socket Class 1 USB Adapter) − Broadcom (Widcomm) v1.4 −... -
Page 8: Product Registration
Product Registration Socket highly recommends that all customers register their Socket products. Registered users receive the following benefits: • Priority for technical support • Special offers for future products and upgrades • The latest new product information. Register online at: www.socketcom.com/prodreg... - Page 9 Status Indicator LED LED Activity Meaning Bluetooth radio is on, but not 1 blink per second Bluetooth connected. Status Bluetooth radio is on, connection (Blue) 1 blink per 5 seconds established. Good Read Data successfully scanned and Green (Green) transmitted to host device. Less than 20% of battery life 1 blink per second Battery...
-
Page 10: Hardware Preparation
2 | Hardware Preparation Installing Batteries and Attaching the Tether 1. Use a coin or screwdriver to unlock and remove the battery cover. Turn the lock underneath the scanner to a horizontal position. Remove the casing. 2. Install the batteries in opposite directions, as indicated by the positive symbols. -
Page 11: Charging The Scanner
Charging the Scanner Use the included AC adapter to charge the Cordless Hand Scanner. The scanner’s NiMH batteries must be charged for at least 4 hours before the first use. The Battery Status LED will emit a solid red light while charging, and turn off when the batteries are fully charged. -
Page 12: Setup For Windows Mobile
3 | Setup for Windows Mobile This chapter explains how to install and use the Cordless Hand Scanner (CHS) with a Bluetooth enabled Pocket PC or other mobile computing device running Windows Mobile 2003, 2003SE or 5.0. Before you begin the instructions in this chapter, make sure you have installed the batteries (and tether, if desired), and charged the scanner, as described in Chapter 2, “Hardware Preparation.”... -
Page 13: Step 1: Install The Software
STEP 1: Install the Software You must install SocketScan, but installing Connect!Agent is optional. Should I install Connect!Agent? Connect!Agent simplifies Bluetooth by automatically setting up and managing the Bluetooth connection. It runs in the background and requires no interaction from the user. If you choose not to install Connect!Agent, you will need to use your Bluetooth software to manually configure and manage the Bluetooth connection. - Page 14 6. The installation wizard will automatically begin. Follow the wizard to install the software. 7. After installing the software, a dialog on your Pocket PC will direct you to soft reset. Tap ok. 8. Remove your device from the cable/cradle and perform a soft reset by pressing the reset button.
-
Page 15: Step 2: Configure Scanner Settings
• Built in: Select if your device has a built-in Bluetooth radio, and you don’t want to use Connect!Agent. Your Bluetooth stack will be reported (e.g., Widcomm). • Socket: Select if using the Socket SD/CF Bluetooth card. CHAPTER 2: SETUP FOR WINDOWS MOBILE... - Page 16 6. Tap on the CS HW tab. Enter the following settings: • Trigger: Select whether you would like the CHS to scan only when a Bluetooth connection to the device is detected. If you require the CHS to detect a Bluetooth connection before each scan, scanning will be a few milliseconds slower.
-
Page 17: Step 3: Connect Chs To Host Device With Bluetooth
Bluetooth serial communication. Refer to the device manual. 4. Tap Start | Programs | SocketScan. Disregard the icons for Socket Trigger RFID, Socket Trigger Scan, and Socket Trigger Select. 5. Tap on the SocketScan icon at the bottom of the screen. In the menu, tap Connect CS. - Page 18 • If you did not install Connect!Agent, your device’s Bluetooth software will search for devices. In the list of found Bluetooth devices, select Socket CHS. The device will connect to the CHS, indicated by a beep. If using the Broadcom (Widcomm) stack, you will be prompted to configure automatic connections.
-
Page 19: Step 4: Scan Data Into Your Application
STEP 4: Scan Data into Your Application 1. Start the Windows application that you want to receive the data (e.g., Excel, Notepad, etc.). Make sure a document or spreadsheet is open. 2. Place the cursor where you want data from the next scan to go. 3. - Page 20 4. After a successful scan, data should appear in your document. For example, after you scan a bar code into a Pocket Excel spreadsheet, data should appear in the first cell. The default “CR” (carriage return) suffix will advance the cursor to the next cell, ready for the next scan. Wait for the “Good Scan”...
-
Page 21: Optional: Select Symbologies
OPTIONAL: Select Symbologies The applet makes it quick and convenient to modify which symbologies you want the scanner to recognize. By default, the scanner is set to recognize nine of the most common symbologies. 1. Tap on the SocketScan icon. In the pop-up menu, tap Symbology Selector... 2. -
Page 22: Optional: Configure Prefix/Suffixes
OPTIONAL: Configure Prefix/Suffixes The SocketScan applet lets you specify prefix and/or suffix characters to be added automatically to the data you scan. This helps to further eliminate manual data entry. 1. Tap on the SocketScan icon. In the pop-up menu, tap Settings. You can configure prefix/suffixes whether or not the CHS is connected to your Pocket PC. -
Page 23: Optional: Run Scan Demo
OPTIONAL: Run Scan Demo Scan Demo makes it easy to determine the symbology, number of characters, and decoded data (in either ASCII or Hex) of any bar code supported by the scanner. This is especially useful if you encounter a bar code that the scanner will not decode by default. -
Page 24: Setup For Palm
4 | Setup for Palm This chapter explains how to install and use the Cordless Hand Scanner (CHS) with a Bluetooth enabled device running Palm OS 5.2 or later. Before you begin the instructions in this chapter, make sure you have installed the batteries (and tether, if desired), and charged the scanner, as described in Chapter 2, “Hardware Setup.”... -
Page 25: Step 1: Install The Software
STEP 1: Install the Software 1. Delete any bar code scanning software already installed in your device, including from other companies. Make sure the software is closed. Tap Home, then tap Menu. In the App menu, tap Delete. Use the utility to delete the software. -
Page 26: Step 2: Connect Chs To Pda With Bluetooth
Scroll down and tap on the SocketScan icon. 3. The main screen of SocketScan will appear, showing a picture of the Socket SDIO In-Hand Scan Card. In the Scanner Device drop-down menu, select Bluetooth CHS. 4. The screen will display a picture of the Cordless Hand Scanner. In the... - Page 27 Tap OK. 6. Your device will begin searching for Bluetooth enabled devices in range. After it finishes searching, select the Socket CHS from the list of discovered devices and tap OK. The Cordless Hand Scanner will appear as Socket CHS [xxxxxx], where the characters in brackets are the last 6 characters of the scanner’s...
- Page 28 8. When the scanner connects to your device, the CHS will beep once. The main screen of SocketScan will also indicate that the scanner is enabled, and the Configure, Symbologies, and Test buttons will appear at the bottom of the screen. If the PDA suspends, the CHS will automatically re-connect once you turn on the PDA again.
-
Page 29: Step 6: Scan Data Into Your Application
STEP 6: Scan Data into Your Application 1. Start the Palm application that you want to receive the data (e.g., Memo). Make sure a document or spreadsheet is open. Note: You cannot scan data into Palm Note Pad, because it is a graphics-based program. - Page 30 3. After a successful scan, data should appear in your document. For example, after you scan a bar code into a Memo, data should appear in the first line. The default “CR” (carriage return) suffix will advance the cursor to the next line, ready for the next scan. Wait for the “Good Scan”...
-
Page 31: Optional: Configure Scan Settings
OPTIONAL: Configure Scan Settings 1. Make sure the main screen of SocketScan reports that the CHS is enabled. Tap Configure. You can configure prefix/suffixes whether or not the CHS is connected to your device. 2. The Configure screen will appear. Enter any settings, as desired: •... - Page 32 • Insert Special: First tap in the Prefix or Suffix field to indicate where you would like to enter special data, such as a date stamp, time stamp, tab, etc. Then tap on the Insert Special drop-down menu and select the type of special data to enter. •...
-
Page 33: Optional: Select Symbologies
OPTIONAL: Select Symbologies The feature makes it easy to modify which symbologies you want the scanner to recognize. By default, the scanner is set to recognize eight of the most common symbologies. 1. In the main screen of SocketScan, tap Symbologies. 2. -
Page 34: Optional: Test Bar Codes
OPTIONAL: Test Bar Codes SocketScan includes a Test feature that makes it easy to determine the symbology, number of characters, and decoded data (in either ASCII or Hex) of any bar code supported by the scanner. This is especially useful if you encounter a bar code that the scanner will not decode by default. -
Page 35: Setup For Windows Xp
5 | Setup for Windows XP This chapter explains how to install and use the Cordless Hand Scanner (CHS) with a Bluetooth enabled computer running Windows XP or Windows XP Tablet Edition. Before you begin the instructions in this chapter, make sure you have installed the batteries (and tether, if desired), and charged the scanner, as described in Chapter 2, “Hardware Setup.”... -
Page 36: Step 1: Install The Software
STEP 1: Install the Software You must install SocketScan, but installing Connect!Agent is optional. Connect!Agent is only compatible with the IVT BlueSoleil and Microsoft XP SP2 Bluetooth stacks. Should I install Connect!Agent? Connect!Agent simplifies the Bluetooth setup and connection process. Once the CHS is turned on and SocketScan is running, Connect!Agent will automatically set up and manage the Bluetooth connection. - Page 37 5. The installation wizard will launch. Follow the wizard to install the software. 6. After software installation, icons for SocketScanXP and Socket CS Connect will appear on your desktop. 7. If desired, install Connect!Agent by opening the Connect!Agent folder in the CD and launching the Connect!AgentXPSetup_S.exe file.
-
Page 38: Step 2: Configure Bluetooth Settings
Bluetooth radio is on but not connected. 2. Insert the Socket card into your computer, using a CF-to-PC Card adapter, or insert the Class 1 USB Adapter into the USB port. 3. Start BlueSoleil. Click on the BlueSoleil icon on your desktop, or click Start | All Programs | IVT BlueSoleil | BlueSoleil. - Page 39 The characters in brackets are the last 6 characters of the scanner’s Bluetooth MAC address. 6. Double-click on the Socket CHS icon to begin the service discovery. After the Serial Port Service icon is highlighted at the top of the screen, right-click on the Serial Port Service icon and click Connect.
- Page 40 Cordless Hand Scanner. Click on the Bluetooth icon in the task tray. In the pop-up menu, click Add a Bluetooth Device. 4. During the device discovery, the Cordless Hand Scanner will appear as Socket CHS [xxxxxx] The characters in brackets are the last 6 characters of the scanner’s Bluetooth MAC address.
- Page 41 Toshiba Bluetooth Stack: These instructions are based on a Motion Computing tablet. Refer to the manual for your Bluetooth hardware/software for specific Bluetooth usage instructions. 1. Turn on the Bluetooth radio of your computer. Tap on the Dashboard icon on the desktop. In the dashboard, check Enable Internal Bluetooth Wireless Radio.
- Page 42 6. In the list of found devices, select Socket CHS [xxxxxx]. Tap Next. 1234 . Tap OK. To indicate 7. If a passkey is requested, enter the default PIN the connection, the CHS will beep once. 8. In the list of device services, select Serial Port. Tap Next.
- Page 43 It is essential to connect to the CHS via Quick Connect because this sets the CHS as your default Bluetooth serial device. 4. During the device search, the CHS will appear as Socket CHS [xxxxxx] The characters in brackets are the last 6 characters of the scanner’s Bluetooth MAC address.
-
Page 44: Step 3: Configure Scanner Settings
2. Tap on the CS tab. Enter the following settings: • Enable CS support: Check this box. IMPORTANT!!! • Bluetooth stack: Select Socket (Connect!Agent) if you want to use it. Otherwise, select your computer’s Bluetooth stack. The Connect!Agent option will only appear if you installed the Connect!Agent software. - Page 45 • Scan only when connected to host, scanning will be a few milliseconds slower. • Good read indication on CS: Select how you would like the CHS to indicate that it has successfully read data. • Auto re-connect: Select the maximum number of attempts and time limit per attempt for the CHS to try to reconnect to your computer in case they are moved out of range from each other.
-
Page 46: Step 4: Start Socketscan And Connect To Chs
STEP 4: Start SocketScan and Connect to CHS 1. If you did not install Connect!Agent start your computer’s Bluetooth software and make sure the Bluetooth radio is turned on. 2. Start SocketScan XP. Click on the icon on the desktop. 3. -
Page 47: Step 5: Scan Data Into Your Application
The task tray icon at the bottom of your screen will change to an image of a scanner to indicate that SocketScan is connected to the CHS. STEP 5: Scan Data into Your Application 1. Start the Windows application that you want to enter scanned data into (e.g., Excel, Notepad, etc.). - Page 48 SocketScan. After the time limit for re-connection attempts has passed, you can click on the Socket CS Connect icon on the desktop to manually initiate re-connection. To end the connection, click on the SocketScan icon and click Disconnect CS.
-
Page 49: Optional: Assign Sound And Prefix/Suffix Settings
OPTIONAL: Assign Sound and Prefix/Suffix Settings You can configure these settings whether or not the CHS is connected to your computer. 1. In SocketScanXP Settings, click on the General tab. 2. Adjust any settings as desired: Good read notification sound: Select which sound you would like your computer to use to indicate good readings of data. -
Page 50: Optional: Configure Advanced Bluetooth Settings
OPTIONAL: Configure Advanced Bluetooth Settings The SocketScanXP utility enables you configure advanced Bluetooth settings of the CHS, including the Bluetooth friendly name and security settings. 1. In SocketScanXP Settings, click on the CS tab. The Trigger and Barcodes tabs will only appear if you are connected to the CHS. - Page 51 CHS Security Settings: Enter a PIN code and/or any authentication or encryption settings. If desired, click Delete Bonding to delete any bonding/pairing information in the CHS. After making any changes, click 6. If you modified any security settings, you will be prompted to turn your CHS off and back on to make the changes take effect.
-
Page 52: Optional: Assign A Trigger Button
OPTIONAL: Assign a Trigger Button The SocketScanXP utility enables you to assign one of your computer’s function keys to trigger the CHS. 1. In SocketScanXP Settings, click on the Trigger tab. The Trigger and Barcodes tabs will only appear if you are connected to the CHS. -
Page 53: Optional: Select Symbologies
OPTIONAL: Select Symbologies The SocketScanXP utility makes it easy to modify which symbologies you want the scanner to recognize and decode. 1. In SocketScanXP Settings, click on the Barcodes tab. The Trigger and Barcodes tabs will only appear if you are connected to the CHS. -
Page 54: Optional: View Version Information
OPTIONAL: View Version Information 1. In SocketScanXP Settings, click on the About tab. The Trigger and Barcodes tabs will only appear if you are connected to the CHS. 2. View the control panel applet (CPL) and CHS firmware version information. Click OK. -
Page 55: A | Specifications
Appendix A Specifications Physical Characteristics Size: 125l x 31h x 35w (mm) 4.9l x 1.2h x 1.4w (in.) Total Mass: approx. 90 g (0.2 lb) Power Source: Two AAA NiMH rechargeable batteries Expected Battery Life with Normal Operation (connected via Bluetooth and minimum 2,000 bar code scans): 8 hours Operating Temp: 32 to 120°F (0 to 50°C) Operating System Support:... - Page 56 Bluetooth Stack Support • Socket Drakar v1.4 (from Socket SD/CF Connection Kit) • IVT BlueSoleil v1.4.7 or greater (from Socket CF + Adapter/USB Connection Kits) • Broadcom (Widcomm) v1.4 • Microsoft Bluetooth stack for Windows Mobile • Microsoft Windows XP SP 2 •...
-
Page 57: B | Safety And Usage Tips
• Treat your product with care. Keep in a clean and dust-free place. • Changes or modifications of this product, not expressly approved by Socket, may void the user’s authority to operate the equipment. Antenna Care Do not place a metallic shield around the Cordless Hand Scanner since it will reduce the radio transmission efficiency. - Page 58 Efficient Use For optimum performance, please make sure that there is no metal surrounding your Cordless Hand Scanner. Driving RF energy may affect some electronic systems in motor vehicles, such as car stereo, safety equipment, etc. Check with your vehicle manufacturer to be sure that the Cordless Hand Scanner will not affect the vehicle’s electronics.
-
Page 59: C | Bar Code Label Specifications
Appendix C Bar Code Label Specifications All bar code symbols/labels should satisfy the appropriate AIM Uniform Symbology Specification. Background Substrate: The bar code symbol should be printed on material (media) that is reflective and has a matte (not glossy) finish. A background diffuse reflectance of at least 70% to 80% is desirable for optimum contrast. -
Page 60: D | Enabling Or Disabling Symbologies
This may make the decoding process slightly longer. • The advanced symbology parameters listed in Table 2 can only be modified by using the SocketScan Advanced Programming Guide or the SocketScan SDK. Check Socket’s website for updates. Table 1. Default Symbologies Scanner Default... - Page 61 Table 2. Other Symbology Parameters Symbology Parameters Scanner Default UPC/EAN/JAN Supplementals Disabled Transmit Check Digit Enabled Bookland EAN Disabled Decode UPC/EAN Supplementals Ignore UPC/EAN Supplemental Redundancy Seven Transmit UPC-A Check Digit Enabled Transmit UPC-E Check Digit Enabled Transmit UPC-E1 Check Digit Enabled Convert UPC-E to A Disabled...
- Page 62 For more information on bar codes, symbologies, labels or other bar code related topics, visit any of the following web sites: a. www.aimglobal.org/technologies/barcode/ b. www.aimglobal.org/aimstore/stackedsymbologies.htm c. www.adams1.com d. www.bizfonts.com e. www.barcode-us.com/info_center/upc.htm (UPC Codes) f. www.barcode-us.com/info_center/bookinfo.htm (Bookland EAN) g. www.dataid.com/bcsymbology.htm h. www.aaabarcodes.com i.
-
Page 63: E | Decode Zone
Appendix E Decode Zone The decode zones for the Cordless Hand Scanner is shown below. The minimum element width (“X Dimension” or bar code “size”) is the width in thousandths of an inch (mils) of the narrowest element (bar or space) in the symbol. -
Page 64: F | Troubleshooting
Appendix F Troubleshooting For help on SocketScan, tap Start | Help on a Pocket PC, or tap on the icon on a Palm device. SYMPTOM I get the “No Scanner Detected” icon in the task tray of my Windows-based mobile computer and can’t trigger the laser or scan any bar codes. - Page 65 SYMPTOM: When I scan a lot of bar codes very fast, the scanner locks up and won’t work for a few seconds. POSSIBLE REASONS SOLUTION You are scanning too fast for the Wait for the confirmation beep Error Proof Protocol to confirm after each scan before you scan a that the mobile computer has new bar code.
- Page 66 POSSIBLE REASONS SOLUTION Some HP iPAQ Pocket PCs are The CHS will not work with your not compatible with the Socket Pocket PC at this time. Cordless Hand Scanner. SYMPTOM Connect!Agent has found multiple CHS devices, and I don’t know which one to choose.
- Page 67 SYMPTOM While scanning with the CHS, I turned off the Pocket PC, or my Pocket PC entered suspend mode. Now the CHS won’t reconnect to my Pocket PC. POSSIBLE REASONS SOLUTION There is a problem with the Soft reset the Pocket PC by Widcomm stack on some Pocket pressing the reset button.
-
Page 68: G | Technical Support
Appendix G Technical Support If you have trouble installing or using the Cordless Hand Scanner with Bluetooth Wireless Technology, contact Socket’s technical support department for assistance. IMPORTANT! To obtain technical support, you must first register your product online at www.socketcom.com/prodreg. -
Page 69: Limited Warranty
Incompatibility is not a defect covered by Socket’s warranty. During the warranty period, Socket will, at its option, repair or replace the defective product at no charge when furnished with proof of retail purchase, provided that you deliver the product to Socket or to an authorized Socket Service Center. -
Page 70: Limited Software Warranty
90 days from the date of delivery of the SOFTWARE. CUSTOMER REMEDIES. SOCKET’S entire liability and your exclusive remedy shall be, at SOCKET’S option, either (a) return of the price paid or (b) replacement of the SOFTWARE which does not meet SOCKET’S Limited Warranty and which is returned to SOCKET with a copy of your receipt. -
Page 71: Regulatory Compliance
Regulatory Compliance The Socket Cordless Hand Scanner is designed to be compliant with the rules and regulations in locations where they are sold and will be labeled as required. This product is type approved — users are not required to obtain license or authorization before using. - Page 72 This equipment generates and radiates radio-frequency energy. To comply with FCC RF exposure compliance requirements, the following antenna installation and device operating configurations must be satisfied: (1) Users are not permitted to make changes or modify the system in any way, and (2) connecting external antennas to the Cordless Hand Scanner is prohibited.
- Page 73 European Normes (EN), as follows. Amendments to these Directives or ENs are included: Normes (EN), as follows: Applicable Directives: • Radio and Telecommunications Terminal Equipment Directive 1999/5/EC • Low Voltage Directive 73/23/EEC Applicable Standards: • EN 55 022 – Limits and Methods of Measurement of Radio Interference Characteristics of Information Technology Equipment.
- Page 74 Battery Warning: • Your device contains a rechargeable NiMH battery. Never throw the battery into a fire, as that could cause the battery to explode. • Never short-circuit the battery by bringing the terminals in contact with another metal object. This could cause personal injury or a fire, and could also damage the battery.
- Page 75 © Socket Communications, Inc. 5/2006 Printed in U.S.A.
Need help?
Do you have a question about the CX2821-656 and is the answer not in the manual?
Questions and answers