Table of Contents
Advertisement
Advertisement
Table of Contents

Subscribe to Our Youtube Channel
Related Manuals for ENHANCED VISION DaVinci Pro


Summary of Contents for ENHANCED VISION DaVinci Pro
- Page 1 User Manual...
- Page 2 Prior to using this system, please carefully review and follow the instructions provided within this booklet. Your DaVinci Pro is ready to use right out of the box. By reviewing all the DaVinci Pro features and controls before use and following the directions carefully, you’ll be able to enjoy all the great benefits from your purchase.
- Page 3 FCC COMPLIANCE NOTICE This device complies with Part 15 of the FCC Rules. Operation is subject to the following two conditions: (1) This device may not cause harmful interference, and (2) this device must accept any interference received, including interference that may cause undesired operation. This equipment has been tested and found to comply with the limits for a Class B digital device, pursuant to Part 15 of the FCC Rules.
-
Page 4: Table Of Contents
Using DaVinci Pro OCR/Text to Speech ........ -
Page 5: Safety And Care
Precautions for Use • Follow all warnings, cautions, and instructions marked on the product. • Use DaVinci Pro on a stable, level surface such as a solid desk or table, according to its intended design specifications. • Avoid placing DaVinci Pro on an unstable table, cart or stand. It may fall causing serious damage to the unit or bodily injury. - Page 6 • Disconnect and secure all power and video cables before moving the unit. • Carry the unit only by the recessed handle located on the back. Do not carry DaVinci Pro by the Camera Arm. (See Figure 1 Safe Transport Page 10)
- Page 7 5 seconds. • Ensure that your DaVinci Pro is completely OFF before cleaning. • Clean DaVinci Pro with a soft dry cloth or an electrostatic dusting cloth. DO NOT use liquid cleaners on its plastic surfaces.
- Page 9 8. Control Console & Console Cover: This allows you to control DaVinci Pro functions. Can be used in cover on or cover off configuration. *Must be plugged in to use DaVinci Pro and have access to the menu items for OCR/Text-To- Speech 9.
-
Page 10: Setting Up Davinci Pro
DaVinci Pro unit by the camera arm. Gently place it on the table or desk (see Figure 1 Safe Transport). 2. Connect the Control Console cord to either of the two USB ports on the back of your DaVinci Pro, (See Figure 4 Rear Panel Connections). Figure 1 Safe Transport 3. - Page 11 Using DaVinci Pro for the First Time DaVinci Pro is a CCTV & OCR product that can function in a variety of modes. The unit consists of the Built in Monitor, Cameras and Mechanical assembly. The OCR & CCTV camera structure can be moved or tilted depending on your target.
- Page 12 DaVinci Pro Basic CCTV Control Console Zoom Wheel Brightness Color Mode Volume Markers Find See the following Page for Basic Console Controls in Detail...
- Page 13 BASIC CCTV CONTROL CONSOLE BUTTONS DEFINED 1. Find – Press and Hold to activate the “Find” feature which will minimize your magnification level. When you release the button it will return to your previous magnification level. You use this feature to “Find” your target easily which can sometimes be challenging at higher magnification levels.
- Page 14 DaVinci Pro Advanced CCTV Control Console Zoom Wheel Color Mode Brightness Volume Markers Find Library See the following Page for Advanced Console Controls in Detail...
- Page 15 ADVANCED CCTV CONTROL CONSOLE BUTTONS DEFINED 1. Find – Press and Hold to activate the “Find” feature which will minimize your magnification level. When you release the button it will return to your previous magnification level. You use this feature to “Find” your target easily which can sometimes be challenging at higher magnification levels.
-
Page 16: Davinci Modes Overview
DaVinci Modes Overview DaVinci Modes Davinci Pro has two main “Modes” of operation that can be switched/toggled by pressing the CCTV/OCR Front Panel Center Button which is shown below. Figure 6 CCTV/OCR Toggle CCTV Mode The CCTV Mode is the default mode that will display immediately after you power the device on. -
Page 17: Using Davinci Pro In Cctv Mode
The image will then be viewable on the LCD Monitor. Figure 7 Range of Motion DaVinci Pro LCD is mounted on to a bracket that allows the user to tilt the screen to adjust for the best viewing position. Choose an angle or position that is most... - Page 18 This makes it ideal for classroom use. When the camera is rotated downward, “Desktop” is announced. DaVinci Pro can slide freely, left or right, along the specially designed bracket mechanism. It is best to close the Close-up Lens when objects are placed 12”-19”...
- Page 19 Distance Viewing Mode The camera can rotate forward to capture people, objects and scenery. “Far” is announced when changing to this viewing angle. Be sure to open the Close-up Lens for Distance Viewing (Figure 8 Opening Close-Up Lens). Figure 8 Opening Close-Up Lens This Distance mode enables magnification for objects when viewing at a distance.
- Page 20 “Self” is announced by the device when the orientation is changed. In this position, you can use DaVinci Pro to help you put on make-up, shave or perform other personal hygiene. For optimum clarity, use the Close-up Lens and position yourself between 7.5”-22”...
-
Page 21: Adjusting Magnification
DaVinci Pro offers a large range of magnification capabilities. The following directions can be used with the DaVinci Pro Front Panel Controls or the Control Console. To adjust the magnification turn the zoom wheel located on the Control Console, or Front Panel, until you reach the desired magnification. -
Page 22: Viewing Modes
Changing the Viewing Mode DaVinci Pro was designed to provide optimum viewing for people with certain visual conditions by offering a range of choices in both text and background colors. Press the [Mode] button located on the Front Panel, or the [Mode Up/Down] on the Control Console, to cycle between Full Color, Black and White, Enhanced Positive, Enhanced Negative, and up to 5 of your favorite color select modes. - Page 23 Factory Default Color 2 In factory default this mode provides a black background with yellow text. To change this mode to any of the 28 available please review page 40 under preferred color modes. Factory Default Color 3 In factory default this mode provides a yellow background with blue text. To change this mode to any of the 28 available please review page 40 under preferred color modes.
- Page 24 1. Press the “[Find/Enter] and [Mode]” on the Control Console, to enter the Menu. 2. Enter into the Menu >> User Settings >> Display and ensure your desired “Markers Setting” are selected. Press the [Find/Enter] button on the DaVinci Pro Front Panel, or Control Console, to select your options.
- Page 25 Adjusting the Volume 1. On the Control Console you can turn the [Volume Wheel] (Left EDGE of Console) to increase or decrease the volume during OCR Readback. Figure 12 Volume Wheel 2. Optionally it can be adjusted via the Audio Sub Menu in the system Menu.
- Page 26 VGA Toggle At the back of DaVinci Pro is a VGA port which allows for a computer or tablet signal to be attached to the DaVinci Pro display (additional peripherals may be required). This port makes it possible to use the DaVinci Pro display as a computer monitor to save desk space.
-
Page 27: Davinci Pro Console Configuration
& “Advanced”. These two control methods are changed by taking the control console cover and either placing it onto the console or removing it. DaVinci Pro will detect the change and you will notice accessibility of certain buttons and features for your DaVinci Pro will also change when the Cover is ON OR the Cover is OFF. - Page 28 Basic Controls One of the great features of DaVinci Pro is the ability to make the product simple to use. This is achieved by placing the console cover over DaVinci Pro (demonstrated in the “Basic Controls Enabled” figure shown to the right). The OCR button configuration...
- Page 29 DaVinci Pro Basic OCR Control Console Zoom Wheel Pause/Play Color Mode Voice Speed Volume Capture See the following Page for Basic Console Controls in Detail...
- Page 30 BASIC OCR CONTROL CONSOLE BUTTONS DEFINED 1. Capture – While in OCR mode press this button to capture an Image for Optical Character Recognition (OCR). Device will begin reading back to you. Press again to return to OCR mode. 2. Zoom Wheel – Turn clockwise/counter-clockwise to increase/decrease the zoom level.
- Page 31 DaVinci Pro Advanced OCR Control Console Zoom Wheel Brightness Mode OCR / Capture Voice Speed Volume Find/Enter Next Line Previous Line Library Save Pause/Play See the following Page for Advanced Console Controls in Detail...
- Page 32 1. Brightness – When in OCR mode and viewing the guide frame, press Up/Down to increase/decrease brightness. 2. Zoom Wheel – Turn clockwise/counter-clockwise to increase/decrease the zoom level (Zoom is Possible only while in OCR Readback) 3. Mode – Press Mode Up/Down to toggle through different color viewing modes. 4.
-
Page 33: Using Davinci Pro Ocr/Text To Speech
Using DaVinci Pro OCR/Text-To-Speech Mode Using the OCR Mode DaVinci Pro is switched from CCTV Mode to OCR Mode by pressing the Center Knob on the Front Panel Shown below. The device will request that you place your target document within the “Guide Frame”... - Page 34 OCR. 4. After DaVinci Pro has completed the processing step it will begin to read the document aloud. You will be able to make various adjustments to your OCR Read-back features including Volume, Color Mode, Reading Speed and more.
- Page 35 OCR Readback & Text-to-Speech (TTS) Modes Basic Page-Mode (Basic mode only) When the console is set to basic mode the page will be displayed as it appears in the guide frame during OCR Readback. The word highlight will be displayed at the current reading position and all of the Basic OCR Navigation features will be available.
-
Page 36: Davinci Pro System Menu Overview
DaVinci Pro System Menu Overview System Menu Once DaVinci Pro has been set up and turned on, you have the option to personalize your DaVinci Pro settings to your own personal preferences. While in CCTV Mode press [Mode Up] and [Find/Enter] to access your DaVinci Pro system menu. Then turn the [Zoom Wheel] in single increments to scroll through your available options. - Page 37 Introduction Video An introduction video has been included with your DaVinci Pro that will give you a brief overview of all the features in an easy to view format. This allows you to brush up on all of the great features and functions available with...
-
Page 38: User Settings Menu
User Settings The User Settings Menu contains all of the configurable options to fine tune your user experience which is divided into 4 Sub-Menus. Use Find/Enter Key & Zoom Wheel to navigate and select while in these menus. User Settings Adjusting Audio Settings The Audio Submenu allows you to set your audible features and preferences. - Page 39 Sounds – This Sub-Menu has 3 items where you can turn on or off the following: a. All Sounds (ON/OFF) – This Enables or Disables Button Clicks and Chime Sounds. b. Button Clicks (ON/OFF) – This Enables or Disables the Button Click Sound exclusively. c.
- Page 40 Display Features The User can select their preferred display and visual settings using this menu. Display Settings control all graphical user interfaces, icons and visuals that can be viewed on DaVinci Pro and consists of the following options: Screen Messages (ON/OFF) – these are all system and software notifications, warnings and alert messages that are displayed to inform the user of various conditions such as when lights are turned on “Lights ON”...
- Page 41 With ‘Exit’ highlighted press [Find/Enter] to return to normal operation. DaVinci Pro will announce the current time if it is enabled in the audio settings. OCR Text Recognition Settings Guide Frame – This is the color of the boundary while in OCR Mode.
-
Page 42: Product Settings Menu
Set System to 50/60 Hz This configures the light frequency for your locale and the environment in which you are using DaVinci Pro. If you notice any visible flicker in the live image you may need to adjust to 50 or Extended Zoom Levels The user has the option to select extended magnification levels which adds the 77.0x... - Page 43 Screensaver Mode. The Options are 5, 10, 20 & 30 minutes. • Off – This enables or disables image display on the screensaver and displays a blank screen. • Company Logo – This enables or disables the Enhanced Vision animated Logo as a screensaver.
-
Page 44: Factory Settings
This menu is used to check the status and revision numbers of your device or to make it “Factory Fresh” in regards to the original configuration at the time it left the Enhanced Vision Factory. Product Information This submenu contains important system information such as the Software Version, Language Group, Product Number etc. -
Page 45: Library Menu
Library Menu The Library function stores all of your saved pictures, pages and books. To enter into the library you may do so via the system menu, CCTV mode or OCR mode by pressing the “Library” button on the advanced control Console. - Page 46 Library Sub-Menus When you navigate to the Library Menu you will be provided with Sub Menus for Pictures and Documents. Selecting “Pictures” takes you to the Display Display List whereas selecting “Documents” will take you to the Pages and Books Sub Menu. Pictures Documents Documents Sub-Menus...
- Page 47 Library Features in depth Navigating DaVinci Pro Display List Once you enter your library you will enter the “Display List” which will show you a preview of your Book, Page or Picture. Use the [Next Line] or [Previous Line] to cycle through all of your saved documents.
- Page 48 Navigating A Book (Next and Previous Pages) In order to navigate all the pages in a book you will need to utilize the following shortcut to simulate turning the page. This is done by Pressing and Holding the [Pause/Play] button and then pressing the [Next] button to go forward one page or [Previous] button to return one page.
-
Page 49: Saving And Downloading
Saving/Downloading Files to USB Drive DaVinci Pro has the option to download your files and documents to a USB Flash drive. It is mandatory that you connect a USB Flash Drive to the available empty USB port in the back of your DaVinci Pro. -
Page 50: Deleting Images
Deleting Images DaVinci Pro has the option to delete your files and documents from the internal storage system There are three different ways to delete files that are listed below along with the instructions for each method. • Delete Single File – Delete one file at a time as selected by the user. -
Page 51: Help Menu
Help Menu The Help Menu Contains a list of all of the available shortcuts and key presses to access your DaVinci Pro features. This is a Quick Start Reference with both Simple and Advanced references mapped in sufficient detail for you to be able to pick up using the device right away. -
Page 52: Power States
Shut Down When your DaVinci Pro is not in use you may want to Power it OFF. Placing your device into a full shutdown saves the most power but takes a little longer to start up when compared with Standby. -
Page 53: Tips And Tricks
User Menus -DaVinci Pro is a feature rich system that comes with a lot of configurable options. You can customize your User Interface, System Sounds or System Display items to suit your preference. Once you are familiar with the system try changing or configuring these options to develop the... -
Page 54: Troubleshooting, Specifications & Warranty Information
-Make sure the power supply from DaVinci Pro is securely connected to a working outlet. Push the Power button on DaVinci Pro’s Front Panel. A blue light near the Power button, and blue Control Console LED, should illuminate indicating the power is turned on. - Page 55 • Storage/transport temperature range: 0-60°C / 32-140°F Warranty: 2 Years *Product specifications subject to change without notice. OCR Storage Capacity •The file size of an OCR scan varies based on text density. 1000 full page scans at minimum can be stored on DaVinci Pro.
- Page 56 Enhanced Vision products are designed to give you the highest quality image, convenient features, ease of use and reliable service. DaVinci Pro has been inspected and tested prior to shipping. Enhanced Vision warrants DaVinci Pro against defects in material and workmanship under normal use for two years from the date of original purchase.
-
Page 57: Other Products From Enhanced Vision
OTHER ENHANCED VISION PRODUCTS Pebble-mini Pebble HD... -
Page 58: Other Enhanced Vision Products
OTHER ENHANCED VISION PRODUCTS 20” LCD: 1.9x (min) to 51.2x (max) 22” LCD: 2.1x (min) to 55.9x (max) 24” LCD: 2.3x (min) to 61.2x (max) - Page 59 OTHER ENHANCED VISION PRODUCTS Amigo HD...
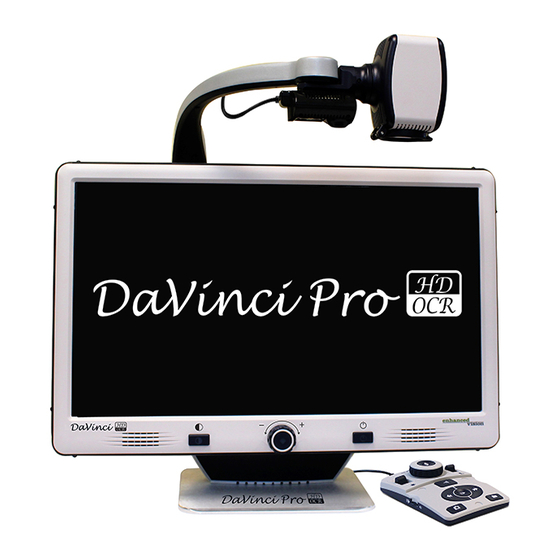
- Page 60 DaVinci Pro is a high definition desktop CCTV – featuring Full Page text to speech (OCR). DaVinci Pro will read any printed text aloud with just the push of a button. Listen or Read along. For more information, Please visit www.enhancedvision.com.
Need help?
Do you have a question about the DaVinci Pro and is the answer not in the manual?
Questions and answers