Advertisement
Advertisement
Table of Contents

Related Manuals for Pioneer KJR-12B/DP(T)-F-1


Summary of Contents for Pioneer KJR-12B/DP(T)-F-1
-
Page 1: Installation Manual
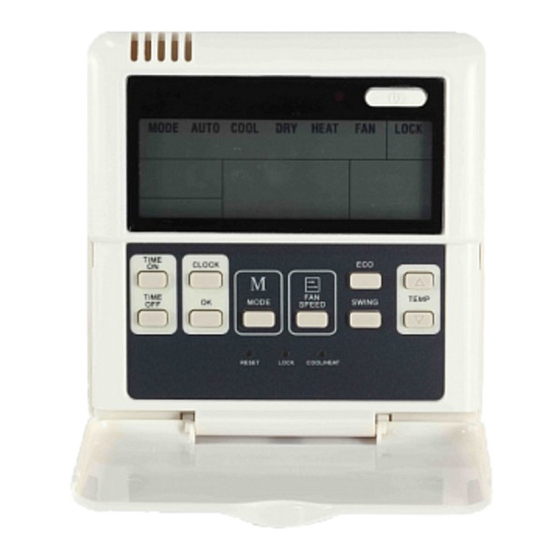
WIRED REMOTE CONTROLLER Installation Manual MODEL: KJR-12B/DP(T)-F-1 KJR-12B/DP(T)-E-1A KJR-12B/DP(T)-E-2 INSTALLATION MANUAL IMPORTANT NOTE: Read this manual carefully before installing or operating your wired remote controller. Make sure to save this manual for future reference. - Page 2 Wall-Mounted Remote Control Wiring Table of Contents WARNING Wall-Mounted Remote Control Wiring.......1 The wiring should adapt to the wire control current. • Wall-Mounted Remote Control Installation ......6 Otherwise, electric leakage or overheating may occur and result in fire. The specified cables shall be used in the wiring. No •...
- Page 3 An overview of the wall-mounted remote control wire outlet Top side wire outlet 2. Installation Diagram Connect the wire from the display panel of the indoor Right side unit to a connecting cable. Then connect the other side Left side wire outlet wire outlet of the connecting cable to the remote control.
- Page 4 NOTE: DO NOT allow water to enter the remote control. Use the trap and putty to seal the wires. Cut three holes for wire outlet Putty Trap Putty Putty Trap Fig. 5 Trap Embedded switch box wiring Wiring through the wall Fig.
- Page 5 Preparation Before Installation Wall-Mounted Remote Control Installation 1. Ensure you have the following parts Table 1 Name Quantity Remarks WARNING Remote Control DO NOT operate the unit with wet hands, as this could M4X20 (For mounting on the wall) Screws lead to electrical shock.
- Page 6 Installation Method Back plate 1. Remove the top panel of remote control Insert a screwdriver into the two slots at the bottom of the remote control to pop off the top panel. Screws (M4×20) Fig. 9 b. For flush mounting, fasten the back plate to the switch box with 2 screws (M4×25), and fasten the switch box to the wall with 1 screw (M4×20).
- Page 7 3. Set the time and date QSXI-007AEN The remote control has a small, built-in battery that allows the time and date to be set. That way the remote control can keep time even during a power outage. When the unit displays an incorrect time and date the batteries need to be replaced.
Need help?
Do you have a question about the KJR-12B/DP(T)-F-1 and is the answer not in the manual?
Questions and answers