
Related Manuals for Pioneer EU-OSK105


Summary of Contents for Pioneer EU-OSK105
- Page 1 "SMART KIT" WIFI EU-OSK105 Manual de instalación y usuario Installation and owner's manual CL09001...
- Page 2 ....................................................
-
Page 3: Table Of Contents
MANUAL DE INSTALACIÓN Y USUARIO ÍNDICE ESPECIFICACIÓN ..........1 PRECAUCIONES ..........1 DESCARGAR E INSTALAR APLICACIÓN ..2 INSTALACIÓN .............3 REGISTRO DEL USUARIO .........4 CONFIGURACIÓN DE RED .........6 CÓMO USAR LA APLICACIÓN ......17 FUNCIONES ESPECIALES .......19 DECLARACIÓN DE CONFORMIDAD Por la presente, declaramos que este "Smart kit" (módulo WIFI) cumple con los requisitos esenciales y otras disposiciones pertinentes de la Directiva 2014/53/UE. -
Page 4: Especificación
1 ESPECIFICACIÓN Modelo: EU-OSK105 Estándar: IEEE 802. 11b/g/n Tipo de antena: Antena impresa de PCB Banda de frecuencia: 2400-2483,5MHz Temperatura de operación : 0 °C~45 °C/32 °F~113 °F Humedad de operación: 10%~85% Potencia de entrada: 5V CC/300mA Potencia TX máxima: <20dBm 2 PRECAUCIONES ●... -
Page 5: Descargar E Instalar Aplicación
- Debido a diferentes situaciones de red, a veces aparece tiempo de espera para la petición, en este momento, es necesario ajustar la configuración de red de nuevo. - El sistema de Aplicación está sujeto a actualizarse sin aviso previo para mejoramiento de funciones del producto. El proceso de configuración de red actual podrá... -
Page 6: Instalación
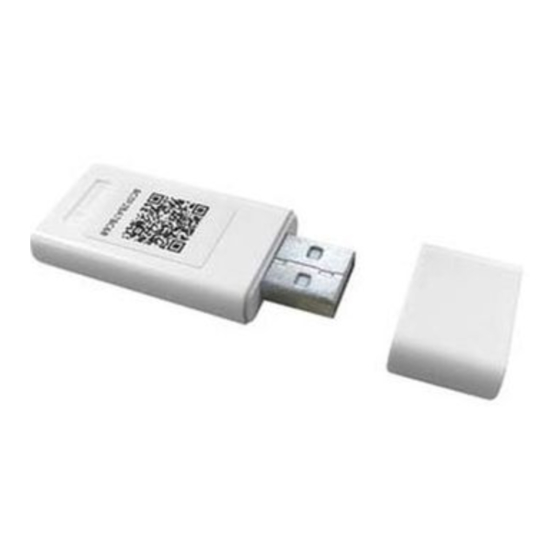
INSTALACIÓN ① Retire la tapa protectora del smart kit (módulo WIFI) ② Abra el panel frontal e inserte el smart kit (módulo WIFI) en el puerto reservado en la placa display. Nota: Es necesario abrir el compartimento donde se ubica la placa display. ③... -
Page 7: Registro Del Usuario
5 REGISTRO DEL USUARIO ● Asegúrese de que el móvil esté conectado al enrutador inalámbrico. Y el enrutador inalámbrico ya se ha conectado a Internet antes del registro de usuario y la configuración de la red. ● Es mejor iniciar sesión en el correo electrónico y activar la cuenta de registro haciendo clic en el link en caso de que olvide la contraseña. - Page 8 ② Ingrese la dirección del correo electrónico y la contraseña, luego haga clic en "Register (Regis- trar)"...
-
Page 9: Configuración De Red
6 CONFIGURACIÓN DE RED Precauciones Es necesario que el dispositivo móvil no reconozca otra red memorizada y asegurarse de que el dispositivo Android o iOS sólo se conecta a la red WIFI que desea conectar al equipo. Asegúrese de que la función WIFI del dispositivo Android o iOS funciona correctamente y puede volver a conectarse automáticamente a su red WIFI original. - Page 10 Configuración de red a través de escaneo de Bluetooth Nota: Asegúrese de que el bluetooth de su dispositivo móvil esté funcionando. ① Presione “+ Add Device ② Presione “Scan for (+Agregar Dispositivo)" nearby devices (Escanear dispositivos cercanos)”...
- Page 11 ③ Espere a que encuentren ④ Seleccione Wi-Fi doméstico, ingrese la los dispositivos contraseña inteligentes, luego haga clic para agregarlos...
- Page 12 ⑤ Espere a que conecte a la ⑥ Configuración correcta, puede modificar el nombre predeterminado.
- Page 13 ⑦ Puede seleccionar un ⑧ La configuración de la nombre existente o red Bluetooth se realizó personalizar uno nuevo correctamente, ahora puede ver el dispositivo en la lista.
- Page 14 Configuración de red por tipo de dispositivo seleccionado: ① Si la configuración de la red bluetooth tiene error, seleccione el tipo de dispositivo.
- Page 15 ② Siga los pasos anteriores para entrar en el modo "AP".
- Page 16 9:41 Choose Method Scan QR code on the unit Note:Wait5-10 seconds while your device is in AP mode before scanning the QR code. Manual Setup ③ Seleccione el método de ④ Seleccione el método configuración de red. de "Scan the QR code (Escanear código QR)".
- Page 17 ⑤ Al seleccionar el ⑥ Ingrese la contraseña. método “Manual Setup (Configuración Manual)”. Conecte a la red inalámbrica (iOS)
- Page 18 ⑦ La configuración de la red ⑧ Una vez exitosa la configuración, puede ver es exitosa. el dispositivo en la lista.
- Page 19 NOTA: ● Al finalizar la configuración de red, la APP mostrará palabras clave de éxito en la pantalla. ● Debido a diferentes entornos de Internet, es posible que el estado del dispositivo siga mostrando "desconectado". Si ocurre esta situación, es necesario extraer y actualizar la lista de dispositivos en la APP y asegurarse de que el estado del dispositivo se convierte en "conectado".
-
Page 20: Cómo Usar La Aplicación
7 CÓMO USAR LA APLICACIÓN Asegúrese de que tanto el dispositivo móvil como el aire acondicionado estén conectados a Internet antes de utilizar la aplicación para controlarlo, siga los siguientes pasos: ① Haga clic "Sign in ② Seleccione el aire (Registrarse)"... - Page 21 ③ Así, el usuario podrá controlar el encendido/ apagado del aire acondicionado, el modo de operación, la temperatura, la velocidad del ventilador y otros. NOTA: No todas las funciones de la aplicación están disponibles para el aire acondicionado. Por ejemplo: Funciones ECO, Turbo (Turbo) y Swing (Oscilar).
-
Page 22: Funciones Especiales
8 FUNCIONES ESPECIALES „ Programación El usuario puede realizar una cita semanalmente para encender o apagar el aire acondicionado en tiempo especificado. También se puede seleccionar circulación para controlar el aire acondicionado bajo el control programado cada semana. - Page 24 „ Sueño El usuario puede personalizar su propio sueño cómodo mediante ajuste de temperatura objetivo.
- Page 25 „ Verificar El usuario puede verificar el estado de funcionamiento del aire acondicionado con esta función. Al terminar el procedimiento, se visualizará ítems normales, ítems anormales e información detallada.
- Page 26 „ Compartir dispositivo El aire acondicionado puede ser controlado por múltiples usuarios al mismo tiempo mediante la función Compartir dispositivo. ① Haga clic en Share QR ② Visualice código QR. code (Compartir código QR) ”...
- Page 27 ③ Los otros usuarios ④ Ahora los demás pueden deben iniciar sesión en agregar el dispositivo la aplicación "net home plus" compartido. primero, luego haga clic en "Add Share Device (Agregar Dispositivo Compartido)" en su móvil, y pídalos a escanear el código QR.
- Page 28 PRECAUCIONES: Para modelos EU-OSK105: ID de FCC:2AS2HMZNA21 IC:24951-MZNA21 Este dispositivo cumple con la Parte 15 de las Reglas FCC y contiene transmisores / receptores libres de licencia que cumplen con los RSS de Innovación, Ciencia y Desarrollo Económico de Canadá que no exigen la licencia.
- Page 29 NOTA: Este equipo ha sido probado y considerado acorde a los límites de un dispositivo digital de Clase B, en virtud de la parte 15 de las Reglas de la FCC. Estos límites están diseñados para proporcionar protección razonable contra interferencias perjudiciales en una instalación residencial.
- Page 30 El fabricante no se hace responsable en ningún caso de problemas causados por Internet, el router Wifi ni los terminales móviles. Debe contactar a los proveedores de estos servicios en caso de que tengan fallos.
- Page 31 INSTALLATION AND OWNER'S MANUAL CONTENTS SPECIFICATION..........PRECAUTIONS ..........DOWNLOAD AND INSTALL APP....INSTALL THE SMART KIT....... USER REGISTRATION ........NETWORK CONFIGURATION......HOW TO USE APP..........SPECIAL FUNCTIONS........DECLARATION OF CONFORMITY Hereby, we declare that this Smart kit is in compliance with the essential requirements and other relevant provisions of Directive 2014/53/EU.
-
Page 32: Specification
SPECIFICATION Model: EU-OSK105 Standard: IEEE 802. 11b/g/n Antenna Type: Printed PCB Antenna Frequency Band: 2400-2483.5MHz Operation Temperature:0 C~45 C/32 F~113 F Operation Humidity: 10%~85% Power Input: DC 5V/300mA Maximum TX Power: <20dBm PRECAUTIONS Applicable system: iOS, Android. Please keep you APP up to date with the latest version. -
Page 33: Download And Install App
Due to different network situation, sometimes, request time-out could happen, thus, it is necessary to do network conf iguration again. The APP system is subject to update without prior notice for product function improvement. The actual network configuration process may be slightly different from the manual, the actual process shall prevail. -
Page 34: Install The Smart Kit
INSTALL THE SMART KIT(wireless module) Remove the protective cap of the smart kit (wireless module) Open the front panel and insert the smart kit (wireless module) into the reserved interface. Attach the QR code packed with Smart kit (wireless module) to the side panel of the machine, ensure it is convenience to be scanned by the mobile phone. -
Page 35: User Registration
USER REGISTRATION Please ensure your mobile device is connected to Wireless router. Also, the Wireless router has already connected to Internet before doing user registration and network configuration. It is better to log in your email box and active your registration account by clicking link in case you forget the password. - Page 36 2 Enter your email address and password, and then click " Register "...
-
Page 37: Network Configuration
NETWORK CONFIGURATION Cautions It is necessary to forget any other around network and make sure the Android or i OS device just connect to the Wireless network you want to configure. Make sure the Android or i OS device Wireless function works well and can be connected back to your original Wireless network automatically. - Page 38 Network configuration by Bluetooth scan Note: Make sure the bluetooth of your mobile device is working. Press “Scan for nearby Press “ + Add Device ” devices”...
- Page 39 Select home Wi-Fi, Wait smart devices to find, enter the password then click to add it...
- Page 40 Configuration Success, Wait connecting to the you can modify the default network name.
- Page 41 You can choose an Bluetooth network existing name or configuration is successful, customize a new name. now you can see the device in the list.
- Page 42 Network configuration by select appliance type : If the bluetooth network cofiguration is failure, please select the appliance type.
- Page 43 please follow the above steps to enter “AP” mode.
- Page 44 horizontal 9:4 1 Choose Method Scan QR code on the unit Note:Wait5-10 seconds while your device is in AP mode before scanning the QR code. Manual Setup Choose the network Choose the “Scan the configuration method. QR code” method. NOTE: Steps are applicable to Android system only.
- Page 45 When choose the “Manual Please enter password Setup” method(Android). Connect to the wireless network(iOS)
- Page 46 Configuration Success, Network configuration is you can see the device successful in the list.
- Page 47 NOTE: When finishing network configuration, APP will display success cue words on the screen. Due to different internet environment, it is possible that the device status still display “offline” . If this situation occurs, it is necessary to pull and refresh the device list on the APP and make sure the device status become “online”...
-
Page 48: How To Use App
HOW TO USE APP Please ensure both your mobile device and air conditioner are connected to the Internet before using app to control the air conditioner via internet, please follow the next steps: S I M ! 2 Choose the air conditioner. 1 Click "... - Page 49 Thus, user can control air conditioners on/off status, operation mode, temperature, fan speed and so on. NOTE: Not all the function of the APP is available on air conditioner. For example: ECO, Turbo, Swing function, please check the user manual to find more information.
-
Page 50: Special Functions
SPECIAL FUNCTIONS Schedule Weekly, user can make an appointment to turn on or off AC on specific time. User also can choose circulation to keep the AC under schedule control every week. - Page 52 Sleep User can customize their own comfortable sleep by setting target temperature.
- Page 53 Check User can simply check the AC running status with this function. When finishing this procedure, it can display the normal items, abnormal items, and detail information.
- Page 54 Share Device The air conditioner can be controlled by multi-users at the same time by Share Device function. 1 Click “Shared QR code” 2 QR code display.
- Page 55 3 The other users must log 4 Now the others can " " in Nethome Plus app add the shared device. " first, then click Add Share " Device on their own mobile, then ask them to scan the QR code.
- Page 56 CAUTIONS: For models of EU-OSK105: FCC ID:2AS2HMZNA21 IC:24951-MZNA21 This device complies with Part 15 of the FCC Rules and it contains licence-exempt transmitter(s)/receiver(s) that comply with Innovation, Science and Economic Development Canada’s licence-exempt RSS(s). Operat ion is sub ject to the f ollow in g two con d ition s: (1) T his d evice may not cause int erferen ce;...
- Page 57 NOTE: This equipment has been tested and found to comply with the limits for a Class B digital device, pursuant to part 15 of the FCC Rules. These limits are designed to provide reasonable protection against harmful interference in a residential installation. This equipment generates, uses and can radiate radio frequency energy and, if not installed and used in accordance with the instructions, may cause harmful...
- Page 58 Company will not be liable for any issues and problems caused by Internet, Wireless Router and Smart Devices. Please contact the original provider to get further help.
- Page 60 CS374-APP(OSK105-OEM) C/ NÁPOLES 249 P1 08013 BARCELONA 16110800000529 SPAIN 20210422 (+34) 93 446 27 80...
Need help?
Do you have a question about the EU-OSK105 and is the answer not in the manual?
Questions and answers