Table of Contents
Advertisement
Quick Links
Advertisement
Table of Contents

Subscribe to Our Youtube Channel
Related Manuals for Robe scan 1200 XT


Summary of Contents for Robe scan 1200 XT
-
Page 3: Table Of Contents
SCAN 1200 XT Table of contents 1. Safety instructions ......................4 2. Operating determinations ..................... 5 3. Description of the device ....................6 4. Installation ........................7 4.1Fitting the lamp ......................7 4.2 Inserting/Exchanging rotating gobos ................. 7 4.3 Rigging the fixture ..................... 8 4.4 Connection to the mains .................... -
Page 4: Safety Instructions
CAUTION! Keep this device away from rain and moisture! Unplug mains lead before opening the housing! FOR YOUR OWN SAFETY, PLEASE READ THIS USER MANUAL CAREFULLY BEFORE YOU INITIAL START - UP! 1. Safety instructions Every person involved with installation and maintenance of this device have to: - be qualilfied - follow the instructions of this manual CAUTION! -
Page 5: Operating Determinations
2. Operating determinations This device was designed for indoor use only. If the device has been exposed to drastic temperature fluctuation (e.g. after transportation), do not switch it on immediately. The arising condensation water might damage your device. Leave the device switched off until it has reached room temperature. -
Page 6: Description Of The Device
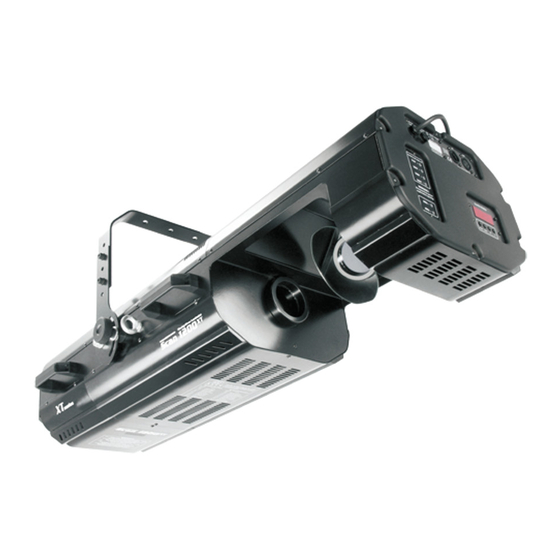
3. Description of the device 1 - Fastening screws 2 - Bracket 3 - Fixation screw for bracket 4 - Objective 5 - Mirror Front panel: 6 - DMX Input 7 - DMX Output 8 - Powercord 9 - Fuseholder 10 - Control board 11- Voltage/frequency selection panel... -
Page 7: Installation
4. Installation 4.1Fitting the lamp DANGER ! Install the lamps with the device switched off only. Unplug from mains before ! To insert the lamp (Osram HMI 1200W) open the cover by loosening the fastening screws at the sides of the cover. -
Page 8: Rigging The Fixture
(decoration articles, etc.) in between a distance of min. 1,0 m. The SCAN 1200 XT can be installed in any position without altering its operation characteristics Install a safety wire that can hold at least 10 times the weight of the fixture. Never use the carrying handles for secondary attachment. -
Page 9: Dmx-512 Connection/Connection Between Fixtures
4.5 DMX-512 connection/connection between fixtures Master/slave operation Controller operation Only use a stereo shielded cable and 3-pin XLR-plugs and connectors in order to connect the controller with the fixture or one fixture with another. Occupation of the XLR-connection: DMX - output DMX-input XLR mounting-socket: XLR mounting-plug:... -
Page 10: Dmx Protocol
5. DMX PROTOCOL Mode 1 Mode 2 8 bit Value Function Type of control channel channel channel 0-255 Coarse control of the pan movement proportional Tilt 0-255 Coarse control of the tilt movement proportional Pan fine 0-255 Fine control of the pan movement proportional Tilt fine 0-255 Fine control of the tilt movement... - Page 11 Mode 1 Mode 2 8 bit Value Function Type of control channel channel channel Effects 0-95 Open position (hole) step 96-127 Frost filter step 128-159 Prism 1 128-142 forward rotation from max. to min. proportional 143-144 stop step 145-159 backward rotation from min. to max. proportional 160-191 Prism 2 160-174 backward rotation from max.
- Page 12 Mode 1 Mode 2 8 bit Value Function Type of control channel channel channel Shutter,strobe 0-31 Shutter closed step 32-63 No function (shutter open) step 64-95 Strobe-effect from slow to fast (max.10 flashes/s) proportional 96-127 No function (shutter open) step 128-159 Pulse-effect in sequences proportional...
-
Page 13: Controller Mode
The SCAN 1200 XT is to be operated with a HMI/MSI 1200 lamp. A relay inside of the SCAN 1200 XT allows you to switch on and off the lamp via the control panel on the front panel or via your controller without affecting the rest of the lighting. - Page 14 (1 - 10 flashes per second) Fans The SCAN 1200 XT is cooled by an axial fan situated at the rear side of the lighting. The speed of the fan (of course the noice) can be continuously reduced if very quiet performance is required.
-
Page 15: Stand - Alone Mode
7.Stand - alone mode The fixtures on a data link are not connected to the controller but can execute pre-set programs which can be different for every fixture.To set the program to be played,see the "Stand-alone setting" ( menu "St.AL."). "Stand-alone operation"... -
Page 16: Functions Of The Control Panel
8. Functions of the control panel The control panel situated on the front side of the fixture offers several features. You can simply set the DMX address,master/slave mode, read the number of lamp or unit hours, switch On and Off the lamp, run test, make a reset and also use many functions for setting and service purposes. -
Page 17: Slave Control
Press [Up] and [Down] buttons to select the desired option and press [Enter] to see the value or next submenu. Power On time -By this option you can read the total number of the operation hours since the SCAN 1200 XT has been fabricated. Press [Enter] or [Mode] to return to the menu. - Page 18 - The number of the hours that the SCAN 1200 XT has been powered On since the counter was last reset.Press [Enter] or [Mode] to return to the menu.In order to reset this counter to 0, you have to hold the [Up] and [Down]-button and press the [Enter]- button.
-
Page 19: Personality Options
[Mode] to return to the menu. 8.4 Personality options These options allow you to modify SCAN 1200 XT operating behavior. Press [Up] and [Down] buttons to select the desired option and press [Enter] to set the value or to see next submenu. - Page 20 Static gobos Static gobos Rot.gobo rotation Rotating gobos Rotating gobos Iris Rot.gobo rotation Rot.gobo rotation Focus,Zoom Iris Iris Shutter,Strobe Focus,Zoom Focus,Zoom Dimmer Shutter, strobe Shutter, strobe Dimmer Dimmer Please refer to the chapter "DMX- protocol" for detail description. Note: If you adjust the 16 bit resolution (Mode 1 or Mode 2), the fixture will occupy 16 DMX channels, if you adjust the 8 bit resolution,the fixture will be operated by only 14 DMX channels.
- Page 21 [Up] and [Down] buttons to select "Off" if you wish to switch the lamp light sensor Off and press [Enter] to confirm or [Mode] to cancel and return to the menu. Important: The option"Off" is for "emergency operation" only if the lamp light sensor is defective and you will wait for a service intervertion! If the lamp light sensor is switched Off,the error messages "LAEr,SnEr,HEAt"...
- Page 22 The fan keeps the adjusted low speed until the temperature exceeds max. inside temperature of the fixture, then the SCAN 1200 XT automatically switches from low to high the fan speed. Note:The modes "Auto" and "HIGH" don´t interact to the DMX value on the channel 6 (0-127)! Default settings Press [Enter] to reset all fixture personalities (not the adjusting functions) to the default values.
-
Page 23: Switching On/Off The Lamp
This function allows you to run a special demo-test sequences without an external controller, which will show you some possibilities of using the SCAN 1200 XT. Press [Up] and [Down] keys to select the "Mod1" or "Mod2" sequences. The "Mod1" is suitable for projections on the wall, ceiling or ground without any mirror-movement, the "Mod2"... - Page 24 (playing is forced by the master). Editing program This menu item allows you to select a program to edit or create.The SCAN 1200 XT has one built-in program ("tESt") and the 3 free programs,each up to 99 steps.
-
Page 25: Reset Function
The editting programs "PrG.1,PrG.2,PrG.3" are saved in the current modified fixture (master or slave1-9). 8.8 Reset function Press [Enter] button to run a reset. This option enables the SCAN 1200 XT to index all effects (functions) and return to their standard positions. - Page 26 Lamp adjustment This function can be used when you make the fine adjustment of the lamp.If you select "LAAd" pressing by [Enter]-button ,all effects will be canceled,shutter will be opened and the dimmer intensity will be set onto 100%.By using the options "PAn, tilt,Foc" you can focus the light on a flat surface (wall) and perform the fine lamp adjustment.
-
Page 27: Error And Information Messages
DMX Calibration protocol: DMX chanel Function Colour 1 Calibration 0-255 Colour 2 Calibration 0-255 Effect Calibration 0-255 Static gobo Calibration 0-255 Rotating gobo Calibration 0-255 No function Colours 1 Standard protocol Colours 2 Standard protocol Effects Standard protocol Static gobo Standard protocol Rotating gobos Standard protocol... - Page 28 MbEr This messsage informs you that the main PCB does not communicate correctly with the Control Board. C1Er (color-wheel 1 error) This messsage will appear after the reset of the fixture if the magnetic-indexing circuit malfunctions (sensor failed or magnet missing) or the stepping-motor is defective (or its driver circuit on the main PCB). The color- wheel1 is not located in the default position after the reset.
-
Page 29: Technical Specifications
10. Technical specifications Power supply: -Voltage......208/230/240V AC, 50/60 Hz ~ -Fuse.......T 10 A@ 230 V -Power consumption..1650VA Motors: -14 high quality stepping-motors controlled by microprocessors Lamp: Osram HMI 1200 W/GS Beampath: Optical system: - double condensor lens with high efficiency parabolic mirror, focus lens and multistep zoom lenses system (15°, 21°, 28°... - Page 30 Rotating gobos: - 2 metal gobos, 1 glass gobo and 1 multicolor dichroic gobo rotating in both dirrections at different speeds - gobo indexing -metal gobos: outside diameter=53.3mm,image diameter=40mm,stainless steel,thickness=0.15mm -multicolor dichroic gobo: diameter=53.1mm,thickness=1.1mm,high temperature borofloat or better glass -glass gobo:outside diameter=49.8mm,max.thickness=4mm,high temperature borofloat or better glass Strobe: - strobe effect with variable speed (1 - 10 flashes per second)
-
Page 31: Maintenance And Cleaning
12. Appendix We believe you will enjoy your SCAN 1200 XT. We assure you will enjoy this product for years if you follow the instructions given in this manual.
Need help?
Do you have a question about the scan 1200 XT and is the answer not in the manual?
Questions and answers