Yealink SIP-T23P User Manual
Hide thumbs
Also See for SIP-T23P:
- Quick start manual ,
- User manual (152 pages) ,
- Quick installation manual (4 pages)
Table of Contents
Advertisement
Quick Links
Advertisement
Table of Contents

Related Manuals for Yealink SIP-T23P


Summary of Contents for Yealink SIP-T23P
- Page 2 Copyright © 2016 YEALINK NETWORK TECHNOLOGY CO., LTD Copyright © 2016 Yealink Network Technology CO., LTD. All rights reserved. No parts of this publication may be reproduced or transmitted in any form or by any means, electronic or mechanical, photocopying, recording, or otherwise, for any purpose, without the express written permission of Yealink Network Technology CO., LTD.
- Page 3 Do not dispose of WEEE as unsorted municipal waste and have to collect such WEEE separately. We are striving to improve our documentation quality and we appreciate your feedback. Email your opinions and comments to DocsFeedback@yealink.com.
- Page 4 Yealink SIP-T23P/G IP phone firmware contains third-party software under the GNU General Public License (GPL). Yealink uses software under the specific terms of the GPL. Please refer to the GPL for the exact terms and conditions of the license. The original GPL license, source code of components licensed under GPL and used in Yealink products can be downloaded online: http://www.yealink.com/GPLOpenSource.aspx?BaseInfoCateId=293&NewsCateId=293&CateId=293.
- Page 5 About This Guide Thank you for choosing the SIP-T23P/SIP-T23G (hereinafter referred to as SIP-T23P/G) IP phone, exquisitely designed to provide business telephony features, such as Call Hold, Call Transfer, Busy Lamp Field, Multicast Paging and Conference over an IP network. The...
- Page 6 User Guide for the SIP-T23P/G IP Phone Optional Accessories on page Phone Installation on page Troubleshooting on page Appendix A - Time Zones on page The following sections are new: Shared Call Appearance (SCA) on page ...
-
Page 7: Table Of Contents
Table of Contents About This Guide ..............v In This Guide ......................... v Summary of Changes ......................v Changes for Release 80, Guide Version 80.95 .............. v Changes for Release 80, Guide Version 80.60 ............. vi Changes for Release 80, Guide Version 80.20 ............. vi Table of Contents .............. - Page 8 User Guide for the SIP-T23P/G IP Phone Key as Send ........................40 Phone Lock ........................40 Audio Settings ........................43 Volume ..........................43 Ring Tones ........................44 Contact Management ....................... 46 Directory........................... 46 Local Directory ........................ 47 Blacklist ..........................57 Remote Phone Book ......................
- Page 9 Table of Contents Advanced Phone Features ............121 Busy Lamp Field (BLF) ..................... 121 BLF List ..........................123 Call Recording ........................125 Hot Desking ........................127 Intercom ..........................128 Outgoing Intercom Calls ....................128 Incoming Intercom Calls ....................129 Using Intercom ......................131 Multicast Paging .......................
- Page 10 User Guide for the SIP-T23P/G IP Phone Appendix A - Time Zones ............177 Index ..................179...
-
Page 11: Overview
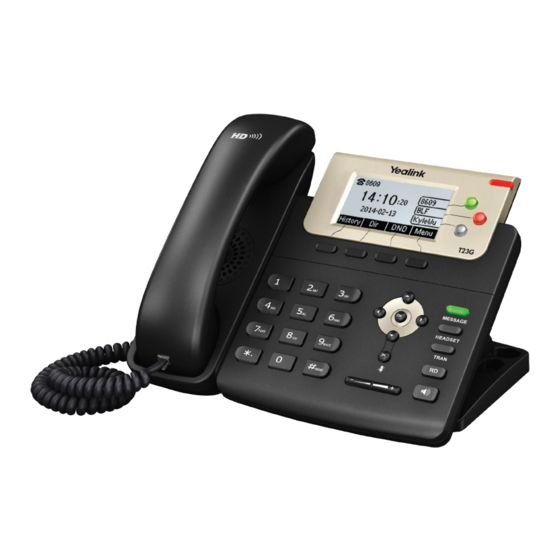
LED Instructions User Interfaces Documentations If you require additional information or assistance with your new phone, contact your system administrator. The main hardware components of the SIP-T23P/G IP phone are the LCD screen and the keypad. - Page 12 User Guide for the SIP-T23P/G IP Phone Hardware component instructions of the SIP-T23P/G IP phone are: Item Description Shows information about calls, messages, soft keys, time, date and other relevant data: • Call information—caller ID, call duration ① LCD Screen •...
- Page 13 Overview Icons appearing on the LCD screen are described in the following table: Icon Description Network is unavailable The private line registers successfully Register failed Registering The shared/bridged line registers successfully Hands-free speakerphone mode Handset mode Headset mode Voice Mail Text Message Auto Answer Do Not Disturb...
- Page 14 User Guide for the SIP-T23P/G IP Phone Icon Description Missed Calls Call Forward/Forwarded Calls Recording box is full A call cannot be recorded Recording starts successfully Recording cannot be started Recording cannot be stopped The contact icon The ACD state is available...
- Page 15 Overview Line key LED LED Status Description The line is seized. Solid green The line is in conversation. Fast flashing green The line receives an incoming call. Slow flashing green The call is placed on hold. The line is inactive. Line key LED (configured as a BLF key or BLF List key) LED Status Description...
-
Page 16: User Interfaces
BLF key are configurable via web user interface. For more information, refer to Yealink_SIP-T2_Series_T19(P) E2_T4_Series_CP860_IP_Phones_Administrator_Guide. Two ways to customize configurations of your SIP-T23P/G IP phone: The user interface on the IP phone. The user interface in a web browser on your PC. -
Page 17: Web User Interface
Overview Customizing Your Phone on page 35. In addition to the phone user interface, you can also customize your phone via web user interface. In order to access the web user interface, you need to know the IP address of your new phone. -
Page 18: Advanced Phone Features
User Guide for the SIP-T23P/G IP Phone Options Phone User Interface Web User Interface --Hotline √ Basic Call Features --Recent Call In Dialing --Auto Answer √ --Auto Redial √ --Call Completion √ --ReCall √ -- Do Not Disturb (DND) √... -
Page 19: Documentations
--NAT Status √ Note The table above lists most of the feature options. Please refer to the relevant sections for more information. The following table shows documentations available for the SIP-T23P/G IP phone. Name Contents Where found Language Basic call features... - Page 20 User Guide for the SIP-T23P/G IP Phone...
-
Page 21: Getting Started
Idle Screen Entering Data and Editing Fields If you require additional information or assistance with your new phone, contact your system administrator. The following components are included in your SIP-T23P/G IP phone package: SIP-T23P/G IP Phone ... -
Page 22: Optional Accessories
Ethernet Cable Quick Start Guide Check the list before installation. If you find anything missing, contact your system administrator. The following items are optional accessories for your SIP-T23P/G IP phone. You need to purchase them separately if required. - Page 23 Headset Note We recommend that you use the accessories provided or approved by Yealink. The use of unapproved third-party accessories may result in reduced performance. If your phone is already installed, proceed to Phone Initialization on page 26.
- Page 24 User Guide for the SIP-T23P/G IP Phone Attach the stand Note The hookswitch tab has a lip which allows the handset to stay on-hook when the IP phone is mounted vertically. Connect the handset and optional headset Connect the network and power You have two options for power and network connections.
-
Page 25: Power Over Ethernet
The IP phone should be used with Yealink original power adapter (5V/600mA) only. The use of the third-party power adapter may cause the damage to the phone. Power over Ethernet With the included or a regular Ethernet cable, the SIP-T23P/G IP phone can be powered from a PoE-compliant switch or hub. -
Page 26: Phone Initialization
User Guide for the SIP-T23P/G IP Phone To connect the PoE for SIP-T23P/G IP phone Connect the Ethernet cable between the Internet port on the phone and an available port on the in-line power switch/hub. Note If in-line power is provided, you don’t need to connect the phone to the power adapter. - Page 27 Getting Started Phone status (e.g., product name, hardware version, firmware version, product ID, MAC address and device certificate status). Account status (e.g., register status of SIP accounts). Note You can view device certificate status via phone user interface only. To view the phone status via phone user interface: Press , or press Menu->Status.
- Page 28 User Guide for the SIP-T23P/G IP Phone The phone status is displayed on the first page of the web user interface. If your phone cannot contact a DHCP server for any reason, you need to configure network settings manually. The IP phone can support either or both IPv4 and IPv6 addresses.
- Page 29 Getting Started Press to select the IPv4 and then press the Enter soft key. Press to select Static IPv4 Client and then press the Enter soft key. Enter the desired value in the IPv4, Subnet Mask, Default Gateway, IPv4 Pri.DNS and IPv4 Sec.DNS field respectively.
-
Page 30: Idle Screen
The SIP-T23P/G IP phone supports up to 3 accounts. If your phone is not registered, you may have to register it. - Page 31 Getting Started stop to select. When the character (or numbers) you want to enter displays in the field, wait one second, and enter the next character (or numbers). The following table lists the input modes and character (or numbers) options for the keypad: Input Mode Keypad...
- Page 32 User Guide for the SIP-T23P/G IP Phone To enter or edit data: Do one of the following: If you want to Then you can Press a keypad key one or more times (depending what input mode you’re in) to enter the characters that is displayed on the keypad key.
- Page 33 Getting Started If you want to Then you can lowercase (Abc soft key) or alphanumeric (2aB soft key) input mode, it will provide the following special characters: *.,?!\-()@/:_;+&%=<>£$¥¤[]{}~^¡ ¿§#"|. If it is in the numeric (123 soft key) input mode, it will provide the following special characters: .*:/@[].
- Page 34 User Guide for the SIP-T23P/G IP Phone...
-
Page 35: Customizing Your Phone
Customizing Your Phone You can customize your SIP-T23P/G IP phone by personally configuring certain settings, for example, contrast, language and time & date. You can add contacts to the phone’s local directory manually or from call history. You can also personalize different ring tones for different callers. -
Page 36: Contrast
User Guide for the SIP-T23P/G IP Phone Press , or the Switch soft key to select the desired time from the Backlight Time field. Press the Save soft key to accept the change or the Back soft key to cancel. -
Page 37: Time & Date
Customizing Your Phone Press to select the desired language. Press the Save soft key to accept the change. Text displayed on the phone user interface will change to the selected language. To change the language for the web user interface: Click on Settings->Preference. - Page 38 User Guide for the SIP-T23P/G IP Phone area from the Time Zone field. The default time zone is “+8”. Enter the domain name or IP address of SNTP server in the NTP Server1 and NTP Server2 field respectively. Press , or the Switch soft key to select the desired value from the Daylight Saving field.
-
Page 39: Administrator Password
Customizing Your Phone Press , or the Switch soft key to select the desired time format (12 Hour or 24 Hour) from the Time Format field. Press , or the Switch soft key to select the desired date format from the Date Format field. -
Page 40: Phone Lock
User Guide for the SIP-T23P/G IP Phone Enter the current password in the Current PWD field. Enter the new password in the New PWD field. Re-enter the new password in the Confirm PWD field. Press the Save soft key to accept the change or the Back soft key to cancel. - Page 41 Customizing Your Phone TRAN, OK, X, navigation keys and soft keys until unlocked. All Keys: All keys are locked except the Volume key, digit keys, # key, * key and Speakerphone key. You are only allowed to dial emergency numbers, reject incoming calls by pressing the X key or the Reject soft key, answer incoming calls by lifting the handset, pressing the Speakerphone key, the HEADSET key, the OK key, or the Answer soft key, mute an active call by pressing the X key,...
- Page 42 User Guide for the SIP-T23P/G IP Phone the icon To unlock the phone, you must know the phone unlock PIN. The default phone unlock PIN is “123”. To change the phone unlock PIN via phone user interface: Press Menu->Settings->Basic Settings->Change PIN.
-
Page 43: Volume
Customizing Your Phone You can long press or wait for a period of time (if configured) to lock the phone again. Note You can also unlock the phone by administrator password. When you enter the administrator password to unlock the phone, the phone will turn to the Change PIN screen. -
Page 44: Ring Tones
User Guide for the SIP-T23P/G IP Phone To adjust the volume when the phone is during a call: Press to adjust the volume of currently engaged audio device (handset, speakerphone or headset). Ring tones are used to indicate incoming calls. You can select different ring tones to distinguish different accounts registered on your phone, or to distinguish your phone from your neighbor’s. - Page 45 Customizing Your Phone If Common is selected, this account will use the ring tone selected for the phone. Press the Save soft key to accept the change or the Back soft key to cancel. A ring tone for the account is configurable via web user interface at the path Account->Basic->Ring Type.
-
Page 46: Directory
User Guide for the SIP-T23P/G IP Phone This section provides the operating instructions for managing contacts. Topics include: Directory Local Directory Blacklist Remote Phone Book Directory provides easy access to frequently used lists. The lists may contain Local Directory, History, Remote Phone Book and LDAP . -
Page 47: Local Directory
Customizing Your Phone Click Confirm to accept the change. Note Directory is configurable via web user interface only. To check the via phone user interface: directory Press the Dir soft key when the phone is idle. The LCD screen displays the enabled list(s) in the directory If there is only one list in the , press the Dir soft key to enter this list directly. - Page 48 User Guide for the SIP-T23P/G IP Phone If Local Directory is removed from the refer to Directory on page , press directory ( Menu->Directory->Local Directory to enter the local directory. Press the AddGr soft key. Enter the desired group name in the Name field.
- Page 49 Customizing Your Phone Press the Option soft key, and then select Detail. Press to scroll through the group information and then edit. Press the Save soft key to accept change or the Back soft key to cancel. To delete a group from the local directory: Press the Dir soft key.
-
Page 50: Adding Contacts Manually
User Guide for the SIP-T23P/G IP Phone Press the OK soft key to confirm the deletion or the Cancel soft key to cancel. You can also delete all groups by pressing the Option soft key and then select Delete All. - Page 51 Customizing Your Phone Press , or the Switch soft key to select the desired ring tone from the Ring field. If Auto is selected, this contact will use the ring tone according to the priority: Group ring tone (refer to Adding Groups) >Account ring tone (refer to Ring...
- Page 52 User Guide for the SIP-T23P/G IP Phone contact in local directory or the Cancel soft key to cancel. For more information on remote phone book operating, refer to Remote Phone Book page 59. To edit a contact in the local directory: Press the Dir soft key.
- Page 53 Customizing Your Phone The IP phone enters the local directory directly as there is only Local Directory enabled in the directory by default. If Local Directory is removed from the refer to Directory on page directory ( press Menu->Directory->Local Directory to enter the local directory. Select the desired contact group and then press the Enter soft key.
- Page 54 User Guide for the SIP-T23P/G IP Phone press Menu->Directory->Local Directory to enter the local directory. Select the desired contact group and then press the Enter soft key. If the contact is not in any group, select All Contacts and then press the Enter soft key.
- Page 55 Customizing Your Phone You can search for a contact from the desired lists when the phone is on the dialing screen. The lists can be Local Directory, History, Remote Phone Book and LDAP . To configure search source list in dialing via web user interface: Click on Directory->Setting.
- Page 56 User Guide for the SIP-T23P/G IP Phone The entries in the enabled search source lists whose name or phone number matches the characters entered will appear on the LCD screen. You can press to scroll to the desired entry, and then place a call to the entry.
-
Page 57: Blacklist
Customizing Your Phone system. (Optional.) Check the Show Title checkbox. It will prevent importing the title of the contact information which is located in the first line of the CSV file. Click Import CSV to import the contact list. (Optional.) Mark the On radio box in the Delete Old Contacts field. It will delete all existing contacts while importing the contact list. - Page 58 User Guide for the SIP-T23P/G IP Phone To add a contact to the blacklist directory manually: Press Menu->Directory->Blacklist. Press the Add soft key. Enter the name and the office, mobile or other numbers in the corresponding fields. Press , or the Switch soft key to select the desired account from the Account field.
-
Page 59: Remote Phone Book
Customizing Your Phone The LCD screen prompts the following warning: Press the OK soft key to accept the change. For operating instructions on editing, deleting, placing calls to and/or searching for contacts in the blacklist directory, refer to the operating instructions of Local Directory page 47. - Page 60 User Guide for the SIP-T23P/G IP Phone To access your remote phone book via phone user interface: Press Menu->Directory->Remote Phone Book. If Remote Phone Book is added to the directory refer to Directory on page press Dir->Remote Phone Book to enter the remote phone book.
- Page 61 The default value is 21600. Click Confirm to accept the change. The SIP-T23P/G IP phone maintains call history lists of Placed calls, Received calls, Missed calls and Forwarded calls. Each call history list supports up to 100 entries. You can view call history, place a call, add a contact or delete an entry from the call history list.
- Page 62 User Guide for the SIP-T23P/G IP Phone you can disable the feature. To disable history record via phone user interface: Press Menu->Features->History Setting. Press , or the Switch soft key to select Disabled from the History Record field. Press the Save soft key to accept the change or the Back soft key to cancel.
- Page 63 Customizing Your Phone To delete an entry from the call history list: Press the History soft key. Press to switch among All Calls, Placed Calls, Received Calls, Missed Calls and Forwarded Calls. Press to select the desired entry. Press the Delete soft key. To delete all entries from the call history list: Press the History soft key.
-
Page 64: Logo Customization
User Guide for the SIP-T23P/G IP Phone Click Browse to locate the logo file from your local system. Click Upload to upload the file. custom logo, you can click Note Delete item will appear after you upload a Delete to delete the custom logo. - Page 65 Customizing Your Phone To deactivate the headset mode: Press again on the phone. The headset icon disappears from the idle screen indicates the headset mode is deactivated. You can use headset in priority when headset prior feature is enabled. This feature is especially useful for permanent or full-time headset users.
-
Page 66: Dss Keys
There are two types of DSS keys: Line Keys and Programable Keys. The details will be introduced in the following. The SIP-T23P/G IP phone supports 3 line keys and 11 programable keys. For more information on DSS key icon indicators, refer to... - Page 67 Customizing Your Phone monitored status when the line keys are assigned with particular features, such as BLF . The default key type of each line key is Line. To assign functionality to a line key via phone user interface: Press Menu->Features->DSS Keys. Select the desired DSS key, and then press the Enter soft key.
- Page 68 User Guide for the SIP-T23P/G IP Phone Zero Touch Phone Lock Directory For the features not listed above, refer to Basic Call Features on page Advanced Phone Features on page 121. For more information, contact your system administrator.
- Page 69 Customizing Your Phone Direct Pickup You can use this key feature to answer someone else’s incoming call on the phone. Type (Key Event) Dependencies: Key Type (DPickup) Account ID (the account this feature will be applied to) Label (key label displayed on the LCD screen) Value (the directed pickup code followed by the target phone number) Usage: Press the DSS key on your phone when the target phone number receives an incoming call.
- Page 70 User Guide for the SIP-T23P/G IP Phone Usage: Press the DSS key when the phone is idle, the phone will then enter the pre-dialing screen and display the prefix number that you specified in the Value field. You can enter the remaining digits and then dial out.
- Page 71 Customizing Your Phone Enter a few continuous characters of the contact name or continuous numbers of the contact number using the keypad. Conference You can use this key feature to set up a conference call. For more information, refer to Conference on page 111.
- Page 72 User Guide for the SIP-T23P/G IP Phone When the transfer mode on DSS key is Attended Transfer, press the DSS key to dial out the number specified in the Value field, and then perform the attended or semi-attended transfer.
- Page 73 Customizing Your Phone You can use this key feature to quickly access text message. For more information, refer Short Message Service (SMS) on page 158. Type (Key Event) Dependencies: Key Type (SMS) Label (key label displayed on the LCD screen) Usage: Press the DSS key when the phone is idle to access text message.
- Page 74 User Guide for the SIP-T23P/G IP Phone containing a specific URL. Type (URL) Dependencies: Value (the URL contained in the HTTP GET request) Label (key label displayed on the LCD screen) Usage: Press the DSS key to trigger the phone to send an HTTP GET request containing...
- Page 75 Note Programable keys are configurable via web user interface only. You can register one or multiple accounts on the SIP-T23P/G IP phone. You can also configure each line key to associate with an account or configure multiple line keys to associate with an account.
- Page 76 User Guide for the SIP-T23P/G IP Phone Select Enabled from the Active Line field. Enter the desired value in Label, Display Name, Register Name, User Name, Password and SIP Server1/2 field respectively. Contact your system administrator for more information. If you use the outbound proxy servers, do the following:...
-
Page 77: Dial Plan
Your phone can be configured to have a combination of accounts with a single line key and accounts with multiple line keys. Dial plan is a string of characters that governs the way your SIP-T23P/G IP phone processes the inputs received from your phone keypad. The SIP-T23P/G IP phone... - Page 78 User Guide for the SIP-T23P/G IP Phone Numeric ranges are allowed within the brackets: Digit “-” Digit. Example: “[5-7]” would match the number”5”, ”6”or ”7”. The square brackets "[]" can be used as a placeholder for a single character which matches any of a set of characters. Example: "91[5-7]1234"...
- Page 79 Customizing Your Phone Enter the desired line ID in the Account field or leave it blank. Click Add to add the replace rule. When you enter the number “1” using the keypad and then press the Send soft key, the phone will dial out “1234” instead. Note The valid values of Account field can be one or more digits among 1-3.
- Page 80 User Guide for the SIP-T23P/G IP Phone You can configure one or more dial-now rules (up to 100) on your phone. When the dialed number matches the dial-now string, the number will be dialed out automatically. For example, a dial-now rule is configured as "1xx", any entered three-digit string beginning with 1 will then be dialed out automatically on the phone.
- Page 81 Customizing Your Phone To configure the delay time for dial-now rule via web user interface: Click on Features->General Information. Enter the time between 0 and 14 (seconds) in the Time-Out for Dial-Now Rule field. The default value is “1”. Click Confirm to accept the change. Note Delay time for dial-now rule is configurable via web user interface only.
- Page 82 User Guide for the SIP-T23P/G IP Phone For more information on the valid values for the Account field, refer to Replace Rule on page 78. Click Confirm to accept the change. Note The default value of minimum and maximum length is 1 and 15 respectively.
-
Page 83: Emergency Number
Customizing Your Phone For more information on the valid values for the Account field, refer to Replace Rule on page 78. Click Confirm to add the block out number. Note Block out number is configurable via web user interface only. Public telephone networks in countries around the world have a single emergency telephone number (emergency services number), that allows a caller to contact local emergency services for assistance when necessary. -
Page 84: Live Dialpad
Note Emergency number is configurable via web user interface only. You can enable live dialpad feature on the SIP-T23P/G IP phone, which enables the IP phone to automatically dial out a phone number without pressing the send key. You can also configure a delay, and then the phone will dial out the phone number automatically after the designated period of time. -
Page 85: Hotline
Customizing Your Phone The default delay time is 4 seconds. Click Confirm to accept the change. Note Live dialpad is configurable via web user interface only. You can dial a hotline number immediately upon lifting the handset, pressing the Speakerphone key or the line key. You can also configure a delay, and then the phone will dial out the hotline number automatically after the designated period of time. - Page 86 User Guide for the SIP-T23P/G IP Phone...
-
Page 87: Basic Call Features
Basic Call Features The SIP-T23P/G IP phone is designed to be easily used like a regular phone on a public switched telephone network (PSTN). You can place calls, answer calls, transfer a call to someone else, or conduct a conference call. - Page 88 User Guide for the SIP-T23P/G IP Phone You can place a call in one of three ways using your SIP-T23P/G IP phone: Using the handset Using the speakerphone Using the headset You can also dial the number first, and then choose the way you want to speak to the other party.
- Page 89 To place multiple calls: You can have more than one call on your SIP-T23P/G IP phone. To place a new call during an active call, do one of the following: Press the line key. The active call is placed on hold.
- Page 90 User Guide for the SIP-T23P/G IP Phone When you are not in another call, you can answer a call in one of three ways: Using the handset Using the speakerphone Using the headset Note You can reject incoming calls by pressing the Reject soft key or the X key. You can also activate Do Not Disturb mode to ignore all incoming calls without ring on your phone.
-
Page 91: Recent Call In Dialing
Basic Call Features The incoming call is answered and the original call is placed on hold. Press to access the new call. Press or the Answer soft key. The incoming call is answered and the original call is placed on hold. To end a call: Do one of the following: If you are using the handset, press the EndCall soft key or hang up the handset. - Page 92 User Guide for the SIP-T23P/G IP Phone Select Enabled from the pull-down list of Recent Call In Dialing. Click Confirm to accept the change. Note Recent call in dialing is configurable via web user interface only. To view placed calls list when the phone is on the pre-dialing screen: Pick up the handset, press the Speakerphone key or press the line key.
-
Page 93: Auto Answer
Basic Call Features You can use auto answer feature to automatically answer an incoming call on a line. Auto answer is configurable on a per-line basis. To configure auto answer via phone user interface: Press Menu->Features->Auto Answer. Press , or the Switch soft key to select the desired account from the Line ID field. - Page 94 User Guide for the SIP-T23P/G IP Phone To configure auto redial via phone user interface: Press Menu->Features->Auto Redial. Press , or the Switch soft key to select Enabled from the Auto Redial field. Enter the desired time (in seconds) in the Redial Interval field.
-
Page 95: Call Completion
Basic Call Features You can use call completion to notify the caller who failed to reach a desired party when the party becomes available to receive a call. To configure call completion via phone user interface: Press Menu->Features->Call Completion. Press , or the Switch soft key to select Enabled from the Call Completion field. -
Page 96: Recall
User Guide for the SIP-T23P/G IP Phone Press the OK soft key to redial the number. Note Call completion is not available on all servers. For more information, contact your system administrator. You can press a recall key to place a call back to the last incoming call. - Page 97 Basic Call Features To un-mute a call: Press again to un-mute the call. You can place an active call on hold. Only one active call can be in progress at any time. Other calls can be made and received while placing the original call on hold. When you place a call on hold, your IP PBX may play music to the other party while waiting.
- Page 98 User Guide for the SIP-T23P/G IP Phone You can use DND to reject incoming calls automatically on the phone. The prompt message "n New Missed Call(s)" ("n" indicates the number of missed calls) will appear on the LCD screen, and callers will receive a busy message. All calls you receive while DND is enabled are logged to your missed calls list.
- Page 99 Basic Call Features In the DND block, mark the desired radio box in the Mode field. Click Confirm to accept the change. Note DND mode is configurable via web user interface only. To activate DND in phone mode: Press the DND soft key when the phone is idle. icon on the status bar indicates that DND is enabled.
- Page 100 User Guide for the SIP-T23P/G IP Phone Incoming calls will be rejected automatically and "n New Missed Call(s)" ("n" indicates the number of missed calls. e.g., 1 New Missed Call(s)) will appear on the LCD screen. Note When DND and busy forward are enabled in phone mode, calls will be sent to the configured destination number.
- Page 101 Basic Call Features Incoming calls on the specific line will be rejected automatically, and the LCD screen will prompt "n New Missed Call(s)" ("n" indicates the number of missed calls. e.g., 1 New Missed Call(s)). Note When DND and busy forward are both enabled for a specific account, calls to the specific account will be sent to the configured destination number.
-
Page 102: Call Forward
User Guide for the SIP-T23P/G IP Phone For multiple numbers, enter a comma between every two numbers. Click Confirm to accept the change. When DND is enabled on the phone, the phone can still receive incoming calls from the numbers specified in the DND Authorized Numbers field. - Page 103 Basic Call Features Phone (default): Call forward is effective for the phone system. Custom: Call forward can be configured for each or all accounts. To configure the call forward mode via web user interface: Click on Features->Forward & DND. In the Forward block, mark the desired radio box in the Mode field.
- Page 104 User Guide for the SIP-T23P/G IP Phone 1) Press , or the Switch soft key to select Enabled from the Always Forward field. 2) Enter the destination number you want to forward all incoming calls to in the Forward to field.
- Page 105 Basic Call Features 4) (Optional.) Enter the no answer forward on code or off code respectively in the On Code or Off Code field. Press the Save soft key to accept the change or the Back soft key to cancel. icon on the status bar indicates that the call forward is enabled.
- Page 106 User Guide for the SIP-T23P/G IP Phone The LCD screen prompts “Copy to all lines?”. 3) Press the OK soft key to accept the change or the Cancel soft key to cancel. b) If you select Busy Forward, you can enable it for a specific account.
- Page 107 Basic Call Features 1) Press , or the Switch soft key to select Enabled from the No Answer Forward field. 2) Enter the destination number you want to forward all unanswered incoming calls to in the Forward to field. 3) Press , or the Switch soft key to select the ring time to wait before forwarding from the After Ring Time field.
- Page 108 User Guide for the SIP-T23P/G IP Phone To configure the forward authorized numbers via web user interface: Click on Features->Forward & DND. Select Enabled from the pull-down list of Forward Emergency. Enter the numbers in the Forward Authorized Numbers field.
-
Page 109: Call Transfer
Basic Call Features To disable call forward in custom mode for a specific account: Press Menu->Features->Call Forward or press when the phone is idle. Press to select the desired account and then press the Enter soft key. Press to select the desired forwarding type and then press the Enter soft key. - Page 110 User Guide for the SIP-T23P/G IP Phone To perform a semi-attended transfer: Press or the Tran soft key during a call. Do one of the following: Enter the number you want to transfer the call to. Press the Dir soft key, and then select Local Directory. Select the desired group and search for the contact (Directory should be configured in advance.
-
Page 111: Call Waiting
Network conference is not available on all servers. For more information, contact your system administrator. The SIP-T23P/G IP phone supports up to 3 parties (including yourself) in a conference call. This is the default method of conference called Local Conference. - Page 112 User Guide for the SIP-T23P/G IP Phone To set up a local conference call: Place a call to the first party. When the first party answers the call, press the Conf soft key to place a new call. The active call is placed on hold.
-
Page 113: Network Conference
Basic Call Features You can use network conference feature on the SIP-T23P/G IP phone to conduct a conference with multiple participants. This feature allows you to perform the following: Join two calls together into a conference call. Invite another party into an active conference call. -
Page 114: Call Park
User Guide for the SIP-T23P/G IP Phone key. When the second party answers the call, press the Conf soft key to add the second party to the conference. Press the Conf soft key to place a new call. The conference is placed on hold. -
Page 115: Call Pickup
You can use call pickup to answer someone else’s incoming call on your phone. The SIP-T23P/G IP phone supports directed call pickup and group call pickup. Directed call pickup is used for picking up a call that is ringing at a target phone number. Group call pickup is used for picking up a call that is ringing at any phone number in a certain group. - Page 116 User Guide for the SIP-T23P/G IP Phone Enter the directed call pickup code in the Directed Call Pickup Code field. Click Confirm to accept the change. To configure the directed call pickup code on a per-line basis via web user interface: Click on Account->Advanced.
-
Page 117: Group Call Pickup
Basic Call Features The DPickup soft key appears on the LCD screen. Press the DPickup soft key on your phone when the target phone receives an incoming call. Enter the phone number which is receiving an incoming call. Press the DPickup soft key again. The call is answered on your phone. - Page 118 User Guide for the SIP-T23P/G IP Phone Enter the group call pickup code in the Group Call Pickup Code field. Click Confirm to accept the change. To pick up a call in the group: Pick up the handset, press the Speakerphone key or press the line key.
-
Page 119: Anonymous Call
Basic Call Features You can use anonymous call to block your identify and phone number from appearing to the called party when you call someone. For example, you want to call to consult some services, but don’t want to be harassed. Anonymous call is configurable on a per-line basis. -
Page 120: Anonymous Call Rejection On
User Guide for the SIP-T23P/G IP Phone The LCD screen of phone B prompts an incoming call from anonymity. You can use anonymous call rejection to reject incoming calls from anonymous callers. Anonymous call rejection automatically rejects incoming calls from callers who deliberately block their identities and numbers from being displayed. -
Page 121: Blf List
Advanced Phone Features This chapter provides operating instructions for the advanced features of the SIP-T23P/G IP phone. Topics include: Busy Lamp Field (BLF) BLF List Call Recording Hot Desking Intercom Multicast Paging Music on Hold ... - Page 122 User Guide for the SIP-T23P/G IP Phone Press , or the Switch soft key to select BLF from the Type field. Press , or the Switch soft key to select the desired line from the Account ID field. (Optional.) Enter the string that will appear on the LCD screen in the Label field.
- Page 123 Advanced Phone Features The phone plays a warning tone (if enabled). The BLF key LED flashes red. The caller ID appears on the LCD screen (if enabled). In the following figure, the LCD screen shows an incoming call from 2500 on the monitored line.
- Page 124 User Guide for the SIP-T23P/G IP Phone monitored user when you press the BLF List key. When there is a conversation on the monitored user, press the BLF list key to barge in and set up a conference call. Before barging in an active call, ensure that the BLF List Barge In Code has been configured in advance.
- Page 125 Call Pickup on page 115. You can record calls by pressing a record key on the phone. The SIP-T23P/G IP phone supports record and URL record. Two ways of call recording: Record: The phone sends SIP INFO message containing a specific header “Record: ...
- Page 126 User Guide for the SIP-T23P/G IP Phone To configure a URL record key via phone user interface: Press Menu->Features->DSS Keys. Select the desired DSS key. Press , or the Switch soft key to select URL Record from the Type field.
- Page 127 You can use hot desking on the SIP-T23P/G IP phone to log out of the existing accounts and then log into a new account. As a result, many users can share the phone resource at different times.
- Page 128 User Guide for the SIP-T23P/G IP Phone (Optional.) Enter the string that will appear on the LCD screen in the Label field. Press the Save soft key to accept the change or the Back soft key to cancel. Hot desking key is configurable via web user interface at the path DSSKey->Line Key.
- Page 129 Press the Save soft key to accept the change or the Back soft key to cancel. Intercom key is configurable via web user interface at the path DSSKey->Line Key. The SIP-T23P/G IP phone supports automatically to answer an incoming intercom call by default. The phone automatically plays a warning tone when it receives an incoming intercom call.
- Page 130 User Guide for the SIP-T23P/G IP Phone Accept Intercom You can enable or disable the phone to answer an incoming intercom call. If Accept Intercom is enabled, the phone will automatically answer an incoming intercom call. If Accept Intercom is disabled, the phone will reject incoming intercom calls and send a busy message to the caller.
- Page 131 Advanced Phone Features Press the Save soft key to accept the change or the Back soft key to cancel. These specific parameters are configurable via web user interface at the path Features->Intercom. To place an intercom call when the target phone is idle: Press the intercom key when the phone is idle.
- Page 132 User Guide for the SIP-T23P/G IP Phone The valid multicast IP addresses range from 224.0.0.0 to 239.255.255.255. Press the Save soft key to accept the change or the Back soft key to cancel. Multicast paging key is configurable via web user interface at the path DSSKey->Line Key.
- Page 133 Advanced Phone Features The valid multicast IP addresses range from 224.0.0.0 to 239.255.255.255. Enter the group name in the Label field. Press the Save soft key to accept the change. Repeat steps 2 to 6, you can add more paging groups. Paging list is configurable via web user interface at the path: Directory->Multicast IP.
- Page 134 User Guide for the SIP-T23P/G IP Phone Select the desired codec from the pull-down list of Multicast Codec. The default codec is G722. Click Confirm to accept the change. Note If G722 codec is used for multicast paging, the LCD screen will display the icon indicate that it is providing high definition voice.
- Page 135 Advanced Phone Features calls. Paging Priority Active The paging priority active parameter decides how the phone handles incoming multicast paging calls when there is already a multicast paging call on the phone. If enabled, the phone will ignore incoming multicast paging calls with lower priorities, otherwise, the phone will answer incoming multicast paging calls automatically and place the previous multicast paging call on hold.
- Page 136 User Guide for the SIP-T23P/G IP Phone The phone sends RTP to a preconfigured multicast address (IP: Port). Both the sender’s and receiver’s phones play a warning tone and the receiver automatically answers the multicast RTP session in the speakerphone mode.
- Page 137 Advanced Phone Features Music on hold (MoH) is the business practice of playing recorded music to fill the silence that would be heard by the party placed on hold. To use this feature, you should specify a SIP URI pointing to a Music on Hold Server account. When a call is placed on hold, the phone will send a SIP INVITE message to the Music on Hold Server account.
- Page 138 ACD on the SIP-T23P/G IP phone allows the ACD system to distribute large volumes of incoming calls to the registered ACD users. To use this feature, you should configure an ACD key in advance.
- Page 139 Advanced Phone Features After logging in, you are ready to receive calls from the . You can press the ACD system ACD key to show your current ACD user status. You can press the Avail/Unavail soft key to change your ACD user status. ACD user status synchronizes on both IP phone and ACD system.
- Page 140 User Guide for the SIP-T23P/G IP Phone You can configure a primary account on the IP phone and other alternate accounts on the other IP phones. In a SCA Hybrid Key System scenario, you can automatically assign multiple DSS keys with Line type for a registered shared line on the phone (If auto linekeys feature is enabled).
- Page 141 Advanced Phone Features Click Confirm to accept the change. To configure the shared line settings and the number of line key on phone A via web user interface: Register the primary account 4603. Click on Advanced, and then select Shared Call Appearance from the pull-down list of Shared Line.
- Page 142 User Guide for the SIP-T23P/G IP Phone The default value is 1. In this example, the value is set to 2. Click Confirm to accept the change. The phone A will automatically configure the line keys from the first unused DSS key, according to the configured number in the Number of line key field.
- Page 143 Advanced Phone Features (Enter the primary account 4603 in the Register Name field.) Click on Advanced, and then select Shared Call Appearance from the pull-down list of Shared Line. Enter the desired number in the Number of line key field. This field appears only if Auto Linekeys is enabled.
- Page 144 User Guide for the SIP-T23P/G IP Phone The default value is 1. In this example, the value is set to 2. Click Confirm to accept the change. The phone B will automatically configure the line keys from the first unused DSS key, according to the configured number in the Number of line key field.
- Page 145 Advanced Phone Features Select Private Hold from the Unselected Softkeys column and then click The Private Hold appears in the Selected Softkeys column. Click Confirm to accept the change. To configure a private hold key via phone user interface: Press Menu->Features->DSS Keys. Select the desired DSS key.
- Page 146 The phone will dial out “*11” automatically when you press the CallPull soft key. This section provides you with detailed information on using the SIP-T23P/G IP phone in a SCA Hybrid Key System scenario. In a SCA Hybrid Key System scenario, the status of the line key LED which associates with a shared line will change.
- Page 147 Advanced Phone Features You can have one call or multiple calls on the shared line. To place a call on the shared line: Do one of following: Enter the desired number using the keypad when the phone is idle. Press , or the Send soft key.
- Page 148 User Guide for the SIP-T23P/G IP Phone B will illuminate solid red. Press the line key 1, or the Answer soft key on phone B. The LED indicators of the line key 1 on phone A will illuminate solid red and phone B will illuminate solid green.
- Page 149 Advanced Phone Features The LED indicators of the line key 2 on phone A will illuminate solid red and phone B will illuminate solid green indicating that there is an active call on the line key 2. Meanwhile, The LED indicators of the line key 1 phone A will illuminate solid green and phone B will illuminate solid red indicating that there is an active call on the line key 1.
- Page 150 User Guide for the SIP-T23P/G IP Phone To retrieve the call on phone A: Press the line key with the slow flashing green LED indicator or the Resume soft key. The conversation between phone A and phone C is retrieved.
- Page 151 Advanced Phone Features Press the Barge In soft key to interrupt the active call of phone A. Party B will set up a conference call with the other parties in the active call. Press the Hold or the EndCall soft key. If any party in the conference call presses the Hold soft key, two-way voice can be heard between the remaining parties.
- Page 152 User Guide for the SIP-T23P/G IP Phone Call pull feature allows users to retrieve an existing call from another shared phone that is in active or hold status. For example, when there is a call between phone A and phone C, you can use call pull feature on phone B to retrieve this call from phone A.
- Page 153 Advanced Phone Features In the following figure, the first line is private and the second line is shared: Any IP phone can be used to originate or receive calls on the bridged line. An incoming call to the BLA number can be presented to multiple phones in the group simultaneously. The incoming call can be answered on any IP phone of the group but not all.
- Page 154 User Guide for the SIP-T23P/G IP Phone To register an account and configure BLA feature on phone A via web user interface: Register the account 14019833020. Click on Advanced, and then select Draft BLA from the pull-down list of Shared Line.
- Page 155 Advanced Phone Features Click Confirm to accept the change. To register an account and configure BLA feature on phone B via web user interface: Register the account 10462190020. Click on Advanced, and then select Draft BLA from the pull-down list of Shared Line.
- Page 156 Enter the desired number in the BLA Number field. Click Confirm to accept the change. This section provides you with detailed information on using the SIP-T23P/G IP phone in a BLA scenario. In a BLA scenario, the status of the line key LED which associates with a bridged line will change.
- Page 157 Advanced Phone Features Press the line key when the phone is idle to enter the pre-dialing screen. Enter the desired number using the keypad and then press , or the Send soft key. The phone will dial the entered number. To place multiple calls on the bridged line: You can have more than one call on the bridged line.
- Page 158 The conversation is established between phone B and phone C, phone A disconnects the call. You can send and receive text messages using the SIP-T23P/G IP phone. New text messages can be indicated both acoustically and visually. When receiving a new text message, the phone will play a warning tone.
- Page 159 Advanced Phone Features You can store text messages in your phone’s Inbox, Sentbox, Outbox or Draftbox. Each of the boxes can store up to 100 text messages. If the number of the text messages in one box is more than 100, the phone will directly delete the oldest text message in the box.
- Page 160 User Guide for the SIP-T23P/G IP Phone To reply a text message: Press Menu->Message->Text Message->Inbox. Select the desired message and then press the Reply soft key. Compose the new text message. You can press the abc soft key to change the input mode.
-
Page 161: Voice Mail
Advanced Phone Features You can leave voice mails for someone else using the SIP-T23P/G IP phone. You can also listen to voice mails that are stored in a voice mailbox. When receiving a new voice mail, the phone will play a warning tone. The power indicator LED will slow flash red, and the LCD screen will prompt “n New Voice Mail(s)”... -
Page 162: Voice Mail
The MWI service is unsolicited for some servers, so the SIP-T23P/G IP phone only handles the MWI messages sent from the server. But for other servers, the MWI service is solicited, so the SIP-T23P/G IP phone must enable subscription for MWI. - Page 163 Advanced Phone Features The MWI subscription parameters you need to know: Options Description Subscribe for MWI Enable or disable a subscription for MWI service. Period of MWI subscription. The IP phone sends a MWI Subscription Period refresh SUBSCRIBE request before initial SUBSCRIBE expiration.
- Page 164 User Guide for the SIP-T23P/G IP Phone To enable subscribe MWI to voice mail via web user interface: Click on Account->Advanced. Select the desired account from the pull-down list of Account. Select Enabled from the pull-down list of Subscribe for MWI.
-
Page 165: Troubleshooting
Troubleshooting This chapter provides general troubleshooting information to help you solve the problems you might encounter when using your SIP-T23P/G IP phone. If you require additional information or assistance with your new phone, contact your system administrator. How can I find the basic information of the IP phone? Press the OK key when the IP phone is idle to check the basic information of the IP phone, such as IP address and firmware version. - Page 166 User Guide for the SIP-T23P/G IP Phone If your SIP-T23P/G IP phone is powered from PoE, ensure you use a PoE-compliant switch or hub. Why does the phone display "Network unavailable"? Ensure that the Ethernet cable is plugged into the Internet port on the phone and ...
-
Page 167: Phone Installation On
Troubleshooting Click Confirm to accept the change. You can also contact your system administrator for help. Note If you are logging into the web user interface of the phone with user credentials, you need to enter the current user password in the Old Password field. User password is configurable via web user interface only. - Page 168 User Guide for the SIP-T23P/G IP Phone Switch between the Handset, Headset (if present) or Hands-Free Speakerphone to check whether the dial tone is present for one of the audio modes. If the dial tone exists on another audio mode, connect a different handset or headset to isolate the problem.
- Page 169 Troubleshooting To enable SRTP on a per-line basis via web user interface: Click on Account->Advanced. Select the desired account from the pull-down list of Account. Select the desired value (Optional or Compulsory) from the pull-down list of RTP Encryption(SRTP). Click Confirm to accept the change. Note SRTP is not available on all servers.
- Page 170 User Guide for the SIP-T23P/G IP Phone Click Export to open file download window, and then save the file to your local system. How to export system log? We may need you to provide a system log to help analyze your problem.
- Page 171 Troubleshooting Click Export to open the file download window, and then save the file to your local system. You can also export the system log to a syslog server. Contact your system administrator for more information. Note It is recommended to reset the syslog level to 3 after exporting the system syslog. How to export all diagnostic files? We may need you to provide three types of diagnostic files (including PCAP trace, system log and BIN configuration file) to help analyze your problem.
- Page 172 User Guide for the SIP-T23P/G IP Phone Click Export to open file download window, and then save diagnostic files to your local system. Note If the issue cannot be reproduced, just directly click Export to export all diagnostic files. How to reboot the phone? To reboot the phone via web user interface: Click on Settings->Upgrade.
- Page 173 Troubleshooting How to upgrade firmware? To upgrade firmware via web user interface: Click on Settings->Upgrade. Click Browse to locate the required firmware from your local system. Click Upgrade to upgrade the firmware. The web user interface prompts “Firmware of the SIP Phone will be updated. It will take 5 minutes to complete.
- Page 174 User Guide for the SIP-T23P/G IP Phone The LCD screen prompts “Resetting to factory,please wait…”. The LCD screen prompts “Welcome Initializing…please wait”. The phone will be reset to factory settings sucessfully after startup. Note Reset of your phone may take a few minutes. Do not power off until the phone has started...
-
Page 175: Regulatory Notices
Without prior written consent, no organization or individual is permitted to make any change to the structure or the safety design of the device. Yealink is under no circumstance liable to consequences or legal issues caused by such changes. - Page 176 User Guide for the SIP-T23P/G IP Phone Please place no heavy objects on the device in case of damage and deformation caused by the heavy load. Keep at least 10 cm between the device and the closest object for heat ...
- Page 177 Appendix A-Time Zones Time Zone Time Zone Name Samoa United States-Hawaii-Aleutian, United States-Alaska-Aleutian -9:30 French Polynesia United States-Alaska Time Canada(Vancouver,Whitehorse), Mexico(Tijuana,Mexicali), United States-Pacific Time Canada(Edmonton,Calgary), Mexico(Mazatlan,Chihuahua), United States-MST no DST, United States-Mountain Time Canada-Manitoba(Winnipeg), Chile(Easter Islands), Mexico(Mexico City,Acapulco), United States-Central Time Bahamas(Nassau), Canada(Montreal,Ottawa,Quebec), Cuba(Havana), United States-Eastern Time -4:30...
- Page 178 User Guide for the SIP-T23P/G IP Phone Time Zone Time Zone Name +9:30 Australia(Adelaide), Australia(Darwin) Australia(Brisbane), Australia(Hobart), Australia(Sydney,Melboume,Canberra), Russia(Vladivostok) +10:30 Australia(Lord Howe Islands) New Caledonia(Noumea), Russia(Srednekolymsk Time) +11:30 Norfolk Island New Zealand(Wellington,Auckland), Russia(Kamchatka Time) +12:45 New Zealand(Chatham Islands) Tonga(Nukualofa) +13:30...
- Page 179 Index Contact Management Contrast About This Guide Copyright Accessing the Remote Phone Book Customizing Your Phone Account Management Account Registration Adding Contacts Adding Groups Declaration of Conformity Administrator password Deleting Contacts Advanced Phone Features Deleting Groups Anonymous Call Dial-now Anonymous Call Rejection Dial Plan Answering Calls Directory...
-
Page 180: Service Agreements
User Guide for the SIP-T23P/G IP Phone Key as Send Safety Instructions Search Source List in Dialing Searching for Contacts Sending RTP Stream Language Service Agreements LED Instructions Shared Call Appearance (SCA) Limitation of Liability Short Message Service (SMS) Line Keys...
Need help?
Do you have a question about the SIP-T23P and is the answer not in the manual?
Questions and answers