Mercedes-Benz COMAND Operating Instructions Manual
Hide thumbs
Also See for COMAND:
- Operating instructions manual (298 pages) ,
- Operator's manual (271 pages) ,
- Supplement manual (190 pages)

Related Manuals for Mercedes-Benz COMAND


Summary of Contents for Mercedes-Benz COMAND
- Page 1 COMAND Operating Instructions É1665846204`ËÍ 1665846204 Order no. 6515 7384 13 Part no. 166 584 62 04 Edition D-2016...
- Page 2 Symbols Publication details In this Operator's Manual you will find the fol- Internet lowing symbols: Further information about Mercedes-Benz vehi- WARNING cles and about Daimler AG can be found on the Warning notes make you aware of dangers following websites: which could pose a threat to your health or http://www.mbusa.com (USA only)
- Page 3 Welcome to the world of Mercedes-Benz First of all, familiarize yourself with your multi- media system. Read these operating instruc- tions, particularly the safety and warning notes, before you drive off. This will help you to obtain the maximum pleas- ure from your multimedia system and avoid endangering yourself and others.
-
Page 4: Table Of Contents
Contents Index ............3 Overview and operation ..... 17 Introduction ......... 13 System settings ........33 Vehicle functions ........ 44 Navigation ........... 52 Telephone ..........93 Online and Internet functions ..126 Radio ..........140 Media ..........149 Sound ..........172 SIRIUS Weather ........ -
Page 5: Index
Traffic announcements ....26 1, 2, 3 ... Alternative Route ........ 76 360° camera Ambient lighting Displaying images ......47 Setting (COMAND) ......44 Opening the camera cover for Armrest cleaning (COMAND) ......48 Adjusting (COMAND) ....... 46 Settings ........... 48... - Page 6 ..........114 Rear Seat Entertainment System ... 189 Camera Selecting the screen ...... 190 360° camera (COMAND) ....47 Rear view camera ......48 Car pool lanes ........56 Date format, setting ......35 Category list (music search) .... 157 Day design, setting ......
- Page 7 Entertainment System) ....194 Favorites (Internet) ......138 DVD video Favorites button ........41 Rear Seat Entertainment System ... 196 Fuel consumption (COMAND) .... 45 DYNAMIC SELECT Configuration via the DYNAMIC SELECT controller ......49 Configuring individual drive pro- Google™ Local Search gram ..........
- Page 8 Equalizer ........174 With the selected provider ..... 128 Features ........173 Locator lighting Surround sound ......174 Setting (COMAND) ......45 Heading up (navigation) ..... 83 Lumbar support Home address Adjusting (COMAND) ....... 46 Entering and saving ......58 Making a call Incident (traffic report) .......
- Page 9 Ending the connection ....130 gation announcements ....26 Establishing a connection ....129 Alternative route ......76 Further Mercedes-Benz Apps ..134 Avoiding an area ......86 Manually setting the access data Basic settings ........54 of the mobile phone network pro- Blocking a route section affected vider ..........
- Page 10 Real-time traffic reports ..... 78 Changing view ....... 171 Rear Seat Entertainment System Displaying pictures ......171 Active COMAND source ....200 Exiting the picture viewer ....171 Adjusting sound settings ....192 POI (navigation) Adjusting the brightness ....192 Category ..........
- Page 11 Opening the camera cover for Selecting a channel ....... 145 cleaning (COMAND) ......48 Tagging music tracks ..... 147 Screen Switching on/off (COMAND) ... 48 Rear-compartment screens ....187 Selecting for the remote control ..187 SD memory card Receiving vCards ....... 112 Ejecting ..........
- Page 12 Index Short message see Text messages (SMS) Telephone SIRIUS weather display Accepting a call (COMAND) ..... 99 5-day forecast ........ 178 Adding a call ........100 Daily forecast ......... 178 Adjusting the volume for calls ..26 Detail information ......179 ®...
- Page 13 Index Rejecting a call (COMAND) ....99 Changing the input language for Safety notes ........93 handwriting recognition ....25 Sending DTMF tones ...... 101 Changing the station/music Setting up a speed dial ....115 track ..........25 Switching between calls (call wait- Character suggestions .....
- Page 14 Index Picture settings ......168 Playing conditions ......167 Safety notes ........166 Selecting a scene/chapter .... 170 Stop function ......... 170 Switching to ........167 Video menu ........169 Voice Control System Settings ........... 36 Volume, adjusting Navigation messages ....... 26 Weather map (SIRIUS) Activating/deactivating display levels ..........
-
Page 15: Introduction
Introduction Bear in mind that at a speed of only 30 mph Operating safety (approximately 50 km/h) your vehicle covers a distance of 44 feet (approximately 14 m) per Important safety notes second. WARNING This equipment complies with FCC radiation exposure limits set forth for uncontrolled equip- If you operate information systems and com- ment and meets the FCC radio frequency (RF) - Page 16 Changes or modifications not expressly against theft can be obtained from an author- approved by the party responsible for compli- ized Mercedes-Benz Center. ance could void the user's authority to operate the equipment. Canada only: The wireless devices of this vehi-...
- Page 17 EDR data may be used in civil and criminal mat- ters as a tool in accident reconstruction, acci- If the vehicle is equipped with COMAND or dent claims, and vehicle safety. Since the Crash mbrace, additional data about the vehicle’s...
- Page 18 Information on copyright Information on licenses for free and Open Source software used in your vehicle and in the electronic components can be found on this website: http://www.mercedes-benz.com/ opensource. Your multimedia system equipment These operating instructions describe all the standard and optional equipment of your multi- media system, as available at the time of going to press.
-
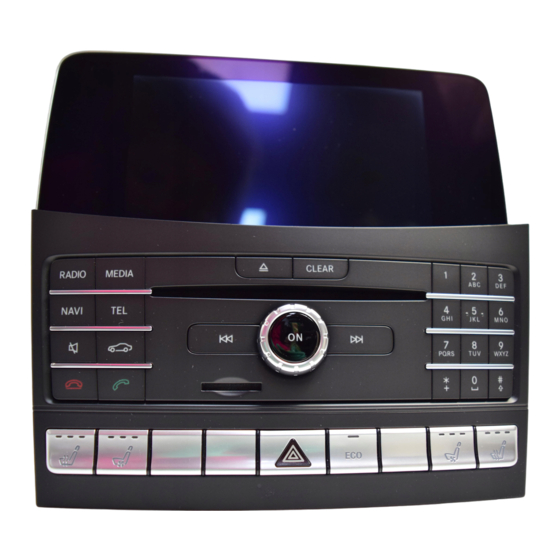
Page 19: Components
Overview Overview Components Display ( page 18) Control panel ( page 19) Controller and buttons ( page 20) The multimedia system consists of: the display the control panel with a single drive or DVD changer the controller and buttons the touchpad two connection options for USB devices or via Media Interface in the center console ®... -
Page 20: Vehicle Functions
Internet browser The display has an automatic temperature-con- trolled switch-off feature. The brightness is Mercedes-Benz Apps with Google™ Local automatically reduced if the temperature is too Search, destination and route download, high. The display may then temporarily switch Facebook, Google Street View™, stock pri-... -
Page 21: Control Panel
Overview Control panel Function Page Function Page Switches to radio mode Number pad Calls up the Radio menu • Saves a station • Authorizes (connects) a Switches to the last selected mobile phone media mode • Telephone number entry Calls up the Media menu •... -
Page 22: Back Button
Overview Function Page Function Page Rejects a call Switches to navigation mode Ends an active call Calls up the navigation sys- tem menu Switches the mute function on/off Calls up the telephone menu Switches off navigation Calls up vehicle settings announcements Controller Buttons and controller... -
Page 23: Operating The Touchpad
Touchpad To delete an entire entry: press and hold the create, manage and call up favorites page 30). $ button on the control panel. enter destinations in navigation save entries Press and hold the j clear button on the controller. Further information on operating the touchpad page 21). -
Page 24: And Telephone
Touchpad Confirming a selection Use two fingers to touch the touch-sensitive surface. Swipe your fingers down. Quick access is hidden. Operating the control for vehicle and sound settings Use one finger to press the touch-sensitive surface until you reach the pressure point. A menu, an option or an application is started. -
Page 25: Touchpad
Touchpad Touch the touch-sensitive surface with two fingers, spaced far apart. Glide your fingers towards each other. The map scale is reduced. Handwriting recognition Handwriting recognition overview This function is only available if the touchpad is equipped with handwriting recognition. Touch the touch-sensitive surface again with You can use handwriting recognition for text, one finger. -
Page 26: Character Suggestions
Touchpad Character suggestions To change the input line or the position of the cursor To change the input language To finish character entry To display the menu: press the touchpad. Switching the text reader function of the handwriting recognition on/off You can switch the text reader function of the handwriting recognition on or off. -
Page 27: Changing The Station/Music Track
Touchpad Press the touchpad. Further information on handwriting recogni- A symbol is shown. tion on the touchpad ( page 23). To select p: glide your finger to the left or Draw additional letters on the touchpad sur- face one after another. right and press. -
Page 28: Traffic Announcements
Basic functions Changing the audio source Basic functions Switching the multimedia system on/ Press the q control knob. When you switch the multimedia system on, a warning message will appear. The multimedia system calls up the previously selected menu. If you switch the multimedia system off, play- back of the current media source will also be switched off. -
Page 29: Navigation
Basic functions Radio: the basic menu of the last radio mode Switching the sound on/off set appears. Media source sound Media: the basic display for the last media source set appears. In the example, Media Press the 8 button on the control panel or Interface mode is set. -
Page 30: Phone Book
Character entry (telephony) Switching input line Press the % button. The phone menu appears. To switch to the bottom line of the character bar: slide 6 the controller. To call up the menu: press the % button again. To select 5: turn and press the controller. The input line for the first name is selected. - Page 31 Character entry (navigation) To enter a character: turn, slide 6 or 5 Symbol Function and press the controller. Selected character : is entered in the upper Cancels input line. The multimedia system adds the missing Inserts a paragraph characters and shows the entry that best matches the current input.
-
Page 32: Overview
Favorites You see which characters you can enter with that key. Each time the key is pressed, the next character is selected. Wait until the character display goes out. The entries matching your input are shown in the list. Favorites Overview of favorites To change the character bar language: slide 6 and turn the controller, then press it... -
Page 33: Media
Favorites Adding favorites Renaming favorites Press the favorites button on the controller. Adding predefined favorites The favorites are displayed. Press the favorites button on the controller. To select a favorite to be renamed: turn the The favorites are displayed. controller. To show the menu bar: slide 6 the con- To show the menu bar: slide 6 the con- troller. - Page 34 Favorites To select Delete: turn and press the control- ler. To select or No: turn and press the con- troller. If you select the favorite is deleted. cancels the procedure.
-
Page 35: System Settings
Display settings Your multimedia system equipment These operating instructions describe all the standard and optional equipment of your multi- media system, as available at the time of going to press. Country-specific differences are pos- sible. Bear in mind that your vehicle may not feature all functions described here. -
Page 36: Date
Time settings Press the Ø button. Design Explanation Day Mode The display is set perma- Press Vehicle in the main function bar. nently to day design. The vehicle menu is displayed. To select Time: slide 6, turn and press the Night Mode The display is set perma- controller. - Page 37 Time settings Press the Ø button. To select Time: slide 6, turn and press the controller. A menu appears. Press Vehicle in the main function bar. To select Set Time Manually: turn and The vehicle menu is displayed. press the controller. To select Time: slide 6, turn and press the A menu with an analog clock appears.
-
Page 38: Voice Control System
Using individualization, you can fine-tune the Voice Control System to your own voice. This will help improve voice recognition (see the sep- arate operating instructions). Text reader settings Press the Ø button on the COMAND con- WiFi trol panel. Overview Press Vehicle in the main function bar. -
Page 39: Connecting The Device
Canada: Requirements for establishing a WiFi connec- tion between the multimedia system and a WiFi Press the Ø button on the COMAND con- hotspot of a WiFi-enabled device, such as a trol panel. smartphone, or another hotspot:... -
Page 40: Selecting A Hotspot
Connecting a device via WPS PIN (Can- ada) Prerequisite: For this type of connection, the device to be connected must support "Connect using WPS Press the Ø button on the COMAND con- PIN". trol panel. Press the Ø button on the COMAND con- trol panel. - Page 41 WiFi Generating a new security key (USA) Press the Ø button on the COMAND con- trol panel. Press Vehicle in the main function bar. The vehicle menu is displayed. To switch to the menu bar: slide 6 the con- troller.
-
Page 42: Activating/Deactivating
® Audio exchange vCards ® Bluetooth is a registered trademark of Blue- tooth Special Interest Group (SIG) Inc. Press the Ø button on the COMAND con- trol panel. ® Activating/deactivating Bluetooth Press the Ø button. Press Vehicle in the main function bar. -
Page 43: Favorites Button
Calling up the Favorites function via the sys- Using this function, you can do the following tem menu: with your personal multimedia system data: Press the Ø button. transfer your personal COMAND data from one system/vehicle to another. Press Vehicle in the main function bar. - Page 44 If you import data such as address data, the existing data on the multimedia system is overwritten. You will see a message to this effect. COMAND is restarted after the data import. To enter the 4-digit PIN and select ¬: turn and press the controller.
- Page 45 Resetting is recommended before selling or transferring ownership of your vehicle, for example. Mercedes-Benz is not liable for any loss of data. Press the Ø button. Press Vehicle in the main function bar.
-
Page 46: Vehicle Settings Calling Up
Vehicle settings Exiting the vehicle settings: Your multimedia system equipment To select &: slide 6 and press the con- troller. These operating instructions describe all the standard and optional equipment of your multi- media system, as available at the time of going to press. - Page 47 Vehicle settings You can find further information on the interior The exterior lighting remains on for 60 seconds lighting in the vehicle Operator's Manual. after the engine is switched off. If you close all the doors and the tailgate, the exterior lighting switches off after the set time.
-
Page 48: Seat Functions
Seats Adjusting the seat contour in the lum- Seats bar region of the seat backrest Overview This function allows you to adjust the air cush- You can configure the following seat functions in ions in the lumbar region of the backrest (4-way the menu: lumbar support). - Page 49 360° camera Massage the entire back, rising waves, sooth- Resetting all adjustments ing downward movements Call up the seat functions ( page 46). Activating Massage Select a seat. Mobilizing massage and rising and descend- To select Reset: turn and press the controller. ing dynamic waves To select a seat: slide 1 the controller.
-
Page 50: Settings
Rear view camera Switching the display off manually The rear view camera is only an aid. It is not a replacement for your attention to your immedi- To select &: slide 6 and press the con- ate surroundings. You are always responsible troller. -
Page 51: Configuration Via The Dynamic Select Controller
DYNAMIC SELECT DYNAMIC SELECT Configuration via the DYNAMIC SELECT controller General notes The DYNAMIC SELECT Controller is available for Press DYNAMIC SELECT to configure the follow- Mercedes-AMG vehicles. ing settings and values for the Individual drive Use the DYNAMIC SELECT controller to select program: the Individual drive program (see the vehicle Drive system... - Page 52 Driving dynamics You can make the following settings for the sus- You can choose from the following settings for pension: the transmission: Comfort Automatic Sport Manual Sport + You can choose from the following settings for ® the ESP (Electronic Stability Program): You can make the following settings for the steering: Sport...
- Page 53 Driving dynamics Road type analogous to the selected drive program G-force display of longitudinal and lateral acceleration Accelerator and brake pedal activity Activity of the spring struts Wheel angle Vehicle level display (Mercedes-AMG vehi- cles) The G-force display is not available in all of the drive programs.
-
Page 54: Navigation
Introduction Digital maps do not cover all areas nor all routes Your multimedia system equipment in an area. For this reason, you must always observe road These operating instructions describe all the and traffic rules and regulations during your standard and optional equipment of your multi- journey. -
Page 55: Moving
Introduction The following entries are not possible, for exam- Using the menu, you can make a destination ple: entry or select the navigation settings, for exam- ple. entering the destination city and street To show: slide 6 the controller when the POI entry via a name search map appears. -
Page 56: Basic Settings
Basic settings Basic settings Eco Route The navigation system calcu- lates an economic route. The Selecting the route type journey may take slightly lon- ger compared to taking the fast route. Short The navigation system calcu- Route lates a route with a short dis- tance. - Page 57 Basic settings To avoid/use route options: select Avoid Selecting announcements Options. A menu appears. Select one of the options. O: using or avoiding route options is enabled ª: using or avoiding route options is disabled Avoid Area page 86) You can define areas that you would like to avoid.
-
Page 58: Address Entry Menu
Destination entry Using car pool lanes Destination entry You can include carpool lanes (HOV or car shar- Important safety notes ing lanes) in the route calculation. WARNING If you use HOV or carpool lanes, please observe the applicable laws as well as the local and time If you operate information systems and com- limitation conditions. - Page 59 Destination entry city or zip code, center city or zip code, street, intersection street, city or zip code, house number street, city or zip code, intersection The address can be entered faster by entering the street before the city if the address has an unusual street name.
-
Page 60: Starting Route Calculation
Destination entry Select the address entry menu ( page 56). Enter a surname and first name ( page 29). To select State/Province, Code, Cen‐ To select the¬ symbol: turn and press the or Intersection: turn, slide 6 and controller. The destination address is saved in the press the controller. -
Page 61: Keyword Search
Destination entry destination and opens the intermediate des- Enter the first few letters of the city and tinations list. street, such as and EMP. While entering the information, the number of The route is calculated using the digital map exact matches and total number of matches data. -
Page 62: Tinations
Destination entry Select an entry: turn and press the controller. Select Keyword Search. The address entry menu appears, showing the To select State/Province: slide 5, turn destination address. and press the controller. To start route calculation: select Start States/provinces are sorted alphabetically. To select a state/province: turn and press the To select POI: select POIs in the Vicin‐... -
Page 63: Selecting An Address Book Con Tact As A Destination
Destination entry Select the destination. To switch to navigation mode: press the The address entry menu appears, showing the Ø button. destination address. To show the menu: slide 6 the controller. To start route calculation: select Start To select Destination: turn and press the controller. -
Page 64: Search
The POI list with character bar appears. ously specified positions Enter a name. To select Mercedes-Benz Service: turn and press the controller. Search By Phone Num‐ Call up the POI menu ( page 61). To select... -
Page 65: Selecting
Destination entry Selecting a POI category The complete address of the POI is shown. To view the vicinity of the destination: POI categories appear after choosing the menu select : by turning and pressing the con- items Near Destination, Current Position troller. -
Page 66: Creating
Destination entry To select a destination from the selection list: Using the map turn and press the controller. If the digital map provides navigable address data, you will see the destination address in the address entry menu. To start route calculation: select Start Entering intermediate destinations Introduction... - Page 67 Destination entry Selection Step From Enter a destination from Mercedes-Benz Apps Mercedes- Benz Apps page 67). Enter a destination using Using Geo- Coordinates the geo-coordinates page 67). To select a POI category or Other : turn and press the controller.
-
Page 68: Editing
Destination entry To load data from the Internet: select www. To change the order: in the menu, select If an Internet address is available, data is loa- Move. ded from the Internet. Turn the controller and move the intermediate To store an intermediate destination in destination or destination to the desired posi- the destination memory: select Save... -
Page 69: Settings For Personal Pois
Select From Mercedes-Benz Apps. Categories which you have created yourself, The list of Mercedes-Benz Apps appears. e.g. on your PC Personal routes are not categorized. Using geo-coordinates Settings for personal POIs To switch to navigation mode: press the ß... -
Page 70: Saving
Personal POIs and routes To switch to navigation mode: press the Select Audible or Optical. The function is switched on O or off ª, ß button. depending on the previous status. To show the menu: slide 6 the controller. To select a category: turn the controller and To select Options: turn and press the con- press to confirm. -
Page 71: Editing
Importing personal POIs and routes To select a register: slide 9 the control- via Mercedes-Benz Apps ler. You can use Mercedes-Benz Apps (e.g. Down- To select a character: turn and press the con- load POI) to import destinations to the naviga- troller. -
Page 72: Recording The Route
Personal POIs and routes Select personal POI or personal route Recording the route page 69). General notes To explore a personal POI or route: turn and press the controller to select Map. When recording the route, bear in mind the fol- The map with the crosshair appears and lowing: shows the destination. -
Page 73: General Notes
Route guidance To select Destination: turn and press the tions. The symbols or the map display could dis- controller. tract you from traffic conditions and driving. Select From Memory Card. The route guidance displays can be seen if nav- igation mode is switched on. Select Personal Routes. -
Page 74: Lane Recommendation
Route guidance Announcement phase When the change of direction is completed, the map will appear in full screen mode again. Display on highways Point at which the change of direction takes place (white dot) Change of direction (turn right here) Distance to the next change of direction The image shows an example of route guidance at a highway intersection when driving on a... - Page 75 Route guidance Calling up the selection mode Lane recommendations are also shown in the multifunction display of the instrument cluster (see the vehicle Operator's Manual). Approaching new lanes When highway information is displayed, slide 9 the controller. The marker is on the highway information. The associated position is highlighted on the map.
- Page 76 Route guidance Canada: view the vicinity of the destination Destination reached if street images are available and a mobile phone is connected to the multimedia sys- ® tem via Bluetooth page 94) or USB page 164) USA: download data from the Internet if an Internet address is available and mbrace is activated for Internet access page 94)
- Page 77 Route guidance Switching navigation announcements Slide 6 the controller. The menu is shown. on/off To select Destination: turn and press the To deactivate navigation announcements: controller. during a navigation announcement, press the Select Continue Route Guidance. 8 button on the control panel. The multimedia system calculates the route.
-
Page 78: Alternative Route
Route guidance Route list USA: download data from the Internet if an Internet address is available and mbrace is activated for Internet access ( page 94). Canada: download data from the Internet if an Internet address is available and a mobile phone is connected to the multime- ®... -
Page 79: Off-Road
Route guidance judge these factors or take them into account Traffic jam function for route guidance. Route guidance to an off-road destina- tion The multimedia system can guide you to desti- nations which are within the area of the digital map, but which are not themselves on the map. -
Page 80: Real-Time Traffic Reports
Real-time traffic reports As soon as the system can assign the vehicle position to the map again, route guidance con- tinues in the usual way. Real-time traffic reports Prerequisites In order to receive real-time traffic reports via satellite radio, you need to subscribe to SIRIUS XM Satellite Radio Traffic Message Service. -
Page 81: Real-Time Traffic Report
Real-time traffic reports Traffic symbol information To select Details: turn and press the con- troller. The report shows the following information: State/province, road and display of the affec- ted direction Section of the road to which the traffic report applies Traffic icon and traffic report To close the detailed display: press the % button. -
Page 82: Reading Out Traffic Reports
Real-time traffic reports Displaying all traffic reports Reading out traffic reports on the route Introduction The text reader function is only available while route guidance is active. It reads out traffic reports affecting the current route. You can select from the following text reader properties: Language ( page 40) -
Page 83: Saving
Storing destinations Recalculating the route dynamically Storing the destination in the address book Route types Dynamic Traffic Route Dynamic TRF. Route After Request take Storing as a new contact into account all of the traffic reports they receive for the current route when calculating the route page 54). - Page 84 To switch to navigation mode: press the ß button. When the map is shown, press and hold the To switch to navigation mode: press the COMAND controller until you hear a tone. ß button. The current vehicle position is saved to the "Last destinations" memory.
-
Page 85: Map Settings
Map functions Select From Previous Destinations. Map settings The "Last destinations" memory appears. Setting the map scale To save the destination: select the destina- tion. The destination address appears. Store the destination in the address book page 81). Save the destination to the SD card page 82). -
Page 86: Selecting Text Information On The Map
Map functions Selecting POI symbols on the map To switch to navigation mode: press the ß button. To show the menu: slide 6 the controller. To select Options: turn and press the con- troller. Select Orientation. The # dot indicates the current setting. Turn and press the controller. -
Page 87: Showing The Map Version
Range on Map. map can be obtained from an authorized Switch the display in the map on O or off ª. Mercedes-Benz Center. To switch to navigation mode: press the Switching highway information on/off ß button. While driving on the highway, gas stations, rest To show the menu: slide 6 the controller. -
Page 88: Building Images
Map functions Rotating the 3D map Other functions: Moving the map ( page 53) Changing the map scale ( page 83) Building images You can use this function to explore the vicinity of the destination in a 3D view. The function is available in all map scales. - Page 89 Map functions Avoiding a new area To select an area: when the map with cross- hair appears, press the controller. A red square appears on the map, symbolizing the area to be blocked. To change the size of the area, turn the con- troller.
-
Page 90: Updating
After selecting Yes, all areas are deleted. Information about new versions of the digital map can be obtained from an authorized Mercedes-Benz Center. You can have the digital SIRIUS XM service map updated there using a data medium, or you can update it yourself. -
Page 91: Online Map Display
Benz Center If an update for your map software is available, you will receive it free of charge at an authorized Mercedes-Benz Center during your vehicle's annual service. You can arrange a separate appointment for this at an authorized Mercedes- Benz Center on request. -
Page 92: Calling Up The Compass Display
Navigation functions Maps™ map shows the vicinity of the current Call up the navigation menu ( page 89). vehicle position. Turn the controller until Info on Naviga‐ To exit the online map display: press the % tion is brought to the front. button. - Page 93 To confirm the message: press the controller. Remove the data medium. Have the data medium checked at an authorized Mercedes-Benz Center. Problem Possible causes/consequences and M Solutions The multimedia system The digital map is secured with an activation code.
- Page 94 The multimedia system asks for an activation code during the map update. The code must be validated in the vehicle. Start the vehicle. To restart the update: insert the DVD, SD memory card or USB device. The multimedia system's integrated hard drive is defective. Consult an authorized Mercedes-Benz Center.
-
Page 95: Telephone
You can also obtain more information by calling. In the USA, you can get in touch with the WARNING Mercedes-Benz Customer Assistance Center on If you operate mobile communication equip- 1-800-FOR-MERCedes (1-800-367-6372). ment while driving, you will be distracted from In Canada, you can get in touch with the Cus- traffic conditions. -
Page 96: Telephony
Connecting/disconnecting a mobile phone Receiver icon shows whether a call is active/ Function restrictions being connected ¡ or not ¢. You may have to wait before using telephony via Calling up the telephone menu the multimedia system in the following situa- Press %. -
Page 97: Searching For A Mobile Phone
The connection is terminated automatically if In the USA, you can get in touch with the you leave the receiver range of the multimedia Mercedes-Benz Customer Assistance Center ® system or deactivate Bluetooth on your mobile on 1-800-FOR-MERCedes (1-800-367-6372). - Page 98 Connecting/disconnecting a mobile phone The code is the same To select Conn. Device: turn and press the controller. Multimedia system: select Yes. The device list is displayed. Mobile phone: confirm the code. Depending To select Search for Phones: turn and on the mobile phone used, you may have to press the controller.
-
Page 99: Establishing The Connection From The Mobile Phone
To ensure an optimum language quality, you another passkey for it. can set the mobile phone's transmission and reception volume ( page 98). Mercedes-Benz recommends de-authoriza- tion in the multimedia system as well as on The code is different the mobile phone ( page 98). Subsequent Multimedia system: select No. -
Page 100: Displaying Connection Details
To close the detailed display: slide 9 the controller. De-authorizing (disconnecting) a mobile phone Setting the reception and transmis- Mercedes-Benz USA, LLC recommends de- sion volume authorization in the multimedia system as well as on the mobile phone. Subsequent authoriza- tion may otherwise fail. -
Page 101: Using The Phone Book
Using the telephone To select a volume setting: turn the controller. Further information about ending a call page 102). To accept changes: press the controller. Incorrect settings may have an impact on Using the number keypad on the upper the quality of calls. section of the center console To call up the telephone menu: press the % button. -
Page 102: Adding A Call
Using the telephone Further information about ending a call Symbol for active telephone connection page 102). Ends a call Switches the microphone on/off Using speed dial page 100) Sends DTMF tones (not possible with all Option 1 mobile phones) ( page 101) To call up the telephone menu: press the Other functions:... -
Page 103: Sending Dtmf Tones
Using the telephone Switching off the microphone: Calls with several participants To switch to the menu bar: slide 6 the con- Switching between calls (call waiting) troller. To select Microphone Off: turn and press the controller. If the microphone is switched off, the Q symbol and the The microphone is off. -
Page 104: Call Waiting
Mobile phone voice recognition several parties to hear one another and speak Depending on the mobile phone, you may with one another. also be able to accept the incoming call (call waiting) on your mobile phone. This function and behavior depends on your mobile phone network provider and the mobile phone (see the manufacturer's operating instructions). -
Page 105: Calling Up
Phone book Phone book You can also call up the phone book with the multifunction steering wheel; see the sepa- Introduction rate operating instructions. The telephone book displays the contacts from the address book which have a phone number. Symbol overview The phone book of the mobile phone is auto- matically displayed in the multimedia system Sym-... - Page 106 Phone book names are identical. The next different char- To complete the search and return to the acters are offered for selection. phone book: press the touchpad. To select and call the contact: glide up or Select the characters of the contact you are down and press.
-
Page 107: Adding Information To A Contact
Phone book To select a category for the number, e.g. If you wish to overwrite one of the phone num- Home: turn the controller and press to confirm. bers: To select a telephone category, e.g. Mobile To select Yes: turn and press the controller. Phone: turn the controller and press to con- A list of the existing five phone numbers is firm. -
Page 108: Introduction
Address book Saving a contact Closing the phone book Saved contacts are indicated in the phone book To select & from the character bar: turn the by different symbols ( page 103). controller and press to confirm. Call up the phone book ( page 103). -
Page 109: Calling Up
Address book Select the characters of the contact you are Calling up the address book searching for one by one, pressing and con- firming with the controller each time. To end the search: select b. The contacts in the address book are dis- played. -
Page 110: Adding Information To A Contact
Address book creates an address book entry that includes the up to five telephone numbers complete navigable address data. two email addresses Call up the address book ( page 107). Internet address To switch to the menu bar: slide 6 the con- two addresses troller. -
Page 111: Changing The Category Of An Entry
Address book To select Details: turn and press the con- Making a call troller. Call up the address book ( page 107). The display is shown in full. To select a contact: turn and press the con- To close the detailed display: press the troller. -
Page 112: Criteria For Contacts
Address book To select Voice Tag: turn and press the con- Storing the phone number as a speed troller. dial number To select Delete: turn and press the control- Call up the address book ( page 107). ler. Select an entry: turn and press the controller. To select Yes: turn and press the controller. -
Page 113: Automatically Importing Contacts From The Phone
Importing contacts Automatically importing contacts Deleting a name from the phone Call up the address book ( page 107). Depending on the mobile phone used, you can Search for a contact ( page 107). set whether the contacts should be called up To select G: slide 9 the controller. -
Page 114: Deleting Imported Contacts
Importing contacts Multimedia system Importing from the memory card or USB device To switch to the menu bar in the telephone menu or the address book: slide 6 the con- Contacts imported from the memory card or troller. from a USB device are identified by the ¯ To select Options: turn and press the con- symbol. -
Page 115: Call Lists
Call lists To select Yes: turn and press the controller. To call up the telephone menu: press the The contacts are deleted. % button. To switch to the menu bar: slide 6 the con- troller. To select No: turn and press the controller. The process is canceled. -
Page 116: Book
Call lists Adding information to an address book Saving telephone numbers entry Adding new entries to the address book To call up the telephone menu: press the % button. To switch to the menu bar: slide 6 the con- troller. To select Call Lists: turn and press the... -
Page 117: Speed Dial Deleting
Messages (text messages and e-mails) Deleting all speed dial presets Speed dial lists To call up the telephone menu: press the Setting up % button. To call up the telephone menu: press the To call up the menu bar: slide 6 the con- % button. -
Page 118: Calling Up The Settings Menu
New Messages In the USA, you can get in touch with the Only the messages that are new on the Mercedes-Benz Customer Assistance Center on mobile phone are displayed. 1-800-FOR-MERCedes (1-800-367-6372). In Canada, you can get in touch with the Cus- The messages are not displayed automati- tomer Relations Center on 1-800-387-0100. -
Page 119: Account
Messages (text messages and e-mails) Only the messages that are new on the To switch to the menu bar: slide 6 the con- mobile phone are displayed. troller. To select Download: turn and press the con- troller. The messages are not displayed automati- cally. -
Page 120: Displaying Details
Messages (text messages and e-mails) If you want to read messages that have already This folder contains all the messages that you been read again, you have to call up the corre- have saved as a draft. sponding message folder ( page 118). -
Page 121: Writing
Messages (text messages and e-mails) Answering a text message Writing text messages Observe the requirements for the message func- Writing a new text message tion ( page 115). Display the message ( page 117). Press the controller. To select Reply: turn and press the controller. The text message input menu is displayed. -
Page 122: Editing Text Templates
Messages (text messages and e-mails) To insert an e-mail address from the address Text templates book: select the Æ symbol. The contacts from the address book which Using text templates have an e-mail address are displayed. Search for and select an entry ( page 103). -
Page 123: Deleting
Dictation function Enter characters using the controller Enter characters using the controller page 28) or the number keypad. page 28) or the number keypad. To adopt changes to the text template, select To finish the entry: select OK. ¬: turn and press the controller. The new contact has been created. - Page 124 ® MirrorLink An e-mail account must be set up on the mobile change the capitalization of words phone for the e-mail function (see the manufac- add words turer’s operating instructions). delete words To read and write e-mails in the multimedia sys- replace the dictated message with a new tem, the e-mail account first needs to be con- figured (...
-
Page 125: Settings
® MirrorLink The multimedia system automatically estab- ® MirrorLink settings ® lishes a Bluetooth connection to the mobile phone. If this is unsuccessful, an error message Activating/deactivating automatic con- will appear. In this case, you should connect the nection ® mobile phone manually via Bluetooth To call up the telephone menu: press the page 94). -
Page 126: Apple Carplay
® Apple CarPlay To select Options: turn and press the con- Prerequisites troller. ® ® Apple CarPlay is available from the iPhone To select MirrorLink Ann. Have Prior‐ 5. It is recommended that you use the latest ity: turn and press the controller. ®... - Page 127 ® Apple CarPlay Changing the activation mode When the telephone is disconnected from the multimedia system, the activation mode can be changed. To call up the telephone menu: press the % button. To select Tel/®: turn and press the control- ler.
-
Page 128: Conditions For Access
Conditions for access Your multimedia system equipment Function restrictions (Canada) You will not be able to use the Mercedes-Benz These operating instructions describe all the Apps and Internet connection, or will no longer standard and optional equipment of your multi-... -
Page 129: Selecting
Search for Bluetooth Phone: The driver is not permitted to call up websites turn and press the controller. while driving and use of the Mercedes-Benz Mobile phones are displayed that: Apps is restricted. fulfill the conditions for the Internet func-... -
Page 130: Vider
Setting up an Internet connection (Canada) Explanation of the access data If the data is not correct, you can edit the set- tings ( page 129). Input field Meaning If the mobile phone network provider provides multiple access data options, the relevant Access number for estab- Phone Num‐... -
Page 131: Editing
The mobile phone must be connected with the entering a web address system for the access data to be changed. calling up the Mercedes-Benz mobile website When the Internet connection is active, you can- calling up a Mercedes-Benz App not edit or delete the access data of the cur- rently set mobile phone network provider. -
Page 132: Google™ Local Search Calling Up Local Search
The menu with the Internet functions is dis- played. To select Mercedes-Benz Apps: turn and Ending the connection press the controller. To select Local Search: turn and press the USA: you cannot cancel the connection your- controller. -
Page 133: Search Term
Google™ local search Further information on how to enter the search Using search results position and search term ( page 131). To select a search result: turn and press the You will first need to register the multimedia controller. system before you can use the Internet func- The following options are available: tions. -
Page 134: Displaying Destinations In The Vehicle
Select "Send to car". Call up Local Search ( page 130). Select Mercedes-Benz as the vehicle brand. To select the search position, e.g. At cur‐ Enter the mbrace e-mail address or the vehi- rent location: turn and press the control- cle identification number. -
Page 135: Deleting A Destination From The Server
Destination/route download To select Download POI: turn and press the Display the destination in the vehicle controller. page 132). Available destinations are shown in the list. To highlight a destination: turn the controller. To select and download a destination: turn To select G: slide 9 the controller. -
Page 136: Mercedes-Benz Apps
To select Tel/®: press the controller. General notes To select Internet: turn and press the con- To be able to use Mercedes-Benz Apps, you first troller. have to register. To do so, you have to enter your The menu with the Internet functions is dis- name and postal address once in the vehicle and played. -
Page 137: Web Browser
Internet pages cannot be shown while the vehi- Additional Mercedes-Benz Apps can be pur- cle is in motion. chased on the Mercedes-Benz website. You can find further information at: Entering a web address http://apps.mercedes-benz.com/apps/ The available features are country-dependent. -
Page 138: Menu Functions
Web browser To refresh the website: select Î. Navigating the website The website is refreshed. This procedure may take some time. Step Result While the website is loading, a cross Turn the controller. Navigates from one appears in the menu. This can be used to can- selectable item (e.g. - Page 139 Web browser To show the menu: press the % button. You can switch the browser's audio playback on or off here. To select 3: turn and press the controller. Hide Scroll Bars A menu appears. The # dot indicates the cur- rent setting.
-
Page 140: Creating Favorites
Web browser Selecting favorites To select the setting you require: turn and press the controller. Press the % button. The last function called up appears. Select Delete All Data On Exit. To select Tel/® in the main function bar: Switch the setting on O or off ª. slide 5, turn and press the controller. - Page 141 Web browser To select ©: slide 9 and press the con- troller. Select Delete. A prompt appears. Select or No. If you select the favorite is deleted. If you select the process is canceled. Closing the browser Select % in the browser menu page 136) Press the % button for longer than two seconds.
-
Page 142: Radio
Overview Your multimedia system equipment Overview These operating instructions describe all the standard and optional equipment of your multi- media system, as available at the time of going to press. Country-specific differences are pos- sible. Bear in mind that your vehicle may not feature all functions described here. -
Page 143: Activating/Deactivating The Sta Tion Presets Display
Station Press the g key on the number keypad. Setting the waveband An input field appears. Enter the frequency of the desired station in In radio mode: press the $ button. the entry field. A menu appears with a selection of Radio HD Radio Radio,... -
Page 144: Deleting A Station
Station Press and hold the controller until the preset Saving/deleting a station list appears. To select the preset number: turn and press the controller. A tone confirms that the storing process was successful. Moving highlighted stations In radio mode: slide 6 the controller. To select Preset: turn and press the control- ler. -
Page 145: Displaying Information
Displaying information able or interrupted for a variety of reasons. These include environmental or topographical conditions as well as other factors beyond the control of Mercedes-Benz USA, LLC. This means operation may not be possible in certain areas. These include: tunnels... -
Page 146: Registering
Updating Channels... http://www.siriusxm.com (USA) or message appears in the display, followed by the satellite radio main menu. http://www.siriusxm.ca (Canada). Your new Mercedes-Benz vehicle comes with You can also have the satellite service acti- ® Sirius XM Satellite Radio pre-installed at the vated online. -
Page 147: Overview
Satellite radio Satellite radio overview Selecting a channel Changing channels When the display/selection window in the satellite radio display is selected, slide 1 or turn the controller. The multimedia system switches to the next available channel. Entering channel numbers directly To select Options in the radio menu bar: turn... -
Page 148: Memory Functions
Satellite radio To select Options in the radio menu bar: turn and press the controller. Set the desired channel in satellite radio To select Current Station List with mode. Artist & Title: turn and press the control- Press and hold the controller until the preset ler. -
Page 149: Music And Sports Alerts
Satellite radio Deactivating Select Select New Alerts. A menu appears. In radio mode: slide 6 the controller. Select the desired team from a league, e.g. To select Preset: turn and press the control- college, NBA, NHL, NFL or MLB. ler. The alert function for the sports team is To select Station Preset View:... -
Page 150: Channel List Updates
Satellite radio The channel last selected is switched to mute Displaying information until the update has been completed. Satellite radio mode is not available during this process. Once the update has been completed, the sat- ellite radio basic menu appears. The channel previously selected will be played if it is still available. -
Page 151: Media
Activating media mode Your multimedia system equipment Switching on automatically When an external media source is connected, These operating instructions describe all the CD and SD memory card functions are automat- standard and optional equipment of your multi- ically switched on by the multimedia system. media system, as available at the time of going When using with USB devices, switch to the to press. -
Page 152: Notes
Audio/video mode To select Media in media mode: slide 5 and Audio/video mode press the controller. The menu appears with the available media Important safety notes sources. WARNING To select the media source: turn the control- ler and press to confirm. The CD/DVD drive is a class 1 laser product. - Page 153 Audio/video mode FAT16, FAT32, exFAT and NTFS for SD mem- ® Copy-protected iTunes music files with ory card and USB storage media the .m4p file extension are not supported. ® HFS and HFS+ for Apple devices The multimedia system supports the following video formats: Writing access is not possible on NTFS.
-
Page 154: Inserting
Audio/video mode Notes on copyright Current track and number in the track list Numerical time display Audio/video files that you create or reproduce Graphic time display yourself for playback are generally subject to Album cover (if available) copyright protection. In many countries, reproductions, even for pri- vate use, are not permitted without the prior Inserting and removing a disc from consent of the copyright holder. -
Page 155: Inserting/Removing
Audio/video mode number buttons (1-6) on the multimedia sys- To eject a single CD/DVD: press the V tem. button. The DVD changer switches to the selected The magazine menu appears. The current disc magazine tray. is marked. Please Wait... message appears. You will then see the Please insert disc message. -
Page 156: Inserting
Audio/video mode Playback options poses an increased risk of injury or even fatal injury. In media mode, slide 6 the controller. Keep SD memory cards out of the reach of The media menu bar is shown. children. If an SD memory card is swallowed, To select Options: turn and press the con- seek immediate medical attention. -
Page 157: Selecting A Track
Audio/video mode Ticking or removing the tick from the box in front Selecting a track Show Track Information displays or hides the information on the track, artist and album in Selecting using the current track list the main display field. If it is deactivated, the file To display the current track list: press the name and the folder name of the track are dis- controller in the basic display. -
Page 158: Gracenote ® Media Database
Audio/video mode Select a sub-category, e.g. Rock. No individual music tracks can be stored or deleted, only a maximum of 12 complete audio Select a track in the sub-category for playing. CDs. All of the tracks in this sub-category are played. -
Page 159: Category List
Media search The tracks on the stored audio CDs can also be Category list found and played using other media search In Media mode, slide 6 the controller. functions ( page 157). The media menu bar is shown. To select Search: turn and press the control- Deleting stored audio CDs ler. -
Page 160: Keyword Search
Media search To select Current Tracklist in the cate- Searching by genre gory list: turn and press the controller. The selection list appears. Select the required track. Searching by folder Playable files can be searched for in the active data medium's directories. To select Folder in the category list: turn and... - Page 161 ® Bluetooth audio mode ® Bluetooth audio mode ® Connecting Bluetooth audio devices Prerequisites ® The Bluetooth function must be activated in the multimedia system ( page 40). ® ® Bluetooth audio mode requires a Bluetooth capable audio device. ® Check your Bluetooth audio device for the fol- Select ¬.
-
Page 162: Device List
The mobile phone is then entered: ® in the Bluetooth telephone list page 95) ® in the Bluetooth audio device list page 160) Mercedes-Benz recommends authorizing a ® mobile phone in Bluetooth telephony ® Bluetooth audio player within range and page 96). already authorized... -
Page 163: External Authorization
® Bluetooth audio mode Authorizing ® Depending on the Bluetooth audio device used, you now have two options for continu- ® Start the authorization on your Bluetooth ing with authorization. audio device (see the manufacturer's operat- ing instructions). Option 1: entering the passkey After successful authorization, the Blue- You can find information on this in the ®... - Page 164 ® Bluetooth audio mode Option 2: De-authorizing (deregistering) a Blue- ® To select Options: slide 6 and press the tooth audio device controller. ® To select a Bluetooth audio device from the To select Bluetooth Audio Devices: press ® Bluetooth device list: turn the controller.
-
Page 165: Tooth ® Audio Device Has Been Stopped
® Bluetooth audio mode already an active Internet connection, this can In this case, you will see the Bluetooth cause the connection to be terminated. Audio Device Paused message. If there is an Internet connection and the mobile phone that is connected only supports ®... -
Page 166: Switching To Media Interface
Operation with the Media Interface common. Once all the tracks in a folder have Media Interface basic display been played, the tracks in the next folder are played. Random Track List: the current track list is played in random order (e.g. 3, 8, 5 etc.). Random Medium: all tracks on the data medium are played in random order (e.g. -
Page 167: Search
Folder http://www.mercedes-benz-mobile.com/. Then follow the instructions in the "Media Inter- Select By Cover face" section. Keyword Search Or call the Mercedes-Benz Customer Assistance Playlists Center at 1-800-FOR-MERCedes Artists (1-800-367-6372) (for the USA) or Customer Albums Relations at 1-800-387-0100 (for Canada). -
Page 168: Playback Options
General notes Notes on discs Do not affix stickers or labels to the discs. They could peel off and damage COMAND. Stickers can cause the disc to bend, which If playable video files are found, they will be can result in read errors and disc recognition played by the multimedia system. -
Page 169: Function Restrictions
The multimedia system is set to region code appears in the display. 1 at the factory. This setting can be changed at an authorized Mercedes-Benz Center. It is also possible to play video DVDs with a dif- Switching on video DVD mode... -
Page 170: Menu Options
Video DVD mode DVD basic display Video settings Setting the picture format Main function bar Main display field Media menu bar The following options are available for the screen format for the DVD being played: The DVD basic display appears once the DVD has been inserted. -
Page 171: Dvd Functions
Video DVD mode DVD's control menu DVD functions Most DVDs have their own control menu which Showing/hiding the DVD functions can be operated using the controller. To show the DVD overlay menu: in full-screen Showing the DVD's control menu video mode, press the controller. To select Menu from the DVD overlay menu:... -
Page 172: Pause Function
Picture viewer Operating the DVD's own menu with the To stop playback: select É again while playback is interrupted. DVD overlay menu To start playback again: select Ì. Playback restarts from the beginning. Pause function In full-screen mode, press the controller The DVD overlay menu is shown. -
Page 173: Displaying Pictures
Picture viewer Displaying pictures Changing the picture view In the media basic display, press the control- ler. Search with a category list appears. To select Photos in the category list: turn and press the controller. A directory list appears. Folders and picture files can be shown. -
Page 174: Sound
Sound settings Your multimedia system equipment Setting treble, mid-range and bass These operating instructions describe all the standard and optional equipment of your multi- media system, as available at the time of going to press. Country-specific differences are pos- sible. Bear in mind that your vehicle may not feature all functions described here. -
Page 175: Calling Up The Sound Menu
® ® Harman/kardon Logic 7 surround sound system To adjust the balance: slide 8 or 9 the Manufactured under license from Dolby controller. Laboratories. Dolby and the double-D symbol are trademarks of Dolby Laboratories. To adjust the fader: slide 6 or 5 the con- troller. -
Page 176: Equalizer
® ® Harman/kardon Logic 7 surround sound system To adjust the balance: slide 8 or 9 the Setting treble, mid-range and bass controller. To adjust the fader: slide 6 or 5 the con- troller. An image shows the sound focus set. To return to the basic menu: press the % button briefly. -
Page 177: Calling Up The Sound Menu
Bang & Olufsen BeoSound Bang & Olufsen BeoSound Calling up the sound menu You can make various sound settings for the General notes different audio and video sources. It is possible The Bang & Olufsen BeoSound AMG sound sys- to set more bass for radio mode than for audio tem is available for all functions in the radio and CD mode, for example. -
Page 178: Sound Profile
Bang & Olufsen BeoSound To switch between the rotary menus: slide Setting the sound profile 8 or 9 the controller. To make the desired Equalizer settings: turn the controller. The rotary menus show the set values. To return to the menu: slide 5 the control- ler. - Page 179 Bang & Olufsen BeoSound For the best sound, the specific seats will need to be set. Call up the sound menu ( page 175). Turn the controller until VIP & BAL Selec‐ tion is in the center. Slide 6 the controller. The rotary menu is activated.
-
Page 180: Sirius Weather
Weather forecasts Depending on which scale has been selected, Your multimedia system equipment the weather map can display the following weather data with symbols: These operating instructions describe all the precipitation radar standard and optional equipment of your multi- media system, as available at the time of going The precipitation radar cannot be displayed to press. -
Page 181: Weather Forecast
Weather forecasts You see the following information: Displaying detailed information the date and time of the weather message received last information on the current weather (temper- ature, cloud cover) and forecast for the next 3, 6, 12 hours the current highest temperature and fore- casts the current lowest temperature and forecasts the probability of rain... - Page 182 Weather forecasts Option 1: selecting the area in the infor- The information chart shows the following infor- mation (if available): mation chart ski slopes/ski lifts To select Location in the information chart: snowboarding and nighttime opening turn and press the controller. snow conditions (e.g.
-
Page 183: Weather Map
Weather forecasts Selecting an area from the weather selected location. The data is supplied by the nearest weather station. memory Directly from the weather memory: select Option 2: selecting the area in the Location from the information chart: turn weather map and press the controller. -
Page 184: Showing/Hiding The Menu
Weather forecasts Showing/hiding the menu in the storm cell with strong winds (super cell), from which a tornado can develop. Torna- weather map does are also known as twisters. To show: press the controller. cyclone: To hide: slide 5 the controller. storm cells from which a tornadic storm can develop hailstorm... - Page 185 Weather forecasts To display the storm characteristics: acti- Weather Explanation vate the Storm Characteristics display front level ( page 182). If weather data is available, the weather map Stationary The weather front moves will then display the storm characteristics. front minimally.
-
Page 186: Legend
Weather forecasts Legend (precipitation radar and storms) You can find out more information about cyclo- nes in the Storm Guide ( page 185). The following information is shown (if available): name of the tropical storm and category time stamp directional movement speed and path maximum wind speed Propagation speed: the speed at which the storm cell of a tropical cyclone is advancing. -
Page 187: Storm Watch Box
Weather forecasts Storm Watch Box To display the storm guide: display the menu on the weather map ( page 182). To select Guide: turn and press the controller. A menu appears. The current storm is high- lighted. There is information about the storm in the status bar. -
Page 188: Rear Seat Entertainment System
Equipment Observe that a range of Rear Seat Entertain- ment Systems are available for Mercedes-Benz vehicles. In this Operator's Manual, the Rear Seat Entertainment System Code 864 is used for illustration purposes. If you have a different... -
Page 189: Rear-Compartment Screens
Overview Rear-compartment screens AUX jacks (AUX display) Display The same AUX jacks (AUX drive) can be found in the rear-compartment drive ( page 188). Remote control Two remote controls are supplied for the US and Canadian markets. Overview Selecting the screen for the remote con- trol You can use the remote control to operate either of the two rear screens. - Page 190 Overview Point the remote control at the rear-compart- The AUX jacks shown are for the AUX drive. ment screen which has been selected for Identical jacks can be found on the right-hand remote operation. side of the rear-compartment screens (AUX dis- play) ( page 187).
-
Page 191: Indicator Lamp
Overview Cordless headphones Overview To adjust the headphones: open both sides of the headphones. Adjust the fit of the headphones by pulling the headphone band in the direction of the arrow. To switch the headphones on or off: press On or Off switch ;. To adjust the volume: turn volume control = until the desired volume is set. -
Page 192: Selecting The Screen
Overview Selecting the screen for the cordless Environmental note headphones Batteries contain dangerous substances. It is against the law to dispose of them with the household rubbish. They must be collected separately and recycled to protect the environment. Dispose of batteries in an environmentally friendly manner. -
Page 193: Using The Main Loudspeaker
MP3) must be activated on at least one rear screen. The headphones' volume setting does not affect the main loudspeakers. To set on COMAND: press the $ button, for example, to switch on an audio mode. To select Info6 slide and press the con- troller. -
Page 194: Adjusting The Brightness
Audio CD/MP3 possibilities: Video DVD the operating mode has been changed on the Radio (active media source in COMAND) other screen. the operating mode has not been changed. Switch on an operating mode (e.g. audio CD In the first case, the operating mode appears as mode) ( page 193). -
Page 195: System Settings
Audio CD/DVD and MP3 mode System settings Setting the brightness Select Settings using the : button and Note press the 9 button to confirm. You can adjust all system settings individually Select Brightness with the 9: but- for each rear screen without affecting the other tons and confirm with the 9 button. - Page 196 Audio CD/DVD and MP3 mode Inserting and removing a CD/DVD Switching to audio CD, audio DVD or from the rear-compartment drive MP3 mode Calls up CD functions, other displays: MP3 (MP3 mode), DVD-A (audio DVD mode) Disc slot Calls up track list (audio CD and audio DVD Disc eject button mode), calls up folders (MP3 mode) The rear-compartment drive is located behind...
- Page 197 Audio CD/DVD and MP3 mode If the Random Tracks Random Folder repeatedly until you reach the desired posi- playback option has been selected, the track tion. order is random. Press and hold the E or F button until Via track list the desired position has been reached.
-
Page 198: Track Information
Video DVD mode To interrupt playback: select É using 9: buttons and press the 9 button to confirm. the :=; buttons on the remote The option is switched on. For all options control and press the 9 button to confirm. except Normal Track Sequence, you will... -
Page 199: Control Menu
Rear Seat Entertain- ment System will be able to play video DVDs that you have copied yourself. Further information ( page 167). Information regarding COMAND also applies to the Rear Type of data medium Seat Entertainment System. Current title Function restrictions... - Page 200 Video DVD mode Fast forwarding/rewinding Selecting a scene/chapter Press and hold the E or F button on Skipping forwards/backwards the remote control until the desired position Press the = or ; button on the remote has been reached. You see the control menu. control.
-
Page 201: Rear Seat Entertainment System
Video DVD mode To skip to the end of a scene: select the DVD menu F menu item and press the 9 button to Calling up the DVD menu confirm. To skip to the beginning of a scene: select The DVD menu is the menu stored on the DVD the E menu item and press the 9 button itself. - Page 202 Active COMAND media source mode tivated. Overview You can transfer a media source selected in COMAND to the Rear Seat Entertainment Sys- tem. If you switch the media source in COMAND, this will not be transferred to the Rear Seat Entertainment System.
- Page 203 192). audio or video source needs to be activated in COMAND. If the media source is activated in COMAND, it is loaded on the Rear Seat Enter- tainment System and is then played. Audio DVD mode functions Rear Off...
-
Page 204: Aux Mode
( page 187) until "L REAR" For further details about external video sources, (left-hand screen) or "R REAR" (right-hand please consult an authorized Mercedes-Benz screen) is highlighted in the window. Center. Select in the menu using the 9=;... - Page 205 AUX mode Adjusting the brightness, contrast or color Select Display Aux Disc Drive Aux the AUX menu and press the 9 button to confirm. Select Brightness, Contrast Color press the 9 button to confirm. A scale appears. Select a setting using the 9 or : but- ton and press the 9 button to confirm.
Need help?
Do you have a question about the COMAND and is the answer not in the manual?
Questions and answers