Table of Contents
Advertisement
Quick Links
Advertisement
Table of Contents

Related Manuals for Keith McMillen Instruments K-MIX

Summary of Contents for Keith McMillen Instruments K-MIX
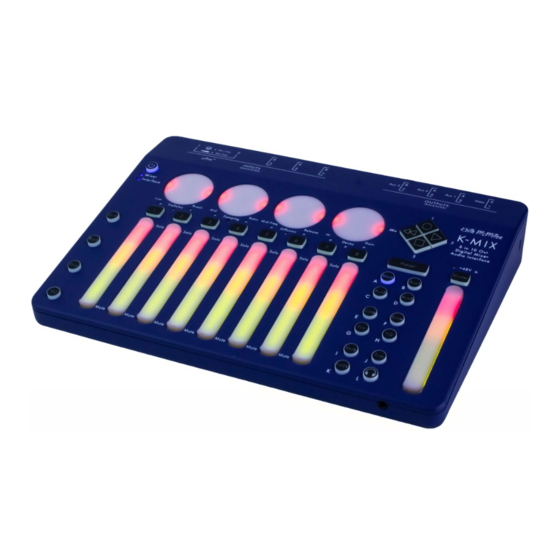
- Page 1 Mic / Line Aux 3 Aux 2 Aux 1 Main Inst / Line µPre ™ I N P UT S O U T P U TS (B AL AN C E D) (B A L A NC E D ) M I X 8 In 10 Ou t Au dio Int er fa ce...
- Page 2 Product and brand names contained in this document are used for identification purposes only. Use of them does not imply any affiliation with or endorsement by them. Keith McMillen Instruments, the Keith McMillen Instruments logo, the K-Mix and K-Mix logo are trademarks of Kesumo LLC.
- Page 3 ABLE ONTENTS 0. WELCOME ............................... 1 1. BEFORE YOU BEGIN ............................2 1.1 What’s In The K-Mix Box? ........................3 1.2 What’s In The MIDI Expander Package? ....................4 1.3 – System Requirements ........................5 1.3.1 – Hardware ..........................5 1.3.2 –...
- Page 4 ABLE ONTENTS 2.3.6 – To A Computer ........................22 2.3.7 – To An iPad ..........................23 2.3.8 – To MIDI Hardware ......................... 25 2.4 – Mixing Audio ............................ 26 3. FEATURES OVERVIEW ..........................27 3.1 – Standalone Mixing ........................... 28 3.2 –...
- Page 5 4.2.5 – VU ............................46 4.2.5.1 – Enabling & Disabling VU Meters ................46 4.2.5.2 – Adjusting Faders While VU Is Enabled ..............46 4.2.5.3 – VU Meter Signal Tap Points ..................47 4.2.5.4 — VU Behavior In The Various K-Mix Modes ............... 47...
- Page 6 ABLE ONTENTS 4.2.6 – Preset ............................. 48 4.2.6.1 – Selecting A Preset ..................... 48 4.2.6.2 – Saving A Preset......................48 4.2.6.3 – Resetting A Preset ..................... 49 4.2.6.4 – Resetting Global Parameters ..................49 4.2.7 – Main ............................50 4.2.7.1 – What Do The Controls Do? ..................50 4.2.7.2 –...
- Page 7 ABLE ONTENTS 4.2.14.1 – Enabling & Disabling Surround Panning ............... 60 4.2.14.2 – What Do The Controls Do? ..................60 4.2.14.3 – [SHIFT] Functionality ....................61 4.2.14.4 – Output Channel Behavior ..................61 4.2.14.5 – Bass Management Crossover ................. 62 4.2.14.6 –...
- Page 8 4.3.1 – MIDI Ports ..........................71 4.3.1.1 – Port 1: K-Mix Audio Control..................72 4.3.1.2 – Port 2: K-Mix Expander ..................... 72 4.3.1.3 – Port 3: K-Mix Control Surface ................... 72 4.3.2 – Sending MIDI From K-Mix ....................72 4.3.2.1 – MIDI Banks ......................... 72 4.3.2.2 –...
- Page 9 ABLE ONTENTS 5.1.1.7 – Receive All Button ..................... 88 5.1.1.8 – Setlist ......................... 88 5.1.1.9 – Show/Hide Presets Toggle ..................91 5.1.1.10 – “Global” Parameters vs. “Per Preset” Parameters ..........92 5.1.2 – Fader Section ........................93 5.1.2.1 – Faders ........................93 5.1.2.2 –...
- Page 10 5.3.3 – Save Globals Button ......................124 5.4 – Menu Bar Options .......................... 125 5.4.1 – K-Mix Editor ........................125 5.4.1.1 – About K-Mix Editor ....................125 5.4.1.2 – Preferences ......................125 5.4.2 – File ............................126 5.4.2.1 – Export Preset ......................126 5.4.2.2 –...
- Page 11 7.2 – USB Hubs ............................137 7.3 – Mac Mini Phantom Power & Connectivity Issues ................137 7.4 – Renaming The K-Mix Device Name In Audio MIDI Setup ............138 7.5 – K-Mix Not Recognized In Audio MIDI Setup ................138 7.6 –...
-
Page 12: Welcome
ELCOME Hello, and welcome to the world of K-Mix! Taking the time to read this document is a huge step toward becoming a true K-Mix wizard! Put on your robe and wizard hat, wield your staff, and replenish your mana reserves before proceeding further. -
Page 13: Before You Begin
Before You Begin... - Page 14 For mixing. -USB C ICRO ABLE For connecting K-Mix to a computer or tablet. -USB C ABLE For connecting K-Mix to a USB power supply or KMI MIDI Expander. USB P OWER UPPLY ONVERTER LADES +5V DC, 1.5A. For powering your K-Mix. Also includes international converter blades.
- Page 15 EFORE EGIN 1.2 W ’ MIDI E XPANDER ACKAGE MIDI E XPANDER For expanding. USB P OWER UPPLY ONVERTER LADES +5V DC, 500 mA Includes power converter blades for non-United States AC sockets. USB C ABLE For connecting the Expander to the USB power supply. -USB C ABLE For connecting a KMI device to the Expander.
-
Page 16: Hardware
• Mac OS 10.7 or later • Intel Core 2 Duo (or greater) • USB 2.0 (or greater) port • 100 MB free hard disk space • A connected K-Mix INDOWS • The K-Mix Editor software is not compatible with any Windows operating system. - Page 17 (‘) denotes feet — e.g. 1/4” refers to one-quarter inch and 3’ refers to three feet. • References to buttons on the K-Mix hardware will appear as the button name (or symbol) enclosed in brackets — e.g. the [SHIFT] button and the [ ] button.
-
Page 18: Getting Started
Getting Started... - Page 19 ETTING TARTED This section covers information that will help you get started with the K-Mix. We will introduce the K-Mix hardware and the MIDI Expander hardware, discuss how to connect your K-Mix to the world, and go over basic operation of the mixer. More in-depth information is available in the K-Mix Hardware and K-Mix Editor...
-
Page 20: Front Panel
2.1.1.1 – F ADERS The K-Mix faders are where the most important part of mixing occurs — level adjustment. Depending on the current mode K-Mix is in, the faders are in charge of controlling output levels, input trim levels, aux send levels, and reverb send levels. -
Page 21: Rotaries
TARTED 2.1.1.2 – R OTARIES The K-Mix rotaries handle most of the parameter adjustments that aren’t covered by the faders. These include EQ, compressor, gate, panning, and reverb adjustments. The outer edge of each rotary, underneath the surface, is lined with 16 LEDs. -
Page 22: Mode Buttons
2.1.1.5 – D IAMOND The diamond buttons are used to select whether K-Mix is in the “Mix” bank, or one of three available MIDI banks (“1”, “2”, “3”); they can also be used to output MIDI notes and transport control messages. -
Page 23: Outputs
2.1.2.2 – I NPUTS This is where all of the audio signals you want to mix go in! K-Mix offers eight balanced, mono inputs, and is capable of accepting both XLR (inputs 1 & 2 only) and 1/4” connectors. XLR/TRS C... -
Page 24: Audio" Micro-Usb Port
MIDI control surface, passing audio and MIDI between the two devices. The connected device will provide power to K-Mix. K-Mix can also be powered from this port by connecting it to a USB power supply. When powered in this manner, K-Mix will operate as a standalone mixer. - Page 25 K-Mix Mix bank parameters, and change the currently selected preset. (2) MIDI O MIDI output from the Expander. MIDI from the K-Mix (and a connected computer) can be sent out of this to external MIDI hardware.
- Page 26 ETTING TARTED 2.3 – C ONNECTING This section covers how you can connect K-Mix to your audio world. ar = 44100 kr = 4410 ksmps = 10 nchnls = 8 /*-------IVORY-------*/ instr 1 ifreq = cpspch(p5) aglis expseg 1, p8, 1, p3 - p8, p9...
-
Page 27: To Power
3. Turn on K-Mix by pressing the [ ] button. It is possible that some devices will not be capable of bus-powering K-Mix on their own. If this is the case then you will need to power K-Mix externally for K-Mix to fully operate. - Page 28 TANDALONE POWER VIA POWER SUPPLY It is also possible to power K-Mix from a standard AC power outlet using a 5V USB power supply (included with K-Mix). The power supply must be capable of putting out a minimum of 500mA of power to ensure K-Mix will work properly;...
- Page 29 Microphones can be connected to inputs 1 and 2 on K-Mix with XLR cables. 1. Connect the female end of an XLR cable to the microphone. 2. Connect the other end of the XLR cable to input 1 or input 2 on K-Mix. Outputs...
- Page 30 2.3.3 – T EVEL NSTRUMENTS Line level instruments can be connected to any of K-Mix’s inputs. 1. Connect a 1/4” TS/TRS cable to your instrument. 2. Connect the other end of the cable to any of K-Mix’s eight inputs. Outputs Inputs...
- Page 31 EVEL NSTRUMENTS Hi-Z instrument level signals can be connected to inputs 1 and 2 on K-Mix with 1/4” TS/TRS cables. 1. Connect a 1/4” TS/TRS cable to your instrument. 2. Connect the other end of the cable to input 1 or input 2 on K-Mix.
- Page 32 EVICES Phono level signals can be connected to inputs 3–8 on K-Mix. Phono level devices, like turntables, typically have RCA connectors; it is likely you will need RCA to 1/4” TS adapters or and RCA to 1/4” TS cable in order to connect to K-Mix.
-
Page 33: To A Computer
2.3.6 – T OMPUTER K-Mix can be connected to a computer with a micro-USB cable, allowing for audio to pass back and forth between the two devices. 1. Connect a micro-USB cable to K-Mix’s AUDIO port on the back panel. -
Page 34: To An Ipad
Apple does not allow iPads to provide as much power as a standard USB port does, so your K-Mix will also need an external power source to function properly; this can come in the form of a USB power supply or a powered USB hub. - Page 35 2. Connect the powered USB hub to a power outlet. 3. Connect the powered USB hub to the Lightning to USB Camera Adapter via USB. 4. Connect the K-Mix’s AUDIO port to the USB hub using a micro-USB cable. Outputs...
- Page 36 3. Connect the Expander’s MIDI OUT jack to the MIDI IN jack on the MIDI hardware device. 4. If power for your K-Mix is needed, connect the Expander’s POWER port to a USB power supply, then plug the power supply into a wall outlet. The Expander will provide power to K-Mix over the USB connection.
- Page 37 2.4 – M IXING UDIO If you want to start mixing as quickly as possible, take your K-Mix out of its box and do the following: 1. Power up K-Mix. 2. Connect your gear to K-Mix’s inputs. 3. Connect your speakers to K-Mix’s main outputs (outputs 1 & 2).
-
Page 38: Features Overview
Features Overview... -
Page 39: Midi I/O
VERVIEW This section is a general overview of the deep feature set offered by K-Mix — what they are, what they do, and what can be adjusted. It does not discuss how these features are controlled, it merely provides a brief introduction. -
Page 40: Microphone Input
K-Mix. 3.4.3 – I NSTRUMENT EVEL NPUT Hi-Z (“high impedance”) instrument level audio signals can be used with inputs 1 and 2 on K-Mix. Plug in and you’re good to go. 3.4.4 – P HONO EVEL NPUT In addition to line level signals, K-Mix inputs 3–8 are capable of receiving phono level audio signals. -
Page 41: Main Outputs
3.5.1 – M UTPUTS Outputs 1 and 2 are K-Mix’s “main outputs”, or “main output bus”. This is the default stereo pair that audio will go out of when mixing. • The main output bus has its own set of DSP effects, including an EQ, compressor, and noise gate. -
Page 42: Headphone Output
EADPHONE UTPUT K-Mix has a 1/8” stereo headphone output jack at the very front of the hardware. The headphone output can be used for a number of purposes. • Monitor any of the four stereo output bus pairs (Mains, Aux 1, Aux 2, Aux 3). - Page 43 VERVIEW 3.6 – O NBOARD K-Mix is equipped with powerful DSP directly onboard — no computer necessary! 3.6.1 – EQ Each of the 8 input channels and the main output bus have their own 3-band, semi-parametric EQ available (low-shelf, mid-band, high-shelf) — similar to a standard channel strip EQ on most mixing consoles. This is extremely useful for sculpting your mix: making sure sounds don’t step on one another, removing...
-
Page 44: Low-Shelf
EATURES VERVIEW 3.6.1.1 – L HELF The EQ’s lower band is a sweepable, dual-pole, low-shelving filter with control over frequency and boost/cut. Low-Shelf EQ Center Frequency Frequency Range: 20Hz-400Hz Boost/Cut: ±18dB 3.6.1.2 – M The middle band is fully parametric, with control over frequency, boost/cut, and bandwidth (Q). Mid-Band EQ Frequency Range: 200Hz-6KHz... -
Page 45: High-Shelf
EATURES VERVIEW 3.6.1.3 – H HELF The high band is a sweepable, dual-pole, high-shelving filter with control over frequency and boost/cut. High-Shelf EQ Center Frequency Frequency Range: 3KHz-20KHz Boost/Cut: ±18dB 3.6.2 – N OISE Each of the 8 input channels and the main output bus have their own noise gate with full control over threshold, gain reduction amount, attack time, and release time. -
Page 46: Compressor
3.6.4 – R EVERB K-Mix also offers a global reverb effect send. Each of the 8 input channels can be sent into the reverb at different levels using the available reverb sends. Reverb sends can be made to send pre-fader or post- fader. -
Page 47: Rumble" Filter
TEREO ANNING K-Mix allows you to individually set each channel’s left/right panning for each of the four output bus pairs (Main, Aux 1, Aux 2, Aux 3). All stereo panning parameters can be adjusted directly from the K-Mix hardware or the K-Mix Editor. -
Page 48: Presets
In addition to the onboard presets, the K-Mix Editor includes much more in-depth preset management. Its Preset Library can store up to 999 presets (though, only 12 can be on the K-Mix hardware at a time); it can save, recall, revert, delete, reorder, rename, copy, paste, import, and export presets. -
Page 49: Stereo Pairs
The K-Mix hardware is tightly integrated with the freely available K-Mix Editor software application (available here). The K-Mix Editor allows you to edit all mixer parameters in real time (plus a few that aren’t available directly from the mixer itself) and manage your preset library. -
Page 50: K-Mix Hardware
K-Mix Hardware Mic / Line Aux 3 Aux 2 Aux 1 Main Inst / Line µPre ™ INPUTS OUTPUTS (BALAN CED) (BALANCED) M I X 8 I n 10 O ut A udi o I n te r f a c e... -
Page 51: Diamond Pad
ARDWARE This section covers everything related to the K-Mix hardware itself. If you’re looking to learn how the K-Mix hardware can be used to adjust all of the available parameters, look no further. This section also contains other general hardware-specific information. -
Page 52: K-Mix Modes & Mode Buttons
K-Mix mastery! This section details the various K-Mix modes and mode buttons — what they do and how you can control the various options for each mode. If you would like more information about the features themselves (like “what kind of EQ does K-Mix offer?”), please refer to the Features Overview section. -
Page 53: Power
4.2.1.2 – T URNING To turn K-Mix off, press and hold the [ ] button for 3 seconds. Once 3 seconds have elapsed, K-Mix will begin powering down. • When K-Mix is powered down in this manner, the current state of the mixer will be stored in its internal memory. -
Page 54: Bypass
ARDWARE 4.2.3 – B YPASS The [BYPS] button is used to turn effects on and off. This can be done on a per channel basis, or an effect can be bypassed globally (all instances of an effect). Bypassing only has an effect on the compressor, gate, EQ, and reverb functionality. Nothing else has the ability to be bypassed. - Page 55 ARDWARE 4.2.3.3 – R ESET UNCTIONALITY The [BYPS] button can be used to reset parameters to their default states and/or set the faders to exactly 0dB. To do this, press and hold the [BYPS] button, then simply press anywhere on the sensor of the parameter you want to reset.
-
Page 56: Fine
5. If you need to go further than the range offered by fine-tuning mode, you can repeat steps 1–4 again to reset the center point to the new value. Depending on the mode your K-Mix is currently in, some faders may not be controlling a mixer function. If this is the case, fine-tuning will not work for those faders and their LEDs will be off. - Page 57 VU meters will only display when K-Mix is in a mode where the faders control volume levels. Modes like +48V Mode will not display VU meters (faders do not control levels in this mode), and Phones Mode will only show a VU meter on the master fader (representing the headphone output level).
- Page 58 There are multiple VU metering points on K-Mix that can be accessed. The displayed metering point is dependent on what mode K-Mix is currently in. Each meter point on K-Mix and its location in the mixer signal flow can be seen in the K-Mix Signal Flow Diagram.
-
Page 59: Preset
3. That is all. The preset’s contents will be loaded immediately and you will automatically be taken out of Preset Selection Mode — K-Mix will return to whatever mode you were in prior to selecting a preset. -
Page 60: Resetting A Preset
4.2.6.3 – R ESETTING RESET Presets can be reset directly from the K-Mix hardware. Resetting a preset will overwrite one of the 12 available preset slots with K-Mix’s default, “normalled” preset. To reset a preset on K-Mix: 1. Press and release the [PRESET] button. The [PRESET] button and the currently selected preset’s button will light up bright. -
Page 61: Main
1 & 2. This is the default mode of K-Mix; when powered on for the first time it will be in this mode. Plug in, turn up the faders, and sound will be going out the mains. -
Page 62: Muting Channels
ARDWARE 4.2.7.3 – M UTING HANNELS Muting audio channels is achieved with use of the [SHIFT] button. 1. Press and hold the [SHIFT] button. 2. Tap the bottom of a fader to mute that channel’s audio. 3. Tap the bottom of that fader again to unmute that channel’s audio. ISUAL EEDBACK •... -
Page 63: Stereo Pairing
AIRING K-Mix channels 1 and 2, 3 and 4, 5 and 6, and/or 7 and 8 can be paired into stereo channels. Once paired, their parameters sync up and follow each other if any of them are adjusted. To enable stereo pairing for one of the pairs: 1. -
Page 64: Aux1
ARDWARE 4.2.8 – A The [AUX1] button is used to enter “Aux 1 Mode”; here you can adjust audio send levels to the first pair of auxiliary outputs, outputs 3 & 4. 4.2.8.1 – W ONTROLS ADER EHAVIOR In Aux 1 Mode, faders 1–8 are used to control the amount of signal being passed to the Aux 1 output bus (outputs 3 &... -
Page 65: Muting In Aux Modes
ARDWARE • Red LED = Pre-fader By default all aux sends will be set to post-fader. 4.2.8.4 – M UTING ODES It is not possible to mute the aux send level of an input channel (faders 1–8), but it is possible to mute the aux output (“Master”... -
Page 66: Comp
ARDWARE 4.2.11 – C The [COMP] button is used to enter K-Mix’s “Compressor Mode” — here you can adjust the compressor settings for each of the eight input channels and the main output bus. 4.2.1 1.1 – W ONTROLS ADER EHAVIOR In Compressor Mode, the K-Mix faders continue to function as though they are in Mains Mode. -
Page 67: Gate
ADER EHAVIOR In Gate Mode, the K-Mix faders continue to function as though they are in Mains Mode [link to section]. Faders 1–8 control the level of input channels 1–8 and the master fader controls the level of the main output bus (outputs 1 & 2). - Page 68 ARDWARE OTARY EHAVIOR When in Gate Mode, the four rotaries are used to adjust gate settings for the currently selected channel (or channels). • Rotary 1 = Threshold • Rotary 2 = Attack Time • Rotary 3 = Release Time •...
- Page 69 4.2.13 – P TEREO The [PAN] button is used to enter both of K-Mix’s “Pan Modes” — here you can adjust the stereo (left/right) panning settings for each of the eight input channels; it is also possible to pan audio in surround sound.
- Page 70 2. If surround panning was previously enabled, press and hold the [SHIFT] button and press the [PAN] button. This will switch your K-Mix back to Stereo Panning Mode. This step can be skipped if you are already in Stereo Panning Mode.
- Page 71 1. Press the [PAN] button to enter Stereo Panning Mode. 2. Press and hold the [SHIFT] button. 3. While [SHIFT] is still held down, press the [PAN] button. Your K-Mix will now be in Surround Panning Mode. 4. Repeat steps 2 & 3 to disable Surround Panning Mode. This will return your K-Mix to Stereo Panning Mode.
- Page 72 When panning in surround, the rotaries act as four surround panners. These are where you move the audio around in space. • Input channels can be assigned to one of the four rotaries (via the K-Mix Editor); the audio from the assigned channels will follow the rotary’s position in the surround field.
-
Page 73: Bass Management Crossover
K-Mix Editor. It cannot be accessed via the K-Mix hardware. 4.2.14.6 – E DITOR ARAMETERS Surround Panning Mode has a number of parameters that may only be changed from the K-Mix Editor software and are inaccessible from the K-Mix hardware. The following parameters are editor-only: • Speaker Layout •... -
Page 74: Pan (Stereo)
ADER EHAVIOR In EQ Mode, the K-Mix faders continue to function as though they are in Mains Mode. Faders 1–8 control the level of input channels 1–8 and the master fader controls the level of the main output bus (outputs 1 & 2). -
Page 75: Shift] Functionality
ARDWARE • Rotary 2 = Mid Boost/Cut • Rotary 3 = Mid Frequency • Rotary 4 = High Boost/Cut It is also possible to hold down the [SHIFT] button to access more EQ parameters. When holding down [SHIFT] the rotaries will adjust the following parameters: •... -
Page 76: Verb
Since the faders function the same as they do in Mains Mode, [SHIFT] can also be used to solo and mute channels via the faders. 4.2.16 – V The [VERB] button is used to enter K-Mix’s “Reverb Mode” — here you can adjust the reverb settings for K-Mix’s global reverb send. 4.2.16.1 – W... - Page 77 ARDWARE HANNEL ELECT UTTON EHAVIOR The channel select buttons are used for adjusting the pre/post state of the reverb sends. • Press and hold any of the channel select buttons for 1 second to toggle between pre-fader and post-fader. The channel select button LEDs are used to represent the current state of the sends. •...
-
Page 78: Trim
ARDWARE 4.2.17 – T The [TRIM] button is used to enter K-Mix’s “Trim Mode” — here you can adjust the input trim levels for input channels 1–8. 4.2.17.1 – W ONTROLS ADER EHAVIOR In Trim Mode, faders 1–8 are used to control the amount of trim (or “gain”) to apply to input signals. - Page 79 ARDWARE 4.2.18.1 – W ONTROLS ADER EHAVIOR The faders are not used when the [+48V] button is held down; they will not respond to touch and their LEDs will be off. OTARY EHAVIOR The rotaries are not used when the [+48V] button is held down; they will not respond to touch and their LEDs will be off.
-
Page 80: Phones
The phantom power parameters (on/off state and voltage level) are global parameters. This means they are not stored on a per preset basis; they will instead remain the same when changing K-Mix presets. Phantom power parameters are global to prevent situations where changing presets alters phantom power states, which could lead to problems with microphone performance (or even potentially damage some microphones). - Page 81 • Press any channel select button, 1–8, to monitor that channel’s input signal, pre-fader and post- DSP. The master channel select button is used to make the headphone output act as its own discrete output, effectively adding an extra two outputs to K-Mix. [MAIN], [AUX1], [AUX2], [AUX3] B EHAVIOR In Phones Mode, the [MAIN], [AUX1], [AUX2], and [AUX3] mode buttons are used to select one of the four stereo output bus pairs as the monitor point for the headphone output.
-
Page 82: Midi Ports
4.3.1 – MIDI P ORTS When a K-Mix is connected to a computer, three virtual MIDI “ports” (or “busses”) are created — Port 1: K-Mix Audio Control, Port 2: K-Mix Expander, and Port 3: K-Mix Control Surface. They are the “portal” to communicating with the connected K-Mix via MIDI;... -
Page 83: Midi Banks
3: K-M ONTROL URFACE The K-Mix Control Surface port is used for receiving MIDI from and sending MIDI to K-Mix’s MIDI banks. This is the port that audio applications should listen to in order to receive MIDI coming directly from K-Mix. - Page 84 • The rotary LEDs display the current value/location of the fader. UTTONS K-Mix’s buttons can behave in two different ways when in MIDI banks; they can act as momentary switches or toggle switches. • Buttons always output MIDI notes.
-
Page 85: Port 2: K-Mix Expander
4.3.2.2 – D IAMOND K-Mix is able to output a few special MIDI messages when in the Mix bank. Whenever K-Mix is in the Mix bank, the diamond pad buttons will output MCU (Mackie Control Universal) transport control messages. • The diamond pad buttons are labelled with the corresponding transport control message they output when pressed. -
Page 86: Midi Channels
ONTROL The Mix bank parameters on K-Mix are controlled by sending specific MIDI messages to the K-Mix Audio Control port. MIDI sent to the K-Mix Expander or K-Mix Control Surface ports will not do anything related to the Mix bank. -
Page 87: Input Channel Parameters
ARDWARE 4.3.3.2 – I NPUT HANNEL ARAMETERS All input channel parameters are controllable via MIDI, the exceptions being Stereo Pairs, Solo, and Aux Pre/Post switches. As stated in the previous section, 4.3.3.1 – MIDI Channel, each input channel’s MIDI controllable parameters are separated by MIDI channel;... -
Page 88: Main Output Bus Parameters
ARDWARE 4.3.3.3 – M UTPUT ARAMETERS The main output bus parameters can be controlled via external MIDI in the same way as the input channels; the only difference is there is no panning, aux send levels, or input trim levels (since these do not exist on the mains bus). - Page 89 URROUND UXES All other K-Mix parameters that do not fall under the input channels or main output bus are controlled via MIDI CC messages sent on MIDI channel 10. The following list details the parameters that may be controlled and the MIDI CCs that are used to control them.
-
Page 90: Controlling Faders
The specific MIDI CCs and MIDI notes for controlling these parameters will mirror whatever CCs/notes and channel each fader, rotary, or button is set to output; these are set in the K-Mix Editor’s MIDI Tab. If, for example, a fader was set to send its position out on CC 24, MIDI channel 5, then sending a CC 24 message on MIDI channel 5 to the K-Mix Control Surface port will control that fader. - Page 91 MIDI note messages. The exact note number and MIDI channel for controlling each button mirrors whatever note and channel the button is set to output; this is set in the K-Mix Editor’s MIDI Tab. • Buttons may only be controlled via MIDI if they are set to act as a momentary switch (set in the K-Mix Editor).
- Page 92 It is possible to control K-Mix’s Mix bank parameters via a connected MIDI Expander. Any MIDI sent from an external MIDI device into the Expander’s MIDI IN jack will be used to control K-Mix. It is not possible, however, to control the MIDI bank parameters from the MIDI Expander.
-
Page 93: K-Mix Editor
K-Mix Editor... - Page 94 DITOR This section covers the use and behaviors of the K-Mix Editor. The K-Mix Editor allows you to edit all mixer parameters in real time (including a few that aren’t available directly from the mixer itself) and manage your preset library.
-
Page 95: Main Window
DITOR 5.1 – M INDOW The K-Mix Editor’s main window is where almost all editing activity occurs. [CONNECTION SYNC] EQUALIZER COMPRESSOR GATE ROUTING Dave’s Myth Slumper MAIN AUX 1 Thresh Ratio Tomo Berheim Input Trim Thresh Gain Reduc. Bob’s Mög... -
Page 96: Presets Section
DITOR 5.1.1 – P RESETS ECTION This is where all of the preset storage, management, and selection happen. 5.1.1.1 – P RESET IBRARY [CONNECTION SYNC] Dave’s Myth The Preset Library displays all presets currently saved in the editor. Slumper Presets in this library do not have to be loaded on the mixer itself; Tomo Berheim the library is more so a “pool”... -
Page 97: Save Button
CONNECTION SYNC is a preset that cannot be modified, reordered, or deleted, and is always at the top of the preset list. It is used to store K-Mix’s current state when the mixer is initially connected to the K-Mix Editor. It is also used when you change presets from the board while connected to the editor. -
Page 98: Save As Button
DITOR to indicate that changes have been made. 5.1.1.3 – S UTTON The SAVE AS button is used to save the currently selected preset settings to a new preset slot. When clicked, a dialog box will appear, prompting you to enter a name for the new preset. -
Page 99: Send All Button
K-Mix’s preset capabilities. Simply selecting a preset in a Setlist slot does not automatically place them onto your connected K-Mix. Presets must be sent to the mixer by using either the SEND button or the SEND ALL button. - Page 100 • Setting a slot to [OFF] will not delete any preset that may have already been present in the selected slot on the K-Mix hardware. It will remain there unaltered; it is solely the sending/ receiving/syncing that will have been disabled.
- Page 101 DITOR • You must enter a name for the preset before the save happens. • Once saved, the new preset is added to the Preset Library and the corresponding Setlist slot is switched over to the new preset. [A–L] The “Copy Into Slot [A–L]” option is more like a normal “Save” behavior. •...
- Page 102 DITOR 4. Click the RECEIVE button to initiate the preset receiving process. 5. All of the settings from the mixer’s slot D preset are copied to the preset in the editor’s slot D drop-down menu. 6. Setlist slot D’s preset (in the editor) now becomes the currently active/selected preset. 7.
-
Page 103: Changing Presets
LOBAL ARAMETERS VS RESET ARAMETERS It is important to note that there are two different types of K-Mix parameters: “global” parameters and “per preset” parameters. RESET ARAMETERS As the name suggests, “per preset” parameters are stored on a per preset basis. -
Page 104: Fader Section
DITOR 5.1.2 – F ADER ECTION The Fader Section of the editor houses all of the basic level-related functions of the mixer. This is where fader levels are adjusted, tracks are soloed or muted, and where channels are selected for more in-depth editing. -
Page 105: Channel Select Buttons
DITOR HONES UTPUT ADER The stereo headphone output has its own fader. • Range: -∞ – +6dB • The headphone output fader is blue. • The headphone output fader controls the final output level of the headphone output. UTPUT ADER The main output stereo pair has its own fader. -
Page 106: Solo Buttons
Always check your mutes and solos when you’re not getting any audio out of your K-Mix (or, really, any audio equipment). -
Page 107: Main Tab Area
5.1.3 – M The main tab area is where the more advanced mixing features of K-Mix are located. It is home to all available Channel Strip, Reverb, Surround, MIDI, and USB options. These tabs will be discussed in the next section of the manual, 5.2 –... -
Page 108: Tabs
DITOR 5.2 – T The top of the K-Mix Editor window houses the tab switching buttons. There are five available tabs: Channel Strip, Reverb, Surround, MIDI, and USB. Clicking one of these will display related parameters in the main tab area. - Page 109 • Range (Channels 3–8): -20dB – +40dB UMBLE ILTER Rumble Filter K-Mix’s rumble filter is an adjustable high-pass filter intended for filtering out low frequency rumbles and handling noise that may occur when using microphones as input. 224 Hz YPASS...
- Page 110 TEREO AIRS Stereo Pairs K-Mix channels 1 and 2, 3 and 4, 5 and 6, and/or 7 and 8 can be paired into stereo channels. Once paired, their parameters sync up and follow Ch.1&2 each other if any of them are adjusted.
- Page 111 DITOR & N OOST UMBER The cut/boost knob controls the amount of cut or boost the low-shelf filter will apply. • Turn clockwise to increase (boost); turn counterclockwise to decrease (cut). • A specific value may be entered into the accompanying number box as an alternative way of setting the cut/boost level.
- Page 112 DITOR • Turn clockwise to increase the frequency; turn counterclockwise to decrease the frequency. • A specific value may be entered into the accompanying number box as an alternative way of setting the frequency. • Range: 3kHz – 20kHz & N OOST UMBER The cut/boost knob controls the amount of cut or boost the high-shelf filter will apply.
- Page 113 DITOR • Turn the knob clockwise to increase (more makeup gain); turn counterclockwise to decrease (less makeup gain). • A specific value may be entered into the accompanying number box as an alternative way of setting the makeup gain. • Range: 0dB – +24dB &...
- Page 114 DITOR ECTION GATE The Gate section of the channel strip is home to the noise gate parameters. Each of the 8 input channels (and the main output bus) have their own noise gate available for shaping your sounds. Thresh Gain Reduc. YPASS UTTON The bypass button enables or disables the gate.
- Page 115 DITOR & N TTACK UMBER The attack knob controls the attack time of the gate — the amount of time it takes to reach full gain reduction once the input signal goes below the threshold. • Turn clockwise to increase (longer attack); turn counterclockwise to decrease (shorter attack).
- Page 116 (or muted), no audio will be sent to the auxes. Regardless of how the pre/post switch is set, the audio will always be post-DSP effects (EQ, gate, compressor). Please refer to the K-Mix Signal Flow Diagram to see exactly where the audio is tapped.
-
Page 117: Aux Output Channel Strip
DITOR 5.2.1.2 – A UTPUT HANNEL TRIP The Aux Output Channel Strips are where parameters related to the aux output busses are located. The panning, send level, and pre/post switch for each input channel is available in the aux channel strips. These parameters are also available in the routing section of the Input Channel Strips, but the aux channel strips allow you to see the settings for all eight input channels simultaneously. -
Page 118: Phones Channel Strip
UTPUT SSIGNMENT These switches allow you to set your K-Mix’s headphone output to monitor any of the four stereo output busses, any of the eight input channels, or have it act as a discrete stereo output. • Main = Monitoring outputs 1 & 2 •... -
Page 119: Main Output Channel Strip
DITOR • Aux 3 = Monitoring outputs 7 & 8 • Ch. 1–8 = Monitoring input channels 1–8 • Discrete Stereo Output = Act as its own output bus (outputs 9 & 10) Click one of the buttons to change the headphones monitoring point. Only one option may be selected at a time. -
Page 120: Reverb Tab
EVEL UMBER Sets the overall level of the reverb to be sent out K-Mix’s main outputs. The reverb gets mixed back into the mains at the end of the signal chain, just before the main output bus’ fader and mute. -
Page 121: Bypass Button
DITOR 5.2.2.1 – B YPASS UTTON The bypass button enables or disables the reverb effect. • Clicking the button will toggle the state of the bypass. • The button will light up green when enabled (reverb on). • The button will go dark when disabled (reverb bypassed). 5.2.2.2 –... - Page 122 DITOR 5.2.2.3 – R EVERB ARAMETERS This section of the Reverb tab is home to all of the settable options for the reverb effect itself. ELAY Adjusts the amount of time between the dry audio and the initial reverb reflections. •...
-
Page 123: Reverb Level
DITOR 5.2.2.4 – R EVERB EVEL The Reverb Level section of the Reverb tab houses a single parameter, the overall reverb level. & N EVERB EVEL ADER UMBER Sets the overall level of the reverb to be sent out the main outputs (outputs 1 & 2). •... -
Page 124: Bass Management
DITOR 5.2.3.1 – S URROUND WITCH Enables or disables surround panning. • Click to toggle the on/off state. • When surround panning is enabled, the switch will light up magenta. • When surround panning is disabled, the switch will be dark. When surround panning is enabled, the Aux sends, Aux panning, and Aux faders no longer function as normal. -
Page 125: Surround Panners
The settable options are as follows: WITCH The on/off switch enables or disables K-Mix’s bass management when surround panning is enabled. • ON = Bass management is enabled • OFF = Bass management is disabled... -
Page 126: Save Globals Button
If power is lost and the K-Mix is turned on again, all changes will be lost; it will boot up with its last saved state. -
Page 127: Midi Parameters Section
Used to select a K-Mix fader, button, or rotary to edit. • Click on the desired sensor and the editable MIDI parameters will pop up just to the left of the K-Mix image in the MIDI Parameters Section. 1 16... - Page 128 CC/Note and MIDI channel. ADERS Bank 3 CC# Each of the K-Mix faders can output a CC message when in one of the three available MIDI banks. • The faders can be set to output any MIDI CC from 0–127.
-
Page 129: Save Globals Button
If power is lost and the K-Mix is turned on again, all changes will be lost; it will boot up with its last saved state. -
Page 130: Usb Pre/Post Switches
5.2.5.1 – USB P WITCHES The USB pre/post switches are used to set where in the K-Mix signal path audio coming from and going to a connected computer will be sent to and sent from. • USB input (mixer to computer) and USB output (computer to mixer) can be set separately. -
Page 131: Save Globals Button
If power is lost and the K-Mix is turned on again, all changes will be lost; it will boot up with its last saved state. -
Page 132: Preferences
The K-Mix Editor’s Preferences window contains lesser used options pertaining to the behavior of K-Mix’s audio, the K-Mix hardware, and the K-Mix Editor. The Preferences window can be accessed by clicking on “K-Mix Editor” in the menu bar and selecting “Preferences”, or via the [⌘,] keyboard shortcut. -
Page 133: Channels 3–8 Line/Phono Switches
(sold separately). It is advisable to keep this setting disabled unless you are using a MIDI Expander to control K-Mix. More information about controlling K-Mix using a MIDI Expander can be found in section 4.3.5 - MIDI Input via MIDI Expander. -
Page 134: Phones Volume Level
If you checked the option to “Remember Decision” in the pop-up dialog when receiving a preset from K-Mix, clicking this button will reset that. The next time you receive a preset from K-Mix you will again be presented with the pop-up dialog. -
Page 135: Save Globals Button
If power is lost and the K-Mix is turned on again, all changes will be lost; it will boot up with its last saved state. -
Page 136: K-Mix Editor
⌘ firmware on your K-Mix. While it may be possible to use a K-Mix loaded with a different firmware version than is expected by the editor, it is not recommended. While we make the best effort to preserve backwards-compatibility, some updates may potentially break backwards- compatibility with older firmware versions, leading to odd behavior. -
Page 137: File
It is important to export your globals if you are concerned about potentially losing them. When a K-Mix makes a connection with the editor, the editor reads the globals from the attached K-Mix, then overwrites the editor globals. So, if you plug in a friend’s K-Mix to your computer and open the editor, you will automatically receive... -
Page 138: Edit
Surround, USB, and Preferences settings on the mixer itself. They will not be stored/saved on the mixer, they will just be updated; you must manually save them to the mixer by either clicking a Save Globals button, or by powering your K-Mix down by holding the [ ] button for three seconds. 5.4.3 – E... -
Page 139: Copy Channel
DITOR • When multiple channels are selected simultaneously, the Copy Channel function will copy whatever the last selected channel was (the one displayed in the Channel Strip view). • Input trims are not included when copying/pasting channel strip settings. This is due to the differing trim ranges between channels 1–2 and channels 3–8. -
Page 140: Hardware
Turn tool tips on and hover your mouse over the control in question. 5.4.5.3 – C HECK PDATES Manually checks to see if there is a newer version of the K-Mix Editor available. An internet connection is required for this to function properly. -
Page 141: Automatic Firmware Update
PDATING Each version of the K-Mix Editor is compatible with a specific version of K-Mix firmware. Occasionally, new features in a K-Mix Editor update will require a firmware update to your K-Mix before the two can properly function together. If the firmware on your K-Mix is not compatible with the K-Mix Editor currently in use, you will need to update the firmware before you can use the editor. -
Page 142: Appendix
Appendix... - Page 143 PPENDIX 6.1 – K-M ECHNICAL PECIFICATIONS UDIO REAMPS • 8 Balanced Inputs • 2 µPre™ mic pres UMBER NPUT HANNELS • Signals up to +28dBu • 10 Outputs (8 balanced) • +48V or +12V phantom power UTPUT HANNELS HANTOM OWER •...
-
Page 144: Signal Flow Block Diagram
LOCK IAGRAM The K-Mix signal flow block diagram is too large to properly fit on a standard sized page. As such, the signal flow diagram is provided as a separate PDF document. The PDF is included in the K-Mix Editor package and can also be downloaded directly from the KMI website at this link here: http://www.keithmcmillen.com/downloads/... - Page 145 EFAULT UTPUT ALUES Below is a diagram detailing the exact MIDI messages K-Mix is set to output by default. It is a very simple mapping, all faders and rotaries (pink in the image below) output a CC message, while all buttons...
- Page 146 KMI follows the C3 = 60 standard for naming/numbering notes. If it seems as though your notes are an octave off, this is likely due to the software/hardware you’re using K-Mix with follows the C4 = 60 naming scheme; this will cause the note name to be off by an octave (though the note number will be the same).
-
Page 147: Troubleshooting
Troubleshooting... -
Page 148: Usb Hubs
K-Mix operation. Sadly, not all USB cables are created equal. If you are having troubles powering your K-Mix or connecting to a computer, please make sure you are using the USB cables that came with your K-Mix. - Page 149 The Audio MIDI Setup application on Mac OS X allows you to rename MIDI devices, a cool feature that can help distinguish between multiple copies of the same device. While it is a cool feature, it is not recommended that you rename your K-Mix if you want to use it in conjunction with the K-Mix Editor.
- Page 150 When K-Mix is plugged into a computer via the “Audio” micro USB port, the computer’s sound volume control effects the volume of K-Mix’s output. If you are not able to get audio out of K-Mix, double check that your computer’s speakers are not muted and make sure to raise the computer’s volume to full to ensure that K-Mix...
-
Page 151: F.a.q
F.A.Q. - Page 152 IX REMEMBER MY PREVIOUS SETTINGS THE NEXT TIME TURN IT Yes, it is possible for K-Mix to remember your previous settings the next time it is turned on, even if you did not save any of the changes made. •...
-
Page 153: Stereo Output
You will likely need to adjust the line/phono switches and set them to “Phono” (this can only be done via the K-Mix Editor); by default they are set to Line. Once the inputs you want to plug turntables into have been set to accept phono level signals simply plug in your turntables and turn up the K-Mix faders. - Page 154 The first part of the process is hooking up your K-Mix to your computer and powering them up. 1. Connect the Audio USB port on K-Mix #1 to an available USB port on your computer using a micro- USB cable. I recommend using the cable that shipped with your K-Mix as it was created to ensure it meets the specs required for proper K-Mix operation.
-
Page 155: Safety Precautions
Safety Precautions... - Page 156 TMOSPHERES Do not use K-Mix in any area with a potentially explosive atmosphere, such as a fueling area, or in areas where the air contains chemicals or particles (such as grain, dust, or metal powders). Obey all signs and instructions.
Need help?
Do you have a question about the K-MIX and is the answer not in the manual?
Questions and answers