Table of Contents
Advertisement
Advertisement
Table of Contents

Related Manuals for Panasonic PT-LC50E


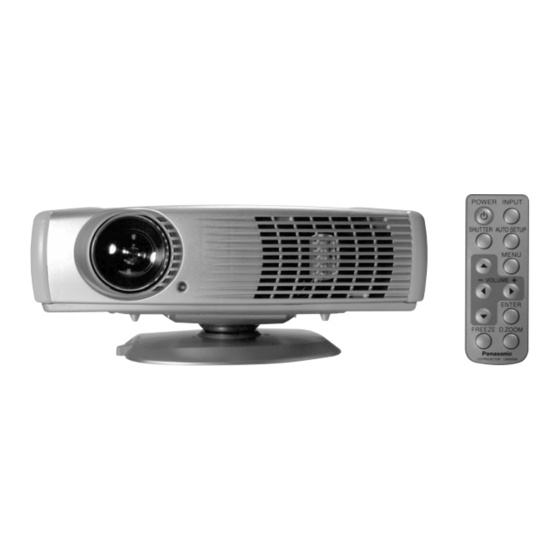
Summary of Contents for Panasonic PT-LC50E
- Page 1 Operating Instructions PT-LC50E Model No. Please read these instructions completely before operating this LCD Projector. By clicking on the red highlighted words in this document, you can go directly to a support page. Downloaded From projector-manual.com Panasonic Manuals Top page...
-
Page 2: Dear Panasonic Customer
We hope it will help you to get the most performance out of your new product, that you will be pleased with your Panasonic LCD Projector. For your own protection and prolonged operation of your LCD Projector, please be sure to read the “Important... - Page 3 Trade Name: Responsible party: Matsushita Electric Corporation of America. Address: One Panasonic Way Secaucus New Jersey 07094 Telephone number: 1-800-528-8601 This device complies with Part 15 of the FCC Rules, Operation is subject to the following two conditions: (1) This device may not cause harmful interference, and (2) this device must accept any interference received, including interference that may cause undesired operation.
-
Page 4: Important Safeguards
Do not use a chemical duster or polisher-cleaner because it can adversely affect the unit and peel the paint coat. 3 Do not use attachments not recommended by Panasonic, as they may cause hazards. Downloaded From projector-manual.com Panasonic Manuals Previous Continued on the next page... - Page 5 The LCD Projector should not be placed in a built-in installation such as a bookcase unless proper ventilation is provided. Downloaded From projector-manual.com Panasonic Manuals Previous Continued on the next page... screen...
- Page 6 13 Do not overload wall outlets and extension cords with too many products, because this can result in fire or electric shock. Downloaded From projector-manual.com Panasonic Manuals Previous Continued on the next page... screen...
- Page 7 E.If the LCD Projector has been dropped or the cabinet has been damaged. F. When the LCD Projector exhibits a distinct change in performance – this indicates a need for service. Downloaded From projector-manual.com Panasonic Manuals Previous Continued on the next page... screen...
- Page 8 Never touch the lens with your fingers. 21 Do not look directly into the aperture and lens while operating as this may result in damage to your eyes. Downloaded From projector-manual.com Panasonic Manuals Previous Continued on the next page... screen...
- Page 9 13 amp socket. If a new plug is to be fitted, please observe the wiring code as shown below. If in any doubt, please consult a qualified electrician. Downloaded From projector-manual.com Panasonic Manuals Previous Continued on the next page... screen...
- Page 10 The wire which is coloured BROWN must be connected to the terminal in the plug which is marked with the letter L or coloured RED. FUSE How to replace the fuse. Open the fuse compartment with a screwdriver and replace the fuse. Downloaded From projector-manual.com Panasonic Manuals Previous screen...
-
Page 11: Lcd Projector Features
Supports Component Video (YP ) Input This unit supports progressive DVD and HDTV (480 i/ 480 p/625 i/720 p/1 080 i) when components are connected. Downloaded From projector-manual.com Panasonic Manuals Previous Continued on the next page... screen... - Page 12 Because this is an electronic manual, by simply clicking on the link given for each item of information, you can go directly to the related page for instructions. Downloaded From projector-manual.com Panasonic Manuals Previous Continued on the next page... screen...
- Page 13 •Freeze functions for video and audio signals can be toggled on and off. •The input signal display function can be toggled on and off. •16:9 (wide) screen projection is provided. •Two projection modes (directions) to choose from. Downloaded From projector-manual.com Panasonic Manuals Previous screen...
-
Page 14: Contents Of Lcd Projector Box
(6) VGA Cable (LSJA0239) (7) Video Cable (LSJA0074) (8) Audio Cable (LSJA0240) Lens Cap (Included with the projector) (10) Carrying Bag (LSFC0015) (11) Swivel Stand (LSYC0162) (12) CD ROM (Operating Instructions) (13) Quick Reference Manual Downloaded From projector-manual.com Panasonic Manuals Previous screen... -
Page 15: Product Information
Group. All product names mentioned in this document are trademarks or registered trademarks of their respective owners. © 1998 Kensington Technology Group. Kensington Technology Group Phone: (650)572-2700 2885 Campus Drive Fax: (650)572-9675 San Mateo, CA 94403, U.S.A Downloaded From projector-manual.com Panasonic Manuals Previous screen... -
Page 16: Control Panel
LCD Projector Control panel POWER Indicator POWER Button STATUS Code STANDBY(RED) Indicator ON(GREEN) STATUS INPUT Button POWER Adjust Buttons INPUT (Also used for KEYSTONE KEYSTONE Volume -/+) ENTER Button MENU MENU ENTER Button Button Downloaded From projector-manual.com Panasonic Manuals Previous screen... - Page 17 The serial connector which is on the terminal board of the projector conforms to the RS-232C interface specification, so that the projector can be controlled by a personal computer which is connected to this connector. Downloaded From projector-manual.com Panasonic Manuals Previous screen...
-
Page 18: Remote Control Unit
- /+ Buttons FREEZE D.ZOOM FREEZE D.ZOOM Button Button Battery Holder Note When you purchase the optional full functional remote control unit (ET-RMLC50), you can enjoy the wireless mouse and laser pointer features. Downloaded From projector-manual.com Panasonic Manuals Previous screen... -
Page 19: Before Using The Remote Control Unit
3 Insert the battery holder. Note • Do not drop the remote control unit. • Keep the remote control unit away from liquids. • Remove the battery if not using the remote control unit for long periods. Downloaded From projector-manual.com Panasonic Manuals Previous screen... - Page 20 • If facing the remote control unit toward the screen to operate the projector, the operating range of the remote control unit will be limited by the amount of light reflection loss caused by the characteristics of the screen used. Downloaded From projector-manual.com Panasonic Manuals Previous screen...
- Page 21 Place the unit on a flat, stable surface covered with a soft cloth, etc. While pressing the PUSH Button, remove the Swivel stand. PUSH Button Caution: Never pick the unit up by the swivel stand. Downloaded From projector-manual.com Panasonic Manuals Previous screen...
-
Page 22: System Configuration Example
• If the video signal source is connected using a cable with a BNC junction plug, use the BNC-RCA Adaptor (not included) to convert the pin jack. Downloaded From projector-manual.com Panasonic Manuals Previous screen... - Page 23 • When LCD Projector power is turned off, turn the personal computer off as well. • Refer to the “Signals that can be Input” for types of RGB signals which can be input to the projector by connecting a personal computer. Downloaded From projector-manual.com Panasonic Manuals Previous screen...
- Page 24 (Connect to P Input Signal) Blue (Connect to P Input Signal) Audio Cable Green (Connect to Y Input Signal) D-sub15-BNC5 (female) Adaptor Cable (sold separately) RGB/YP AUDIO IN Downloaded From projector-manual.com Panasonic Manuals Previous Continued on the next page... screen...
- Page 25 Input Signal Selection”. • D-sub15-BNC5 (female) Adaptor Cable (sold separately) often have BNC connectors, however a DVD output device usually has RCA jacks. In this case, you will need BNC-RCA adaptors (not included). Downloaded From projector-manual.com Panasonic Manuals Previous screen...
- Page 26 • Do not expose to extreme heat or cold. Operating temperature: 0 ºC – 40 ºC (32 ºF – 104 ºF) Preparation • Refer to “screen size and required distance”. • Select a room that can be darkened. Downloaded From projector-manual.com Panasonic Manuals Previous Continued on the next page... screen...
- Page 27 Viewing a picture projected on the front of the screen from a floor. Viewer Rear projection Viewing a picture projected through the back of the screen from a floor installation. Translucent screen Viewer Downloaded From projector-manual.com Panasonic Manuals Previous screen...
- Page 28 Also, the LCD Projector should be at a 90° angle to the screen for the best picture results. To determine the distance for the desired size, please refer to the “LCD Projector /Screen Relative Position Chart”. Downloaded From projector-manual.com Panasonic Manuals Previous screen...
- Page 29 For 16:9 aspect ratios, the following formula can be used to calculate the screen width (SW) and the projection distance for the wide lens position. SW (m) = SD x 0.0254 18.36 x 16 Downloaded From projector-manual.com Panasonic Manuals Previous screen...
-
Page 30: Turning The Power On And Off
• When power is turned off, the cooling fan continues to operate (approximately 60 seconds) in order to cool the projector interior. • This unit consumes approx. 15 W in OFF condition when plugged into an AC outlet. Downloaded From projector-manual.com Panasonic Manuals Previous Continued on the next page... screen... - Page 31 The power indicator will illuminate flashing red. Wait for the cooling fan to stop. The power indicator changes to solid red, the cooling fan stops, and the projector goes into Stand-by mode. (After about 1 minute) Downloaded From projector-manual.com Panasonic Manuals Previous screen...
-
Page 32: Adjusting The Lens
• Turn the ring to the right or left until the picture is at the optimum focus. Turn the ZOOM Ring again to adjust the size of the picture. • When you turn the FOCUS Ring, the size of the picture changes. Downloaded From projector-manual.com Panasonic Manuals Previous screen... -
Page 33: Menu Operations
(Second MENU) Note • The last adjustment condition is saved and will not be erased even if the power is turned off. • The value differs with each input signal. Downloaded From projector-manual.com Panasonic Manuals Previous screen... - Page 34 However, the operation of this function varies depending on which screen is being displayed. Picture Use the Buttons Image Quality •Dynamic •Natural to select “Standard”, Brightness and then press the Contrast ENTER Button. Standard (Push ENTER) Downloaded From projector-manual.com Panasonic Manuals Previous screen...
-
Page 35: Changing The Projection Mode
•Front •Rear Expansion •ON •OFF Press On Screen Display select projecting •ON •OFF mode. Auto Lamp Off •YES •NO • Front (Factory Standard (Push ENTER) setting) • Rear (Right and Left displays in reverse) Downloaded From projector-manual.com Panasonic Manuals Previous screen... -
Page 36: Setting The Screen Type
•4:3 •16:9 Press 16:9 •ON •OFF change the screen On Screen Display •ON •OFF type. Auto Lamp Off •YES •NO • The 4:3 type Standard (Push ENTER) screen is set at the factory. Downloaded From projector-manual.com Panasonic Manuals Previous screen... -
Page 37: Changing To 16:9 (Wide) Screen Format
On Screen Display •ON •OFF • Select “OFF” to return Auto Lamp Off •YES •NO the normal screen. Standard (Push ENTER) (This is the factory setting.) • Select “ON” to display in 16:9 (wide) screen. Downloaded From projector-manual.com Panasonic Manuals Previous screen... - Page 38 Even if the 16:9 (wide) screen feature is set to OFF, when an “S1” signal or DTV Format signal (720 p, 1 080 i) is input, the image is automatically displayed in 16:9 (wide) screen. Downloaded From projector-manual.com Panasonic Manuals Previous screen...
-
Page 39: Changing The Input Signal
V I D E O connector or VIDEO IN connector is projected. If cables are connected to both connectors, the S-VIDEO signal will be selected automatically. (The S-VIDEO signal has priority.) Downloaded From projector-manual.com Panasonic Manuals Previous Continued on the next page... screen... - Page 40 • Please refer to the “Setting of the RGB/YP Input Signal Selection” if you change the signal input to the RGB/YP connector. • When RGB signal is input, please input the registered signals found. Downloaded From projector-manual.com Panasonic Manuals Previous screen...
-
Page 41: Adjusting The Lcd Projector Projection Angle
LOOSEN position. (Top view) Adjust to the desired projection angle. If necessary, you can also tilt to the right or left. Slide the TIGHTEN Knob to FRONT the TIGHTEN position. (Top view) Downloaded From projector-manual.com Panasonic Manuals Previous screen... -
Page 42: Basic Lcd Projector Operation
FREEZE Button on the remote control unit is pressed. Press FREEZE Button again to resume motion. FREEZE F r e e z e (Remote Control unit) Note Sound is muted while the picture is frozen. Downloaded From projector-manual.com Panasonic Manuals Previous screen... - Page 43 However, the picture continues to be sent from the personal computer or video source. • The projector uses less power in shutter mode than it does in normal projection mode. Downloaded From projector-manual.com Panasonic Manuals Previous screen...
-
Page 44: Using The Auto Setup Feature
AUTO SETUP Button once more. Or, perform the following operations as indicated in the on-screen display. Refer to the “Adjusting the Image Position, Dot Clock and Phase”. Refer to the “Keystone correction function”. Downloaded From projector-manual.com Panasonic Manuals Previous screen... - Page 45 Standard (Push ENTER) you want to adjust. Press to adjust the H Position setting. • The current setting will be displayed on the screen by numerals and a bar. Downloaded From projector-manual.com Panasonic Manuals Previous Continued on the next page... screen...
- Page 46 (vertical stripes) appears on the screen. only Adjust in order to remove any picture interfer- Phase ence or contour blurring which may occur in only computer images. Downloaded From projector-manual.com Panasonic Manuals Previous screen...
-
Page 47: Selecting The Image Quality
•Dynamic •Natural Quality”. Brightness Press Contrast select the Image Standard (Push ENTER) Quality. • Dynamic is the factory RGB input signal setting. • Natural is the factory S-VIDEO/ VIDEO, YP input signal setting. Downloaded From projector-manual.com Panasonic Manuals Previous screen... -
Page 48: Adjusting The Picture To The Desired Setting
•Dynamic •Natural Color Press adjust the color. Tint • The current setting Brightness will be displayed on Contrast the screen by Sharpness numerals and a Standard (Push ENTER) bar. Downloaded From projector-manual.com Panasonic Manuals Previous Continued on the next page... screen... - Page 49 Contrast. Button. Press The picture quality becomes sharper. Button. S-VIDEO/ Sharpness The picture quality becomes Press VIDEO only softer. Button. Note The different adjustment condition cannot be saved for S-VIDEO and VIDEO. Downloaded From projector-manual.com Panasonic Manuals Previous screen...
-
Page 50: Adjusting The White Balance
G Level Press B Level adjust the R Level Standard (Push ENTER) setting. • The current setting will be displayed on the screen by numerals and a bar. Downloaded From projector-manual.com Panasonic Manuals Previous Continued on the next page... screen... - Page 51 The green component becomes Press Button. weaker. The blue component becomes Press Button. stronger. B Level The blue component becomes Press Button. weaker. Note Unless properly adjusted, none of the colour may display normally. Downloaded From projector-manual.com Panasonic Manuals Previous screen...
- Page 52 “RGB/YP ”. RGB/YP •RGB •YP Projection Mode •Front •Rear Press or to Expansion •ON •OFF change the input On Screen Display •ON •OFF signal. Auto Lamp Off •YES •NO Standard (Push ENTER) Downloaded From projector-manual.com Panasonic Manuals Previous screen...
-
Page 53: Turning Off The Input Signal Display
Standard (Push ENTER) display function. • Select “ON” to turn the input signal display function. The input signal will be displayed each time it is changed. (This is the factory setting.) Downloaded From projector-manual.com Panasonic Manuals Previous screen... - Page 54 Function select “Auto Lamp RGB/YP •RGB •YP Off”. Projection Mode •Front •Rear Press Expansion •ON •OFF select “YES” or On Screen Display •ON •OFF “NO”. Auto Lamp Off •YES •NO Standard (Push ENTER) Downloaded From projector-manual.com Panasonic Manuals Previous screen...
- Page 55 • Select “OFF” to Auto Lamp Off •YES •NO cancel enlarge Standard (Push ENTER) (scanning line conversion) function. • Select “ON” to use enlarge (scanning line conversion) function. (This is the factory setting.) Downloaded From projector-manual.com Panasonic Manuals Previous screen...
-
Page 56: Keystone Correction Function
• procedure Project a picture onto the screen. Press the KEYSTONE Button KEYSTONE on the projector. (LCD Projector) Press Keystone adjust the Keystone. Adjust MENU Escape Downloaded From projector-manual.com Panasonic Manuals Previous Continued on the next page... screen... - Page 57 • When keystone is corrected, the screen becomes smaller. • The LCD Projector detects whether the Simple Stand is down or up and automatically corrects keystone distortion when the KEYSTONE Button is pressed. Downloaded From projector-manual.com Panasonic Manuals Previous screen...
- Page 58 “Language”, Language and then ENTER to display the screen. Information Language Press select language. English • You can select Deutsch English, German, Français French, Spanish, Español Italian, Japanese Italiano and Chinese. 日本語 中文 Downloaded From projector-manual.com Panasonic Manuals Previous screen...
-
Page 59: Information Functions
“Information”. Language Information Information Press ENTER to display the screen. No. of Dots 800 x 600 H Frequency 37.88 kHz V Frequency 60 Hz Lamp Runtime 100 h Downloaded From projector-manual.com Panasonic Manuals Previous Continued on the next page... screen... - Page 60 Name of the input signal type is displayed. When AUTO is selected in the VIDEO/ Signal Video System screen, the S-VIDEO selected format will be only displayed. Number of hours the lamp has Lamp Runtime been used is displayed. Downloaded From projector-manual.com Panasonic Manuals Previous screen...
- Page 61 X1.0 (Remote Control unit) D.Zoom x 1.5 X1.5 Move Note X2.0 You can enlarge the centre portion of the image to one of 6 magnifications. X3.0 X4.0 X5.0 Downloaded From projector-manual.com Panasonic Manuals Previous Continued on the next page... screen...
- Page 62 VOLUME • Use the arrow Buttons to move the position to the left and right. (Remote Control unit) Note Position cannot be moved with arrow Buttons on the unit. Downloaded From projector-manual.com Panasonic Manuals Previous screen...
-
Page 63: Status Code Display Indications
Please wait one minute before turning the power back on, to allow the lamp to cool. A much longer time may be required if the projector had attained an abnormally high internal temperature. Downloaded From projector-manual.com Panasonic Manuals Previous Continued on the next page... screen... - Page 64 1 900 hours. • Replace the Lamp unit. Lamp operation • The Lamp Unit must be time reaches replaced. 2 000 hours. Forced cooling fan operating to expedite lamp replacement. Downloaded From projector-manual.com Panasonic Manuals Previous screen...
-
Page 65: Cleaning The Air Filter
Remove the Air Filter unit Indent Hold the indent on the Air Filter unit with your hands and pull the Air Filter unit out of REMOTE the LCD Projector. Downloaded From projector-manual.com Panasonic Manuals Previous Continued on the next page... screen... - Page 66 • Using with the air filter sponge removed will result in dirt and dust being drawn in and lead to malfunction. Note If the dust cannot be removed by cleaning, it is time to replace the air filter. Downloaded From projector-manual.com Panasonic Manuals Previous screen...
-
Page 67: Lamp Replacement
(Order Lamp ET-LAC50.) • When the lamp operation time has exceeded 1 900 hours, a warning will appear for 15 seconds when the LCD Projector power is turned on. Downloaded From projector-manual.com Panasonic Manuals Previous Continued on the next page... screen... - Page 68 The lamp used as the light source eventually wears out. The service life of the light source lamp used on the PT-LC50E is about 2 000 hours, but depending on the individual lamp’s properties and the usage conditions the lamp may no longer light after less than 2 000 hours (the...
-
Page 69: Signals That Can Be Input
75.03 78.750 Macintosh 16″ 832 X 624 49.73 74.55 57.283 Macintosh 19″ 1 024 X 768 60.24 74.93 80.000 XGA (85Hz) 1 024 X 768 68.68 85.00 94.500 Downloaded From projector-manual.com Panasonic Manuals Previous Continued on the next page... screen... - Page 70 • DTV Format Signals are picture signals from a DVD or a digital broadcast. • The Sync. signal of a DTV format signal (RGB) is only supported if the Horizontal and Vertical frequencies are separate. Downloaded From projector-manual.com Panasonic Manuals Previous screen...
- Page 71 800 X 600 may cause a portion of information to be omitted, or the image quality to be degraded. • DTV Format Signals are picture signals from a DVD or a digital broadcast. Downloaded From projector-manual.com Panasonic Manuals Previous screen...
- Page 72 Because of this, if the incorrect setting is selected, colour pictures may appear in black-and-white. • The video system screen is not displayed with no S-VIDEO/VIDEO input signal. Downloaded From projector-manual.com Panasonic Manuals Previous screen...
- Page 73 PAL-N obtained. SECAM Note If using a signal source with poor picture quality, such as a dubbed tape, it may not be possible to get the picture to display properly. Downloaded From projector-manual.com Panasonic Manuals Previous screen...
- Page 74 • If an unrecognizable signal is Signal input, the screen goes black and “Signal” is displayed. • When RGB signal is input, please input the registered signals found on “Signals that can be Input”. Downloaded From projector-manual.com Panasonic Manuals Previous screen...
-
Page 75: Optional Accessories
(1) Full Functional Remote Control Unit (ET-RMLC50) (2) Replacement Lamp (ET-LAC50) (3) D-sub15-BNC5 Adapter Cable (ET-ADBNC) Note When the full functional remote control unit is used, you can operate the wireless mouse and laser pointer features. Downloaded From projector-manual.com Panasonic Manuals Previous screen... -
Page 76: Specifications
Video Input : RCA pin X 1 Audio Input: M3 stereo mini pin X 1 Serial Port (RS-232C): Mini Din 8-pin X 1 RGB/YP Input: D-Sub mini 15-pin X 1 Downloaded From projector-manual.com Panasonic Manuals Previous Continued on the next page... screen... - Page 77 Dimensions W x H x D 267 mm x 74 mm x 208 mm (excluding projected portion) 2.5 kg Weight Approvals FCC, UL, C-UL, CE, VDE Note Specifications and design subject to change without notice. Downloaded From projector-manual.com Panasonic Manuals Previous screen...
-
Page 78: Before Requesting Service
• The video formats may not match. poor. • The signal cables may be connected incorrectly. For instance, the P connectors may be reversed. Downloaded From projector-manual.com Panasonic Manuals Previous Continued on the next page... screen... - Page 79 Pro- jector. • The remote control unit may be out of the operat- ing range. The colour is • The Video System may not be correct. black-and white. Downloaded From projector-manual.com Panasonic Manuals Previous screen...
- Page 80 Matsushita Electric Industrial Co., Ltd. Central P.O. Box 288, Osaka 530-91, Japan Downloaded From projector-manual.com Panasonic Manuals Previous screen...
Need help?
Do you have a question about the PT-LC50E and is the answer not in the manual?
Questions and answers