Panasonic PT-LC55E Operating Instructions Manual
Panasonic lcd projector operating instructions
Hide thumbs
Also See for PT-LC55E:
- Operating instructions manual (28 pages) ,
- Service manual (168 pages)
Table of Contents
Advertisement
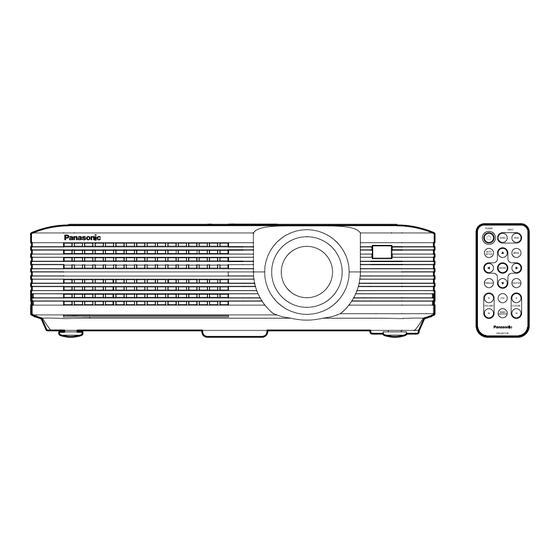
LCD Projector
Operating Instructions
Before operating this product, please read the instructions carefully and save this
manual for future use.
R
Commercial Use
PT-LC75E
Model No.
PT-LC55E
POWER
INPUT
VIDEO
RGB
AUTO
MENU
SETUP
ENTER
FREEZE
SHUTTER
STD
VOLUME
D.ZOOM
INDEX
WINDOW
PROJECTOR
TQBJ 0093-1
Advertisement
Table of Contents

Related Manuals for Panasonic PT-LC55E


Summary of Contents for Panasonic PT-LC55E
-
Page 1: Operating Instructions
LCD Projector Operating Instructions Before operating this product, please read the instructions carefully and save this manual for future use. Commercial Use PT-LC75E Model No. PT-LC55E POWER INPUT VIDEO AUTO MENU SETUP ENTER FREEZE SHUTTER VOLUME D.ZOOM INDEX WINDOW PROJECTOR... -
Page 2: Important Safety Notice
This instruction booklet provides all the necessary operating information that you might require. We hope it will help you to get the most performance out of your new product, and that you will be pleased with your Panasonic LCD projector. -
Page 3: Table Of Contents
B Continued use of the projector in this condition may result in fire or electric shocks. B Contact an Authorised Service Centre for repairs. - Page 4 Do not place the projector on top of surfaces which are unstable. B If the projector is placed on top of a surface which is sloped or unstable, it may fall down or tip over, and injury or damage could result.
-
Page 5: Accessories
B If dust is left to build up inside the projector without being cleaned out, it can result in fire or problems with operation. B It is a good idea to clean the inside of the projector before the season for humid weather arrives. Ask your nearest Authorised Service Centre to clean the projector when required. -
Page 6: Precautions On Handling
If the projector is set up in locations with strong vibration, such as near a motor, or if it is installed inside a vehicle or on board a ship, the projector may be subjected to vibration or shocks which can damage the internal parts and cause malfunctions or accidents. -
Page 7: Location And Function Of Each Part
Location and function of each part Projector <Top, right and front> & # Projector control panel (page 14) $ Zoom ring (page 25) % Focus ring (page 25) & Air inlet ports Do not cover these ports. ' Projection lens... -
Page 8: Storing The Card Remote Control Unit
RGB INPUT LAMP TEMP STANDBY(R) ON(G) MENU ENTER B The wireless remote control and the projector itself have the same control buttons available. # RGB INPUT indicator ' Power indicator (page 17) (pages 24 and 25) This indicator shows whether a... -
Page 9: About The Rgb Input Indicator
This connector is used to connect This jack is used to input video a personal computer to the signals from a video equipment projector in order to externally such as a video deck. control the projector. (RS-232C ( AUDIO IN L-R jacks... -
Page 10: Using The Remote Control Unit
Place the projector as far away “+” marked side of from light sources as possible. the battery holder. B If facing the remote control unit toward the screen to operate the % Insert the battery holder. -
Page 11: Example Of Connecting To Video Equipment
B Refer to the list of compatible signals on page 52 for the types of RGB signals which can be input signals which can be input to the projector by connecting a computer. B Do not input the signal to the RGB2 IN/RGB1 OUT connector when the RGB2 SELECT item in the OPTION1 menu is set to OUTPUT. -
Page 12: Setting-Up
Setting-up Projection methods The projector can be set up so that any one of the following four projection methods are used. Select whichever projection method matches the setting- up method. (The projection method can be set from the OPTION2 menu. -
Page 13: Starting To Use
ON(G) FREEZE SHUTTER MENU ENTER Do not in any way cut power to the projector while the cooling fan is still VOLUME D.ZOOM INDEX WINDOW operating. Be careful not to switch off the MAIN POWER switch of the... -
Page 14: On-Screen Menus
On-screen menus Menu screens The various settings and adjustments for this projector can be carried out by selecting the operations from on-screen menus. The general arrangement of these menus is shown below. Keystone correction MAIN MENU (page 31) M E N U... -
Page 15: Menu Operation Guide
E N T E R menu items $ Press the F F or G G arrow buttons to select an item. This projector has unadjustable Selected items will be displayed items and unusable functions in blue. depending on the signal being input. -
Page 16: Using The D.zoom (Digital Zoom) Function
To obtain the best picture quality, set up the projector and screen in such a way that the amount of keystone correction required is as minimal as possible. -
Page 17: Adjusting The Picture
Use the F and G buttons on the PICTURE MODE projector or remote control unit to P I C T U R E M O D E S T A N D A R D select an item, and then use the I and H buttons to change the setting for that item. -
Page 18: Adjusting The Position
Keep this in mind when 4 : 3 selecting the aspect ratio. B If using this projector in places such 1 6 : 9 as cafes or hotels with the aim of S 4 : 3... -
Page 19: Option Settings
During automatic setup, the angle of RGB2 SELECT tilt of the projector is detected and keystone distortion is corrected R G B 2 S E L E C T automatically. This setting is used to select the... -
Page 20: Func 1
Using the shutter function The shutter function can be used to momentarily turn off the picture and sound from the projector when the projector is not being used for short periods of time, such as during breaks in meetings or when carrying out preparation. -
Page 21: Using The Serial Connector
Using the SERIAL connector The serial connector which is on the side connector panel of the projector conforms to the RS-232C interface specification, so that the projector can be controlled by a personal computer which is connected to this connector. -
Page 22: Indicators
problem. -
Page 23: Cleaning And Replacing The Air Filter
Cleaning and replacing the air filter If the air filter becomes clogged with dust, the internal temperature of the projector will rise, the TEMP indicator will flash and the projector power will turn off. The air filter should be cleaned every 100 hours of use, depending on the location where the projector is being used. -
Page 24: Lamp Unit Replacement Procedure
NOTE: B If the lamp usage time has passed 2000 hours (when LAMP POWER has been set to “HIGH”), the projector will switch to standby mode after approximately 10 minutes of operation. The steps ) to - on the next page should thus be completed within 10 minutes. -
Page 25: Before Asking For Service
B The lens focus may not have been set correctly. (Refer to page 25.) B The projector may not be at the correct distance from the screen. (Refer to pages 22 and 23.) B The lens may be dirty. -
Page 26: Specifications
LCD panel: Panel size (diagonal): 0.7 type (17.78 mm) Aspect ratio: 4:3 (16:9 compatible) Micro lens array: PT-LC75E: Available PT-LC55E: Not available Display method: 3 transparent LCD panels (RGB) Drive method: Active matrix method Pixels: PT-LC75E: 786 432 (1024 x 768) x 3 panels... -
Page 27: Appendix
Appendix List of compatible signals Scanning Display Dot clock frequency Mode resolution frequency (dots)* (MHz) (kHz) (Hz) NTSC/M-NTSC/PAL-M 720 x 480i 15.734 59.940 PAL/PAL-N/SECAM 720 x 576i 15.625 50.000 525i 720 x 480i 15.734 59.940 13.500 625i 720 x 576i 15.625 50.000 13.500... -
Page 28: Trademark Acknowledgements
Trademark acknowledgements B VGA and XGA are trademarks of International Business Machines Corporation. B Macintosh is a registered trademark of Apple Computer, Inc. B S-VGA is a registered trademark of the Video Electronics Standards Association. B Windows is a registered trademark of Microsoft Corporation. All other trademarks are the property of the various trademark owners.
Need help?
Do you have a question about the PT-LC55E and is the answer not in the manual?
Questions and answers