Table of Contents
Advertisement
Quick Links
Advertisement
Table of Contents

Related Manuals for Gastroback Design Espresso Plus


Summary of Contents for Gastroback Design Espresso Plus
-
Page 1: Operating Instructions
GASTROBACK ® Operating Instructions DeSiGn eSpReSSO pluS E.S.E.-pad-SyStEm suitable for espresso pads Art.-No. 42606 Design Espresso Plus Read all provided instructions before first use! Model and attachments are subject to change! For household use only! -
Page 2: Table Of Contents
Table of Contents Important Warning Notes ....................34 Knowing Your Design Espresso Plus ..................35 Important Safeguards ......................36 General Safety Instructions.....................36 Important Safeguards for all Electrical Appliances ............39 High Temperatures—Risk of Burns ...................40 Technical Specifications .....................41... - Page 3 Congratulations on the purchase of your new Gastroback Design Espresso Plus. The durable housing, the handy size and professional functionality, as well as an outstan- ding performance and easy handling of the Design Espresso Plus is ideal for getting started in the world of espresso.
-
Page 4: Important Warning Notes
impORTAnT wARninG nOTeS • Never leave small children unsupervised with the appliance or the parts of the appliance! Always make sure that the appliance is properly and fully assembled before you plug the power cord into the outlet and turn on the appliance. • Do not remove the steam wand out of the milk, as long as steam escapes. Otherwise hot milk may splash out of the frothing jug. -
Page 5: Knowing Your Design Espresso Plus
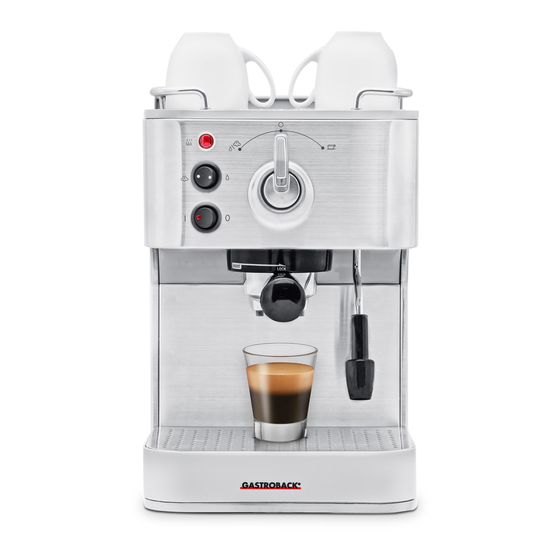
KnOwinG yOuR DeSiGn eSpReSSO pluS Selection Switch Cup-preheating- Function for espresso (right), steam & hot water (left), standby (middle/O) warming plate for cups Water tank Heating Indicator (HEATING) removable 1.5 litre water tank, easy to fill lights red during preheating... -
Page 6: Important Safeguards
impORTAnT SAfeGuARDS Carefully read all instructions before operating this appliance and save for further reference. Do not attempt to use this appliance for any other than the intended use described in these instructions. Any other use, especially misuse, can cause severe inju- ries or damage by electric shock, heat or fire, and moving parts. - Page 7 • The appliance is not intended to be operated by means of an external timer or separate remote control system. • Do not use attachments other than those provided with the appliance. The use of accesso- ry attachments not recommended by Gastroback may result in fire, electric shock or injury to persons. • Do not attempt to operate the appliance by any method other than those described in this book. • Use only cold, tap water in the water tank. Do no use any other liquid. Do not use any harsh chemicals and descalers for descaling (see ›Care and Cleaning‹).
- Page 8 • Ensure the portafilter is firmly inserted and secured into the grouphead before using the machine. • Never remove the portafilter during the brewing operation as the machine is under pressure. • Do not move the appliance whilst in operation. • Do not leave any food dry on the appliance. Always clean the appliance after each use to prevent a build up of baked-on foods (See: ›Care and Cleaning‹). Always keep the appli- ance and the accessories clean.
-
Page 9: Important Safeguards For All Electrical Appliances
• The moisture content of the coffee grounds in the portafilter, which is due to the special brewing technology of the machine, represents not a malfunction of the appliance. • Store packaging materials out of reach of children. • This appliance can be used by children aged from 8 years and above and persons with reduced physical, sensory or mental capabilities or lack of experience and knowledge if they have been given supervision or instruction concerning use of the appliance in a safe way and understand the hazards involved. -
Page 10: High Temperatures-Risk Of Burns
• To protect against electric shock do not immerse power cord, power plug or appliance in water or any other substance. • This appliance is not intended for use by persons (including children) with reduced phy- sical, sensory or mental capabilities, or lack of experience or knowledge, unless they have been given supervision or instruction concerning use of the appliance by a person responsi- ble for their safety. • Children should be supervised to ensure they do not play with the appliance. -
Page 11: Technical Specifications
• Always make sure that the portafilter inserted correctly into the grouphead before opera- ting the appliance. When brewing the espresso high pressure is produced - risk of burns! • Never remove the portafilter during brewing. • Always wait until the appliance is cooled down to room temperature and empty the water tank and the drip tray before moving or cleaning the appliance. Grasp the appliance on both sides of the bottom of the appliance base (not the drip tray!) If you want to move the appliance. -
Page 12: Preparing The Appliance For Operation
Before the first use, you should operate the appliance without coffee. The internal compo- nents of the appliance will be heated and purged. Follow the instructions according to the section ›Preparing a Coffee‹. preparing the Appliance for Operation wARninG: Never leave small children unsupervised with the appliance or the parts of the appliance! Always make sure that the appliance is properly and fully assembled and the selector switch is positioned on standby (centre) before plugging the power cord into the outlet and turning on the appliance. -
Page 13: Filling The Water Tank
filling the water Tank 1. Lift the cover of the water tank upwards. You can lift the water tank by the open lid. Fill the water tank with clean, running cold water. ATTenTiOn: When operating the appliance, always ensure that the water level in the water tank is between the filling marks MIN (100 ml) and MAX (1500 ml). -
Page 14: Tamping The Espresso
Tamping the espresso 1. Distribute the ground coffee evenly in the filter and press the espresso powder with the flat bottom of the spoon (tamper) evenly but not too tightly (see: ›Useful tips‹). 2. Clean off thoroughly any spilled espresso powder on the edge of the filter. The edge must be very clean so that the filter can be closed pressure-tight to the grouphead. -
Page 15: Brewing The Espresso
Brewing the espresso Once the appliance has reached the operating temperature, the heating indicator turns off. note: If the appliance is an extended time in standby position the heating indicator begins to light up in between. If the temperature decreases in the grouphead, the heater will automatically switch on again to maintain a constant operating temperature. -
Page 16: Frothing Milk
waste. Do not dispose of the espresso powder in the sink, otherwise the drain could be clogged. 3. The filters sit firmly in the portafilter. Lift the filter by the recesses on the sides of the portafilter to remove it from the portafilter. 4. -
Page 17: Frothing Milk
frothing milk wARninG: Hot steam or hot water escape from the steam wand. Never place your hands or other body parts under the steam wand, or less if the selector switch is on the steam or hot water position. Place a suitable container under the steam wand before you turn the selector switch into the steam or hot water position. -
Page 18: Hot Water
center into the ›standby‹-position before you remove the frothing jug from the steam wand. Only thereby the steam generation is terminated immediately. 9. Once the milk has the desired texture and is sufficiently heated (to control you can gently touch the bottom of the frothing jug - but you do not scald yourself), turn the selector switch in the middle into the standby position, and turn the appliance off. -
Page 19: Useful Tips
ATTenTiOn: The cup bottom and the vessel can be very hot because of the hot water. wARninG: Do not remove the steam and hot water wand from the cup, as long as hot water is still leaking. Hot water may splash out of the cup. Turn the selector switch always first to center into the standby position before removing the cup from the steam and hot water wand. -
Page 20: Tamping The Coffe
Tamping the Coffee Once you have filled the right amount of coffee powder into the filter, you must press the ground coffee evenly as possible. To do this, use the flat bottom of the spoon. The coffee must be very firmly pressed. • If you press the coffee too hard, the water flows too slowly through the powder. The coffee is dark and bitter. -
Page 21: Cleaning The Steam Wand
Cleaning the Steam wand Clean the steam wand each time after you have frothed milk, otherwise protein and fat in the milk will form a solid crust, through which the steam wand and the openings in the attachment are clogged. 1. -
Page 22: Cleaning The Housing And The Warming Plate
Here, the use of gentle descaler, that does not affect any metal, is important. Please use for decalcifying only the Gastroback Premium Descaler (Art. No.:... - Page 23 2. Remove the portafilter from the grouphead and the attachment of the steam wand. Then pour the mixture of 750 ml water and 50 ml Gastroback Premium Descaler into the water tank. 3. Plug the power cord into the outlet and turn the appliance on by pressing the ›on/off‹- switch.
-
Page 24: Trouble Shooting
TROuBle SHOOTinG problem possible Cause The Simple Solution to the problem Espresso does not run Appliance is not turned on or Ensure the machine is plugged in and the POWER button is through. plugged in. pressed to on. Water tank is empty. Fill fresh cold water into the water tank. - Page 25 problem possible Cause The Simple Solution to the problem The coffee is too cold. The appliance was not preheated. Always wait before brewing the espresso for the appliance to reach operating temperature and the heating indicator to turn off. The cups were not preheated. The warming plate (ontop of the appliance) is heated as soon as you turn on the appliance.
-
Page 26: Storage
STORAGe Always turn the appliance off (power button), remove the power cord from the outlet and clean the appliance and all parts and tools if you do not want to use the appliance for a long time (see: ›Care and Cleaning‹). Empty the water tank and drip tray. -
Page 27: Notes For Disposal
AnD SeRviCe Please check www.gastroback.de for further information. For technical support, please contact Gastroback Customer Care Center by phone: +49 (0)4165/22 25-0 or e-mail: info@gastroback.de. wARRAnTy We guarantee that all our products are free of defects at the time of purchase. -
Page 28: Coffee-Recipes
Coffee-Recepies espresso Cappuccino Intense and aromatic, The real thing is served very light and luke an espresso or short warm with espresso to steamed milk black as it’s also and a generous final known uses about ¼ of creamy froth. oz of ground espres- For added finesse, so. - Page 29 Con panna Tiramisu Meaning ›with cream‹ Makes 4 this heart warmer is 1½ cups mascarpone a chic variation on 1¼ cups cream old-fashioned Vienna 2½ tablespoons powdered sugar Coffee. In a 3-4 oz ½ cup strong espresso coffee, cooled cup, dress a double ½...
- Page 30 GASTROBACK GmbH Gewerbestraße 20 . 21279 Hollenstedt / Germany Telefon +49 (0)41 65/22 25-0 . Telefax +49 (0)41 65/22 25-29 info@gastroback.de . www.gastroback.de...
Need help?
Do you have a question about the Design Espresso Plus and is the answer not in the manual?
Questions and answers